
How to Tell If Mold Has Been Painted Over in Your Home
You can usually tell if mold’s been painted over by looking for discoloration, bubbling, cracking, or tide lines in the paint and by sniffing for musty odors or feeling for damp, soft spots; tap suspicious areas—hollow sounds can mean trapped moisture. Try a bleach or hydrogen peroxide swab, a tape-lift, or a DIY spore test to confirm. If stains bleed through or odors persist, get a pro—keep going and you’ll learn how to confirm and fix it.
Quick Answer Can Mold Be Painted Over and How to Spot It
Yes — paint can cover mold, but it won’t eliminate the problem.
Painting over mold risks health issues and structural damage if the growth and moisture source aren’t removed, so you’ll need to clean or remediate the area first and fix any leaks or humidity.
If you’re unsure, test the area or call a professional before repainting.
One-sentence direct answer
Can you paint over mold? You shouldn’t—covering it hides damage and lets it keep growing; instead, learn how to tell if mold has been painted over by checking for stains, bubbling or peeling paint, musty odors, and fuzzy or discolored spots beneath finishes.
If you spot those signs, don’t repaint—address the moisture source and remove the mold before refinishing.
Brief summary of risks and next steps
Although painting over mold might seem like a quick fix, it risks trapping moisture and allowing the mold to keep spreading, staining, and degrading the surface beneath the paint.
You should inspect for texture changes, odor, or discoloration, test or peel paint if unsure, and address moisture sources.
Don protective gear, remove and treat mold properly, then repaint with mold-resistant primer.
How Mold and Paint Interact Basic Understanding
Household mold is a living fungus that feeds on moisture and organic surfaces, so you’ll often find it in damp corners or behind walls.
Painting over mold is problematic because most paints only hide the growth temporarily and can trap moisture, allowing the mold to keep spreading underneath.
Some coatings—like breathable, mold-resistant paints—can help reveal or inhibit mold, while standard latex or oil-based paints tend to mask stains without solving the underlying problem.
What is household mold?
Mold is a type of fungus that thrives in damp, warm environments and shows up as fuzzy or discolored patches on surfaces like drywall, wood, and fabric.
You’ll notice it by smell, appearance, or recurring damp spots.
Common household mold traits:
- Varies in color and texture
- Releases spores
- Grows on organic materials
- Needs moisture to persist
Why painting over mold is problematic
When you paint over a moldy surface, the paint may hide the problem but it won’t stop it—mold lives beneath and can keep growing, breaking down paint and causing stains, bubbles, or peeling that reveal itself later.
You risk structural damage, persistent odors, and health exposure as spores continue spreading.
Removing mold and addressing moisture first prevents recurring damage and failed cosmetic fixes.
Types of paint and coatings that mask vs. reveal mold
Since painting over mold only masks symptoms, you should know how different paints and coatings behave so you can tell if the problem’s been hidden or exposed. Oil and glossy paints often seal and hide stains; porous primers and anti-mold paints can reveal odor or discoloration. Test areas and inspect edges for blistering, staining, or texture changes.
| Coating | Tends to Mask | Tends to Reveal |
|---|---|---|
| Oil/gloss | Yes | No |
| Latex | Sometimes | Sometimes |
| Anti-mold primer | No | Yes |
| Sealers | Yes | No |
| Breathable paint | No | Yes |
Visual Signs That Mold Has Been Painted Over
You’ll often spot telltale discoloration patterns under paint where mold was covered instead of removed.
Look for texture changes like bubbling, cracking, or soft spots in the surface, plus stains that bleed through multiple paint layers.
Also watch for shadowing or tide lines that trace past moisture events and often mark hidden mold growth.
Discoloration patterns under paint
If paint hides mold, you’ll often see telltale discoloration through the finish—patches that look slightly darker, shadowy, or with a faint halo around them compared to the surrounding paint.
Check corners, behind furniture, and near vents for subtle mottling, yellowish or gray-green hues, and irregular outlines that don’t follow normal shadowing.
These color shifts often indicate underlying biological staining.
Texture and surface irregularities (bubbling, cracking)
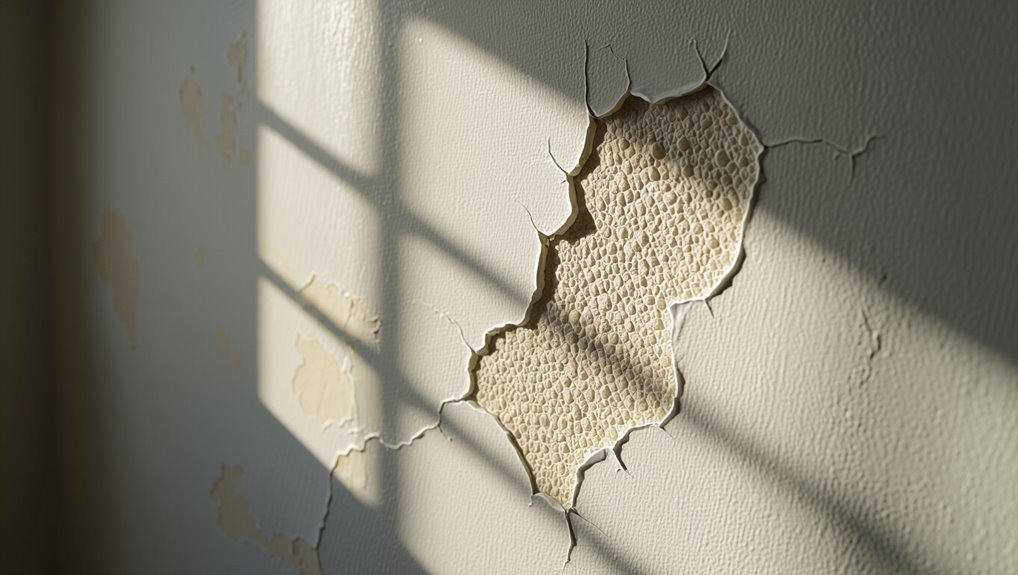
Color shifts aren’t the only clue—feel and surface behavior can reveal painted-over mold even when hues look uniform.
Run your hand lightly: raised bubbles, soft or spongy patches, or paint that flakes easily often mean trapped moisture and microbial growth.
Cracking patterns that follow walls or ceilings, especially near seams or corners, suggest underlying decay.
Document locations and consult a pro for testing.
Staining that shows through multiple paint layers
Often a faint shadow or halo peeks through even after several paint jobs, and that persistent staining is a strong sign mold was painted over.
You’ll notice discoloration showing through thin topcoats, especially where paint thins at edges or fastener points.
This recurring tint won’t wipe away and often reappears after repainting, indicating underlying contamination that needs inspection and proper remediation.
Mold shadowing and tide lines
Someone might spot mold long after a wall’s been repainted when faint shadowing or tide lines appear along ceilings, baseboards, or where moisture tracked—that telltale banding won’t match the surrounding paint and usually follows the path of past water intrusion.
You should inspect these subtle stains, check for musty odors, and probe edges; they often indicate underlying mold growth that painting alone didn’t remove.
Smell and Environmental Clues
If you still notice a persistent musty smell after painting, that’s a strong hint something’s wrong behind the paint.
Check for signs of condensation, high humidity, or water stains nearby, and note any history of leaks, flooding, or prior mold remediation.
These environmental clues can help you decide whether to inspect further or call a professional.
Persistent musty odors after painting
When you still smell a persistent musty odor after painting, that lingering scent can be a key clue that mold or mildew was painted over rather than removed.
Paint can trap spores and odors beneath the surface, letting the smell seep back through walls, trim, or fresh coats.
If the odor persists despite cleaning and new paint, inspect hidden areas, peel back caulk, and test suspect surfaces for staining or softness.
Condensation, humidity, and water damage indicators
How can you tell if condensation, humidity, or hidden water damage is feeding mold behind your paint?
- Check for repeated window or wall condensation.
- Feel for damp, cool patches on painted surfaces.
- Smell stale, musty air in corners or closets.
- Watch for peeling paint, bubbling, or efflorescence on walls.
If you notice these signs, moisture likely supports concealed mold growth.
History of leaks, flooding, or previous mold remediation
Because past water problems often leave lingering clues, you’ll want to mentally map any leaks, floods, or repairs against the areas that smell musty or feel different.
Check attic, crawlspace, bathrooms, basements, and exterior walls for patched drywall, discolored paint, or fresh caulk.
Ask previous owners or contractors about remediation dates, drying methods, and whether mold testing was done.
Simple At-Home Tests to Detect Painted-Over Mold
Start by doing a focused visual inspection in three steps: scan for discoloration, check edges and seams, and press for soft spots.
If that raises suspicion, try a small surface scrape to see if dark material comes off, or use a tape-lift/adhesive sample to capture spores for closer look.
For spot testing, you can apply diluted bleach or hydrogen peroxide carefully to a tiny area (wear gloves and ventilate) to see if staining or bubbling indicates active mold.
Visual inspection steps (Step 1 to Step 3)
Before you grab testing kits, take a careful look at the painted surface: inspect edges, corners, and any areas near moisture for discoloration, bubbling, or faint texture variations that could signal paint hiding mold.
- Note discoloration patterns and streaks.
- Check for soft or spongy spots.
- Look for shadowy speckles beneath gloss.
- Smell musty odors near suspect areas.
Surface scrape test and what to look for (Step 4)
If your visual checks raised suspicions, try a simple surface scrape to see whether mold lies under the paint.
Use a clean utility knife or putty knife to gently lift paint in a small, inconspicuous spot. Look for dark staining, fuzzy growth, or discolored layers beneath.
Collect loosened material in a bag and note musty odors or soft, crumbly substrate for further inspection.
Using bleach or hydrogen peroxide spot test (safety notes)
When you suspect mold under paint, a small bleach or hydrogen peroxide spot test can help reveal live growth by breaking down spores and discoloration; however, both chemicals can bleach surfaces, release fumes, and irritate skin or lungs.
So protect yourself with gloves, eye protection, and good ventilation while testing.
Apply a tiny amount to a discreet spot, wait a few minutes, then blot and observe—discard contaminated materials safely.
Tape-lift and adhesive sampling method
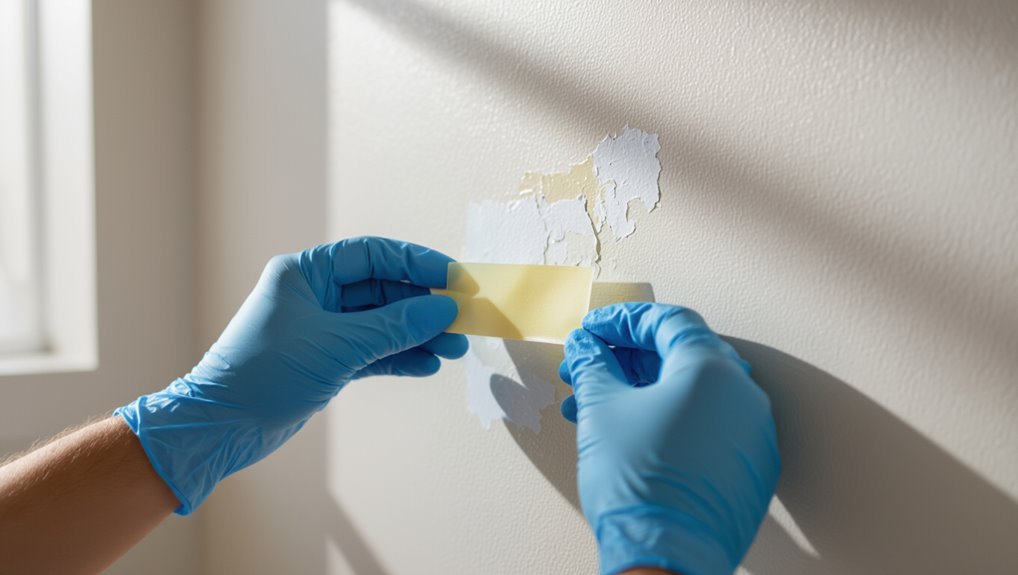
One quick way to check for painted-over mold is the tape-lift or adhesive sampling method, which lets you collect surface material without cutting into the paint.
Press clear tape or a sticky pad onto suspicious areas, peel it off, and place it sticky-side down on glass or a slide.
Examine with a magnifier or send to a lab for confirmation.
When to Use Professional Testing
If your at-home checks leave doubt, consider professional testing to compare air sampling (which detects spores floating in the room) with surface sampling (which checks painted areas directly).
Call an inspector if you find persistent odors, spreading discoloration, health reactions, or water damage that keeps returning.
Certified mold inspectors will perform moisture mapping, take samples for lab analysis, and recommend targeted remediation based on results.
Air sampling vs. surface sampling differences
Because mold can lurk unseen behind paint or float as spores in the air, you’ll need to choose the right test for the question you want answered: surface sampling checks whether mold or its residues are present on painted walls or materials, while air sampling measures airborne spore concentrations to reveal hidden or ongoing contamination and assess exposure risk.
| Test | Purpose | When to Use |
|---|---|---|
| Surface | Detects residues | Visible stains |
| Air | Measures spores | No visible mold |
| Bulk | Material analysis | Removed samples |
Signs that warrant a professional inspection
After comparing surface and air testing, you’ll want a pro when signs point to hidden, widespread, or health-affecting mold.
Call a professional if you notice persistent musty odors, unexplained allergy or respiratory symptoms, recurring stains after cleaning, structural dampness, or large areas of discoloration.
Also get tested after water damage, during remodeling, or if occupants are immunocompromised.
What certified mold inspectors will do (moisture mapping, lab tests)
When you call a certified mold inspector, they’ll start by mapping moisture sources and likely pathways. Then, they will collect targeted samples for lab analysis to confirm species and concentration.
They’ll use moisture meters, infrared cameras, and borescopes to find hidden growth. Then, they will take surface swabs, tape lifts, or air samples.
You’ll get a report with lab results, risk assessment, and remediation recommendations.
DIY Removal vs. Professional Remediation
If the painted mold is limited to a small area, you can take DIY steps like sealing the room, using an N95 mask and gloves, and cleaning with detergent or a mold-specific cleaner.
Don’t attempt DIY if the patch is large, the mold returns, or you have health issues—those are cases where it’s unsafe or likely ineffective.
A pro remediation team will assess hidden contamination, use containment and specialized equipment, and typically costs more but offers a long-term solution and documentation for insurance.
Small-area DIY removal steps
Because small patches of mold under paint can often be handled safely, you can choose DIY removal for isolated, non-porous surfaces—but only when you follow strict safety steps and know when to stop and call a pro.
Wear N95, gloves, goggles.
Contain area with plastic, ventilate outward, lightly scrape loose paint, clean with detergent then a diluted bleach or commercial mold remover, dry thoroughly, and repaint with mold-resistant primer.
When DIY is unsafe or ineffective
Although small spots are manageable, you shouldn’t tackle larger or hidden mold yourself — call a professional when contamination covers more than about 10 square feet, affects porous materials (like drywall, ceiling tiles, or insulation), involves HVAC systems, or coincides with water damage or persistent musty odors that suggest an ongoing moisture problem.
You should also avoid DIY if you have health risks, unclear sources, or recurring growth.
What to expect from professional remediation and costs
When you hire a pro, expect a structured process: they’ll assess the scope, contain the area to prevent spread, remove contaminated materials, clean and treat salvageable surfaces, and verify that moisture sources are fixed so mold won’t return.
You’ll get clear estimates, safety protocols, and post-remediation testing. Typical costs vary by size and severity.
- Inspection
- Containment
- Removal
- Testing
Preventing Mold Recurrence After Paint
To prevent mold from coming back after paint, you’ll need to control moisture and boost ventilation in the affected area.
Before repainting, clean and treat the surface, then use appropriate primers or sealants to block stains and spores.
Finally, choose mold-resistant paints and products designed for high-humidity spaces to create a longer-lasting finish.
Addressing moisture and ventilation causes
Because paint only hides the symptom, you’ll need to fix the underlying moisture and ventilation problems to stop mold from coming back.
Act now to control humidity, airflow, and leaks:
- Install or repair exhaust fans in bathrooms and kitchens.
- Use a dehumidifier in damp basements.
- Fix roof, plumbing, or window leaks promptly.
- Improve airflow with vents and routine inspections.
Proper surface preparation before repainting (cleaning, primers, sealants)
If mold has ever been present, you can’t just slap on fresh paint and call it done; you need to clean, treat, and seal the surface so spores won’t return under a new finish.
Wear protection, remove visible growth with detergent or a mildew cleaner, dry thoroughly, and repair damaged material.
Apply a mold-inhibiting primer or sealer per instructions before repainting to lock out remaining spores.
Best paint types and mold-resistant products
Choice of paint matters: pick products formulated to resist mold and you’ll cut the risk of recurrence after you repaint. Use mold-resistant latex, antimicrobial additives, and mildew-proof primers. Maintain ventilation and control humidity.
| Product Type | Benefit |
|---|---|
| Mold-resistant latex | Durable, easy to clean |
| Antimicrobial paint | Inhibits growth |
| Mildew-proof primer | Seals spores |
| Anti-condensation paint | Reduces surface dampness |
Common Mistakes Homeowners Make
You might be tempted to paint right over mold, but that just hides the problem and lets it grow back.
Don’t rely on bleach as a cure-all or simply mask stains with primer and paint.
Also, if you ignore the moisture source, the mold will return no matter how many coats you apply.
Painting without removing mold
One common mistake homeowners make is slapping paint over visible mold, thinking a fresh coat hides the problem; that only masks stains and lets spores keep growing beneath the finish.
If you paint without removing mold, you’ll trap moisture and odor, worsen surface decay, and create health risks.
Always address the source, clean or remove contaminated material, then repaint with proper primers and ventilation.
Using bleach improperly or relying only on masking
Painting over mold or skipping proper removal often leads people to reach for bleach or cover stains with thicker paint, but those quick fixes don’t solve the underlying problem.
You shouldn’t assume bleach kills all mold; it often lightens surface stains without addressing roots.
Don’t just mask spots with heavy paint—you’ll trap spores, encourage regrowth, and create hidden contamination that’s harder and costlier to fix later.
Ignoring underlying moisture problems
If you skip fixing the moisture source before repainting, the mold’s just going to come back.
You need to find and stop leaks, improve ventilation, and address condensation or rising damp.
Painting hides stains but won’t remove spores or wet conditions.
Tackle humidity and structural issues first; otherwise you’ll waste time and money and encourage healthier, recurring mold growth.
Quick Checklist: How to Confirm and Fix Painted-Over Mold
Start by looking and smelling for musty areas that hint at hidden mold.
Then run simple at-home tests, weigh whether it’s a DIY job or needs a pro, and follow proper remediation and repainting steps if you confirm mold.
Use the checklist to decide next steps quickly and safely.
Step 1: Visual and smell inspection
Before you do anything else, inspect the area closely—look for discolored patches, bubbling or cracking paint, fuzzy spots at seams or corners, and any dark or greenish stains that show through the topcoat.
Then check smell and moisture; follow this quick list:
- Sniff for musty odors.
- Feel for dampness.
- Tap for hollow-sounding paint.
- Note recurring stains or peeling.
Step 2: Perform basic at-home tests
Wondering whether that suspicious spot is just old paint or hidden mold? Test with a cotton swab dipped in diluted bleach—apply, wait a minute; if stain fades, it might be surface mold.
Use a DIY mold test kit for spores and press a piece of clear tape over the area to lift residues for inspection.
Note discoloration, texture, and persistent odor.
Step 3: Decide DIY vs. professional
If the tests suggest mold, decide whether you can safely handle removal or need a pro by weighing the size of the patch, the material involved, and any health risks to occupants.
Choose DIY for small, nonporous areas if you’re healthy, have proper PPE, and can contain dust.
Hire a licensed remediation specialist for extensive growth, porous materials, immune-compromised residents, or unclear sources.
Step 4: Remediation and repainting steps
Start by securing the area and gathering your supplies: proper PPE (N95 or better respirator, gloves, eye protection), plastic sheeting and tape to isolate the space, HEPA-filtered vacuum, cleaning solution (commercial mold cleaner or a 1:10 bleach-to-water mix for nonporous surfaces), scrub brushes, and disposal bags.
Remove paint and mold, clean and dry thoroughly, seal with a mold-killing primer, then repaint with mildew-resistant paint.
Dispose contaminated materials safely.
FAQs
You probably have a few quick questions about painted-over mold, like whether it can make you sick or if fresh paint will kill it.
You’ll also want to know about costs for professional testing, whether you can repaint after treating mold, and how long to wait after remediation.
Below are clear answers to help you decide what to do next.
Can painted-over mold make me sick?
Wondering whether painted-over mold can make you sick? Yes — covering mold won’t remove spores or toxins.
You may still inhale allergens, irritants, or mycotoxins, triggering respiratory symptoms, headaches, or allergic reactions, especially if you’re sensitive.
If paint traps moisture, mold can regrow beneath the surface, worsening exposure.
Address the underlying mold source and clean it properly before repainting to protect your health.
Will new paint kill mold?
Because paint only covers mold rather than removing it, many people ask whether a fresh coat can actually kill the growth beneath. It won’t.
Paint may seal spores temporarily, but trapped moisture and organic matter let mold persist and spread.
You should remove and remediate mold before repainting, using appropriate cleaners or professional help for larger or recurrent infestations to prevent recurrence.
How much does professional mold testing cost?
When considering professional mold testing, expect to pay anywhere from about $200 to $800 for a typical home inspection, depending on location, the number of samples taken, and whether air, surface, or bulk testing is used.
Additional factors include lab fees, travel, and specialized testing for hidden growth, which can raise costs.
Get itemized quotes and compare certified inspectors before booking.
Can I repaint over mold after treating it?
Can you repaint over mold after treating it? Yes, if you properly clean and kill the mold, repair damaged surfaces, and use a mold-resistant primer and paint.
Make certain the area’s dry and the source of moisture is fixed. If stains persist, apply a stain-blocking primer.
If mold returns, stop and consult a professional before repainting.
How long after remediation can I repaint?
After remediation, wait until the cleaned area is fully dry and the moisture source is fixed before you repaint—usually 24–72 hours for small drywall patches but longer for soaked or porous materials.
Test moisture with a meter or touch; paint only when readings match surrounding areas.
Use mold-resistant primer and paint.
If remediation involved removal, replace materials and verify dryness before finishing.
