How to Tell If Paint Is Bad: Signs and Shelf Life Guide
You can tell paint’s gone bad by smell, texture, and appearance: a sharp, sour, or musty odor, gritty or lumpy consistency that won’t smooth out with stirring, or permanent watery separation and color dulling are bad signs. Look for mold speckles, skinning on the surface, or debris after straining. Test a swatch for proper drying and adhesion. Store cans sealed in a cool, dry spot and track dates to avoid surprises—keep going to learn practical fixes and disposal tips.
Can Paint Be Judged by Smell?
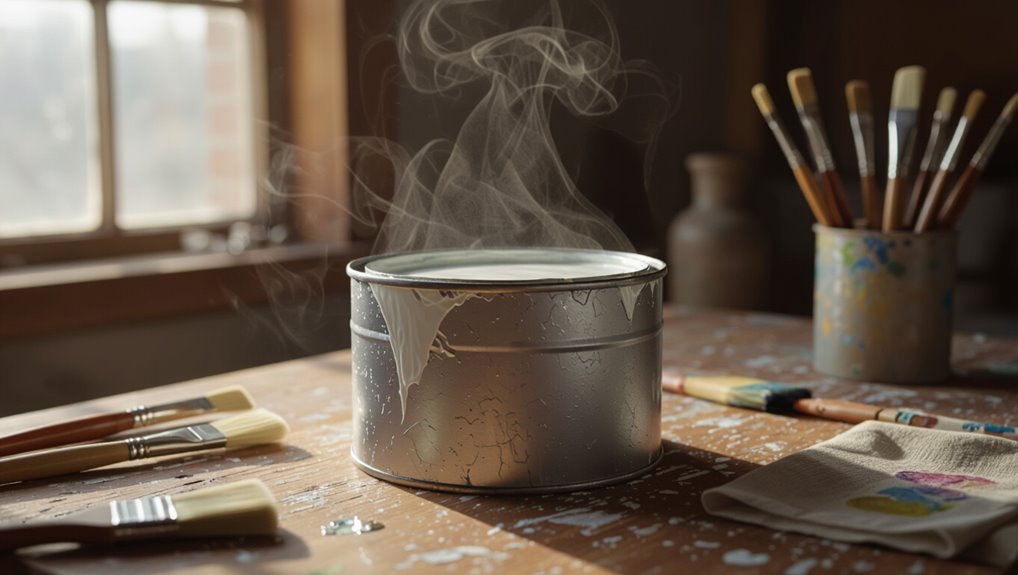
Can you tell if paint has gone bad just by sniffing it? You can use paint odor analysis and scent evaluation as quick clues: a sharp, sour, or unusually chemical smell suggests breakdown or contamination.
Still, smell alone isn’t definitive; you’ll need other checks to confirm spoilage. Trust odor as an initial warning, not a sole diagnosis.
Check Paint Texture Quickly
Run your finger or a stir stick through the paint to check texture quickly—you’re looking for smooth, consistent flow without clumps, strings, or a curdled, grainy feel.
For a simple paint consistency check, note any resistance, uneven lumps, or separation layers that remix easily.
Use quick texture analysis to decide if stirring restores usability or if the paint’s compromised and should be discarded.
Spot Permanent Separation in Paint
If you see distinct layers or a watery layer sitting on top of thicker pigment, that’s visible separation and a red flag.
Try stirring vigorously—if the color stays streaky or the watery part won’t reincorporate, the paint’s permanently separated.
Don’t waste time testing it on your wall; toss it or replace it.
Visible Layer Separation
When you spot thin, translucent patches or clear lines where one coat peels away from another, that’s visible layer separation—also called spot permanent separation—and it’s a sure sign the paint’s lost adhesion.
You should assess layer stability, noting separation causes like contamination, improper curing, or incompatible coatings.
Don’t reuse separated paint; remove and recoat after proper surface prep to guarantee lasting results.
Ineffective Recoloring After Stirring
Although you stirred the can thoroughly, the color may still come out patchy or inconsistent—signs of spot permanent separation where pigments or binders have settled or separated and won’t remix properly.
You’ll notice streaks after applying despite proper stirring techniques. That indicates compromised paint longevity; don’t expect reliable coverage.
Discard or strain and test a small area before committing to a full project.
Test for Clumps and Skinning
Before you scoop paint onto a stir stick, give the can a quick visual and tactile check for clumps or a thin film on the surface—known as skinning.
Before scooping paint, glance and gently run a finger across the surface to check for clumps or skin.
You’ll want clump identification and skinning prevention steps:
- Gently run a finger along the surface to feel any film.
- Lift small bits to inspect texture.
- Note gritty, separated particles before use.
Identify Color Changes and Fading
Paint can lose its original hue over time, and you’ll notice this most clearly by comparing a fresh swatch to paint taken from the can or a recently painted test patch.
Check for uneven color fading, dullness, or a yellowish tint. If hues shift from your sample, that’s a sign of paint aging—don’t assume coverage will remain true on large surfaces.
Detect Mold or Contamination in Paint
How can you tell if paint is contaminated? Look for mold detection cues and contamination signs: visible spots, musty odor, or separation that won’t remix. If unsure, discard.
- Black or green speckles floating on surface
- Fuzzy growth around lid or rim
- Sour, damp smell when you open the can
Trust clear signs; don’t risk applying contaminated paint.
Evaluate Paint Thickness and Consistency
A few quick checks will tell you whether the paint’s thickness and flow are right for your job: squeeze a small bead onto cardboard to observe sagging and flow, note any separation or jelly lumps, and run a toothpick through to see if it fills smoothly.
Use simple paint viscosity evaluation and paint consistency testing to decide if thinning or disposal is needed.
Stir-and-Inspect Method for Paint
If the thickness and flow check out but you’re still unsure about color uniformity or hidden clumps, give the can a thorough stir and inspect.
Use proper stirring techniques to blend pigments and check paint consistency.
Stir thoroughly to blend pigments and confirm a smooth, consistent paint texture.
Look for smooth texture, no strings, and even color.
Visualize:
- paddle scraping sides
- glossy swirl turning matte
- tiny specks dispersing into one tone.
Do a Laydown Test on Scrap Wood
Grab a scrap piece of wood and roll a small, even coat of paint across it to see how the product lays down, levels, and covers; this quick trial shows drying appearance, adhesion, and hidden defects that stirring alone won’t reveal.
Use the laydown technique for a focused scrap evaluation: note brush marks, sagging, color shift, and drying speed to decide if the paint’s usable.
Check Adhesion With a Tape Test
Next, check adhesion with a tape test to see if the surface prep was sufficient.
Press a piece of strong tape firmly onto the paint, smooth out any bubbles, then pull it off quickly at a low angle.
If paint flakes or peels, you’ll know the substrate or prep needs more work before repainting.
Paint Surface Preparation
Before you commit to repainting, check adhesion with a simple tape test to see whether the old paint will hold or peel away — and save yourself time and wasted materials.
Prepare the paint surface by noting surface imperfections, paint types, finish options, and surface compatibility.
Consider application techniques, drying times, adhesive properties, environmental factors, and preparation methods.
- cracked glaze
- chalky residue
- glossy patches
Tape Removal Technique
When you want to check whether old paint will hold or peel, press a strip of strong adhesive tape onto a small, inconspicuous area, rub it down firmly, then pull it off quickly at a 90-degree angle to the surface; any flaky or loose paint that comes away reveals poor adhesion and a likely need for stripping or thorough surface prep.
After tape removal, note edges, document results, and protect surrounding areas for surface protection.
Strain Lumpy Paint for Reuse
Grab a clean paint strainer and a disposable container, because you can often rescue lumpy paint by filtering out dried bits and debris.
Grab a clean paint strainer and disposable bucket — filter out dried bits to rescue lumpy paint.
You’ll use practical paint straining techniques and simple paint reuse tips to salvage usable paint. Strain slowly, discard solids, and decant gently.
- Metal mesh catching crumbs
- Paper cone removing clumps
- Disposable bucket collecting filtered paint
Thin Separated Paint Safely
Before you thin separated paint, put on gloves and a respirator so you don’t inhale fumes or touch contaminants.
Stir gently but thoroughly to reincorporate oils and pigments without whipping in air.
Pause to inspect for mold, an off smell, or particles that mean the can should be discarded.
Safety Gear First
Put on PPE first—gloves, goggles, and a respirator rated for organic vapors—so you’re protected while handling thin, separated paint.
You’ll want proper safety gear and protective gloves before touching cans or wiping drips.
Visualize risks:
- Splattered cuffs and ruined clothing
- Fumes rising from an open can
- Sticky residue on skin and tools
Stay cautious and avoid skin contact.
Proper Stirring Technique
With your PPE on and the work area ventilated, you can safely tackle separated, thin paint by stirring it correctly.
Use a flat stir stick, scrape bottom solids, and fold layers gently to avoid aeration. Start slow, increase speed as components blend, and rest to let bubbles rise.
Try recommended stirring techniques and mixing methods to restore uniform consistency before testing a small sample.
Check For Contaminants
Once you’ve stirred the paint back toward a uniform consistency, check it for contaminants that could ruin a finish: shine a bright light into the can and look for grit, hairs, insect parts, or mold clinging to the sides or floating on top.
Use a fine mesh strainer and note paint contamination sources tied to poor paint storage conditions.
- grit flakes
- tiny insect parts
- fuzzy mold bits
Remix Dried Skin Without Contaminating
If the paint film has formed a dry skin, gently break and remix it without dipping your brush or tool into the can, because introducing used tools or debris will contaminate the remaining paint. Use clean stir sticks, strain as you pour, and employ gentle remix techniques for skin removal to avoid clumps.
| Tool | Action |
|---|---|
| Stir stick | Break skin |
| Strainer | Remove debris |
Repair Small Batches of Spoiled Paint
When a small container shows separation, clumps, or an off smell, you can usually salvage it without wasting the whole batch. You’ll assess, strain, and amend cautiously using paint repair techniques and spoiled paint solutions.
When a small paint can separates or clumps, assess carefully, strain, and gently amend before discarding the batch
Try gentle mechanical fixes and mild additives, then test. Visualize restoration:
- Stirring thickened pigments back into fluid
- Straining out lumps and debris
- Adding small conditioner drops and retesting
Re-Tint Strained or Thinned Paint to Match
Because thinning or straining can alter a paint’s color and gloss, you’ll often need to re-tint small batches to match the original shade precisely.
Test with thin swatches, add tint concentrates sparingly, and stir thoroughly.
Use re-tint techniques like incremental dosing and mix samples under the same light for accurate color matching.
Label adjusted containers with pigment amounts and date.
Use Bad Paint for Non-Critical Projects
After re-tinting small amounts, you can set aside paint that’s past its prime for less demanding tasks around the house.
Use it for bad paint projects and creative repurposing where finish quality isn’t critical.
Try small-scale ideas like:
- primer for test patches or undercoats
- painted planters, stakes, or signs
- craft accents, picture-frame trims or touchups
When to Repaint vs. Restore Old Finish
You’ll want to repaint when the coating is flaking, chalking, or has lost adhesion, but restoration can be enough for minor wear, scratches, or surface dirt.
Check whether sanding, cleaning, and spot repairs will restore appearance and protection before stripping everything back.
Finally, weigh the cost of materials and labor against the value of the piece to decide which option makes sense.
When Repainting Is Necessary
While some surface issues can be fixed without stripping paint, knowing when to repaint versus restoring the old finish hinges on the underlying damage: you should repaint when structural peeling, widespread mildew, or faded protection compromise surfaces, when paint color trends or repainting frequency justify an update, or when multiple layers flake beyond spot repairs.
- paint bubbling and large flakes
- mold spreading across walls
- sun-bleached, chalky surfaces
When Restoration Suffices
If the damage you’ve seen is limited—small chips, isolated mildew patches, or surface chalking—you can usually restore the existing finish instead of repainting the whole area.
Clean, sand, spot-prime, and apply compatible touch-up coats using proven restoration techniques. You’ll extend paint longevity, preserve texture and color, and delay full repainting—saving time and material when substrate and adhesion remain sound.
Assess Cost Versus Value
Decide whether to repaint or restore by weighing the immediate costs against the long-term value: calculate labor, materials, and downtime for a full repaint and compare that to the expense and lifespan added by targeted restoration.
You’ll use cost analysis and a clear value assessment to decide. Visualize the outcome:
- Glossy new finish gleaming
- Spot-repaired, aged charm preserved
- Time and disruption minimized
Unopened Latex Paint: Shelf Life
A sealed can of latex paint will usually stay good for about two to ten years, depending on quality and storage conditions.
You should keep cans in a cool, dry place off concrete, sealed tightly to maximize latex paint storage and preserve unopened paint lifespan.
Check cans for bulging, rust, or separation before use, and note manufacture dates for rotation.
Opened Latex Paint: Usable Timeframe
Opened cans of latex paint will generally stay usable for about one to three years when you reseal them tightly and store them in a cool, dry place away from temperature extremes.
Opened latex paint lasts about 1–3 years if tightly resealed and stored cool, dry, away from temperature extremes.
You should check consistency, smell, and color before reuse to avoid paint expiration surprises.
- Thick clumps or skin on surface
- Sour or chemical odor
- Darkened, separated color
Practice proper paint storage.
Unopened Oil-Based Paint: Shelf Life
If you keep an unopened can of oil-based paint sealed and stored in a cool, dry place, it can remain good for three to five years or even longer depending on ingredients and storage conditions.
You should check manufacturer guidelines, note quality indicators and paint longevity expectations, guarantee proper sealing of unopened cans to limit contamination risks, and follow usage recommendations for best results.
Opened Oil-Based Paint: Usable Timeframe
Although exposure to air and temperature swings will gradually degrade it, opened oil-based paint can still be usable for months to a couple of years if you store it properly and watch for signs of spoilage.
Keep good oil paint storage and monitor shelf life by checking smell, texture, and separation:
- thick skin forming
- sour or solvent odor
- gritty or curdled consistency
Follow those cues.
How Long Does Spray Paint Last?
Spray paint usually lasts about 2 to 5 years unopened, but that can vary by brand and storage conditions.
Once the can’s contents start clumping, sputtering, or spraying unevenly, those are clear signs the paint has degraded.
Check for a foul odor, thickened nozzle buildup, or a watery separation to tell if it’s time to toss the can.
Typical Shelf Life
Most cans last about two to three years unopened, but how long your spray paint stays usable depends on storage and condition; you’ll get the best results when cans are kept cool, dry, and upright with their nozzles clear.
Consider paint deterioration factors and check shelf life indicators.
Visualize storage:
- Cool, dark shelf
- Upright can with cap on
- Clean nozzle and temperature-controlled space
Signs Of Degradation
1 clear sign that paint has gone bad is a foul, sour odor—you’ll notice it immediately when solvents break down.
Use visual inspection to spot clumps, separation, or altered color consistency.
Consider container types and storage solutions to reduce moisture impact and environmental factors.
Aging effects shorten the paint lifecycle, degrading paint quality.
Prioritize paint safety when disposing of compromised cans.
Primer Shelf-Life and Storage
Because primers sit unused for long stretches, you need to know how storage and age affect their performance.
Check cans for separation, lumps, or sour smell—these signal spoilage. Store sealed tins upright in cool, dry places.
Consider primer types and primer applications when estimating life: oil-based lasts longer than water-based.
- Dented can
- Frozen can
- Rusted lid
Specialty Paints (Chalk, Enamel): Longevity
Chalk paint typically lasts a couple of years if you keep the lid sealed and it hasn’t dried out or separated.
Enamel paints can last longer but need cool, dry storage and occasional stirring to prevent skinning or thickening.
Check for foul odor, grainy texture, or uneven consistency—those are clear signs the paint’s degraded.
Chalk Paint Shelf Life
If you’ve stored specialty chalk paint for a while, you’ll want to check its texture and smell before brushing it on—age affects performance more than most people expect.
For proper chalk paint storage and chalk paint maintenance, inspect consistency, scent, and apply a test patch.
Visualize issues:
- Curled brush marks and grainy paste
- Sour, chemical odor
- Thick clumps that won’t remix
Enamel Paint Storage
1 key to keeping enamel paint usable longer is correct storage: seal containers tightly, store them upright in a cool, dry place out of direct sunlight, and keep temperatures steady to prevent thickening or separation.
You should monitor storage conditions, control humidity, choose proper container types, practice mold prevention and pest management, and use paint organization with inventory tracking to extend shelf life.
Signs Of Degradation
When specialty paints like chalk and enamel start to degrade, you’ll notice clear physical and performance changes—skin formation, clumping, off-odors, fading, poor adhesion, and uneven sheen are common signs that the paint’s chemistry has broken down and its longevity is compromised.
You should check paint composition, storage conditions, usage frequency, and environmental impact; quality indicators guide shelf life and maintenance tips.
- Flaky surface, brittle film
- Odorful, separated can
- Patchy coverage, bad paint application
How Seasonal Storage Affects Paint Life
Because temperature swings and moisture change how paint components interact, how you store cans across seasons directly affects their lifespan.
You should monitor seasonal temperature and storage humidity, move cans away from damp basements or uninsulated sheds, and consider climate impact when choosing storage spots.
Proper ventilation and steady indoor conditions slow paint deterioration and keep cans usable for future touch-ups.
How Temperature Extremes Ruin Stored Paint
If you store paint where temperatures swing, you’ll see problems fast: freezing can cause pigments and binders to separate and ruin the mix.
Excessive heat, on the other hand, thickens the formula and shortens its usable life.
Repeated temperature cycling makes these changes worse by breaking down the paint’s emulsion and consistency.
Freezing Causes Separation
Though cold itself doesn’t kill paint, freezing can split its components and leave you with a watery, unusable mess. Ice crystals push pigment and binder apart, breaking the uniform emulsion that keeps paint smooth.
You’ll notice damaged paint after exposure to freezing temperatures, which ruins paint quality and makes stirring futile.
- clumpy, separated layers
- cloudy, watery top
- gritty, uneven pigment
High Heat Thickens Paint
When stored paint sits in high heat, its liquid carrier evaporates and the resinous binders thicken, so you’ll find cans that pour like syrup or refuse to spread smoothly.
You’ll notice tacky skins, reduced gloss, and poor leveling.
To limit heat effects and preserve paint longevity, store cans in cool, shaded spaces, seal lids tightly, and use older cans first to avoid irreversible thickening.
Repeated Temperature Cycling
Because paint expands and contracts with every freeze and heat spike, repeated temperature cycling breaks down its components faster than steady conditions do.
You’ll notice separation, clumping, and lost flexibility when temperature fluctuations happen. Protect paint to preserve paint longevity and usability.
- rattling lids from shifting layers
- cracked skins on cans
- gritty sediment settling unevenly
How Moisture and Humidity Shorten Paint Life
If you leave paint exposed to high moisture or humidity, it won’t dry or cure properly and will break down faster.
You’ll notice moisture absorption and other humidity effects accelerating paint deterioration. Poor storage conditions and prolonged air exposure let mold, separation, and foul odors develop.
Control climate impact by sealing lids, using dehumidifiers, and storing cans off damp floors to extend usable life.
How Sunlight and UV Exposure Affect Cans
You’ve seen how moisture ruins paint; sunlight and UV do their own kind of damage.
You’ll notice sunlight effects that heat cans, causing can deterioration and accelerated paint degradation. UV damage breaks down binders and fades color.
Picture it:
- A hot, faded can on a porch
- Cracked lid with brittle seal
- Powdery, separated paint inside
How Container Type Impacts Paint Longevity
When choosing paint, consider the container: metal cans, plastic pails, and plastic or metal cartridges each protect paint differently and affect how long it stays usable.
You’ll notice metal cans block light and slow oxidation, while plastic can be permeable to air.
Match container materials to expected storage conditions, keep containers dry and cool, and rotate stock to use older units first.
How to Reseal Cans Properly
When you’re done painting, make sure the lid is seated squarely so it snaps on evenly and forms a tight seal.
Wipe any drips or dried paint from the can rim before closing to prevent gaps and future leaks.
Press the lid with a block of wood and a hammer around the edge for an even, secure fit.
Proper Lid Alignment
Although it’s easy to think slapping the lid back on is enough, proper alignment is what keeps paint fresh and prevents spills. You’ll use lid alignment techniques to seat lids evenly on paint canisters, tapping around the rim with a rubber mallet until flush.
Visualize fit with small checks:
- even gap all around
- lid sits level
- no wobble when inverted
Clean Rim Before Sealing
Before you press the lid down, wipe the can’s rim clean—any dried paint or debris will prevent a tight seal and let air in.
Use a cloth or putty knife to remove residue, then apply paint sealing techniques like a thin plastic wrap before resealing.
Follow rim cleaning tips: clean, dry, and seat the lid evenly to keep paint fresh and shelf-stable.
Label and Date Paint for Inventory Control
Label and date every can as soon as you buy or open it so you’ll always know what’s inside, when it was mixed, and whether it’s still usable.
Use simple paint tagging to track color, room, and mix date; note expected shelf life. Quick visual cues help you avoid bad paint:
- Bright colored tape for fresh cans
- Faded label for older cans
- Date+initials on lid
Choose the Best Storage Spot at Home
Pick a cool, dry spot in your home that stays between about 50–80°F and out of direct sunlight, and you’ll keep cans usable longer.
For ideal storage, prioritize temperature control and humidity management; limit light exposure.
Use tight container choice, elevated shelving for pest prevention, clear inventory organization, and follow safety measures like ventilation and secure lids so you’ll protect paint and people.
Prevent Mold When Storing Paint Long-Term
If you want paint to last without developing mold, keep moisture and contamination out of the cans: store them in a cool, dry area with steady ventilation, wipe rims clean before resealing, and transfer any partially used latex paint into smaller, airtight containers to minimize trapped air.
Use mold prevention with humidity control and proper ventilation, moisture barriers, container selection, sealing techniques, paint sanitization, storage temperature, climate considerations, pest protection.
Prevent mold by controlling humidity, ventilating, using moisture barriers, airtight containers, and sanitizing paint before storage.
- cool basement corner with a dehumidifier
- sealed plastic tubs lined with moisture barriers
- small airtight jars after paint sanitization
Prevent Pests and Debris in Stored Cans
Keep cans tightly sealed after use so pests can’t get in and debris won’t contaminate the paint.
Wipe rims clean before closing and press lids firmly or use a rubber mallet to guarantee an airtight seal.
Store cans off the floor on shelves or pallets to reduce moisture and rodent access.
Seal Cans Properly
When you’re storing leftover paint, seal the can tightly to block pests, dust, and moisture from getting in.
Use simple paint sealing techniques for proper storage: press the lid, tap the rim, and add a plastic wrap barrier.
Picture protection:
- a snug metal lid biting the can
- plastic film hugging the rim
- a rubber mallet giving a final tap
Store Off The Floor
After sealing lids and adding a plastic barrier, raise your paint cans off the floor to keep pests and stray debris out.
Use shelving for paint storage, follow organization tips, and guarantee proper labeling so you track shelf life and long term effects.
Control humidity and temperature management to prevent spoilage, and practice pest prevention to preserve quality and avoid contamination.
How to Decide When to Discard Old Paint
Wondering whether that half-full can of paint is still usable? Check smell, texture, and separation; if it’s foul, chunky, or won’t remix, discard.
Consider local paint disposal methods and paint recycling options before tossing.
Visualize:
- Curdled, lumpy surface you can’t smooth
- Thick sludge clinging to the can
- Sour chemical odor that stings your nose
If any match, it’s time to let it go.
Safely Dispose of Bad Paint
If paint’s gone bad, don’t toss the can in regular trash — you could harm the environment or violate local rules.
Check municipal hazardous waste programs for pickup or drop-off, use eco friendly disposal methods like solidifying latex with kitty litter, and follow label instructions for oil-based.
Explore paint recycling options or community collection events, and always seal cans to prevent spills during transport.
How to Recycle Latex Paint Locally
Check with your local recycling center to see if they accept latex paint or can point you to a household hazardous waste facility that does.
If you can’t drop it off year-round, look for community paint drop-off events that collect and reuse or properly process leftover paint.
Taking these steps keeps paint out of landfills and helps local recycling programs.
Local Recycling Centers
Many cities and towns partner with local recycling centers to accept leftover latex paint, and you can drop off partially full cans or schedule a household hazardous waste pickup to keep usable paint out of landfills.
You should call ahead to learn hours, fees, and accepted container conditions.
Check examples below to picture options:
- garage with labeled bins
- attendants guiding your drop-off
- curbside collection trucks
Household Hazardous Waste
When you’re ready to get rid of leftover latex paint, household hazardous waste (HHW) programs provide a safe, local option for disposal or recycling—many municipalities run drop-off sites or periodic collection events that accept partially full cans.
Check your local HHW rules so you follow paint regulations, label cans, and prevent hazardous disposal mistakes. Call ahead for accepted types and any prep instructions.
Paint Drop-Off Events
If your municipality runs household hazardous waste programs, you can often take leftover latex paint to scheduled paint drop-off events for safe recycling or disposal.
You’ll help community recycling and may find paint donation programs nearby. At events, staff check cans, then sort usable from unusable for proper processing.
- lined tables of cans
- volunteers labeling colors
- trucks hauling waste
Handle Paint That Smells Strongly of Solvents
Because strong solvent odors often mean the paint’s volatile compounds are breaking down or evaporating faster than they should, you should treat any persistent chemical smell as a warning sign: check the can for separation, swollen lids, or a varnish-like film.
Note how long it’s been stored and at what temperature, and avoid using the paint until you confirm it’s still safe and usable.
Do a paint odor analysis, limit solvent exposure, ventilate well, and discard if odors persist or textures change.
Test Old Paint for Lead Before Use?
Since older paints commonly contained lead, you should test any vintage can before using it on walls, trim, or furniture you’ll live with.
Test vintage paint for lead before using it on walls, trim, or furniture you’ll inhabit.
Use a certified kit or pro for reliable lead testing and follow safety precautions: wear gloves, ventilate, and avoid sanding.
Imagine:
- Flaking windowsill dust
- A creaky painted crib
- A dented metal can with crusted paint
Build a Paint-Stability Checklist
When you’re deciding whether old paint is worth keeping, use a simple checklist to judge stability and safety so you don’t end up with peeling walls or hidden hazards.
Check paint shelf life and paint consistency; inspect storage containers and paint labeling; note temperature control and humidity effects where stored.
Track inventory management, plan paint disposal or recycling options, and confirm paint safety before reuse.
Create a Paint Rotation System at Home
Now that you’ve assessed which cans are usable, set up a simple rotation system to keep paint fresh and easy to find.
Use paint organization, color coding, labeling systems, and storage solutions for easy access.
Implement inventory management with paint tracking and shelf life reminders, plus regular can maintenance.
Example visuals:
- Shelf with oldest cans front
- Labeled rows by color
- Rotation schedule chart
Manage Paint Inventory for Contractors
As a contractor, you should track batch numbers so you can trace any quality issues and guarantee color consistency.
Rotate stock regularly to use older cans first and avoid expired material on jobs.
Store paint according to temperature guidelines to prevent freezing or breaking down in heat.
Track Batch Numbers
Start by recording each can’s batch number the moment it arrives on-site so you can quickly link any performance issues back to a specific production run.
You’ll use paint tracking to log product labeling, shelf life indicators, storage conditions and paint longevity for quality assurance.
Keep paint inventory notes to protect color consistency and enable paint recycling.
- Rusty lid, swollen can
- Faded label
- Date stamped
Rotate Stock Regularly
Rotate stock regularly so you use the oldest cans first and avoid expired or compromised paint sitting on the shelf.
You should label dates, group by type, and move older cans to the front.
Good paint organization and simple inventory management cut waste, speed job prep, and prevent surprises.
Check seals and consistency as you rotate to spot bad cans early.
Store According To Temperature
When you store paint, control temperature to preserve its pigment, binder, and finish—keep latex paints between about 45–85°F and oil-based coatings slightly warmer to prevent thickening or separation.
You should plan ideal storage, monitor temperature ranges, and rotate cans.
Visualize conditions:
- Cool, dry basement with steady heat
- Garage with insulated shelving
- Climate-controlled storage unit for long-term stock
Spot Counterfeit or Low-Quality Paint Brands
One quick way to spot counterfeit or low-quality paint is to check the label and packaging closely—authentic brands use consistent logos, clear batch codes, and printed safety/data sheets, while fakes often have misspellings, blurry printing, or missing regulatory info.
You should also inspect texture and scent for low quality ingredients, verify seller reputation, and demand product documentation to avoid counterfeit label detection.
Read Paint Labels for Shelf-Life Clues
Curious how long that can of paint will actually last once you open it?
Read labels—manufacturers list shelf life indicators and paint storage tips so you’ll know when to use or discard.
Look for:
- manufacture date and expiry icons
- recommended storage temperature range
- “recoat” or “dispose after” notes
Follow these clues to avoid spoiled paint and wasted time.
How VOCs Change as Paint Ages
Because paint continues to off-gas as it cures and breaks down, the mix of volatile organic compounds (VOCs) you’re exposed to shifts over time: high-volatility solvents evaporate quickly after opening, leaving lower-volatility and sometimes more persistent compounds behind.
Chemical byproducts from degradation can increase overall odor and irritant potential.
You should monitor VOC emissions as part of paint deterioration, since aging effects alter air quality, volatile compounds raise health risks, and proper disposal limits environmental impact for better paint safety.
Seasonal and Regional Storage Tips
When storing paint, keep it within the manufacturer’s recommended temperature range so it won’t freeze or overheat.
You’ll also want to seal cans and protect them from moisture to prevent rust and contamination.
In humid regions, adjust storage—use desiccants or a dehumidified space—to keep water from breaking the paint down.
Store In Temperature Range
In summer and winter, store paint within the temperature range printed on the can—usually between about 50°F and 80°F—to keep its chemistry stable and prevent skinning, separation, or freezing.
You should monitor paint temperature for ideal storage and avoid extremes.
Visualize where to keep cans:
- A cool basement shelf
- A heated garage cabinet
- A climate-controlled closet
Protect From Moisture
Keep paint cans off damp floors and away from humidity sources so moisture won’t ruin the finish or promote rust and mold; store them on a raised shelf or in sealed plastic bins, and use silica gel packs or desiccant pouches for extra protection in rainy or coastal climates. Create a moisture barrier and maintain humidity control.
| Region | Tip |
|---|---|
| Coastal | Use desiccants |
| Basement | Elevate cans |
Adjust For Humidity
Humidity levels change with seasons and regions, so you should tweak how and where you store paint to avoid spoilage.
Use humidity control to keep cans dry and cool; it aids paint preservation.
Picture proper storage:
- A sealed can on a high shelf in winter
- A dehumidified basement in humid summers
- Insulated garage during spring swings
Check seals regularly.
Match Faded Stored Paint to Original Color
Wondering whether your stored paint still matches the wall it came from?
Test a small area and let it dry, then do a color swatch comparison under the same lighting to spot paint color fading.
If the dried sample differs, adjust by blending with a small amount of fresh paint or visit a paint store for a matching scan.
Keep notes on results.
Document Color Formulas for Touch-Ups
After you’ve confirmed matching or adjusted a faded sample, record the exact formula so future touch-ups are painless. Note brand, base, pigment percentages, and any tint adjustments.
Keep a printed copy with the paint can and update after each tweak. Sketch visuals like patch location.
- kitchen backsplash swatch
- hallway trim chip
- exterior door corner
Include color matching and paint storage notes.
Prepare a Garage for Safe Paint Storage
If you want your paint to last, organize your garage so cans stay stable, dry, and easy to find: place full cans off the floor on shelving or pallets, keep lids sealed and labeled with date and formula, and group by type and flash point so incompatible products aren’t stored together. Use paint organization and safe shelving to reduce spills and simplify access.
| Shelf level | Recommendation |
|---|---|
| Top | Light, sealed cans |
| Middle | Frequently used cans |
| Bottom | Heavy, secured cans |
Use Tech Tools to Track Paint Shelf Life
When you want to keep paint usable and avoid costly surprises, use simple tech tools to track shelf life and storage conditions.
You can log purchases, temperatures, and open dates with paint tracking apps or shelf life calculators so you know what to toss.
Visualize stored cans:
- Date-stamped shelf on an app
- Thermometer alerts for freezes
- Quick scan barcode inventory
Frequently Asked Questions
Can I Freeze Paint to Extend Its Shelf Life?
No, you shouldn’t freeze paint to extend its shelf life; freezing paint risks breaking down binders and causing separation. You’ll harm consistency and color. Instead focus on proven paint preservation techniques like airtight storage and proper temperature control.
Is Paint Still Usable if It Separated but Smells Normal?
Yes — if it stirs back to a smooth whole and the paint smell indicators stay normal, you can use it; think of separated paint like a jar of vinaigrette that recombines. Check paint separation causes before trusting results.
How Do I Transport Paint Safely on a Hot Day?
You’ll transport paint safely by keeping cans upright, sealed, and shaded, using insulated carriers or coolers to minimize temperature effects, avoiding trunk heat, and moving quickly; label cans and secure them to prevent tipping or spills.
Can Old Paint Be Donated to Community Organizations?
Yes — you can often donate old paint if it meets paint donation guidelines; check cans for usable condition, label, and color, then contact community organizations to confirm their needs and drop-off or arrange pickup.
Will Paint Thinner Restore Old Oil-Based Enamel?
About 60% of oil paints thicken irreversibly; you can’t reliably restore old oil-based enamel with paint thinner. You’ll improve paint quality modestly by thinning slightly, but full enamel restoration usually needs fresh paint or straining.
Conclusion
You’ll want to trust your senses but not rush judgment: if paint smells off, looks lumpy, or shows that sad, separated layer, it’s gently retired rather than useful. Keep cans cool, labeled, and shaken occasionally so colors stay faithful to memory. Use photos and apps to track formulas and storage dates, and prepare your garage like a conscientious caretaker. That way, when it’s time to refresh a wall, you’ll reach for paint that’s still dignified and ready.