How to Texture Concrete Walls Like a Pro (Step-by-Step Guide)
You can texture concrete walls like a pro by prepping thoroughly, choosing the right mix and tools, and following a clear step‑by‑step routine. Clean, patch, and prime the surface, apply a base coat, then use trowels, stipple brushes, or a hopper gun to build your chosen finish. Cure properly, blend color washes, and seal for durability. Expect moderate skill, a few days of work, and practical tips ahead if you want pro results.
Quick Direct Answer Can You Texture Concrete Walls Like a Pro and What It Entails
Yes—you can texture concrete walls like a pro by prepping the surface, applying a base coat, and finishing with your chosen texture and sealant.
Expect a few hours to a couple of days depending on drying times, moderate material costs, and a skill level from DIY-friendly to advanced for complex patterns.
With the right tools and patience, you’ll control time, cost, and difficulty to get professional results.
Short summary of process steps
Start by prepping the surface, then move through texturing, curing, and finishing so you get a durable, attractive wall.
You’ll learn how to texture concrete walls by cleaning, patching, and priming; apply texture with tools or sprayers; cure properly; then seal and finish for appearance and protection.
- Prep
- Texture
- Cure
- Finish
Estimated time, cost, and difficulty
You can get pro-looking textured concrete walls without a contractor if you plan carefully: a small accent wall takes a weekend (6–10 hours), while a whole room or exterior surface can take 2–3 days of active work plus several days for curing.
Expect $50–$300 for materials per wall, $200–$1,500 for larger jobs, and a moderate skill level—practice first.
Understanding Concrete Wall Texturing What, Why, and When
Concrete wall texturing is the process of applying patterns or finishes to raw concrete to change its look and performance.
You’ll often pick texture for added durability, improved aesthetics, or to hide surface flaws, and you’ll weigh that against simpler options like paint or cladding depending on cost, exposure, and desired lifespan.
Common choices range from broom and trowel finishes to stamped, sprayed, or chemical-treated surfaces, each with different effects and maintenance needs.
What is concrete wall texturing?
Texture transforms plain gray walls into surfaces that catch light and resist wear, and it’s more than just aesthetics—it’s a set of techniques for altering a cured or fresh concrete surface to improve appearance, slip resistance, or hide imperfections.
You’ll use tools, additives, or finishing methods—stamping, brooming, trowel patterns, or overlays—to create tactile, visual effects suited to location and function.
Benefits of textured concrete walls (durability, aesthetics, concealment of imperfections)
Durability, visual appeal, and practical concealment make textured concrete walls a smart choice for many projects.
You’ll get long-lasting surfaces that resist wear, hide minor flaws, reduce maintenance, and add depth to spaces.
Choose textures to match style and function; they adapt indoors or out.
- Increased durability
- Enhanced aesthetics
- Conceals imperfections
- Low maintenance
When to choose texturing vs. painting or cladding
When you’re weighing options for a wall finish, think about how the surface will be used and maintained:
- Choose texturing when you need durability, hides flaws, and want low maintenance.
- Paint when you want quick color changes and smoother surfaces, but expect more upkeep.
- Cladding works for insulation, dramatic aesthetics, or damage protection.
- Combine methods if you need both function and style.
Common texture styles and finishes overview
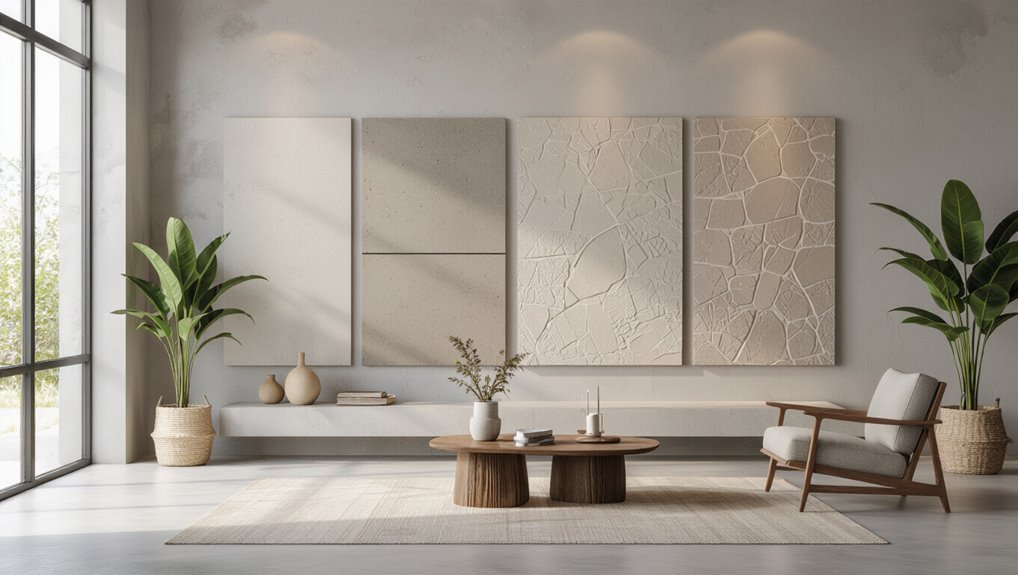
There are several common concrete wall textures you’ll encounter—each offers a distinct look and performance profile to match different needs.
You’ll pick based on style, durability, and maintenance. Consider these popular finishes:
- Smooth trowel — sleek, modern, easy to seal.
- Broomed — slip-resistant, casual.
- Stippled/knockdown — hides flaws, adds depth.
- Exposed aggregate — rugged, decorative, durable.
Materials, Tools, and Safety Preparation
Before you start texturing, you’ll gather the right materials—plasters, bonding agents, primers, and sealers—and pick products suited for interior or exterior use.
You’ll also need essential tools like trowels, floats, sprayers, grinders, and mixers.
Don’t forget PPE and a site safety checklist so you can work safely and efficiently.
Required materials (plasters, bonding agents, primers, sealers)
Gathering the right plasters, bonding agents, primers, and sealers will set you up for a durable, attractive textured concrete wall.
Choose cement-based or lime plasters for adhesion; use polymer-modified bonding agents; pick a penetrating or acrylic primer suited to concrete; finish with a breathable sealer.
Apply per manufacturer instructions and test compatibility.
- Cement or lime plaster
- Polymer bonding agent
- Penetrating/acrylic primer
- Breathable sealer
Essential tools and equipment (trowels, floats, sprayers, grinders, mixers)
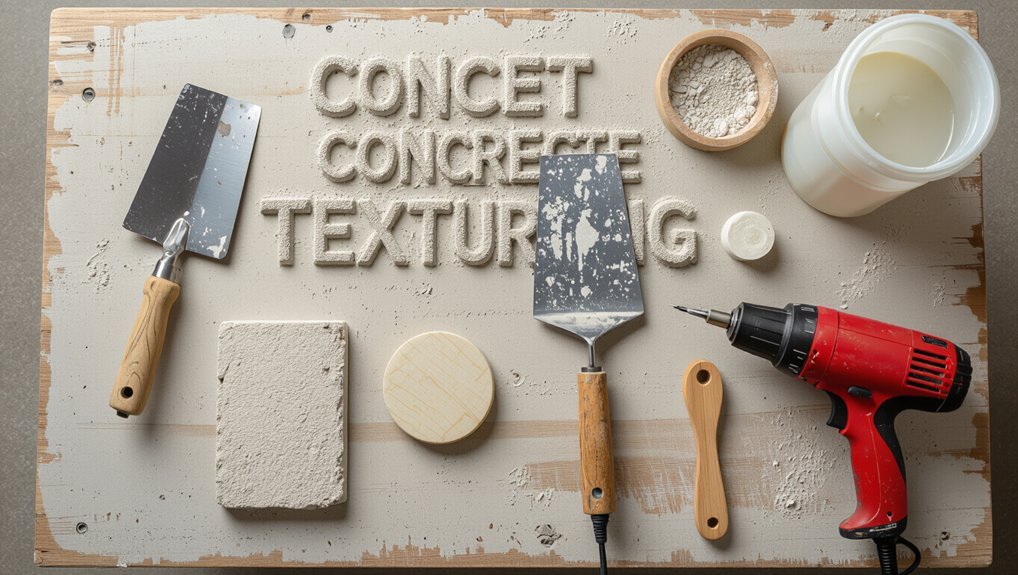
Tools matter: pick the right trowels, floats, sprayers, grinders, and mixers so you can work cleanly, efficiently, and safely on textured concrete walls.
You’ll need quality tools, proper maintenance, and matching accessories to get consistent textures and avoid rework.
- Hawk, stainless trowels (various sizes)
- Magnesium/wood floats
- Texture sprayer and pump
- Angle grinder, diamond cup, and paddle mixer
PPE and site safety checklist
While you’re prepping materials and equipment, prioritize personal protective equipment and site safety so you stay healthy and keep the job moving.
You’ll need correct PPE, clear access, and emergency plans before you start.
Follow this quick checklist:
- Safety goggles, respirator, gloves, knee pads, and steel-toe boots
- Hearing protection and hard hat when grinding or mixing
- Ventilation and dust control measures
- Clear walkways, signage, and first-aid kit
Choosing the right products for interior vs. exterior walls
1 key decision when texturing concrete walls is whether the surface will live indoors or outdoors, because that dictates the products and prep you’ll need.
For interiors, choose low-VOC primers, flexible bonding agents, and decorative topcoats.
For exteriors, use weatherproof primers, cement-based render, and breathable sealers.
Match tools and curing times to conditions, and always follow manufacturer safety and application guidelines.
Assessing and Preparing the Wall Surface
Before you texture, inspect the concrete for cracks, efflorescence, mold, oil, and other contamination so you know what repairs and cleaning methods you’ll need.
Fix cracks and spalls step-by-step with appropriate patching products, then clean the surface using pressure washing, acid etch, or degreasing as required.
Finally, apply the right primer or bonding agent when the surface is sound and fully dry to guarantee adhesion.
Inspecting concrete for cracks, efflorescence, mold, and contamination
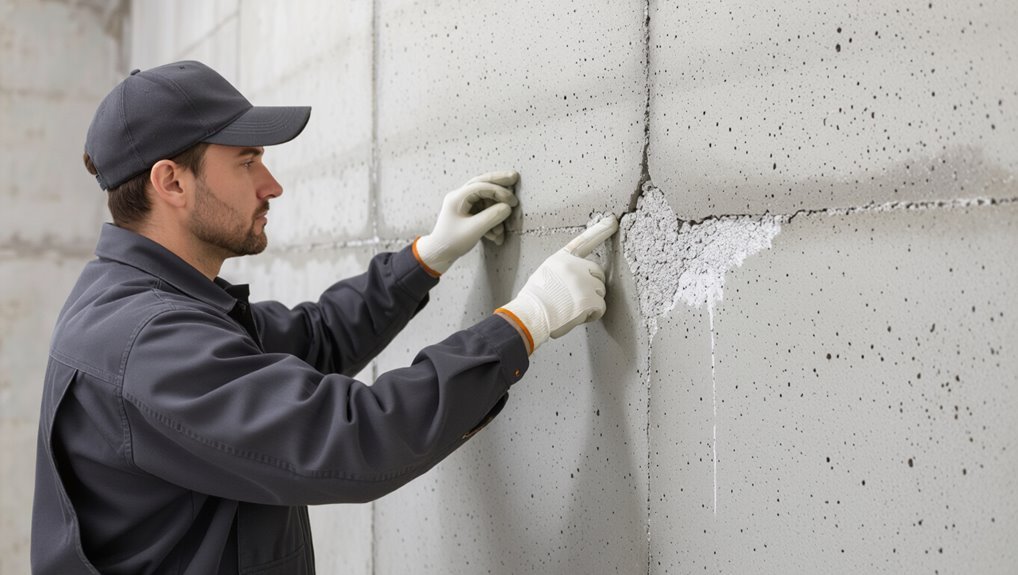
Because the durability of your texture depends on the condition of the concrete, you should start with a careful inspection for cracks, efflorescence, mold, and any contamination.
Use this checklist to evaluate and document issues before proceeding:
- Check for surface powdery salt deposits (efflorescence).
- Look for dark, fuzzy mold or mildew.
- Note oil, paint, or chemical stains.
- Map hairline and wider cracks for repair later.
Repairing cracks and spalls step-by-step
With the issues you found documented, you’ll now repair cracks and spalls so the texture will bond and last.
Triage defects, widen hairline cracks to V-grooves, remove loose material, then apply compatible patching compound. Follow with a firm trowel finish and allow proper cure before texturing.
- Assess size and depth
- Remove loose concrete
- Fill with patch mortar
- Smooth and cure
Cleaning methods: pressure washing, acid etch, degreasing
When you’re preparing a concrete wall for texturing, thorough cleaning guarantees the surface will accept the new finish and bond properly.
Use appropriate methods based on contamination and condition:
- Pressure wash to remove dirt, loose paint, and efflorescence.
- Acid etch (muriatic) to open pores; neutralize afterward.
- Degrease with a concrete cleaner for oil or solvent stains.
- Rinse and let fully dry before continuing.
Priming and bonding: when and how
A proper primer and bonding agent will make your texture adhere evenly and resist peeling, so assess the wall for chalking, coatings, and porosity before you start.
Remove loose material, clean and dry the surface, then test porosity with water.
Use acrylic primer on painted or smooth concrete, and a silicate or epoxy bonding agent for dense or slick surfaces.
Apply per manufacturer directions.
Step-by-Step How-To: Professional Texturing Techniques
Now you’ll learn four pro texturing methods you can use on concrete walls.
You’ll start with skip trowel or Venetian plaster techniques, then try stipple or stomp-brush textures, spray-on aggregate or stucco finishes, and finish with faux effects like concrete washes, acid stains, and color washes.
Each method has a clear step-by-step approach and tool list so you can pick the right look and execute it cleanly.
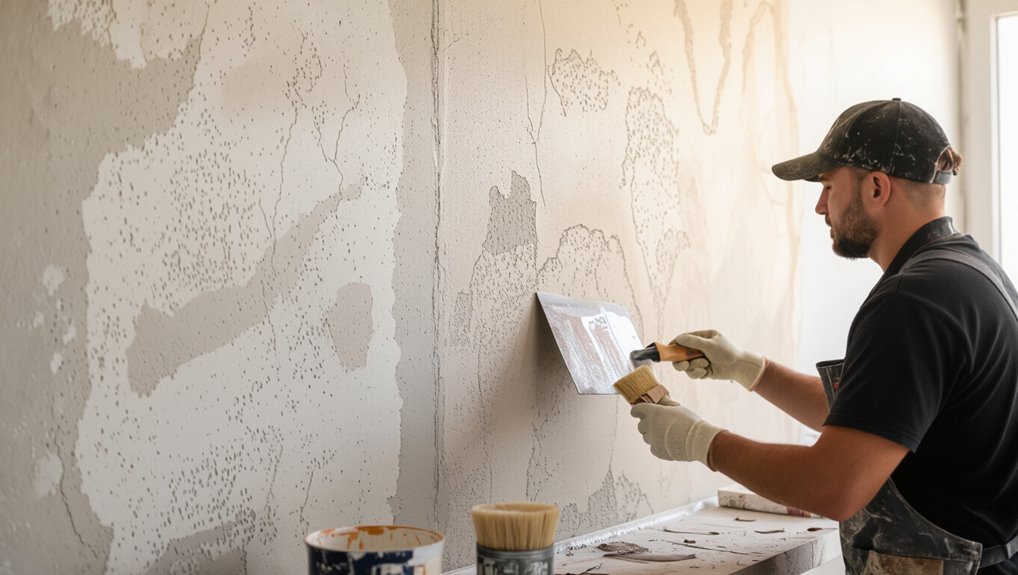
Technique 1 Skip trowel / Venetian plaster style
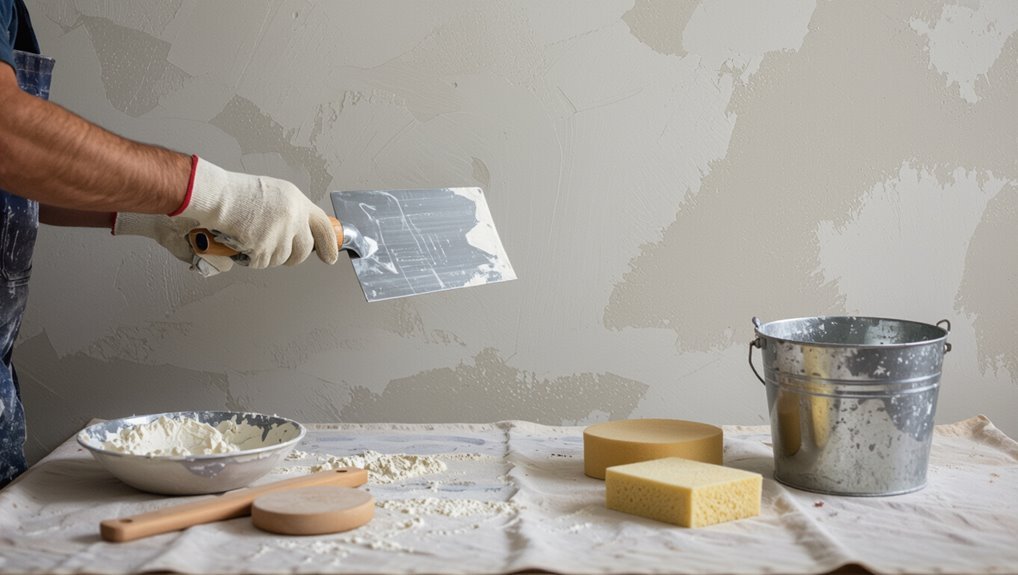
You’ll get the best skip trowel or Venetian plaster finish when you use the right materials and tools, follow a clear step-by-step application, and finish with proper sealing.
Start by gathering your joint compound or Venetian plaster mix, stainless steel trowel, hawk, and sanding block; then apply thin layers with overlapping trowel strokes and texture by skipping the blade.
Finish by sanding light high spots and sealing with a breathable clear coat to protect the surface.
- Materials and tools specific to this technique
- Step-by-step application process
- Texturing tips for consistent skip pattern
- Finishing and sealing recommendations
Materials and tools specific to this technique
Before you start, gather the specific materials and tools that make the skip trowel/Venetian plaster effect possible: quality Portland-cement–based plaster or pre-mixed Venetian plaster, bonding primer, stainless-steel finishing trowels (one small for application, one larger for smoothing), hawk or mud pan, mixing bucket and drill paddle, various grit sandpaper or abrasive pads, and breathable sealer.
Also have clean rags, a respirator, gloves, and a level.
Step-by-step application process
With your tools and materials at hand and the surface prepped, you’re ready to apply the skip trowel/Venetian plaster finish.
Mix thin plaster to workable consistency. Load a stainless steel trowel lightly, skim diagonally, and lift to leave patches.
Work in small sections, overlapping edges. Allow slight drying, then burnish selectively for smooth highlights.
Clean tools between passes.
Finishing and sealing tips
Satisfaction comes in the details, so take your time when finishing and sealing a skip trowel/Venetian plaster wall to lock in texture and protect the surface.
Let the plaster cure fully, sand lightly for uniformity, then apply a breathable sealer or microcrystalline wax.
Test in a small area, use thin even coats, and buff between layers for depth and durability; avoid non-breathable sealers.
Technique 2 Stipple / stomp brush texture
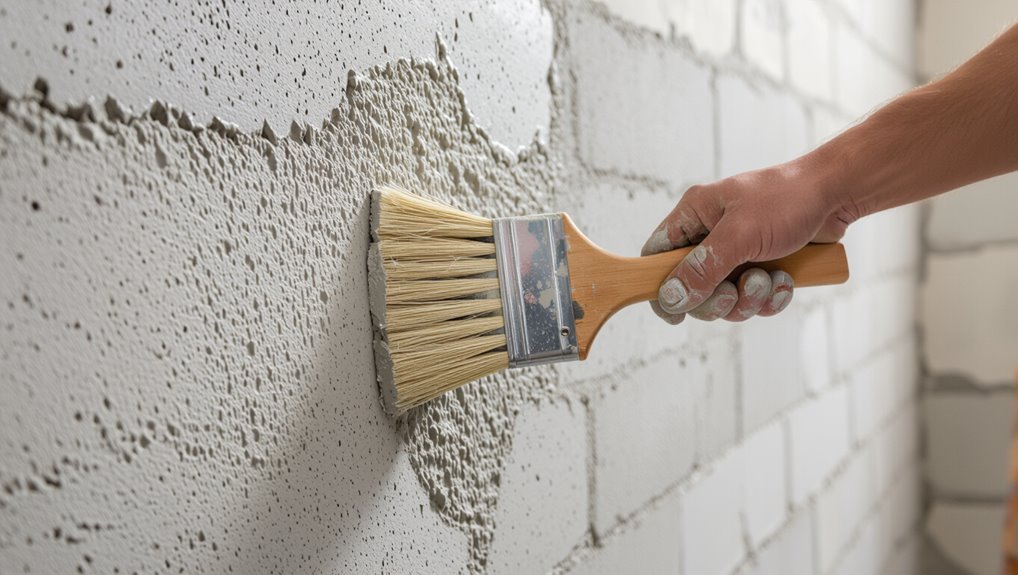
You’ll learn what materials and tools you need, the step-by-step application process, and how to troubleshoot common issues with a stipple/stomp brush texture.
Start with the right brush, mix, and surface prep, then practice your stroke rhythm before tackling the whole wall.
If problems pop up—like uneven texture or flaking—you’ll get quick fixes to keep the finish consistent.
- Materials and tools: brushes, mixes, protective gear
- Step-by-step application process: prep, mix, stroke, cure
- Common issues: uneven coverage, overworking, adhesion problems
- Quick troubleshooting tips: adjustment techniques and preventive checks
Materials and tools
Before you start, gather the right materials and tools so the stomp/stipple brush texture goes on smoothly and looks professional: a high-quality stipple/stomp brush (natural or nylon bristles), roller and tray for base coat, textured mortar or joint compound, mixing bucket and paddle, trowel or putty knife, sanding block, drop cloths, painter’s tape, gloves, safety goggles, and a respirator for dust.
Step-by-step application process
With your tools and materials ready, set up the work area by covering floors and taping edges so dust and splatter won’t be a problem.
Mix texture compound to manufacturer specs. Apply a thin, even coat with a hawk and trowel.
While wet, stomp or stipple with a stiff brush in overlapping circles for consistent pattern.
Let cure before sealing.
Troubleshooting common issues
1 common problem is uneven stipple patterns caused by inconsistent pressure or brush angle; if you see high spots or sparse areas, lightly remix the compound for uniform consistency, re-wet the brush, and rework only the affected sections in small, overlapping motions to blend without disturbing surrounding texture.
For blisters, remove loose compound, sand, prime, then reapply.
Prevent drips by keeping strokes short and controlled.
Technique 3 Spray-on aggregate or stucco finish
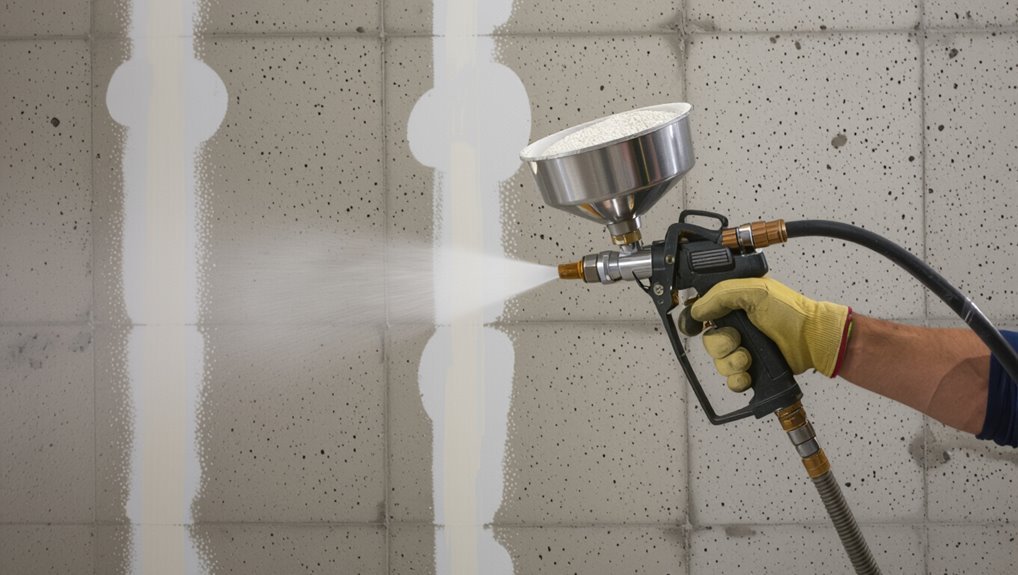
You’re ready to try a spray-on aggregate or stucco finish, and you’ll need the right materials and tools to get professional results. Follow a clear step-by-step application process and focus on techniques that give consistent coverage and control texture depth.
With practice you’ll learn how equipment setup, nozzle technique, and overlap patterns affect the final look.
- Gather materials and tools: mixer, hopper gun or sprayer, aggregates, stucco mix, trowels, protective gear.
- Prep and mix: clean surface, apply bonding agent if needed, mix to manufacturer specs.
- Application steps: set spray settings, apply in even passes, back-roll or trowel to adjust texture.
- Consistency tips: maintain distance and speed, overlap passes by 25–50%, check for uniform depth and repair low spots immediately.
Materials and tools
To get a clean, durable spray-on aggregate or stucco finish, you’ll need the right mix of tools and materials: a hopper gun or pressure sprayer rated for heavy coatings, a compressor or pump with sufficient PSI, coarse aggregate or premixed stucco, bonding agent, primer, mixing buckets, trowels or floats for touch-ups, protective tarps and tape, and full PPE including respirator, eye protection, and gloves.
Also bring measuring tools, a drill mixer, cleaning brushes, spare nozzles, and sealant for aftercare.
Step-by-step application process
Start by prepping the surface and workspace so the spray goes on evenly: clean and repair the wall, mask adjacent areas, lay drop cloths, and set up your sprayer and compressor per the manufacturer’s specs.
Mix the stucco or aggregate per instructions, test spray on a board, spray in steady overlapping passes, allow initial set, then finish edges and inspect for missed spots before cleanup.
Achieving consistent coverage and texture depth
With the spray pattern set and a test pass confirmed, focus on getting even coverage and consistent texture depth across the entire wall.
Move steadily, overlap passes by about 30%, keep nozzle distance steady, and watch thickness. Adjust pressure or mix slightly if spots thin or clog.
Feather edges to blend; step back frequently to check uniformity and correct any high or low areas immediately.
Technique 4 Faux finishes (concrete wash, acid stain, color washes)
You’ll get the richest results from faux finishes when you prep properly and use the right materials, tools, and safety gear.
Follow a clear step-by-step application process, focus on natural-looking color blending, and finish with the proper sealer to lock in the effect.
Below are the essentials to gather and follow before you start:
- Materials and tools (wash/stain, brushes, sprayers, respirator, cleaners)
- Step-by-step application process (prep, test patch, apply, texture, remove excess)
- Color blending techniques (layering, feathering, neutral bases)
- Sealing and maintenance (sealant types, application, curing times)
Materials and tools
Before you mix or apply any faux finish, gather the right materials and tools so the work goes smoothly and finishes well.
You’ll need concrete cleaner, pH-neutral primer, acid stain or color wash, mixing buckets, measuring cups, stiff brushes, sprayer or low-pressure atomizer, rags, protective gear (gloves, goggles, respirator), plastic sheeting, painter’s tape, and a neutralizing solution for acid stains.
Step-by-step application process
Start by confirming the surface is clean, dry, and properly primed so your faux finish will bond and look consistent.
Once that’s done, set up your work area with plastic sheeting, tape, and safety gear.
Mix your chosen wash or stain per instructions.
Apply in sections with a mop, brush, or sprayer, working wet edges.
Blot or lift for texture, let dry between layers.
Color blending and sealing
With your washes layered and textures set, move on to color blending and sealing to lock in depth and protect the finish.
Blend tones using diluted washes and dry-brushing, feathering edges for seamless shifts. Test small areas, adjust contrast, then clean surface.
Apply a breathable masonry sealer or matte polyurethane in thin coats, allowing full cure between coats to preserve color and texture.
Finishing Touches and Clean-Up
Decide whether you want to sand, burnish, or leave the texture pronounced—each choice affects the final look and durability.
Then apply an appropriate sealer or protective coating to extend the life of the finish.
Finally, clean your tools and the worksite thoroughly to prevent residue buildup and guarantee a professional result.
Sanding, burnishing, and smoothing vs. leaving texture pronounced
Choose how you want the wall to read: sand, burnish, or leave the texture pronounced.
Decide based on light, touch, and style; you’ll trade grit for subtlety or keep bold relief.
Quick tips:
- Sand for smooth, paint-ready surfaces.
- Burnish to deepen color and sheen.
- Light-smooth to reduce sharp edges.
- Leave pronounced for tactile, dramatic impact.
Sealing and protective coatings for longevity
After you’ve settled on how much texture to keep, protect the surface so it lasts: sealing and protective coatings lock in appearance, resist stains, and make cleaning easier.
- Choose breathable sealer for exterior walls to prevent trapped moisture.
- Use solvent or water-based acrylics indoors for abrasion resistance.
- Apply thin, even coats with a roller or sprayer; follow dry times.
- Recoat periodically based on wear and exposure.
Cleaning tools and site cleanup best practices
When you finish texturing, clean tools and the site promptly to prevent dried concrete and coatings from becoming a bigger problem—wipe rollers and brushes with the appropriate solvent, flush sprayers, and scrape trowels while material is still soft.
Collect waste, seal contaminated rags in metal containers, and dispose of solvents per local rules.
Sweep debris, hose surfaces, and inspect equipment before storage to ascertain readiness for the next job.
Troubleshooting Common Problems and Mistakes to Avoid
When something looks off—uneven texture, lap marks, or visible tool lines—you’ll want to identify whether it’s a technique issue or a material problem and correct it before it sets.
If you see peeling or poor adhesion, check substrate prep and moisture, then remove and reapply with proper bonding agents; for color inconsistency or patchiness, blend and feather repairs and match mixes carefully.
For exterior work, watch temperature, humidity, and drying times and adjust timing or use additives to prevent weather-related failures.
Uneven texture, lap marks, and tool marks fixes
Spot irregularities quickly to prevent small lap marks and tool tracks from becoming permanent.
- Feather edges with a damp sponge or float to blend fresh overlaps.
- Rework small tool gouges immediately with matching mix and light trowel strokes.
- Sand cured high spots gently, then recoat thinly to match texture.
- Keep mixing consistency and maintain overlapping wet edges to avoid future laps.
Adhesion failures and peeling diagnosis and repair
Because adhesion issues can start small and spread fast, you should diagnose peeling promptly to avoid larger repairs.
- Scrape loose material, note bonded vs. delaminated areas.
- Check surface moisture and efflorescence; dry and clean before repairs.
- Grind or sand feathered edges, apply compatible primer or bonding agent.
- Patch with matching texture compound, cure per manufacturer, and monitor for recurrence.
Color inconsistency and patchiness prevention and correction
If color varies across a repaired wall, you’ll notice patches that catch the eye and undermine the overall finish; preventing and fixing that starts with matching materials, surface preparation, and application technique.
- Test small swatches to match pigments and sealers.
- Clean and prime uniformly before texturing.
- Blend repair edges with feathering and thin coats.
- Use consistent mixing, cure times, and lighting when inspecting.
Weather-related issues for exterior work and mitigation strategies
When you’re working outdoors, changing weather is the single biggest factor that can ruin texture, adhesion, and curing—so plan around temperature, humidity, wind, and precipitation.
Protect surfaces and schedule work, and you’ll avoid failures.
Consider these mitigation tactics:
- Use tarps/heaters for cold or rain.
- Delay work if humidity exceeds manufacturer limits.
- Windbreaks to prevent fast drying.
- Sunshade to control surface temperature.
Professional Tips, Best Practices, and Efficiency Strategies
Plan and batch your work so mixes, tools, and weather conditions stay consistent across the whole wall.
Decide when the job’s worth hiring a pro—compare cost, complexity, and your comfort with advanced tools—and consider time-saving techniques pros use like pump sprayers, texture rollers, and staging.
Finally, set a simple maintenance schedule to keep the texture looking sharp and prevent premature wear.
Planning and batching work for consistent results
Because consistency starts before you touch the trowel, organize batching and workflow so every mix, tool, and timing decision is repeatable; you’ll cut rework and get uniform texture across large areas.
- Premeasure mixes and label buckets for each run.
- Stage tools and replacement blades nearby.
- Time working windows and set alarms for joins.
- Batch-match additives and water ratios for color/finish consistency.
When to hire a pro vs. DIY cost and complexity factors
If you’re weighing whether to tackle textured concrete walls yourself or hire a pro, consider the job’s scale, your skill with concrete tools, and the value of your time—you’ll save money on small, simple projects but professionals pay off for large areas, complex finishes, or when structural or warranty concerns are involved.
- Budget limits
- Area size and access
- Finish complexity
- Risk and liability
Time-saving tools and techniques pros use
Given the trade-offs you just weighed—budget, area, finish, and liability—pros save time with gear and methods that cut hours while keeping quality up.
You’ll streamline projects by choosing the right tools, prepping efficiently, and sequencing tasks to avoid rework.
- High-torque mixer for consistent batches
- Airless sprayer for thin skim coats
- Adjustable hawk and trowel rigs
- Tactical staging and task batching
Maintenance schedule to preserve textured concrete
When you set up a routine inspection and cleaning plan, you’ll keep textured concrete looking sharp and extend its life while cutting long-term repair costs.
- Inspect quarterly for cracks, delamination, and staining.
- Clean gently with pH-neutral detergent and soft brush every 3–6 months.
- Reseal annually or as manufacturer recommends, more often in harsh climates.
- Promptly repair damage and document dates to track trends and budget maintenance.
Comparison of Popular Texture Finishes
You’ll find it helpful to see a quick-read chart that compares durability, cost, difficulty, and best uses for common texture finishes so you can pick the right one fast. Below is a simple visual summary to guide your choice. Refer to it as you weigh trade-offs for your project.
| Finish | Durability | Best Uses |
|---|---|---|
| Smooth trowel | High | Interior walls, modern look |
| Skip trowel | Medium | Accent walls, moderate traffic |
| Stomp brush | Low–Medium | Rustic exterior, decorative panels |
| Spray/knockdown | Medium–High | Commercial facades, weather-exposed areas |
Quick-read comparison: durability, cost, difficulty, best uses
Here’s a fast, side-by-side look at common concrete wall textures so you can quickly weigh durability, cost, skill required, and ideal uses; the goal is to help you pick a finish that fits your budget, timeline, and maintenance expectations. You’ll see which textures last, what they cost, how hard they are, and where they shine.
| Texture | Quick pick |
|---|---|
| Smooth | Low cost, moderate skill, indoor |
| Stucco | Durable, mid cost, higher skill, exterior |
FAQs Common Questions About Texturing Concrete Walls
You probably have practical questions about timing, compatibility, durability, and matching when you texture concrete walls.
I’ll cover how long textured concrete needs to cure before painting or sealing, whether you can texture over paint or wallpaper, and if textures work in humid or wet areas.
You’ll also get guidance on expected lifespans for common finishes and how to match a new texture to an existing wall.
How long does textured concrete take to cure before painting or sealing?
How long before you can paint or seal textured concrete depends on the mix, ambient conditions, and the product you’ll apply; generally, expect 28 days for full cure.
Though light sealing or painting can often wait 7–14 days once the surface is dry and strength has reached the manufacturer’s minimum.
Check moisture content with a meter, follow product specs, and allow extra time in cold or humid conditions.
Can you texture over existing paint or wallpaper?
Can you texture over existing paint or wallpaper? You can, but prep matters.
Remove loose wallpaper and glossy paint, sand smooth, and clean thoroughly.
Prime with a high-adhesion primer suited to concrete and painted substrates.
For stubborn coatings, apply a bonding primer or use a mechanical keying method.
Test a small area first to confirm adhesion before texturing the entire wall.
Is textured concrete suitable for humid or wet areas?
If you’ve prepped the surface properly, textured concrete can work well in humid or wet areas, but some extra steps are needed.
Use moisture-resistant mixes, proper curing, and a vapor barrier or waterproof membrane.
Seal the texture with a breathable, water-repellent sealer and guarantee good drainage and ventilation.
Maintain seals and inspect regularly to prevent mold, efflorescence, or delamination.
What is the expected lifespan of different textured finishes?
Lifespan varies a lot by finish—stamped or broomed surfaces typically last decades with basic maintenance, while delicate overlays or decorative trowel textures may need repairs or resealing every 5–10 years depending on exposure and traffic.
Your choice, climate, UV, freeze‑thaw cycles, and abrasion determine longevity. Regular sealing, prompt repairs, and gentle cleaning extend life; expect shorter cycles for high‑use or exterior decorative finishes.
How to match a new texture to an existing wall?
Matching a new texture to an existing concrete wall starts with close inspection and a few simple tests so you can replicate scale, tool marks, and surface profile.
Measure texture depth, photograph patterns, and test small patches with matching mix, trowel and stroke.
Adjust aggregate, water, and tools until the cured sample blends.
Feather edges and color-match with stain or paint for seamless repair.
Conclusion and Next Steps
You’ve got the core steps and techniques to get professional-looking textured concrete walls, so review your plan and tackle any tricky spots first.
Grab the suggested checklist and materials list to make sure you’ve got everything on the job site.
If you want a printable step checklist or expert help, download the sheet or consult a pro before you start.
Recap of key actions to achieve professional results
Wrap up by focusing on the essentials that give your textured concrete walls a professional look: prep the surface thoroughly, pick the right tools and mix, apply consistent technique, and finish with proper curing and sealing.
- Clean and repair surfaces.
- Choose tool, texture, and mix.
- Apply uniform strokes and timing.
- Cure, seal, inspect, and touch up.
Suggested project checklist and materials shopping list
Before you head to the store, gather a compact checklist so you’ll buy only what you need and can tackle the job efficiently:
- Mixable joint compound or cement skim, bonding primer, and sealer.
- Trowels, hawk, texture rollers, and float.
- Sandpaper, patching tools, drop cloths, and painter’s tape.
- Safety gear: gloves, goggles, mask, and knee pads.
Call to action download printable step checklist / consult a pro
Now that you’ve got your materials checklist, grab the printable step-by-step checklist to keep the process organized and avoid last-minute trips to the store.
Print it, tick tasks as you go, and save time. If the wall’s condition or scale feels overwhelming, consult a pro for assessment or a quote.
Ready? Download the checklist now and start confidently.