How to Texture Dry Wall: Step-By-Step Finishing Techniques
You’ll start by choosing a finish—smooth, orange peel, knockdown, or skip trowel—based on the room’s look and maintenance needs. Prep the surface, tape seams, and mix joint compound to the right consistency. Apply with a hawk, trowel, or texture sprayer, shape the pattern while compound is wet, then knock down or skip-trowel as needed. Sand lightly, prime, and paint. Follow safety and cleanup steps, and continue for detailed tips, tool setups, and troubleshooting.
What You’ll Achieve With This Drywall Texture Guide
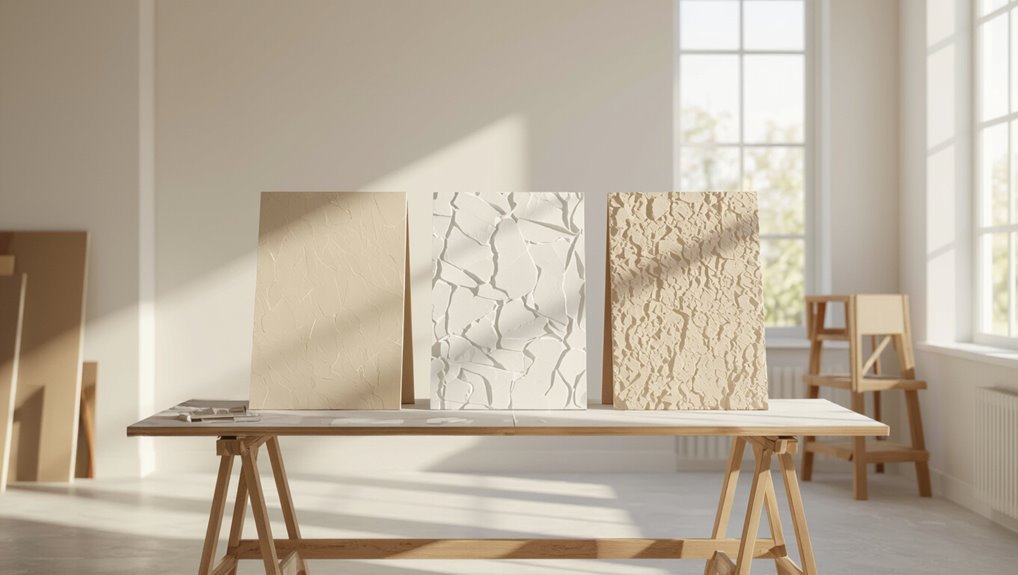
When you finish this drywall texture guide, you’ll know which textures suit different rooms, how to prep surfaces correctly, and which tools and materials to buy for each technique.
You’ll understand drywall benefits like durability and sound control, compare texture styles for living, bath, and ceiling areas, and feel confident planning projects, estimating materials, and avoiding common mistakes for clean, lasting results.
Quick Guide: Pick a Finish and the 5 Basic Steps
Pick the finish that fits the room and then follow five clear steps to get consistent results: choose texture style, prep the surface, apply compound, shape the texture, and finish with sanding and sealant.
You’ll pick among finish options, gather tools, prep surfaces properly, practice texture techniques, apply and shape compound confidently, then sand and seal for durability and a uniform look.
Which Finish to Choose: Smooth, Orange Peel, Knockdown, or Skip Trowel
Now that you know the five basic steps, it’s time to choose the finish that suits your room and skill level.
You’ll weigh texture styles: smooth for modern clean lines, orange peel for subtle concealment, knockdown for a softer sculpted look, or skip trowel for rustic character.
Use finish comparisons to match aesthetics, maintenance, and your confidence applying each.
Essential Tools and Materials for Drywall Texture
Before you start texturing, gather the right tools and materials so you won’t stop mid-job: a hawk and trowel or spray gun for applying compound, mud (all-purpose or setting) in the appropriate consistency, taping knives in several widths, sanding tools (sanding sponge or pole sander) and dust control, protective gear (glasses, mask, and drop cloths), plus primer and the finish coat.
Before texturing, gather your hawk, trowel or spray gun, mud, knives, sanders, safety gear, primer, and finish coat.
- Hawk, trowel, knives
- Mud, primers, texture materials
- Sanders, dust control, protective drywall tools
Sprayer Setup: Nozzles, Pressure, and Consistency Tips
When you set up your texture sprayer, focus on nozzle size, air pressure, and compound consistency—those three factors control pattern, coverage, and finish.
Match nozzle diameter to desired pattern, adjust PSI for spray width, and thin compound to manufacturer specs.
Test on scrap, tweak settings, and clean filters. Regular sprayer maintenance prevents clogs and guarantees even texture application.
Rollers, Knives, and Trowels: Choosing Hand Tools
You’ll pick rollers based on nap length and texture pattern to match the finish you want.
Choose knives by blade flexibility and shape for feathering or scraping, and learn which trowel profile gives you the control you need for smoothing or creating texture.
With the right combo of roller, knife, and trowel technique, you’ll get consistent, professional-looking results.
Choosing The Right Roller
Picking the right roller makes a big difference in how your drywall texture turns out, so match nap length and roller type to the finish you want.
You’ll choose among roller types that create varied texture patterns and coverage. Consider:
- Short nap for subtle, smooth textures.
- Medium nap for knockdown or orange-peel.
- Thick nap for heavy, pronounced textures.
Knife Styles And Uses
1 essential set of knives will save you time and improve texture consistency: a flat taping knife, a curved knockdown knife, and a pointed joint knife.
You’ll choose knife types for spreading, shaping, and detailing.
Keep edges sharp, clean off compound after use, and store blades dry—knife maintenance prevents rust and nicks, ensuring smooth application and consistent texture results.
Trowel Technique Tips
Start by matching the tool to the texture you want: rollers are fast for stipple and orange-peel effects, knives give control for smooth or dragged patterns, and trowels excel at skim coats and swirl or skip trowel finishes.
Use trowel techniques to vary texture patterns—pressure, angle, and speed change results.
- Light pressure: fine skip
- Firm sweep: bold swirl
- Layered passes: blended finish
Prepare Drywall: Clean, Tape, and Joint Compound Basics
Before you apply texture, clean the drywall surface thoroughly, tape all seams, and understand the basics of joint compound so your finish will stick and look smooth. You’ll prep by removing dust, using paper/fiberglass tape, and choosing lightweight or setting joint compound for durability. Follow curing times and sand lightly before texturing.
| Task | Tip |
|---|---|
| Clean | Dust-free |
| Tape | Press firmly |
| Compound | Cure fully |
Mix Joint Compound and Texture Premix to the Right Consistency
Now that your seams are taped and the compound has cured, you’ll move on to mixing the compound and any texture premix to the right consistency for your chosen finish.
Use proper mixing techniques and consistency tips so textures hold. Try small batches, adjust water slowly, and test on scrap.
- Thin, pancake batter—smooth sprays
- Drop, spoonable—stipple tools
- Thick, peanut-butter—knockdown
When to Sand and When to Wait Before Texturing
If the joint compound is still soft or tacky, wait—sanding too soon will clog your sandpaper and ruin the smoothness you’re after. You’ll learn proper sanding techniques and texture timing: let compound dry fully (24–48 hours), then sand lightly. Use grit progression and test a small area before texturing.
| Condition | Action |
|---|---|
| Tacky | Wait |
| Dry | Sand |
| Cracked | Repair |
| Smooth | Texture |
Smooth Finish: Step-by-Step Application
Start by properly prepping the surface so it’s clean, dry, and free of dust or loose tape.
You’ll apply joint compound in thin, even coats, feathering edges and letting each layer dry before the next.
Finish with careful final sanding to smooth any ridges and blend the surface for priming.
Surface Preparation
Before you apply a smooth finish, prep the surface so the compound will bond evenly and sand smoothly.
Inspect drywall types, remove dust, and repair dents so texture techniques work predictably. Clean, prime glossy areas, and flag weak paper.
Then follow this checklist:
- Wipe and vacuum surfaces.
- Tape and reinforce seams.
- Lightly prime repaired spots before finishing.
Joint Compound Application
Apply the joint compound in thin, even coats so you can control drying and minimize sanding later.
Choose joint compound types for each task—setting, all-purpose, or lightweight—and mix per instructions.
Use proper application techniques: bed tape with a taping knife, feather edges with wider knives, and apply successive thin layers once dry.
Keep tools clean and work methodically for a smooth finish.
Final Sanding Techniques
1. You’ll refine the surface with precise sanding techniques, keeping pressure light and movements even to avoid gouges.
Use a sanding block or pole sander with fine grit for consistency. Finish by wiping dust away before priming so paint adheres.
- Light circular strokes
- Feather edges to blend
- Vacuum and tack-cloth for finishing touches
Orange Peel: Spray and Finish Technique
Mix your spray settings and practice on cardboard until the droplets form a consistent, fine “orange peel” texture that matches the room’s existing pattern.
You’ll use a hopper gun or aerosol, adjust air and material flow, and sweep evenly. Maintain distance and overlap passes for uniform coverage.
After drying, inspect and touch up sparse areas so the spray technique and finish style look seamless.
Knockdown Texture: Create the Look Like a Pro
Knockdown texture gives walls a subtle, professional look you can achieve with a few simple tools and steady technique.
You mix thin joint compound, spray or apply splotches, then gently drag a wide knife to flatten peaks.
Use knockdown techniques to vary texture patterns for depth.
Steps:
- Spray or trowel mud.
- Wait partial dry.
- Knock down peaks with knife.
Skip Trowel Finish: Hand-Textured Technique
If you liked the softer look of knockdown, try a skip trowel finish for a more handcrafted, irregular surface.
You’ll apply thin joint compound with a wide trowel, skipping strokes to leave raised islands. Focus on pressure, angle and random spacing—technique nuances that create appealing texture variations.
Sand lightly when dry and seal or paint to protect the finish.
Timing: Drying Times Between Coats and Before Knockdown
When you’re timing coats, remember that joint compound needs to be touch-dry and firm enough to hold a knife blade without gouging before you apply another layer or perform the knockdown. In most conditions, that means waiting 24 hours for a full coat of all-purpose mud, 8–12 hours for lightweight or quick-setting compounds, and longer in high humidity or low temperatures.
Use these drying techniques and timing considerations:
- Check firmness with a clean knife.
- Speed drying with airflow, not heat.
- Extend waits in damp or cool spaces.
Feather and Blend New Texture Into Existing Walls
When you’re matching new texture to an existing wall, study the pattern and pressure used so your spray or hand-applied finish replicates it.
Feather the joint edges by thinning the compound toward the old surface and smoothing connections with a wide knife.
Work in small sections and step back often to confirm the blend is seamless.
Match Existing Texture
Matching existing texture means feathering fresh compound into the surrounding wall so the patch disappears into the surface rather than standing out like a bandage.
You’ll use texture matching to blend new work with existing surfaces, visualizing pattern, depth, and stroke. Practice on scrap, adjust tools, and blend edges until seamless.
- Replicate pattern
- Match depth
- Smooth shifts
Feather Joint Edges
Feather the joint edges by thinning the compound toward the surrounding wall so the new texture melts into the old—use a wider knife or trowel and light, sweeping strokes to taper the material until you can’t see a raised ridge, keeping pressure consistent and overlapping each pass slightly to avoid hard lines.
Use a proper feathering technique, inspecting and blending edges with fine passes and light sanding.
Repair Small Patches and Match Existing Drywall Texture
Start by evaluating the patch area and the surrounding texture so you know what you’re matching—knowing whether the finish is knockdown, orange peel, or skip trowel will guide your approach.
Use texture blending techniques and precise patch repair methods to feather edges and replicate spray settings.
- Match compound viscosity.
- Test spray patterns.
- Feather and sand connections.
Fix Large Areas and When to Retexture a Whole Room
When damage covers multiple walls or the texture’s age and color won’t blend, you’ll need to assess whether to retexture sections or the whole room.
Larger jobs mean matching substrate conditions, deciding on a new finish, and planning for more extensive sanding, priming, and spray equipment.
You’ll evaluate retexturing techniques, factor large area considerations like time, scaffolding, and material waste, then schedule work accordingly.
Priming and Painting Textured Drywall for Best Results
Before you paint, prime textured drywall to seal porous surfaces and create an even base so your finish coat adheres and looks uniform.
Use proper priming techniques: roll with a thick-nap roller, cut edges first, and allow full dry time.
For paint selection, choose quality latex or acrylic with sufficient sheen for washability.
- Tools: thick-nap roller
- Primer: stain-blocking
- Paint: durable latex
Common Mistakes and How to Avoid Them (Splatter, Overworking)
Although textured drywall hides a lot of imperfections, you’ll still run into problems like paint splatter and overworking the surface if you’re not careful.
Use proper splatter control—low pressure, correct nozzle, and steady distance—to minimize misting.
For overworking techniques, stop once texture sets; avoid excessive trowel passes or rewetting.
Practice on scrap panels to refine timing and pressure.
Safety, Cleanup, and Protecting Floors and Fixtures
Before you start texturing, make sure you’re wearing proper PPE—respirator, goggles, and disposable coveralls—to protect your lungs and skin.
Contain dust by sealing off the room, using plastic sheeting and a box fan with a HEPA filter or a dust extractor.
Lay down drop cloths and protect fixtures with tape and plastic so cleanup is quick and surfaces stay undamaged.
Personal Protective Equipment
When you’re getting ready to texture drywall, gear up with the right personal protective equipment so dust, debris, and splatter don’t put you or your home at risk; wear a respirator rated for fine particles, safety goggles, disposable coveralls or old clothing, and sturdy gloves.
Cover floors and fixtures with drop cloths and plastic sheeting to keep cleanup manageable.
- Protective eyewear, goggles or face shield
- Respiratory masks (P100/N95) and fit checks
- Coveralls, gloves, boots, and taped seams
Dust Containment Strategies
Now that you’ve got your PPE on, focus on keeping dust and debris contained so cleanup stays quick and your home stays protected.
Seal doorways with plastic sheeting, use zippered containment portals, and run a HEPA-equipped vacuum while sanding.
Combine local dust control methods with room air filtration to reduce airborne particles.
Dispose of collected dust promptly and vent the work area outdoors when possible.
Floor And Fixture Protection
Covering floors and protecting fixtures keeps your work area safe and makes cleanup fast—start by laying a continuous, taped barrier of rosin paper or contractor-grade floor protection from the entryway to the workspace, extending a few inches up baseboards.
Then shield fixed surfaces (cabinets, countertops, light fixtures) with breathable drop cloths and secure them with low-tack painter’s tape so adhesive won’t damage finishes.
- Use durable floor coverings and tape seams.
- Apply fixture wrapping to vents, switches, and hardware.
- Keep a clear pathway for debris removal and tool access.
Cost and Time Estimates: DIY vs Hiring a Pro + Quick Troubleshooting
1 key choice you’ll make is whether to tackle drywall texturing yourself or hire a pro, and that decision shapes both budget and schedule.
Compare DIY Cost versus Professional Estimates, weigh Time Comparison and Budget Considerations, and plan materials.
Keep Troubleshooting Tips handy: small holes, low spots, and texture mismatch have Quick Fixes like skim coats, sanding, or spot re-texturing to save time and money.
Frequently Asked Questions
Can Textured Drywall Hide Major Wall Imperfections or Structural Damage?
No, textured drywall won’t reliably hide major wall imperfections or structural damage; you’ll need proper repair methods first. You should use texture types to disguise minor flaws after fixing issues, not instead of addressing underlying problems.
Will Textured Ceilings Require Different Techniques Than Walls?
Yes, you’ll use different ceiling techniques than walls; ceilings need lighter compound, different sprayers or trowels, shorter working times, and safer access. Expect wall differences in texture direction, gravity control, and patching approaches.
How Do Humidity and Seasonal Changes Affect Long-Term Texture Adhesion?
Humidity and seasonal swings directly affect texture longevity: you’ll see adhesion fail if moisture control’s poor, causing peeling, mold, or cracking. You’ll need consistent humidity, ventilation, and vapor barriers to preserve long-term texture bond.
Can You Texture Over Existing Wallpaper or Vinyl Wall Coverings?
You can—but beware: you’ll likely need wallpaper removal first, because most texture types won’t bond to vinyl. If you skip prep, textures can peel; strip, repair, prime, then apply your chosen texture confidently.
What Warranties or Guarantees Should a Contractor Provide for Texture Work?
You should get a written warranty covering texture durability, workmanship, and materials for a defined period; it should outline contractor obligations for repairs, timelines, exclusions, and a clear dispute-resolution process so you’re protected.
Conclusion
You’ve got the tools and roadmap now — think of this as your drywall Odyssey: with a steady hand, you’ll turn blank walls into finished surfaces that withstand scrutiny. Pick a texture, prep carefully, practice the technique, and don’t rush the drying or sanding. If you hit a snag, troubleshoot or call a pro. You’ll finish stronger, smarter, and with a space that feels truly finished — your own small epic.