How to Thin Latex Paint for HVLP Sprayer (Easy Step-by-Step Guide)
You’ll usually need to thin latex for an HVLP to get smooth atomization and avoid clogging; start by checking your sprayer’s viscosity/tip specs, then add 5–10% water (or manufacturer-recommended reducer) and mix, strain, and test on cardboard, adjusting in small increments until the spray is even with no sputter or orange peel. Use a viscosity cup, strainers, and safety gear, keep thin coats and overlap passes, and follow cleanup to prevent clogs—more tips and troubleshooting follow.
Quick Start: Do You Need to Thin Latex for HVLP?
If you’re using an HVLP sprayer, you’ll usually need to thin latex paint—straight from the can it’s often too thick to atomize properly, which leads to clogging, heavy orange-peel texture, and uneven coverage.
You’ll check paint consistency, follow manufacturer thinning ratios, and test spray on cardboard. Adjust gradually, use proper spraying techniques, and aim for a smooth, even atomization before starting your project.
How HVLP Differs From Airless and Conventional Guns
HVLP guns use much lower pressure than airless or conventional sprayers, so you’ll get higher transfer efficiency and less overspray.
That lower pressure changes atomization and the spray pattern, which means viscosity and thinning needs are different than with an airless or conventional gun.
Before you thin latex, you should match its viscosity to the HVLP’s spray characteristics rather than treating it like airless equipment.
Lower Pressure, Higher Transfer
Think regarding finesse rather than force: HVLP systems use much lower air pressure at the cup and nozzle, which means you’ll get higher transfer efficiency and less overspray compared with airless or conventional sprayers.
You control paint flow gently, improving spray efficiency and reducing waste.
- Relief — less cleanup.
- Pride — smoother finish.
- Confidence — predictable coverage.
Atomization And Spray Pattern
Atomization in HVLP systems relies on lower air velocity, so you’ll see finer, wetter droplets that land more accurately than the larger, drier particles from airless or conventional guns.
You’ll use specific atomization techniques and spray pattern adjustment to control overlap, fan width, and edge definition.
Aim for consistent, close passes and tweak fluid and air controls to get smooth, even coverage without overspray.
Viscosity And Thinning Needs
Because lower air velocity produces wetter, finer droplets, you’ll need to pay closer attention to paint viscosity when using an HVLP system versus airless or conventional guns.
You’ll monitor viscosity measurement and use precise thinning techniques to avoid runs or poor coverage.
Feel confident adjusting fluid flow and incremental thinner additions.
Find Your Sprayer’s Recommended Viscosity and Tip Sizes
Check your sprayer’s manual for the recommended viscosity (often given in KU or CPS) so you know what consistency the pump can handle.
Match that spec to the suggested tip sizes—smaller tips for thinner coatings and larger tips for thicker latex.
Following both specs will help you thin correctly and avoid clogging or poor atomization.
Sprayer Viscosity Specs
Before you start thinning latex for your HVLP sprayer, find the manufacturer’s recommended viscosity range and tip sizes for your specific model.
Check sprayer viscosity specs to match paint consistency, thinning techniques, and viscosity measurement. Proper paint flow and spray performance depend on sprayer settings and material compatibility.
Follow these steps to proceed:
- Verify specs.
- Measure viscosity.
- Adjust thinning.
Recommended Tip Sizes
1 key factor in matching paint to your HVLP sprayer is choosing the right tip size—manufacturers usually list recommended viscosity ranges alongside specific tip or nozzle sizes, and using those guarantees proper atomization and even coverage.
Check your manual for tip size recommendations, test spray on scrap, and adjust thinning until you hit the ideal nozzle selection for smooth, consistent coats without clogging.
Choose Latex Paint for Spraying: Solids, Sheen, and Binders
Picking the right latex paint for your HVLP sprayer comes down to three basics: solids content, sheen level, and binder type.
You’ll assess latex paint types, sheen variations, solid content, binder selection, paint compatibility, and drying characteristics to succeed.
- Choose solids for coverage.
- Match sheen to surface mood.
- Pick binders for adhesion and flow.
Tools You’ll Need to Thin and Test Latex Paint
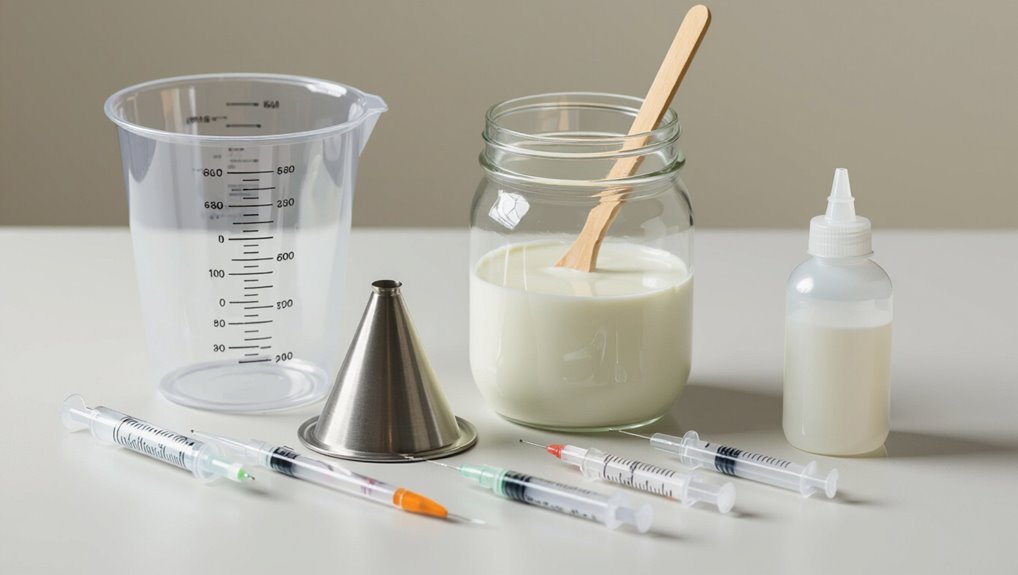
Now that you’ve settled on the right latex—solids, sheen, and binder—you’ll need the proper tools to thin and test it for an HVLP sprayer. Use this tools checklist to gather essentials: measuring cup, stir stick, viscosity cup, paint strainer, test panels, and safety gear.
| Item | Purpose |
|---|---|
| Measuring cup | Accurate thinning |
| Paint strainer | Remove debris |
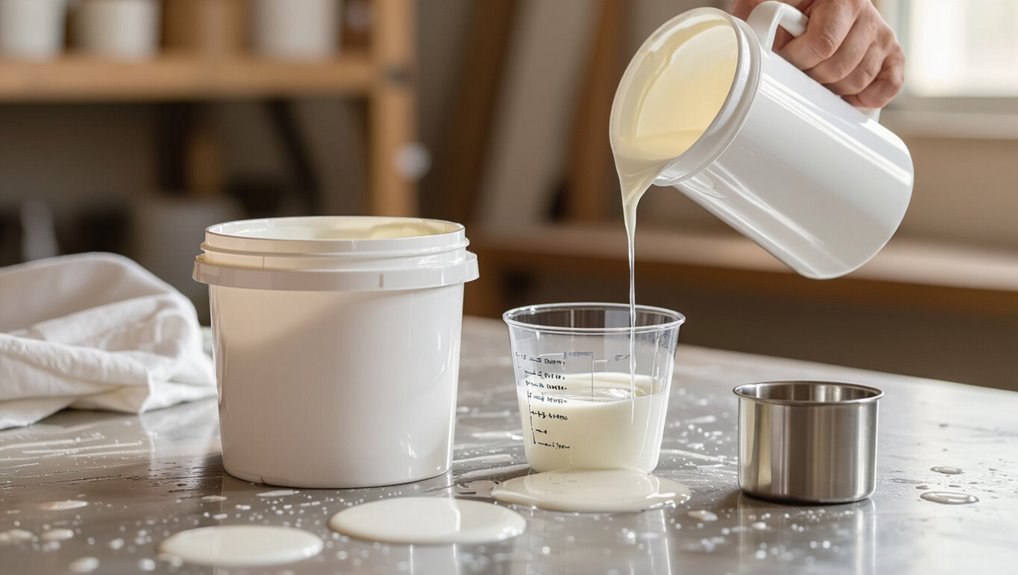
Prepare Paint: Mixing, Straining, and Workspace Setup
Gather your materials and set up a clean, well-ventilated workspace before you touch the paint: lay out drop cloths, position test panels within easy reach, open windows or run a fan, and put on safety gear (respirator, goggles, gloves).
Use proper mixing techniques, paint straining, and smart workspace organization. Focus on material prep and tool selection while following safety precautions.
- Calm
- Confident
- Careful
Simple Viscosity Cup Test You Can Do at Home
Pick a viscosity cup that matches your sprayer’s recommended orifice size, then hold it steady to get consistent results.
You’ll time how long it takes for paint to flow through the cup—shorter times mean thinner paint, longer times mean thicker.
Use that reading to add small amounts of water or reducer and retest until you hit the target flow.
Choosing The Right Cup
Before you commit to thinning, choose a cup that matches your sprayer’s recommended viscosity and is easy to reproduce at home; a simple viscosity cup—made from a tin can or plastic container with a uniform hole—lets you measure flow time and compare batches consistently.
Pick by cup size, sprayer compatibility, paint measurement needs, and how additives affect paint viscosity.
- Fear
- Hope
- Control
Performing The Flow Test
Start by filling your viscosity cup and timing how long the paint takes to flow through the hole—this simple flow test tells you if the latex is ready for your HVLP sprayer or needs thinning.
For flow test preparation, level the cup, stir paint gently, and note temperature.
For flow test execution, record seconds to empty, compare to your sprayer’s spec, and repeat if needed.
Adjusting Paint Consistency
Once you’ve confirmed the flow time, you’ll adjust the latex until it matches your sprayer’s spec by adding small amounts of water or extender—mix, let bubbles settle, and re-test.
Use a simple viscosity cup for viscosity measurement to tune paint texture and spray efficiency.
Consider drying characteristics, paint types, surface preparation, environmental factors, equipment compatibility, and cleanup process.
- Calibrate.
- Spray.
- Inspect.
Paint Thinning Ratios by Sprayer Type and Tip Size

Different sprayers and tip sizes need different thinning ratios to spray latex smoothly, so you’ll want to match viscosity to your equipment rather than guess. Use viscosity measurement and tip selection to set ideal ratios—consider sprayer compatibility, paint thickness, material types, spray efficiency, application methods, thinning techniques, and paint additives.
| Sprayer Type | Suggested Ratio |
|---|---|
| HVLP (0.8–1.4mm) | 5–10% |
| Airless (11–21 thou) | 0–5% |
| LVLP (0.8–1.2mm) | 7–12% |
| Conventional | 10–15% |
Best Thinners for Latex: Water, Flow Additives, and Retarders
Matching the right thinning ratio is only half the job; you also need the proper thinning agent to get consistent atomization and finish quality.
Choose the best thinners for sprayer compatibility and viscosity adjustment to match thinning ratios and paint consistency.
Consider:
- Water for mild thinning and basic application techniques.
- Flow additives to improve leveling.
- Paint retarders to slow drying and reduce defects.
Don’t Use Oil-Based Thinners With Latex: Why Not
Don’t mix oil-based thinners with latex because the solvents can break the water-based binder and cause chemical incompatibility.
You’ll risk poor adhesion, uneven drying, and a weakened finish that won’t hold up over time.
Stick with water or purpose-made additives to preserve durability and appearance.
Chemical Incompatibility Risks
One key rule to remember is that oil-based thinners and latex (water-based) paint simply don’t mix—you’ll end up with clumps, separation, and a ruined finish if you try.
You risk chemical reactions and compatibility issues that destroy texture and application. Don’t experiment—use water or manufacturer-recommended additives.
- Panic at ruined paint
- Frustration with clogging
- Regret over wasted time
Finish And Durability Issues
Although oil-based thinners might seem like a quick fix, they break down latex binders and leave you with a weakened, uneven film that won’t hold up.
You’ll see poor finish quality, tackiness, and faster wear. To avoid durability concerns, don’t mix solvents; stick to water or manufacturer-recommended additives so your HVLP-sprayed latex maintains adhesion, flexibility, and a consistent, long-lasting coating.
When to Thin Water-Based Primer vs. Latex Topcoat
When you’re prepping for an HVLP sprayer, decide whether to thin a water-based primer or a latex topcoat based on viscosity, surface needs, and the manufacturer’s recommendations; primers often tolerate more thinning to improve flow and penetration, while topcoats usually need just enough adjustment to atomize evenly without sacrificing hide or sheen.
Thin primers for better flow and penetration; only slightly adjust latex topcoats to ensure even atomization and finish
- Fear: undercoat failure.
- Relief: smoother laydown.
- Pride: flawless finish.
How to Thin High-Viscosity Premium Latex (Hybrid Formulas)
If your premium latex is thick and tacky, you’ll need to thin it carefully so it atomizes without losing body or hiding power.
Use distilled water sparingly—add 5% at a time—and stir thoroughly.
For high viscosity paint and hybrid formulas, check viscosity with a cup or meter after each addition.
Stop when spray pattern’s even and film builds properly; don’t over-thin.
Making Small Test Batches to Dial in Sprayability
Because small adjustments can make or break your finish, start by mixing tiny test batches before committing a full can to the HVLP.
Start with tiny test batches — small tweaks can save your finish before you commit a full can to the HVLP.
You’ll practice test batch techniques and tweak paint viscosity adjustments in small increments.
Try this emotional, focused approach:
- Mix 100–200 ml and note ratio.
- Spray briefly, observe flow.
- Adjust water or reducer, repeat.
Test-Spray Routine: Pattern, Distance, and Adjustments
Although you’ve already mixed test batches, you’ll now run targeted pattern passes to judge atomization, overlap, and coverage before committing to a piece—hold the gun perpendicular, use a consistent 6–8 inch distance for lacquers or 8–12 inches for heavier latex, and start with a 3–4 inch-wide fan at medium air pressure.
Then evaluate spray technique, make small distance adjustments, check pattern consistency, and tweak pressure settings.
How to Adjust Thinning Mid-Job When Paint Thickens
If your spray pattern starts to sputter, check the tip and pressure first to rule out mechanical issues.
Stir the paint constantly and add small amounts of thinner, testing after each increment until the flow improves. That way you avoid over-thinning and keep finish quality consistent.
Check Sprayer Tip And Pressure
Check the sprayer tip and pressure whenever your latex paint starts to sputter or the spray pattern narrows—those are the quickest signs the material’s thickening and needs adjustment.
You’ll prevent clogs with basic sprayer maintenance and smart tip selection. Do this now to stay in control:
- Stop and inspect.
- Adjust pressure slightly.
- Clean or switch tip.
Thin Incrementally And Test
When paint starts to thicken mid-job, stop spraying and thin a little at a time so you don’t overshoot the viscosity you need; add small amounts of reducer, mix thoroughly, then test the spray pattern before you continue. Use incremental testing and quick viscosity adjustments to maintain consistency.
| Step | Action | Result |
|---|---|---|
| 1 | Add 5% reducer | Slight flow |
| 2 | Mix | Even blend |
| 3 | Test spray | Check pattern |
| 4 | Repeat | Optimal viscosity |
Keep Paint Stirred Constantly
You’ve been thinning incrementally and testing spray patterns, so keep that momentum by stirring the paint constantly while you work; agitation prevents pigments and solvents from separating and lets you spot viscosity changes faster.
Use these stirring techniques to keep flow smooth and maintain consistency, then adjust thinning as needed:
- Stir every 5–10 minutes.
- Scrape sides and bottom.
- Test spray after each adjustment.
Thinning for Fine Detail Work vs. Large Surfaces
Whether you’re spraying intricate trim or an entire wall, thinning requirements change with the scale and detail of the job.
For fine detail work you’ll thin slightly more for smoother atomization, using gentler detail techniques and lower flow.
For large surfaces, thin less to maintain coverage and reduce passes, applying broader surface strategies and faster rhythm to keep finish even and avoid runs.
Spraying Technique After Thinning: Distance, Speed, Overlap
Start about 6–8 inches from the surface and hold the gun perpendicular to your work. Then move in steady, overlapping passes at a consistent speed so each new pass covers roughly 50% of the previous one. This distance, speed, and overlap combo gives even atomization and avoids runs after you’ve thinned the latex for your HVLP sprayer.
- Calm: control spray distance.
- Confident: steady spray speed.
- Satisfied: consistent spray overlap, technique adjustments and surface preparation guarantee spray consistency.
How Thinning Affects Drying Time and How to Manage It
Because thinner paint contains more solvent, it dries faster at the surface but can leave a weaker film underneath.
So you’ll need to balance thinning to avoid premature skinning or poor adhesion. You should monitor drying time, control moisture, and adjust for environmental factors and temperature effects.
Good surface preparation and appropriate application techniques help paint curing and preserve finish quality.
Prevent Clogging, Spitting, and Sputtering With Thinned Paint
When you reduce paint viscosity to suit your HVLP sprayer, clogging and spitting become less likely but you still need to take precautions.
Always run thinned paint through a fine strainer and the spray gun’s filter to catch lumps and debris.
Finally, tweak your sprayer settings—pressure, fan size, and tip—to match the thinner mix and stop sputtering before it starts.
Reduce Paint Viscosity
If your HVLP gun is clogging, spitting, or sputtering, chances are your latex paint’s viscosity is too high—thinning it to the right consistency will let the atomizer form a smooth, even spray pattern and prevent interruptions.
Measure viscosity, adjust for paint flow, and balance drying time to protect paint quality and material compatibility.
Maintain equipment for consistent spray consistency and crisp finishing touches.
- You’re frustrated
- You’re relieved
- You’re proud
Strainer And Filter Use
Although thinning gets your latex to the right flow, you’ll still need strainers and inline filters to catch skins, clumps, and debris that wreck spray tips; using a 60–100 mesh paint strainer at the bucket and a fine inline filter on the gun cup or feed line prevents most clogs, spitting, and sputtering and protects the atomizer without changing paint balance.
Choose strainer types and filter sizes matching your paint.
Adjust Sprayer Settings
Strainers and inline filters will keep debris out of the system, but you’ll still need to tune the gun to handle thinned latex: adjust fluid flow, air pressure, and fan pattern so the atomizer can break the slightly heavier droplets without overworking or spitting.
Use sprayer calibration and check pressure settings, then:
- Slowly increase flow.
- Lower pressure if sputtering.
- Widen fan for even coat.
Avoid Runs and Heavy Edges After Thinning Paint
Check your spray pattern and adjust technique to prevent runs and heavy edges after thinning latex for an HVLP sprayer.
Use slow, overlapping passes and keep the gun perpendicular to the surface. Apply thin, even coats, watch for build-up at corners, and feather edges.
Practice run prevention techniques and adopt edge finishing strategies like back-brushing or light final passes to guarantee smooth, uniform coverage.
Dealing With Overspray and Over-Atomization
Once you’ve settled your technique to prevent runs and heavy edges, you’ll also need to manage overspray and over-atomization, which waste paint and blur detail.
You’ll adjust fan, pressure, and distance, using overspray control and refined atomization techniques to sharpen edges.
- Slow your sweep
- Lower pressure
- Tighten pattern
Cleaning and Flushing Your HVLP After Thinned Latex
Right after finishing, you’ll want to rinse the sprayer with the appropriate solvent to prevent thinned latex from drying inside the gun.
Don’t skip a full flush through the fluid passages and air cap until the rinse runs clear.
Then remove and thoroughly clean the needle and nozzle to keep spray performance consistent.
Immediate Solvent Rinse
Before you put the gun away, flush the HVLP with the proper solvent to prevent dried latex from clogging the fluid passages.
You’ll want immediate cleanup and to follow solvent safety—wear gloves and ventilate.
Then act quickly:
- Rinse cup and hose thoroughly.
- Spray solvent until clear.
- Wipe exterior and store upright.
Do this every session to avoid costly clogs.
Thorough Needle Disassembly
Disassemble the needle and packing to access hidden dried latex that an immediate solvent rinse can’t reach; you’ll need to remove the needle, air cap, and nozzle so you can clean, inspect, and flush each passage thoroughly.
Sort parts by needle types, soak compatible pieces, and scrub with appropriate brushes.
Reassemble carefully, test spray, and follow maintenance tips to prevent clogs and wear.
Safe Storage and Disposal of Thinned Latex Paint
When you finish thinning latex paint for an HVLP sprayer, don’t just leave leftover mix sitting uncovered—store it in a tightly sealed, clearly labeled container and keep it cool and out of direct sunlight.
You’ll protect surfaces and pets with safe storage and follow local rules for proper disposal.
- Seal tight
- Label clearly
- Follow local disposal rules
Small-Project Checklist: Materials, Thinning Steps, Test-Spray Plan
Gather your materials—paint, reducer, mixing stick, filter, measuring cup, and a clean spray gun—so you’re ready before you start thinning.
Follow a simple thinning sequence: measure, mix slowly, strain, and test for consistency.
Plan a quick test-spray on cardboard to confirm atomization and adjust in small increments.
Materials Checklist
Before you start, lay out every item you’ll need for the small project so you don’t interrupt the job to hunt for tools or supplies.
Check material types, thinning techniques, sprayer compatibility, paint consistency, safety precautions, workspace organization, cleanup protocols, and testing methods.
Gather:
- HVLP sprayer, strainers, mixing sticks
- Latex paint, reducer, measuring cup
- PPE, drop cloths, cleaning tools
Test-Spray Plan
Start by planning a quick test-spray so you can fine-tune thinning, pressure, and technique without committing to the whole surface.
Pick a scrap panel, note paint:thinner ratio, cup viscosity, and PSI.
Use basic test spray techniques: multiple passes, varying distance, and trigger control.
Inspect for runs, coverage, and required spray pattern adjustments.
Record settings before moving to the project.
Quick Troubleshooting Checklist: Won’t Spray, Poor Atomization
If your HVLP sprayer won’t spray or the atomization’s poor, don’t panic—you can usually fix it with a few targeted checks.
Use these troubleshooting methods to regain control of spraying techniques and paint consistency by adjusting HVLP settings quickly:
- Check nozzle/clog.
- Thin paint to spec and strain.
- Verify air pressure, hose, and gun seals.
When a Commercial Reducer or Pro Is the Right Call
When DIY thinning and strainers don’t give you consistent spray patterns, call in a commercial reducer or a pro—you’re paying for precise viscosity, faster drying, and fewer runs, especially on large jobs, complex finishes, or high-value surfaces where any mistake costs time and money.
You’ll get access to commercial paint options and professional advice, save rework, and guarantee warranty-compliant results on critical projects.
Best Practices for Furniture vs. Walls With Thinned Latex
While both furniture and walls can be sprayed with thinned latex, you’ll adjust technique, viscosity, and prep to suit each surface: furniture needs thinner, smoother coats, lower pressure, and careful masking to avoid runs and drips on edges and details.
Whereas walls tolerate slightly thicker mixes, higher flow, and faster passes for even coverage over large areas.
Walls accept a slightly thicker mix and higher flow, letting you cover large areas faster with even results.
- Cherish furniture finishes.
- Respect wall textures.
- Master spray techniques for paint durability.
Common Paints, Recommended Thinners, and Ratios (Quick Chart)
Charting your paint and thinner choices saves time and avoids clogs: below you’ll find the common latex and acrylic-based paints, the thinners that work best with each, and practical mixing ratios to get proper flow for an HVLP sprayer.
Use water for most latex, acrylic extenders for higher solids, 5–15% mixing ratios.
Monitor viscosity measurement, adjust with paint additives to optimize flow consistency and spray performance for application methods.
Long Jobs: Maintaining Consistency Across Batches
Because color and viscosity can shift between mixed batches, you’ll want a simple routine to reproduce the same results across long jobs.
Because color and viscosity shift between batches, establish a simple routine to reliably reproduce results across long jobs.
Keep a notebook for batch mixing, color matching, paint additives, and paint storage notes.
Do consistency checks, equipment calibration, humidity control, monitor drying times and environmental factors, and track surface preparation.
- Log
- Test
- Repeat
Final Checklist Before You Spray: Setup, Safety, and Test Pass
Before you pull the trigger, walk through a quick, methodical checklist: confirm your setup checklist, review safety precautions, verify paint properties and thinning, and check equipment maintenance.
Guarantee workspace organization and environmental considerations (ventilation, temperature).
Do a controlled test spray to dial spray technique and pattern.
Confirm project planning, materials on hand, and a clear cleanup process before you start.
Frequently Asked Questions
Can You Spray Latex Over Oil-Based Undercoat After Thinning?
Yes — you can spray latex over an oil-based undercoat if you degloss, sand, and use a proper primer; you’ll guarantee oil based compatibility and strong undercoat adhesion, so the latex bonds reliably and resists peeling.
Will Thinning Latex Affect VOC Levels or Ventilation Needs?
A DIY neighbor thinned latex for sprayer and didn’t change ventilation needs much. Thinning techniques slightly raise VOC impact by adding solvent; maintain ventilation requirements, monitor paint consistency, and use low‑VOC thinners or masks.
Can You Tint Thinned Latex Paint at the Sprayer?
Yes — you can tint thinned latex paint at the sprayer, but you’ll need compatible tinting options and thorough mixing; expect reduced color intensity, test spray samples, and adjust tint cautiously to achieve the shade you want.
Is It Safe to Use an Inline Filter With Thinned Latex?
Yes — you can safely use an inline filter with thinned latex; it protects the spray tip, improves finish, and provides inline filter benefits by catching debris while maintaining proper latex paint consistency for smoother, clog-free spraying.
How Long Can Thinned Latex Sit in the Sprayer Between Coats?
You can usually let thinned latex sit in the sprayer between coats for up to 2–4 hours; picture a slow-drying puddle. For longer breaks, flush the system—sprayer maintenance—and transfer leftover paint to proper paint storage.
Conclusion
So you’ve learned to thin latex for your HVLP like a mildly responsible mad scientist—measure, strain, test, tweak, and don’t explode the workshop. Remember: HVLP’s gentle finesse loves thinner, filtered paint and patience. Keep records, replace tips, and test-spray onto cardboard until your finish looks civilized. If you skip the prep, your “smooth” finish will rebel with drips and orange peel. Play it smart, not heroic, and your furniture and walls will forgive you.