How to Tile a Painted Wall Without Removing Paint
You can tile over paint if the finish is sound: remove loose or flaking paint, sand glossy or high‑sheen areas, and clean grease and dust thoroughly. Do a tape adhesion test and try a thinset patch to confirm bond. Use a bonding primer when needed, choose thinset made for nonporous surfaces, plan your layout, dry‑fit tiles, and use proper spacers and sealant at edges. Keep going to learn step‑by‑step prep, adhesive choices, and finishing tips.
Can You Tile Over Paint? Quick Checklist
Before you start, check whether your painted wall is a suitable substrate for tile. You’ll assess paint compatibility, surface cleanliness, and adhesion.
Remove loose or flaking paint, sand glossy finishes, and clean grease or dust.
Test a small patch with thinset to confirm bond strength.
Plan tile preparation: priming or keying the surface if needed, then proceed only when adhesion’s reliable.
Which Paint Types Don’t Bond With Tile
You’ll run into problems if the wall has glossy or high‑sheen paint, since those smooth surfaces won’t let tile adhesive grip well.
Oil‑based paints are also troublemakers because they repel moisture and prevent proper bonding.
And you shouldn’t tile over peeling or flaking surfaces — the paint has to be solid or it’ll lift the tiles.
Glossy And High-Sheen Paints
Because glossy and high-sheen paints create a hard, slick surface, they often prevent tile adhesive from gripping properly. You’ll need to identify and treat these finishes before tiling.
You’ll face glossy finishes and high sheen challenges; sand or degloss and use bonding primer. Consider:
- Light sanding for texture
- High-bond primer
- Test a small tile patch before full installation
Oil-Based Paints
You’ll appreciate oil-based benefits like durability and stain resistance, but know the oil-based limitations: poor adhesion for tile adhesive and slower curing.
Sanding and using a high-adhesion primer or bonding agent lets you tile successfully without full paint removal.
Peeling Or Flaking Surfaces
If paint is peeling or flaking, it won’t hold tile adhesive and must be fixed before you start tiling.
You’ll need to remove loose material, repair the substrate, and prime for a stable bond. Address peeling paint and flaking paint promptly to avoid tile failure.
- Scrape and sand to solid edges
- Patch and skim uneven areas
- Use a high-adhesion primer
When You Should Remove Paint Before Tiling
When the existing paint is flaking, glossy, or thicker than a couple of coats, you should remove it before tiling to guarantee a strong, durable bond between the tile adhesive and the wall. You’ll assess paint removal necessity and follow surface preparation tips: strip, sand, clean. Use the table for quick guidance.
| Condition | Action | Result |
|---|---|---|
| Flaking | Remove | Solid bond |
| Glossy | Sand/strip | Better adhesion |
| Many coats | Strip | Stable substrate |
How to Test Paint Adhesion (Tape Test)
Start by picking a small, inconspicuous area and apply a strip of strong adhesive tape—like duct or packing tape—pressing firmly to make good contact; then pull it off sharply and check for paint flakes stuck to the tape.
Use this simple adhesion testing method to decide if tiles will bond.
- Inspect tape for flakes
- Repeat in several spots
- Note loose paint areas and repair
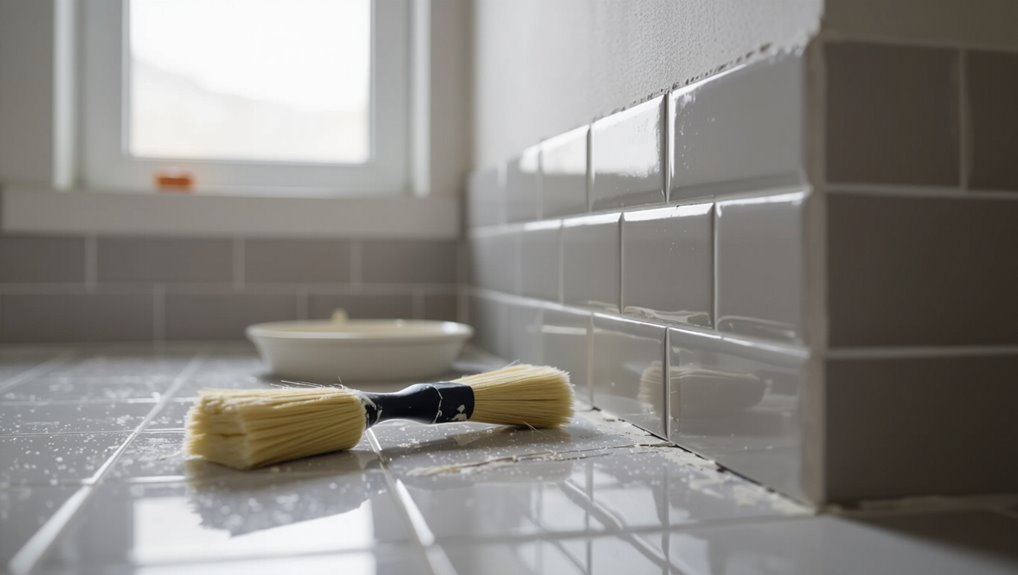
Clean Painted Walls Before Tiling
Before you tile, thoroughly clean the painted wall so adhesives can bond properly: remove dust, grease, and any chalky paint residue with a degreasing cleaner or trisodium phosphate (TSP) substitute, rinse with clean water, and let the surface dry completely.
Use targeted cleaning techniques—soft brush, sponge, or microfiber—to remove contaminants. Proper wall preparation prevents tile failure and guarantees uniform adhesive coverage.
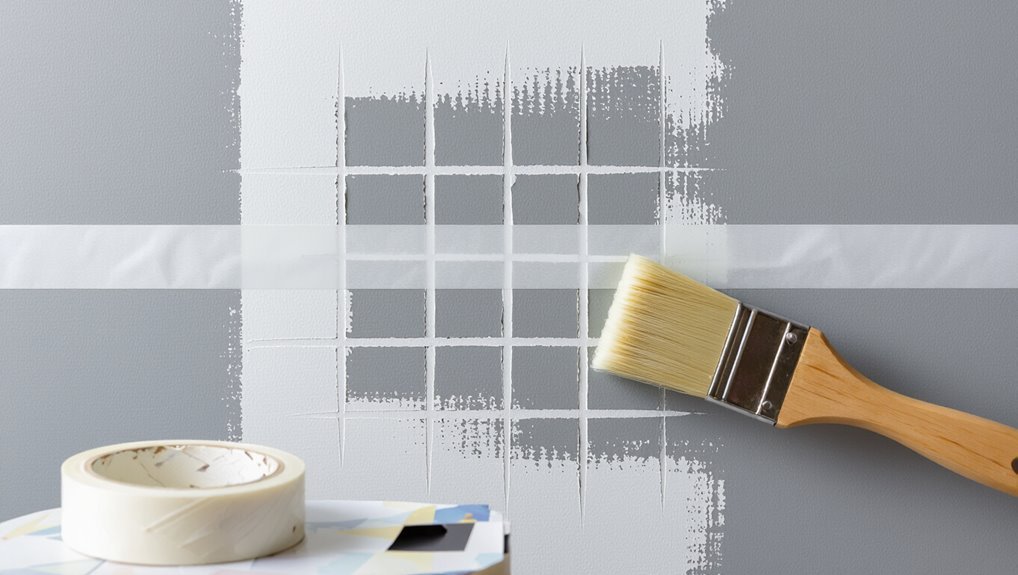
Roughen Smooth Paint Safely
Before you tile, you’ll need to roughten smooth paint by sanding it lightly so the adhesive can grip.
Use fine-grit sandpaper and keep the pressure even to avoid gouging the surface.
Wipe away all dust with a damp cloth or vacuum so the mortar bonds cleanly.
Sand Paint Surface Lightly
Lightly sand the painted wall to create a tooth that helps tile adhesive bond—use a fine-grit (120–220) sandpaper or a sanding block and work in gentle, even strokes until the gloss dulls.
You’ll alter paint texture to improve surface adhesion. Focus on consistent pressure, avoid stripping to bare substrate.
- Even strokes
- Inspect gloss
- Feather edges
Clean Dust Thoroughly
Brush or vacuum the sanded wall thoroughly to remove all dust so your adhesive can grab the surface.
Next, use a damp microfiber cloth or tack rag to wipe remaining particles, following proven dust removal techniques. Work top to bottom, changing cloths as needed.
Finish with allowed wall cleaning methods—mild detergent solution if paint is sturdy—then let the wall dry completely before tiling.
Pick the Right Adhesive for Painted Walls
Choose an adhesive formulated for painted surfaces so your tiles will stick without lifting or damaging the paint.
You’ll evaluate adhesive types and surface compatibility, then select one rated for nonporous or painted walls. Use products specifying paint-safe bonds and flexible grout joints.
- Modified thinset for painted drywall
- Acrylic or urethane adhesives
- Contact adhesives for small accents
Tools and Materials You’ll Need
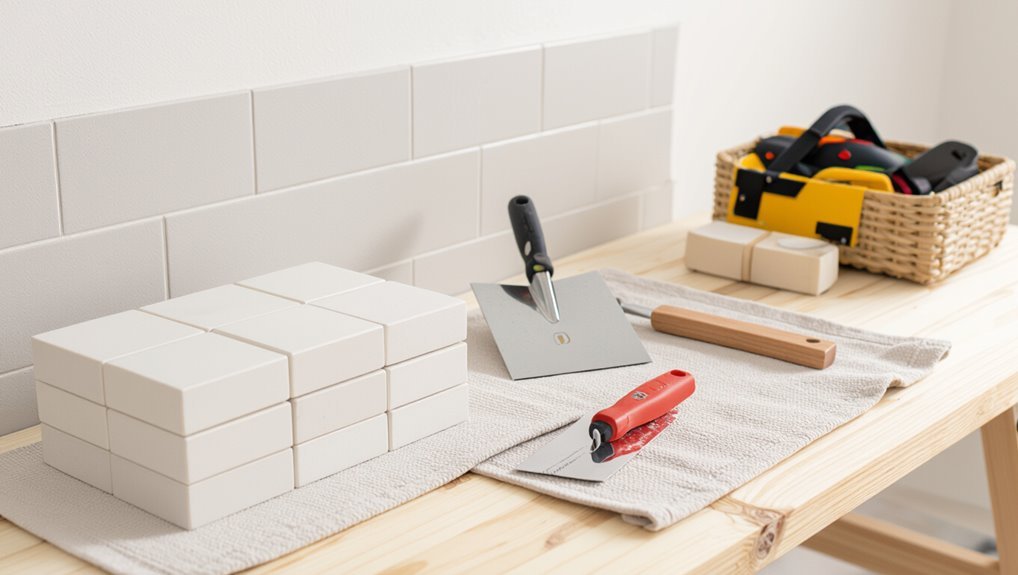
Before you start laying tile, you’ll want to gather the essential tools—trowels, spacers, a level, tile cutter, and a grout float.
Prep materials like sandpaper, a primer, and cleaning supplies will make the painted surface ready to accept adhesive.
Finally, pick the right adhesives and sealants for painted walls so your installation bonds and stays watertight.
Essential Tools List
You’ll need a compact set of tools and materials to get your painted wall ready and lay tile cleanly and securely.
Gather essential tools for proper tiling techniques and efficient work. Bring quality items that guarantee precise cuts, consistent spacing, and strong adhesion.
- Notched trowel, grout float, tile spacers
- Wet saw or tile cutter, tile nippers
- Level, tape measure, pencil, bucket, sponge
Surface Preparation Materials
Now that you’ve gathered the basic tiling tools, focus on materials that get the painted wall ready to accept tile.
Gather degreaser, trisodium phosphate or mild cleaner for surface cleaning techniques, scuff pads, 80–120 grit sandpaper, tack cloths, primer suitable for glossy or latex surfaces, and painter’s tape.
Check paint compatibility concerns before priming to confirm adhesion.
Adhesives And Sealants
Gather the right adhesives and sealants so your tiles bond securely and stay watertight: a polymer-modified thin-set mortar for wall tile, an appropriate mastic for non-wet areas if recommended, waterproof thin-set for bathrooms or backsplash zones, and a latex or silicone grout sealer.
Choose adhesive types and sealant options based on substrate and moisture.
- Polymer thin-set
- Waterproof thin-set
- Silicone grout sealer
Choosing Tiles That Work Over Painted Surfaces
Texture matters when you’re picking tiles for a painted wall, because some finishes hide paint imperfections while others highlight them. You’ll choose tile materials and tile styles that match paint types and surface compatibility, consider wall preparation, design considerations, adhesive selection, and installation techniques to guarantee lasting adhesion and aesthetics.
| Material | Finish | Suitability |
|---|---|---|
| Ceramic | Matte | Good |
| Porcelain | Glossy | Caution |
| Glass | Textured | Best |
| Stone | Natural | Variable |
Plan Your Tile Layout
With your tile type and surface prep chosen, it’s time to map out the layout so cuts, joints, and focal points fall where you want them.
You’ll consider tile patterns and practical layout considerations, then mark reference lines later. Focus on balance and symmetry.
- Start from a center or focal point
- Adjust for full tiles at edges
- Plan grout joint spacing
Mark Gridlines on Painted Walls
Start by measuring and snapping level horizontal and vertical lines so your grid is square and aligned with the room.
Use a chalk line for straight, visible guidelines that you can wipe off later.
Then mark your tile centers to guarantee balanced cuts at edges and around fixtures.
Measure And Level Lines
Before you apply any adhesive, measure the wall and snap level gridlines so your tiles go on straight and even.
Use proper measuring tools and employ basic leveling techniques to establish reference lines. Check corners and outlets, then:
- Mark vertical reference lines
- Establish a horizontal baseline
- Verify squareness with a level and tape
Follow those lines as you install tiles.
Use A Chalk Line
A chalk line lets you transfer your level grid quickly and accurately across painted surfaces, giving you straight guides to follow as you set tiles.
Snap perpendicular lines using a chalk line technique for consistent wall alignment. Hold the reel taut, mark reference points, snap lightly to avoid paint damage, then recheck level before applying adhesive so your tiles stay true to the grid.
Mark Tile Centers
Once your chalk lines are set, mark the tile centers so each row and column lines up with the grid you’ve snapped.
You’ll transfer measurements and note adjustments for neat tile layout and proper surface preparation. Use a pencil or erasable marker and check level frequently.
- Mark center points at intersections
- Note edge cut widths
- Confirm vertical plumb and horizontal straightness
Cut and Dry‑Fit Tiles Against Paint
Measure and mark each tile carefully so you can cut and dry-fit them against the painted wall without damaging the finish.
Use your tile layout to determine edge cuts, marking tiles with a pencil and score line. Cut with a wet saw or nipper, then dry-fit pieces, checking gaps and level.
Consider adhesive options later; avoid scraping or scuffing paint during fitting.
Apply Adhesive Correctly on Painted Surfaces
With your tiles dry‑fit and gaps checked, you’re ready to apply adhesive to the painted wall—but first confirm the paint’s adhesion and porosity so the mortar will bond.
Before applying adhesive, verify the paint’s adhesion and porosity to ensure the mortar will bond properly.
Test small areas, sand glossy spots, and prime if needed.
For proper adhesive application and surface compatibility:
- Use thin‑set suitable for nonporous finishes.
- Mix per manufacturer.
- Trowel with correct notch size.
Set Tiles and Keep Spacing Consistent
Start by planning your tile layout so cuts and pattern lines fall where they’ll be least noticeable.
Use consistent spacers between tiles to keep grout lines even.
Check alignment regularly with a level as you work so rows stay straight.
Plan Tile Layout
Before you set a single tile, map out the pattern and spacing on the wall so you know where full tiles will sit and which edges will need cuts.
You’ll plan using tile patterns and precise wall measurements. Mark guidelines, dry-fit tiles, and note cut locations.
- Sketch layout lines
- Dry-fit full rows
- Record cut sizes and positions
Use Consistent Spacers
When you set tiles, use consistent spacers so grout lines stay even and the finished surface looks professional; pick spacer sizes that match your planned grout width and insert them at every corner of each tile as you go.
You’ll choose spacer types for straight, T, or wedge needs and follow strict spacer placement so joints stay uniform and tiling proceeds quickly and predictably.
Check Alignment Regularly
Although you’ve set a few tiles, keep checking alignment with a level and straightedge as you work so rows stay true and grout lines remain consistent; tap tiles gently with a rubber mallet to adjust height and swap or reposition any that sit out of line.
You’ll rely on tile leveling techniques and careful wall preparation to finish cleanly.
- Check level each row
- Reset uneven tiles
- Maintain spacer gap
Grout Painted Backer: Timing and Technique
If you’ve painted your backer, wait until the paint is fully cured—not just dry to the touch—before grouting so the grout’s moisture and abrasion won’t lift or stain the finish.
Test a small area, use grout compatible with your adhesive types, and guarantee surface preparation was solid.
Work in small sections, wipe excess promptly with a damp sponge, and let grout cure per manufacturer instructions.
Seal and Caulk Tile Edges Over Painted Walls
Seal the edges and caulk where tile meets painted wall to keep water out and give a clean finish. You’ll choose caulk types suited to painted surfaces and prioritize proper edge sealing.
Prep by cleaning and masking, apply consistent beads, smooth with a wet finger or tool, then remove tape.
- Clean and dry surface
- Use paint‑compatible caulk types
- Tool and inspect seams
Common Problems and How to Fix Them
Wondering what can go wrong when you tile over painted walls? You’ll face adhesive failure if paint isn’t properly prepared or incompatible.
Check surface compatibility before you start: roughen glossy paint, remove loose flakes, and use a primer or bonding agent.
Fix lippage, grout voids, and tile movement quickly—remove affected tiles, clean substrate, reapply correct adhesive, and reset tiles for a lasting result.
Maintain Tiled Surfaces Installed Over Paint
When you maintain tiles that were installed over paint, stay proactive to prevent bond failures and surface damage—regular cleaning, quick attention to grout cracks, and occasional inspections for loosening will keep the installation sound.
Stay proactive with tiles over paint—clean regularly, fix grout cracks, and reattach loosened tiles promptly to prevent damage.
You should focus on tile maintenance for painted surfaces and act fast on issues.
- Wipe spills and use pH-neutral cleaner
- Repair grout promptly
- Re-adhere loose tiles immediately
Cost and Time Estimates for Tiling Over Paint
Keeping up with repairs and cleaning helps prevent costly rework, but you’ll also want a realistic sense of what tiling over painted walls will cost and how long it takes.
Do a cost analysis: material, adhesive, labor, and prep.
For time estimation, plan 1–3 days for small jobs, longer for complex patterns or drying.
Factor inspections and potential repainting.
Frequently Asked Questions
Will Tiling Over Painted Plaster Affect Wall Insulation?
Yes — tiling over painted plaster usually won’t change insulation effectiveness much, but it can create moisture concerns if tiles or grout trap dampness against the plaster; you should use proper sealants and ventilation to avoid problems.
Can Heated Towel Rails Be Installed on Tiles Over Paint?
Can you safely mount a heated towel rail on tiles over paint? Yes—you can install a towel rail installation on tiled paint if you guarantee painted surface preparation, solid substrate, proper fixing anchors, waterproofing, and electrician-approved connections for heated rails.
Will Tiling Over Paint Change Room Acoustics?
Yes — you’ll notice changes: tiling reduces acoustic absorption and increases sound reflection, making rooms livelier and brighter sonically. You’ll want added soft furnishings or acoustic panels if you’re aiming to retain warmth and dampened sound.
Can You Revert Tiles to a Painted Wall Later Without Damage?
Like peeling wallpaper after a storm, you can’t easily revert tiles to a painted wall later without damage; adhesive choices and tile longevity mean you’ll likely chip paint removing mortar, so expect repairs and surface refinishing afterward.
Are Specific Tile Colors Better Over Painted Backgrounds?
Yes — you should consider tile color psychology and contrasting paint choices; you’ll pick hues that evoke mood, use contrast for depth, and choose complementary or bold opposing tiles to highlight features while balancing brightness and room psychology.
Conclusion
You can tile over some painted walls, but only after you’ve done the homework: test adhesion, clean thoroughly, roughen glossy finishes, and use suitable thinset and primer. If paint flakes or won’t bond, remove it — “a stitch in time saves nine.” Seal and caulk edges, watch for common problems like lippage or weak grout, and keep up regular maintenance. Do the prep right and your tile will stay put and look great for years.