How to Wash Painted Walls: Safe Cleaning Without Damage
You can safely wash painted walls by dusting top-to-bottom, spot-testing a hidden area, and using a soft sponge with mild dish soap or a 1:1 vinegar solution for most finishes; avoid abrasive scrubbers on flat paint. Rinse promptly with clean water and dry with a soft cloth to prevent streaks. Tackle stains gently—erasers for scuffs, alcohol for ink, diluted bleach for mold—and touch up chips as needed. Continue for detailed steps and tips.
Quick 5‑Step Method to Clean Painted Walls
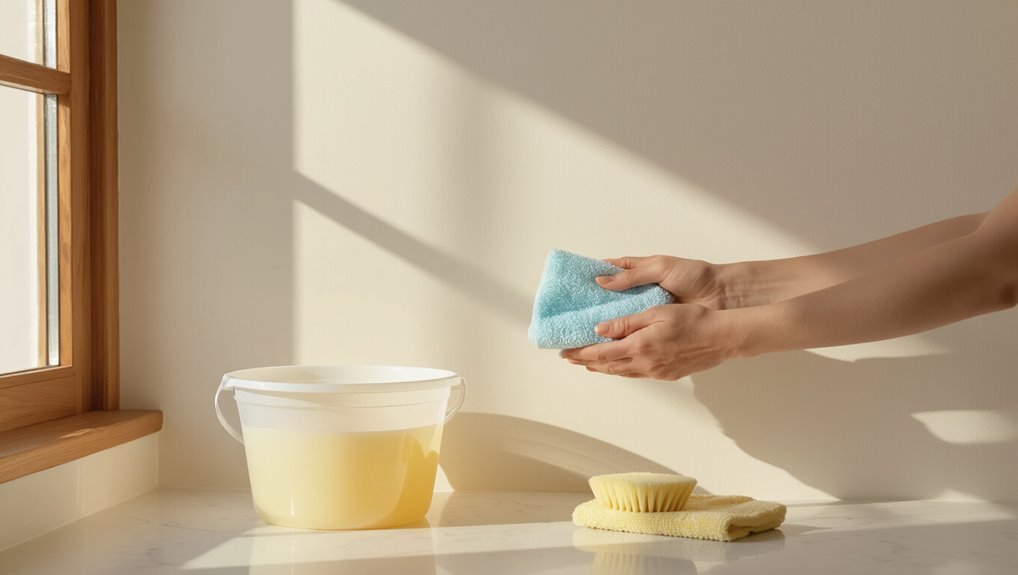
Start by gathering your supplies so you won’t interrupt the job: a soft sponge or microfiber cloth, a bucket, mild dish soap, a mop or long-handled sponge, and clean water for rinsing.
Wet-test a hidden spot, dust top‑to‑bottom, wash gently in sections, rinse promptly, and dry with a soft cloth.
These Wall Cleaning Maintenance Tips help prevent streaks and paint damage.
Identify Your Paint Sheen (Flat, Eggshell, Satin, Semi‑Gloss)
Now that you’ve got your supplies and tested a hidden spot, check the paint sheen before you wash the whole wall — the finish determines how stubborn dirt is and how gentle your cleaning must be.
Identify flat, eggshell, satin, or semi‑gloss by feel and light reflection.
Sheen variations affect cleaning ease and paint durability, so adjust technique and solution strength accordingly.
When to Clean, Touch Up, or Repaint
If stains are isolated and the finish looks intact, you can usually clean; if scuffs persist, paint flakes, or large areas show uneven color, you’ll want to touch up or consider repainting.
Decide by wear, smell, and adhesion. Note cleaning frequency and maintenance tips.
- Spot clean first
- Touch up chips
- Repaint high-wear walls
- Schedule inspections annually
Gather Tools and Gentle Cleaners First
Gather a few basic tools and gentle cleaners before you tackle painted walls so you won’t interrupt the job to hunt for supplies.
Gather basic tools and gentle cleaners before washing painted walls to avoid interrupting the job.
Collect a soft sponge, microfiber cloths, a bucket, mild dish soap or pH‑neutral cleaner, and a gentle scrub brush for stubborn spots.
Keep a spray bottle for diluted solutions and a towel for drips.
These cleaning supplies support careful wall care.
How to Spot‑Test Cleaners (And How Long to Wait)
Before you apply any cleaner broadly, test it on an inconspicuous patch—behind a door, inside a closet, or near baseboard trim—so you can spot any color loss, sheen change, or softening of the paint.
Wait 15–30 minutes, then 24 hours for full cure. Check surface compatibility with your cleaning products.
- Apply
- Wait
- Inspect
- Approve
Start With Dry Cleaning: Dust and Vacuum Walls
Before you get any wet, you should remove loose dust with a microfiber cloth or a long-handled duster so grit won’t scratch the paint.
Use a vacuum with a soft-brush attachment to lift dust from corners, moldings, and high spots—move slowly and overlap strokes.
Check that the brush setting is gentle and keep the nozzle a fraction of an inch from the wall to avoid scuffing.
Dusting Techniques
Start by dry-cleaning your painted walls to remove loose dust and cobwebs so any wet cleaning you do later won’t smear dirt into the finish.
Choose duster types suited to wall materials and reach high spots safely.
Use:
- Microfiber mop for flat paint
- Feather duster for delicate trims
- Extendable static duster for ceilings
- Soft-bristled brush for textured surfaces
Vacuum Attachment Tips
When you’re ready to follow up dusting, attach the soft-brush or upholstery tool to your vacuum and work top to bottom, using slow, overlapping strokes to lift settled dust without scratching paint.
Check suction on low, swap attachments for textured or delicate wall types, and avoid crevice tools directly on paint.
Move steadily, inspect as you go, and empty the canister when full.
Use a Microfiber Cloth to Clean Painted Walls
Pick a soft, high-quality microfiber cloth so you won’t scratch the paint or leave lint behind.
Wring it out until it’s damp, not dripping, and wipe in gentle, overlapping strokes to lift dirt without damaging the finish.
For stubborn spots, use a light circular motion and rinse the cloth frequently to avoid spreading grime.
Choose The Right Cloth
Because microfiber traps dust and grime without scratching paint, it’s the best cloth to use on painted walls.
You should pick quality cloth materials and know microfiber benefits for different finishes. Choose one that’s lint-free, nonabrasive, and washable.
- Soft microfiber
- Cotton blends (backup)
- Avoid abrasive synthetics
- Keep separate for walls only
Proper Cleaning Technique
1. Use a damp microfiber cloth to gently wipe painted walls, working top to bottom in overlapping strokes.
You’ll rinse and wring the cloth often to avoid spreading dirt. For stubborn spots, apply gentle pressure and a mild detergent, then rinse with a clean damp cloth.
This method supports wall care and paint preservation by minimizing abrasion and moisture damage.
Make a Mild All‑Purpose Cleaner for Painted Walls
A simple, mild all‑purpose cleaner lets you remove dirt, fingerprints, and scuffs without harming paint—mixing it takes just a few common ingredients and a couple of minutes. You’ll use natural ingredients and adjust concentration by cleaning frequency. Mix and store in a spray bottle:
- 1 cup warm water
- 1/4 cup white vinegar
- 1 tsp mild dish soap
- Optional few drops essential oil
Remove Fingerprints and Light Grime
Start by testing your cleaner on an inconspicuous spot.
For fingerprint removal and light grime, dampen a microfiber cloth with your mild solution, wring well, and wipe in gentle circular motions. Rinse the cloth frequently and finish with a dry cloth to prevent streaks.
For grime prevention, clean high-touch areas weekly and use washable covers or clear barrier films where appropriate.
Remove Scuff Marks Without Damaging Paint
Before trying anything on a visible area, test an inconspicuous spot to make sure the finish won’t lift or discolor.
If the test is fine, gently rub scuffs with a soft eraser or a specialty cleaning eraser, using light pressure and short strokes.
Stop immediately if the paint starts to dull or crumble, and try a different method.
Test Inconspicuous Area
When you’re about to tackle scuff marks, test an inconspicuous spot first so you can confirm the cleaning method won’t dull or remove the paint.
You should use gentle test methods to gauge paint sensitivity before wider cleaning.
- Try diluted soap
- Try water only
- Try mild solvent
- Wait and inspect for changes
Use Gentle Erasers
1 simple tool—an art gum or melamine sponge—can lift scuff marks without stripping paint if you use it carefully.
You should test on an unseen spot, dampen slightly, and rub gently with even pressure. Gentle erasers remove marks while preserving wall protection; avoid scrubbing hard or soaking the surface.
Wipe residue with a soft cloth and inspect for gloss loss.
Tackle Grease and Kitchen Splatter Safely
If grease and splatter have settled on your painted kitchen walls, you can remove them safely without stripping the finish by using the right cleaners and gentle techniques.
For kitchen cleaning and grease removal, try this approach:
- Dust and vacuum loose debris.
- Test cleaner in an inconspicuous spot.
- Use mild detergent and warm water with a soft cloth.
- Rinse and dry gently to protect paint.
Treat Water Stains, Rings, and Soap Residue
Although water stains, soap rings, and mineral buildup can look stubborn, you can usually remove them without damaging paint by using the right cleaners and gentle scrubbing. Use diluted vinegar or mild detergent for water stain solutions and targeted soap residue removal; rinse, blot dry, and test hidden spots first.
| Cleaner | Use |
|---|---|
| Vinegar | Minerals |
| Detergent | Soap rings |
| Baking soda | Stains |
| Rinse | Finish |
Remove Crayon, Marker, and Ink
When crayon, marker, or ink marks show up on painted walls, act quickly and pick a gentle method so you don’t strip the finish; start by testing any cleaner on an inconspicuous spot.
- Use a soft eraser for crayon removal.
- Try rubbing alcohol for ink solutions—dab, don’t rub.
- Use mild soap and water for marker techniques.
- Consider baking soda paste as a low‑abrasion cleaning alternative.
Handle Mold and Mildew on Interior Paint
Mold and mildew look similar but you’ll spot mildew as powdery, surface-level spots and mold as fuzzy or patchy growth that may penetrate paint.
Before scrubbing, test a small area and pick a safe cleaner like diluted bleach (1 cup bleach to 1 gallon water), white vinegar, or a commercial mold remover labeled for painted surfaces.
Wear gloves and good ventilation, rinse thoroughly, and repaint with mold-resistant primer if staining or damage persists.
Identify Mold vs. Mildew
How can you tell mold and mildew apart on painted walls? You spot differences by appearance, smell, texture, and growth habits. Use these quick cues:
- Dark, fuzzy spots — mold characteristics.
- Powdery, white or gray patches — mildew.
- Musty odor indicates mold.
- Frequent moisture needs mean focus on mildew prevention.
Check edges and corners for early signs.
Safe Cleaning Solutions
Now that you can spot the difference between mold and mildew, you’ll want safe, effective cleaners that remove growth without harming paint or indoor air. Use natural cleaners or mild commercial products; try homemade solutions like diluted vinegar or hydrogen peroxide. Test a hidden spot first, wear gloves, ventilate well, and blot—don’t scrub aggressively.
| Cleaner | Ratio | Notes |
|---|---|---|
| Vinegar | 1:1 water | Safe on most paint |
| Hydrogen peroxide | 3% straight | Bleaches stains |
| Baking soda | Paste | Gentle abrasive |
| Commercial mild cleaner | Follow label | Paint-safe options |
Remove Smoke, Nicotine, and Cooking Stains
Stains from smoke, nicotine, and cooking leave oily, yellowed residue that simple soap and water won’t always lift, so you’ll need stronger cleaners and a careful approach.
Follow these steps for smoke removal and treating nicotine stains while preserving wall protection and tackling cooking splatter:
- Test cleaner in hidden spot.
- Use trisodium phosphate substitute.
- Rinse gently with clean water.
- Dry and inspect before repainting.
Clean Trim, Doors, and Baseboards Safely
Before you tackle the walls, give trim, doors, and baseboards a careful cleaning so they don’t undermine your fresh paint or clean walls.
Clean trim, doors, and baseboards first—dust, gently wash, and dry to protect fresh paint and finishes.
Wipe dust first, then use mild detergent and a soft sponge for trim cleaning and baseboard maintenance.
For door care, clean panels and hardware gently, avoid soaking edges, and rinse.
Dry thoroughly to guarantee paint protection and prevent moisture damage.
Best Ways to Reach High or Hard‑to‑Reach Walls
Once the trim, doors, and baseboards are clean and dry, you’ll want a safe plan for reaching high or awkward wall areas.
Use stable equipment and protect floors.
- extendable ladder for ceilings and tall walls.
- wall mounted platform for steady, hands-free work.
- telescoping pole with microfiber mop for gentle cleaning.
- cleaning reachers to retrieve or steady items without overstretching.
What Not to Do When Cleaning Walls
When you’re cleaning painted walls, don’t scrub hard, use harsh chemicals, or ignore the paint type—those mistakes can strip finish, fade color, or leave watermarks.
You should avoid abrasive cleaners, skip harsh scrubbing, never use bleach, and refrain from steam cleaning.
Also, don’t ignore wall type or bypass color testers; avoid over saturation and skip high pressure washing to protect finish.
If Cleaning Removes Sheen: How to Fix It
If scrubbing has dulled your paint’s sheen, you can often restore the finish without repainting the whole wall.
Try a light buff with a soft cloth and a gentle restorer, or spot-clean and blend with a matching touch-up coat.
If those don’t match, plan a full recoat for a consistent sheen across the surface.
Restore Paint Sheen
Although cleaning can brighten a room, abrasive scrubbing or harsh cleaners can dull your paint’s sheen — and you don’t have to repaint to fix it.
Use gentle methods for paint finish care and targeted sheen restoration:
- Clean residue with mild soap.
- Rinse and dry thoroughly.
- Apply a compatible restorer or glazing compound.
- Buff lightly with a microfiber cloth.
Recoat Or Touch-Up
Decide whether a full recoat or a small touch-up will restore the look—cleaning can strip finish unevenly, but you don’t always need to repaint an entire wall.
Inspect affected areas under good light, test a discreet touch-up to match paint finish and sheen, and feather edges to blend with wall textures.
If mismatch persists, recoat the whole section for uniformity.
How to Touch Up Paint After Cleaning Damage
After cleaning, you’ll often find small scuffs, dull spots, or tiny chips that need a quick touch-up to restore an even finish.
Use precise paint color matching and simple touch up techniques:
- Clean and sand tiny flaws.
- Test color on hidden spot.
- Apply thin coats, feather edges.
- Let dry, assess, repeat sparingly for seamless results.
How to Protect Fresh Paint While Cleaning
1 simple rule will keep fresh paint safe while you clean: wait until it’s fully cured, then use gentle methods and soft tools.
Use paint protection methods like low‑abrasion sponges, mild detergent, and test a hidden spot.
Limit cleaning frequency to prevent wear; dust often with a soft cloth and deep‑clean sparingly.
Avoid scrubbing and harsh chemicals until paint is well cured.
Stain‑Removal Products: Buy or Avoid
While some store‑bought stain removers can save time, you should pick products carefully to avoid damaging paint — especially on recently painted or satin/eggshell finishes.
You’ll want to test and choose based on label warnings and proven product effectiveness.
Consider these points before buying:
- Test inconspicuous spot first.
- Check for harsh solvents.
- Prefer non‑abrasive formulas.
- Measure stain removal vs. finish risk.
Eco‑Friendly and DIY Cleaner Alternatives
You can clean most painted walls safely with simple, eco-friendly mixes you probably already have at home.
Try a gentle vinegar solution for light grime and a baking soda paste for tougher spots—both cut grease without harsh chemicals.
Always test a small area first to make sure the finish isn’t affected.
Gentle Vinegar Solution
If you prefer a simple, eco-friendly cleaner, a gentle vinegar solution works well on most painted walls and’s easy to mix at home.
You’ll enjoy vinegar benefits like grease cutting and being a natural disinfectant.
Mix, test, then wipe gently.
- 1 cup water + 1/4 cup vinegar
- Test hidden spot
- Soft cloth, wrung damp
- Rinse if needed
Baking Soda Paste
Another easy, eco-friendly option is a baking soda paste, which tackles scuffs, stains, and grease without harsh chemicals.
Mix baking soda with water to a spreadable paste, apply gently with a soft cloth or sponge, rub lightly, then wipe clean. Rinse the area and pat dry.
Use this DIY wall cleaner for spot treatment on painted surfaces, testing first in an inconspicuous spot.
How Often to Deep‑Clean Different Rooms
1 room you clean weekly might need monthly deep‑cleaning, while others can wait longer—knowing the difference saves time and keeps painted walls in good shape.
Assess cleaning frequency and room specifics to decide.
Consider each room’s use and needs—tailor deep‑clean timing accordingly rather than following a one‑size‑fits‑all schedule
- Kitchen: monthly for grease hotspots.
- Bathroom: monthly to control mildew.
- Living areas: quarterly unless heavy use.
- Bedrooms: biannually or as needed.
When to Call a Pro vs. DIY
When stains are stubborn, damage is extensive, or you lack the right tools, call a pro—otherwise, you can handle most routine wall cleaning yourself.
You should seek a professional assessment for mold, deep gouges, or uncertain finishes. If stains respond to gentle cleaning and paint stays intact, proceed with DIY.
Trust your DIY confidence, but don’t hesitate to get expert help when risks rise.
Cost Estimates: Cleaning, Touch‑Ups, Repainting
Costs for cleaning, touch-ups, and repainting vary widely, but you can expect a basic cleaning to run under $100 for DIY supplies or $50–$200 for a pro.
Small touch-ups to cost $20–$150 depending on paint and labor.
Full-room repainting to start around $200–$400 per room for DIY and $300–$1,000+ for professionals depending on size, prep work, and finish.
- Cleaning: DIY vs pro cost comparison
- Touch-ups: paint, labor, matching
- Repainting: per-room budget breakdown
- Hidden costs: prep, repairs, disposal
Daily Habits to Keep Walls Looking New
Budgeting for cleaning, touch-ups, or a fresh coat is useful, but keeping paint looking new day-to-day will save you time and money.
Wipe smudges promptly with a soft cloth, manage humidity, and avoid harsh cleaners.
Use mats and furniture pads, rotate wall decor to prevent sun fading, and schedule simple preventative maintenance checks so small issues don’t become big repairs.
Step‑by‑Step Wall Cleaning Checklist
Start with a quick inspection and gather supplies so you don’t waste time mid-clean: soft microfiber cloths, a bucket, mild liquid dish soap, a gentle sponge, a magic eraser (optional), and clean water for rinsing.
Follow this checklist using proven wall cleaning techniques to protect finish and paint care:
- Dust top to bottom.
- Spot-test solution.
- Wash gently in sections.
- Rinse and dry.
Frequently Asked Questions
Can Cleaning Painted Walls Affect Indoor Air Quality?
Yes — you can affect indoor air: cleaning products release VOCs that interact with wall materials, and poor ventilation systems let residues linger. You should choose low-VOC cleaners and boost ventilation to keep air safer.
Can Wallpapered Walls Be Cleaned the Same Way as Painted Walls?
Yes — but you shouldn’t assume it’s identical: test wallpaper materials first, since delicate papers and pasted seams need milder cleaning solutions; you’ll avoid damage by spot‑testing, using gentle cleaners, and blotting instead of scrubbing.
How Do You Clean Exterior Painted Walls Safely?
You clean exterior painted walls by rinsing debris, using mild detergent, and spot-scrubbing; you’ll avoid high-pressure settings, hire pressure washing for sturdy surfaces, rinse thoroughly, and schedule regular exterior maintenance to protect paint and trim.
Are There Special Precautions for Cleaning Walls With Lead Paint?
Like walking on thin ice, you should avoid scrubbing lead paint; you’ll use gentle wall cleaning techniques, wet methods, HEPA vacuuming, and PPE. Prioritize lead paint safety, contain debris, and get professional abatement if needed.
Can Pets’ Oils and Dander Damage Painted Walls Over Time?
Yes — pet dander and oils can degrade finishes over time, so you should include regular wall maintenance like gentle wiping and occasional deep cleaning to prevent buildup, discoloration, and damage from persistent grime or oils.
Conclusion
You’ve given your walls a little TLC, so they’ll keep smiling for guests and family. By choosing the right sheen, testing cleaners gently, and knowing when to touch up or repaint, you’ll avoid harsh surprises and keep finishes looking polished. Stick to soft tools, mild solutions, and small daily habits to prevent scuffs. If a spot feels out of reach, call a pro—think of them as the next‑door savior for trickier moments.