Is Ceiling Paint Water Based? What Most Homeowners Don’t Know
Yes — most ceiling paints you’ll buy are water-based (acrylic or latex), which dry fast, smell mild, and clean up with soap and water. They’re preferred for living spaces because they resist yellowing and have lower VOCs than oil-based options, though they can show seams and need proper priming for stains. You’ll also learn how to identify water-based labels, when to pick oil-based instead, and tips to avoid common application mistakes.
Quick Answer Is Ceiling Paint Water Based?
Yes — most modern ceiling paints are water-based acrylics, so you’ll find a lot of low-odor, easy-clean options.
You’ll usually choose water-based for living rooms, bedrooms, and kitchens because they dry fast, resist yellowing, and clean up with soap and water.
However, ceilings in very humid spaces, industrial settings, or where extreme durability is needed might still call for oil-based or specialty formulations.
Short direct answer
Although some ceiling paints are oil-based, most modern ceiling paints are water-based (acrylic or latex).
So you’ll usually be using a water-based product unless a specific oil-based formula is specified.
If you’re wondering “is ceiling paint water based,” the short direct answer: yes in most cases.
Check the label for “water-based” or “oil-based” to confirm before buying or painting.
Typical use cases where water-based ceiling paint is recommended
When you need a fast-drying, low-odor finish that’s easy to clean up, water-based ceiling paint is usually the best choice.
Use it in bedrooms, living rooms, nurseries, and recently renovated spaces where ventilation is limited. It’s ideal for popcorn or smooth ceilings, rental units, and quick touch-ups.
You’ll appreciate minimal fumes, faster recoat times, and easy soap-and-water cleanup.
When it might not be water-based
If you need maximum durability, stain resistance, or are tackling high-humidity areas, ceiling paint mightn’t be water-based—manufacturers often offer oil-based or alkyd formulations for tougher performance, heavy stains, or exterior ceilings.
You’ll choose non-water formulas when sanding, sealing, or covering nicotine, water damage, or grease—these binders resist yellowing and moisture better, but need solvents for cleanup and longer cure times.
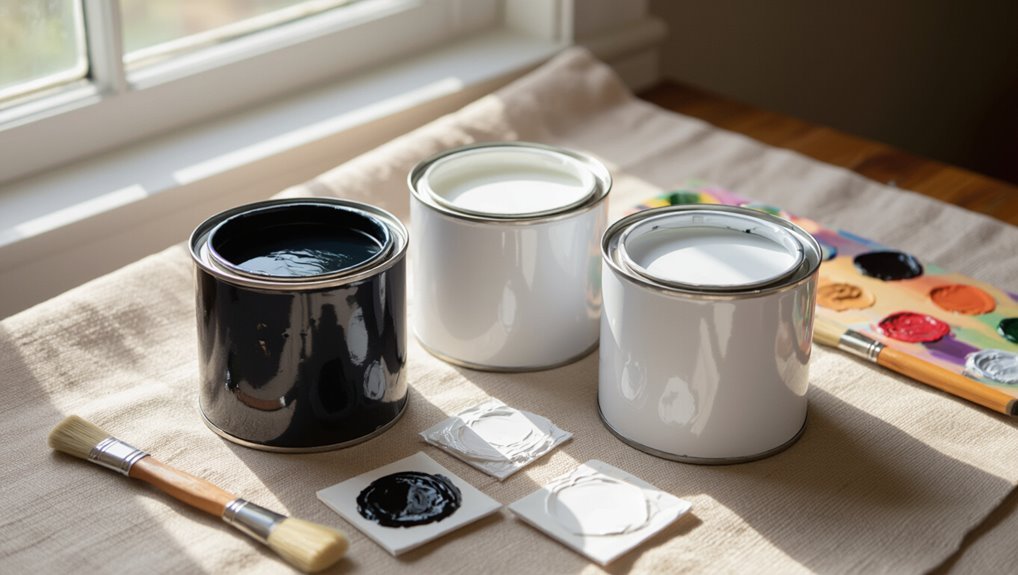
Basic Understanding What Is Water-Based Paint?
You’ll find that water-based paint (often called latex) is mostly pigment, binder, water, and additives that control flow and drying.
It contrasts with oil-based (alkyd) paints in how it dries, cleans up with water, and usually emits fewer fumes.
Many ceiling paints are marketed as water-based formulations tuned for low splatter, high hide, and quick drying.
Definition and main components
Although water-based paint uses water as its primary solvent, it’s defined by more than just that—it’s a formulation where pigments and binders are dispersed in water so the paint applies smoothly and dries into a durable film.
You’ll find three main components you should know:
- Pigments for color and opacity.
- Binders (resins) that form the film.
- Additives for stability and performance.
Difference between water-based (latex) and oil-based (alkyd) paints
When comparing ceiling paints, remember that “water-based” (often called latex) and oil-based (alkyd) formulations behave differently: you’ll notice drying time, cleanup, odor, and flexibility vary. Choose based on surface and ventilation.
| Feature | Difference |
|---|---|
| Drying | Latex dries faster |
| Cleanup | Latex uses water; alkyd needs solvent |
Common formulations marketed as ceiling paint
Now that you’ve seen how latex and alkyd differ in drying, cleanup, odor, and flexibility, it’s helpful to look at the specific formulations labeled as ceiling paint.
You’ll find water-based flat or low-sheen latex blends, stain-blocking latex with added titanium dioxide, acrylic hybrids for better adhesion, and specialty mildew-resistant or high-hide formulas.
Manufacturers tailor these for spatter control and reduced drip on overhead surfaces.
How Ceiling Paint Is Formulated Why Manufacturers Choose Water-Based
When you pick ceiling paint, manufacturers often favor water-based formulas because they dry fast, have low odor, and resist yellowing over time.
You should also weigh limitations like lower stain-blocking or adhesion on some surfaces compared with solvent-based options.
Finally, additives and finishes—matte or flat pigments, mildew inhibitors, and stain-blocking polymers—are blended to boost coverage, hide imperfections, and improve durability.
Advantages of water-based formulations for ceilings
Because they dry fast, release fewer odors, and clean up with soap and water, water-based ceiling paints make life easier whether you’re a DIYer or a pro.
You’ll get quicker recoat times, low VOCs for healthier indoor air, and durable, fade-resistant finishes.
Apply smoothly, touch up easily, and maintain less mess.
- Faster project completion
- Healthier indoor air
- Easy maintenance
Limitations of water-based ceiling paints
Those benefits make water-based ceiling paints a popular choice, but they also come with trade-offs you should know.
They can show seams or lap marks if you rush application, sometimes have lower hide on deep stains, and may dull faster in high-moisture areas.
You’ll also find slower leveling in cooler temps and limited film thickness compared with some solvent-based options.
Additives and finishes used in ceiling paints (matte, flat, stain-blocking)
Although ceiling paints look simple, manufacturers mix in specific additives and select matte or flat resins to control sag, hide, and light reflection so your ceiling hides imperfections and resists stains.
You’ll find rheology modifiers for application, pigments and opacifiers for coverage, and stain-blocking binders or primers to seal tannins and water marks.
These choices balance touch-up ease, mildew resistance, and long-term appearance.
How to Identify If a Ceiling Paint Is Water-Based
You can usually tell from the label or technical data sheet, which will list water or an acrylic/styrene-acrylic binder.
If that’s unclear, you can do simple at-home checks—smell for strong solvent odors and try a small solvent test (water vs. mineral spirits) on an inconspicuous spot.
Also watch for visual and performance clues: water-based paints dry quickly, have low odor, and clean up with soap and water.
Reading the label and technical data sheet
Wondering how to tell if a ceiling paint is water-based? Read the label and technical data sheet carefully: they state binder type, cleanup method, and VOC levels.
Look for acrylic, latex, or waterborne; “solvent” or “alkyd” indicates oil. Check recommended thinner and drying times.
Use the TDS for precise chemistry and performance specs before buying.
- Binder type
- Cleanup method
- VOC/drying specs
Simple at-home tests (smell, solvent test) step-by-step
How can you quickly tell if ceiling paint is water-based without lab gear?
Sniff: fresh water‑based paint smells faint, latex‑like; oil/alkyd smells strong, solventy.
Do a solvent test: dab a cotton swab with denatured alcohol on a hidden spot—if paint softens or lifts, it’s water‑based.
If alcohol does nothing but mineral spirits dissolve it, it’s likely oil‑based.
Use gloves and ventilate.
Visual clues and performance indicators
Although solvents and smell give quick answers, your eyes and a little knowledge of paint behavior often tell you a lot about whether ceiling paint is water‑based.
Look for uniform matte finish, minimal yellowing, and crisp edges where tape was used. Water‑based paints dry faster, resist cracking, and show fewer solvent blooms.
If it flakes or yellows, it’s likely oil‑based.
Comparison Water-Based vs Oil-Based Ceiling Paints
When choosing between water-based and oil-based ceiling paints, you’ll want to compare drying and recoat times, durability and scuff resistance, and how much odor or VOCs they release.
Consider cleanup and ongoing maintenance plus cost and availability in your area so you’re not surprised mid-project.
These factors will help you pick the right paint for performance and indoor air quality.
Drying time and recoat intervals
Because water-based ceiling paints dry by evaporation, they usually feel dry to the touch within 30 minutes to an hour and can be recoated in 2–4 hours, while oil-based formulas cure by oxidation and often take 6–8 hours to surface-dry and 24 hours or more before you can safely recoat. Plan temperature and humidity; faster drying lets you finish sooner.
| Type | Touch Dry | Recoat |
|---|---|---|
| Water | 30–60 min | 2–4 hrs |
| Oil | 6–8 hrs | 24+ hrs |
Durability and scuff resistance
Fast drying doesn’t guarantee long-term wear, so you should consider how water- and oil-based ceiling paints hold up to scuffs and abrasion.
Water-based paints resist yellowing and rebound from light rubs well, but lower sheen formulas can mark easier.
Oil-based finishes cure harder and resist scuffs better, so you’ll choose them where durability trumps quick recoat and easier cleanup.
Odor, VOCs, and indoor air quality
Although both water- and oil-based ceiling paints release fumes during application, you’ll notice a clear difference in odor strength and chemical emissions: water-based formulas emit milder smells and far fewer VOCs, so you can reoccupy rooms sooner with less irritation.
Oil-based paints give stronger, persistent odors and higher VOC levels, increasing ventilation needs and potential respiratory or odor-sensitivity issues.
Clean-up and maintenance
When you’re done painting, water-based ceiling paints make cleanup simple: soap and water remove brushes, rollers, and drips with minimal effort, and cured surfaces resist yellowing so routine maintenance is easier.
Oil-based paints, by contrast, need solvents like mineral spirits or paint thinner for cleanup, can leave lingering residues that require more elbow grease, and often need stronger cleaners or recoat prep to maintain appearance.
You’ll also spot-clean water-based ceilings gently, while oil-based surfaces may demand degreasers and careful scuff-sanding before refinishing.
Cost and availability
Cleanup and maintenance affect long-term costs, but upfront price and how easy paint is to find also shape your project budget and timeline.
Water-based ceiling paint is generally cheaper, widely stocked, and available in big-box and online stores.
Oil-based options cost more, are rarer since regulations reduced use, and may require specialty shops.
Factor availability into scheduling and total expense.
When to Choose Water-Based Ceiling Paint Use Cases and Scenarios
If you’re working on new construction or fresh drywall, water-based ceiling paint is usually the best choice for its quick drying and low odor.
You’ll also want water-based formulas in high-humidity rooms like bathrooms and kitchens because they resist moisture and mildew better.
For stained ceilings or ones with old oil-based coatings you’ll need extra prep, and textured or popcorn ceilings may require specific water-based products for proper coverage.
New construction and drywall ceilings
Because new construction often means smooth, unpainted drywall, you’ll usually want a water-based ceiling paint that dries fast, has low odor, and allows for quick recoats so you can finish rooms sooner.
You’ll appreciate easy cleanup, minimal yellowing over time, and better adhesion to fresh joint compound.
Choose a flat or matte finish to hide imperfections and speed up post-construction touch-ups.
High-humidity areas (bathrooms, kitchens)
New construction ceilings often benefit from fast-drying, low-odor water-based paints, but wet rooms present a different set of demands: in bathrooms and kitchens you’ll want a water-based ceiling paint formulated to resist moisture, mildew, and frequent temperature swings.
Choose mildew-resistant, semi-gloss or satin finishes for easier cleaning; guarantee good ventilation and use a paint labeled for high-humidity spaces to maintain durability and appearance.
Ceilings with stains or previous oil-based coatings prep needed
When your ceiling shows stains or carries an old oil-based coat, you’ll need extra prep before applying water-based paint so it bonds and hides blemishes.
That means cleaning, sealing stains with a shellac- or oil-based primer, and scuff-sanding glossy oil finishes to promote adhesion.
After priming, spot-check for bleed-through, allow full cure, then apply water-based ceiling paint in thin, even coats for consistent coverage.
Special cases: textured ceilings and popcorn ceilings
If your ceiling has texture or the classic popcorn finish, you’ll want to choose water-based paints formulated for high build and good flow so they coat nooks without drips or thinning out the texture; these paints dry faster, clean up easily, and resist yellowing compared with old oil-based options.
Use a thick-nap roller or sprayer, apply thin even coats, and spot-prime damaged areas for best adhesion.
Step-by-Step: How to Apply Water-Based Ceiling Paint for Best Results
Before you start painting, you’ll want to clean, patch, and prime the ceiling so the finish goes on smooth (Step 1).
Pick the right finish and tools, then use proper application techniques—rollers, brushes, or a sprayer—working methodically to avoid drips and lap marks (Steps 2–3).
Finish by following recommended drying and recoating times, then clean up tools and dispose of waste responsibly (Steps 4–5).
Prep: cleaning, patching, priming (Step 1)
Start by clearing and inspecting the ceiling so you can spot dirt, stains, cracks, and peeling paint that’ll affect adhesion.
Clean with a mild detergent solution, rinse, and let dry.
Scrape loose paint, sand edges, and fill holes or cracks with spackling.
Sand smooth, dust off, and apply a stain-blocking primer where needed so the water‑based ceiling paint bonds evenly.
Selecting the right finish and tools (Step 2)
While choosing paint sheen and the right tools might seem minor, they determine the ceiling’s final look and how easy the job will be.
Pick a flat or matte water-based ceiling paint to hide imperfections.
Use quality extension poles, a sturdy roller frame with a short-nap cover, angled brushes for edges, and good painter’s tape.
Match tools to surface texture and room lighting.
Application technique: rollers, brushes, spraying (Step 3)
Grab your roller, brush, or sprayer and work methodically across small sections so the paint stays wet for a smooth, even finish.
Use a nap suited to texture, keep a wet edge, and feather out overlaps.
Cut in with a synthetic brush around fixtures and corners, then roll in straight lines.
If spraying, back-roll for uniformity and to reduce overspray.
Drying, recoating, and curing (Step 4)
After you’ve cut in and rolled each section, let the paint begin to dry before touching adjacent areas—proper drying affects how soon you can recoat and how the finish ultimately cures.
Wait the manufacturer’s recommended recoat time, usually 2–4 hours in mild conditions. Guarantee good ventilation and moderate humidity.
Apply subsequent coats lightly; full curing can take up to two weeks, during which avoid heavy cleaning.
Clean-up and disposal (Step 5)
Tackle cleanup promptly to prevent dried paint and clogged tools—rinse brushes, rollers, and trays with warm soapy water until the water runs clear.
Then spin or shake rollers to remove excess and lay everything flat to dry.
Dispose of rinse water per local rules, wring solids into a sealable bag, recycle or store leftover paint tightly labeled, and never pour paint down drains.
Common Mistakes Homeowners Make with Ceiling Paint
When you paint a ceiling, the biggest mistakes are easy to make and costly to fix: skipping or using the wrong primer, slathering on coats too thickly or with poor technique, and picking the wrong finish for the room.
You also can’t ignore ventilation or drying times, since trapped moisture ruins coverage and prolongs tackiness.
I’ll walk you through how to avoid each of these so your water-based ceiling paint looks professional.
Using the wrong primer or skipping primer
If you skip primer or pick the wrong one, you’ll likely see poor adhesion, uneven sheen, and faster peeling on your ceiling.
You should choose a primer compatible with water-based ceiling paint and the substrate—drywall, plaster, or previously painted surfaces.
A stain-blocking, high-adhesion primer prevents bleed-through and improves coverage, letting your topcoat apply smoothly and last longer.
Applying too thick coats or poor technique
Even with the right primer, how you apply the paint matters just as much—laying on thick coats or using poor technique will create drips, visible lap marks, and long dry times that trap dust.
Work in thin, even passes, keep a wet edge, and use proper rollers or brushes. You’ll finish faster, with a smooth, uniform ceiling and fewer touch-ups.
Ignoring ventilation and drying times
Because paint needs airflow and time to cure, skimping on ventilation or rushing recoats causes tacky surfaces, trapped odors, and dust that sticks to the finish.
You should open windows, run fans, and follow manufacturer drying intervals before sanding or applying another coat.
Otherwise you’ll ruin smoothness, extend curing, and invite stains or peeling—fixes that cost time, money, and frustration.
Choosing the wrong finish for the room
Poor finish choices can undo careful prep and drying—what looks fine on walls often fails on ceilings.
You should pick a flat or matte water‑based ceiling paint to hide imperfections and reduce glare; semi‑gloss or satin shows roller marks and reflects light, highlighting flaws.
Match finish to room use—kitchens or bathrooms may need washable finishes, but avoid high sheen overhead.
Tips and Best Practices for Choosing and Using Ceiling Paint
When picking ceiling paint, you’ll want low-VOC, eco-friendly formulas that suit the room’s lighting and size to avoid unwanted glare or a cramped feel.
Keep ceilings fresh with simple maintenance like spot-cleaning and touch-ups, and choose washable finishes in high-traffic areas.
If you’re facing extensive stains, texture issues, or tricky heights, call a professional to guarantee a safe, even result.
How to choose low-VOC and eco-friendly options
If you want a healthier home and lower indoor air pollution, choose ceiling paints labeled low-VOC or zero-VOC and check independent certifications (Green Seal, GREENGUARD) for verification.
Read labels for odor, solids, and scrub ratings, test sample patches, and prefer water-based acrylics. Follow proper ventilation during application.
- Verify certifications and VOC levels
- Buy samples and patch-test
- Ventilate while painting
Matching paint to lighting and room size
After you’ve picked a low‑VOC, water‑based ceiling paint and tested samples, think about how lighting and room size will affect color choices and finish.
In small or dim rooms, choose a brighter, warm white and a flat to low‑sheen finish to reflect light and hide imperfections.
In large, well‑lit spaces, you can use cooler tones or subtle sheen to add depth without overpowering the room.
Maintenance tips to keep ceilings looking fresh
Because ceilings collect dust, smoke, and occasional stains, regular upkeep keeps them looking fresh and prevents costly touch-ups later.
You should dust or vacuum monthly, spot-clean grease or smoke with mild detergent, and use a microfiber mop for flat areas.
For painted ceilings, apply a low-VOC water-based touch-up coat as needed, and ventilate well to speed drying and reduce odors.
When to call a professional
When a ceiling problem goes beyond routine cleaning or small touch-ups, call a professional so you don’t compound damage or waste time and materials.
You should also hire an expert for persistent stains, sagging drywall, mold, water damage, or complex texture repairs.
Pros assess structural issues, guarantee proper ventilation, match paint finish, and apply corrective treatments safely, saving you money and preventing recurring problems.
FAQ Common Questions About Ceiling Paint and Water-Based Formulations
You’ve probably got a few practical questions about water-based ceiling paint — like whether it covers oil-based coats, how washable it is, or how many coats you’ll need.
You’ll also want to know if it blocks stains and how long to wait before rehanging fixtures or moving furniture beneath a fresh ceiling.
I’ll answer each of these clearly so you can plan the job right.
Can I paint over oil-based ceiling paint with water-based paint?
Can you successfully top an oil-based ceiling with water-based paint? Yes, but prep matters.
You’ll need to degloss with sandpaper or a chemical deglosser, clean dust and grease, then apply a quality bonding primer rated for oil-to-latex adhesion.
Once primed and dry, use your water-based ceiling paint.
Skipping primer risks poor adhesion, peeling, and visible defects over time.
Is water-based ceiling paint washable?
Wondering whether water-based ceiling paint will stand up to cleaning? Yes—modern acrylic and latex ceiling paints are washable when fully cured.
You can gently wipe dust and light marks with a damp cloth or mild detergent. Avoid heavy scrubbing or abrasive cleaners, test a small area first, and allow full cure time (usually days) before cleaning to prevent damage or sheen changes.
How many coats of water-based ceiling paint do I need?
How many coats you’ll need depends on the ceiling’s current color, surface condition, and the paint’s hide—most water-based ceiling paints cover well, so expect one to two coats for typical white or light ceilings.
You may need two to three coats if you’re covering a darker color, stains, or a patched surface.
Let the first coat dry fully, inspect under good light, then apply a second or third as needed for uniform coverage.
Will water-based paint block stains on ceilings?
Even though many modern water-based ceiling paints offer improved stain resistance, they won’t reliably block severe water stains, smoke, or tannin bleed on their own—so you’ll usually need a dedicated stain-blocking primer before painting to prevent discoloration from seeping through.
Use an oil- or shellac-based primer for tough stains; for light marks a high-quality water-based primer may suffice. Test a small area first.
How long before I can hang fixtures or move furniture under a freshly painted ceiling?
When can you safely hang light fixtures or move furniture beneath a freshly painted ceiling?
Wait at least 24 hours for water-based paint to dry to the touch, but allow 48–72 hours for partial curing before light handling.
For heavy fixtures or close-contact items, wait seven days for better adhesion and reduced scuff risk.
Guarantee good ventilation and moderate temperature to speed safe handling.