Should Crown Molding Be Painted Flat or Semi-Gloss? The Right Answer
You should usually paint crown molding semi-gloss for durability and to highlight profiles, especially in kitchens, bathrooms, and high-traffic areas where cleaning matters; satin is a good softer alternative for living rooms or historically sensitive spaces. Semi-gloss reflects more light and shows detail, while flatter sheens hide imperfections but lack toughness. Match sheen to material and room use, prep and prime properly, and keep on for a bit more guidance about choosing and applying the right finish.
Quick Answer Which Finish to Use for Crown Molding
For crown molding, you’ll usually want a semi-gloss or satin finish because they’re durable and highlight details without being too shiny.
Use semi-gloss in high-traffic or moisture-prone rooms like kitchens and bathrooms, and satin for living spaces where a softer sheen is preferred.
If your molding has lots of intricate profiles, a slightly higher sheen will make the edges pop.
Direct recommendation summary
When choosing a finish for crown molding, pick semi-gloss for painted woodwork and satin for stained or natural wood—you’ll get durability and easy cleaning without a flashy glare.
If you’re asking should crown molding be painted flat or semi-gloss, go semi-gloss for trims and high-traffic rooms.
Use satin for warmth on natural wood.
Cut gloss near ceilings to hide imperfections.
Why Finish Choice Matters for Crown Molding
Your choice of sheen changes how crown molding catches light and how visible brush strokes or imperfections are.
You’ll also want a finish that stands up to dusting and occasional cleaning, especially in high-traffic rooms.
And remember the material—wood, MDF, or polyurethane—affects which sheen and paint type will bond and wear best.
How paint sheen affects appearance and light reflection
Light interaction plays a big role in how crown molding looks, so your choice of paint sheen changes everything from subtle depth to sharp highlights.
Lower sheens absorb light, softening profiles and hiding minor flaws; higher sheens reflect more, emphasizing contours and making edges pop.
Choose based on how much definition you want under natural and artificial lighting to shape room character.
Durability and cleanability considerations
Because crown molding sits where dust, fingerprints, and scuffs collect, the finish you pick directly affects how well it holds up and how easy it’s to clean.
Semi-gloss resists stains, wipes clean without streaking, and stands up to scrubbing better than flat.
If you want low maintenance and longevity, choose a harder, glossier finish for high-traffic areas or near kitchens and hallways.
How molding material (wood, MDF, polyurethane) changes the recommendation
When choosing a finish, consider the molding material—wood, MDF, and polyurethane all absorb paint and wear differently, so the best choice depends on what you’re starting with and where the trim will be used.
You’ll pick semi-gloss for durable, moisture-prone areas and for painted polyurethane; wood can handle either depending on stain or paint prep.
MDF often benefits from semi-gloss to resist swelling and scuffs.
Basic Understanding of Paint Sheens
When choosing a finish for crown molding, you’ll want to know how common sheens—flat, eggshell, satin, semi-gloss, and high-gloss—look and perform.
Each sheen has pros and cons for trim: flatter sheens hide imperfections but aren’t durable, while glossier sheens stand up to cleaning and highlight details but show flaws.
Knowing those trade-offs helps you pick the right balance of appearance and practicality for your molding.
Common sheens explained: Flat, Eggshell, Satin, Semi-Gloss, High-Gloss
Five common paint sheens—flat, eggshell, satin, semi-gloss, and high-gloss—let you balance durability, washability, and appearance so you can pick the right finish for crown molding and the room it anchors. You’ll see subtle to shiny surfaces, increasing cleanability and highlight. Choose based on traffic, light, and desired sheen contrast.
| Sheen | Character |
|---|---|
| Flat | Matte |
| Eggshell | Low luster |
| Satin | Soft sheen |
| Semi-Gloss | Durable shine |
| High-Gloss | Reflective finish |
Pros and cons of each sheen for trim applications
Now that you know the basic characteristics of flat, eggshell, satin, semi-gloss, and high-gloss, you can weigh how each sheen performs on trim: some finishes hide imperfections but lack washability, while others stand up to scrubbing and show every brushstroke.
Choose flat for low-traffic, eggshell or satin for subtle durability, semi-gloss for easy cleaning, and high-gloss for dramatic, highly durable highlights.
Primary Recommendation and Nuances
You’ll usually choose semi-gloss for crown molding because it highlights profiles and wipes clean easily in high-traffic rooms.
In low-traffic or historically sensitive spaces, flat or low-sheen can work if you’re okay trading durability for a subtler look.
Balance aesthetics and practicality by matching sheen to room use—use harder finishes where scuffs matter and softer sheens where appearance matters more than maintenance.
When to use Semi-Gloss for crown molding
Although semi-gloss can draw attention to imperfections if applied over poorly prepped surfaces, it’s the best choice for most crown molding because it highlights detail, resists scuffs, and’s easy to clean.
Use semi-gloss in high-traffic rooms, kitchens, bathrooms, and entryways where durability and wipeability matter.
Choose it when you want crisp shadow lines and a subtle reflective pop without being flashy.
When Flat or Low-Sheen might be acceptable
Semi-gloss works great for durability and detail, but there are times when flat or low-sheen makes more sense: choose them when you want crown molding to recede visually so walls and artwork take center stage, or when the molding has surface imperfections you’d rather hide than highlight.
Use flat in low-traffic rooms or historic spaces for a softer, period-appropriate look that minimizes glare.
Balancing aesthetics vs practicality in different rooms
When deciding on a finish, think about how each room will be used and what you want the molding to do visually: choose semi-gloss or gloss for high-traffic, moisture-prone, or detail-oriented spaces like kitchens and bathrooms where durability and easy cleaning matter.
Opt for satin or eggshell in living areas and bedrooms for a softer look with reasonable wipeability. You’ll balance shine to match décor, maintenance, and light.
Step-by-Step Guide to Choosing and Applying Finish
Start by evaluating the room—look at light, style, and traffic—to determine the durability and sheen you’ll need.
Check the molding’s material and condition, then choose between latex or oil-based paint and the appropriate sheen.
Prepare the surface with sanding, caulking, and primer, and pick the best application method (brush, roller, or sprayer) for a smooth trim finish.
Step 1: Assess the room (light, style, traffic)
Before you pick a paint finish, take a close look at the room’s light, style, and foot traffic—these factors determine both appearance and durability.
You’ll match sheen to brightness, room formality, and how often walls get touched. Consider cleaning needs and contrast with trim.
- Natural vs artificial light
- Formal or casual style
- High or low traffic
- Color contrast goals
- Maintenance frequency
Step 2: Identify molding material and condition
If you want a finish that lasts and looks right, identify what your crown molding is made of and note any damage or wear.
Check whether it’s solid wood, MDF, polyurethane, or plaster. Look for cracks, dents, water stains, gaps, or loose joints.
Document repairs needed and surface texture—smooth, grainy, or porous—so you can prep correctly before painting.
Step 3: Select appropriate sheen and paint type (latex vs oil-based)
When choosing a sheen and paint type, consider how the room’s lighting, traffic, and the molding’s condition will affect appearance and durability.
Pick semi-gloss for trim that needs wiping and highlights profiles; choose flat or low-sheen for subtle, low-reflective looks in low-traffic rooms.
Prefer modern water-based latex for easy cleanup and flexibility; use oil-based for extreme durability on high-wear surfaces.
Step 4: Surface preparation (sanding, caulking, priming)
Step 4 covers the three prepping actions that make paint stick and look professional: sanding for smoothness, caulking for seamless joints, and priming for adhesion and stain blocking.
You’ll sand lightly with fine-grit paper, remove dust, fill gaps with paintable caulk, smooth beads with a wet finger, then apply a compatible primer to bare wood or patched areas so your chosen sheen performs evenly and resists stains.
Step 5: Application technique for a smooth trim finish (brush vs roller vs sprayer)
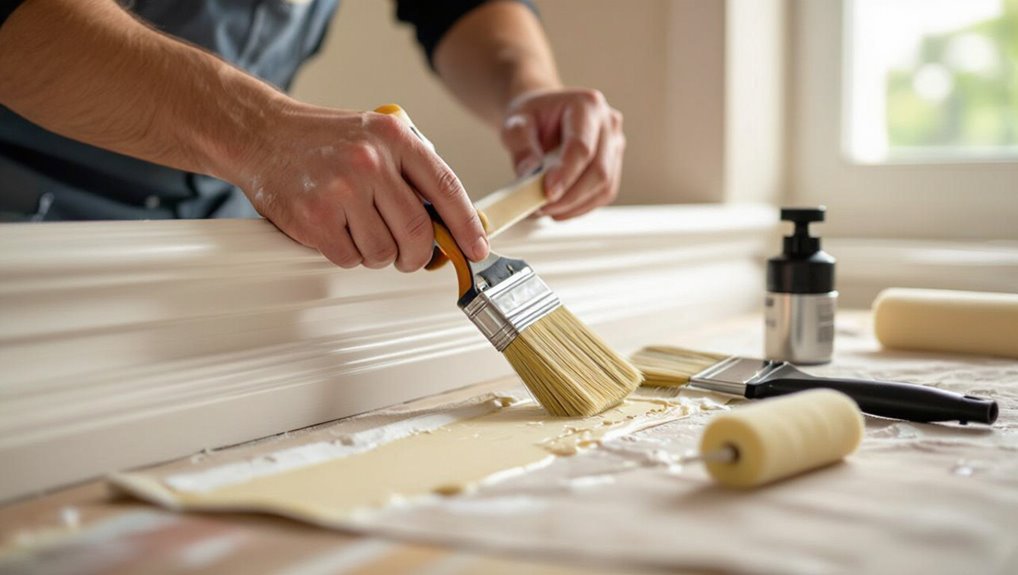
Although choosing the right application method can feel technical, you’ll usually pick between a brush, a small roller, or a sprayer based on the trim profile, paint type, and desired finish; each tool has trade-offs in speed, control, and surface smoothness.
Use a high-quality angled brush for detail, a dense foam mini-roller for flat faces, and a HVLP sprayer for ultra-smooth, fast coverage.
Step 6: Drying, recoating times, and touch-up tips
6. Let paint dry per manufacturer—usually 1–2 hours for touch, 4–6 for recoat with water-based; oil-based needs longer.
Keep temperatures steady and humidity low to avoid tackiness. Lightly sand between coats for adhesion, remove dust, then recoat.
For touch-ups, feather edges, match sheen, and clean brushes promptly.
Test final cure before gentle cleaning or heavy use.
Comparison: Semi-Gloss vs Flat for Crown Molding
When you look at crown molding under different lighting, semi-gloss shows highlights and imperfections while flat hides flaws but appears more muted.
You’ll also notice semi-gloss stands up better to cleaning and scuffs, whereas flat will need gentler care.
Finally, semi-gloss may cost a bit more upfront but usually means less frequent repainting compared with flat.
Visual comparison (appearance under different lighting)
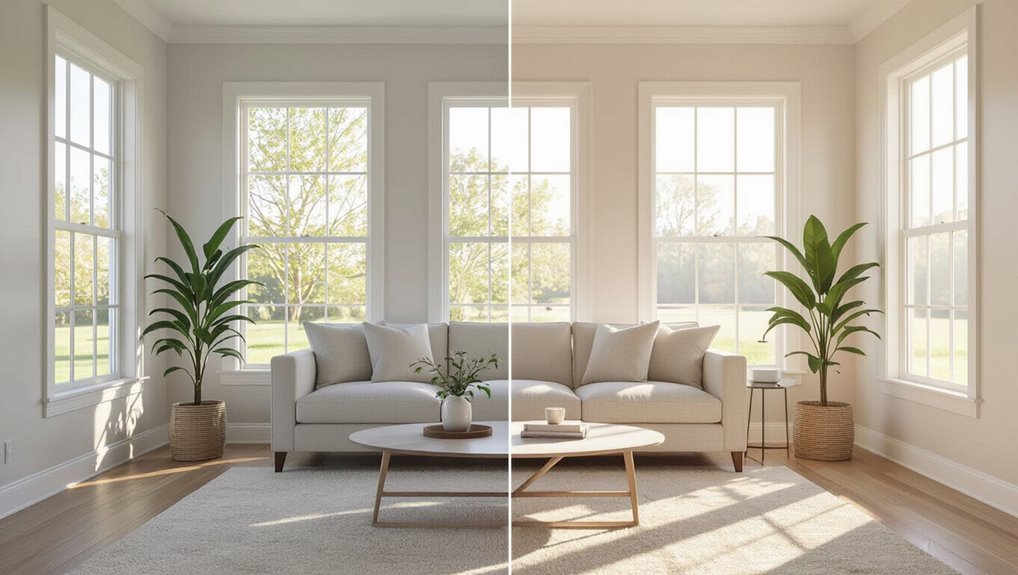
If you stand in a room at different times of day, you’ll notice how semi-gloss crown molding picks up and reflects light, showing highlights and any surface imperfections, while flat paint gives a softer, more even look that hides minor flaws but absorbs light so details read less sharply.
You’ll see semi-gloss create crisp outlines and contrast; flat offers muted, uniform shifts that suit subtle, low-key rooms.
Durability and maintenance comparison
Because crown molding sits at the junction of wall and ceiling where dust, fingerprints, and occasional bumps accumulate, you’ll want a finish that stands up to cleaning and wear. Semi-gloss resists scuffs and wipes clean; flat hides imperfections but stains. Choose based on traffic and cleaning habits.
| Finish | Cleanability | Scratch Resistance |
|---|---|---|
| Semi-gloss | High | High |
| Flat | Low | Low |
| Satin | Medium | Medium |
Cost and repaint frequency comparison
Although semi-gloss costs a bit more up front, it usually saves you money over time because it holds up to cleaning and needs repainting less often than flat.
You’ll spend less on touch-ups and labor with semi-gloss, especially in high-traffic rooms.
Flat hides imperfections but demands more frequent repainting, increasing long-term material and time costs compared with semi-gloss.
Common Mistakes and How to Avoid Them
Don’t pick a sheen just because it’s trendy—you’ll regret it when it clashes with your room’s lighting or durability needs.
Always prime and prep the molding properly, and use the right brush and stroke to avoid brush marks or drips.
Finally, check how the trim sheen pairs with your wall paint so you don’t accidentally create an awkward contrast.
Mistake: Choosing sheen based only on trend
When you pick a sheen just because it’s trendy, you risk a finish that clashes with the room’s lighting, maintenance needs, or architectural style.
Don’t follow fashions blindly. Consider traffic, dust visibility, and trim detail before choosing flat or semi-gloss.
Test samples under real light, finger-test for wipeability, and match sheen to era and room function so the molding lasts and looks intentional.
Mistake: Skipping primer or improper surface prep
Picking the right sheen matters, but paint won’t perform if you skip primer or prep the surface poorly.
You’ll get poor adhesion, visible stains, and uneven finish if you ignore cleaning, sanding, or filling gaps. Always remove dust and grease, repair nicks, sand lightly, and apply a suitable primer for your substrate.
Proper prep saves time and guarantees a durable, smooth trim finish.
Mistake: Using wrong brush or technique for trim
Choose the right brush and technique, and you’ll avoid visible brush marks, drips, and uneven coverage on your crown molding.
Use a high-quality angled sash brush for crisp edges and a small foam brush for touch-ups.
Load paint sparingly, maintain a wet edge, and smooth long strokes away from corners.
Clean strokes and patience prevent drips and uneven texture.
Mistake: Mismatching sheen with wall paint unintentionally
Even with the right brush and steady strokes, you can undo a clean paint job by picking a trim sheen that clashes with your wall finish.
If you choose a high-gloss trim against a matte wall, it screams contrast; a flat trim beside satin walls looks dull.
Match or complement sheens, test small sections, and view in different light to confirm harmony before committing.
Best Practices and Professional Tips
You’ll want to choose a trim sheen that fits your style—glossy for traditional elegance or a subtler finish for modern rooms—and think about how the trim blends with both wall and ceiling colors.
Keep a simple maintenance routine (regular dusting, occasional touch-ups) to preserve that freshly painted look.
If the molding is intricate, the room is large, or you want flawless seams and crisp lines, hire a professional painter.
Matching trim sheen to overall design style (traditional vs modern)
When you’re aiming for a cohesive look, the sheen of your crown molding should echo the room’s overall style: higher sheens like semi-gloss or gloss read as crisp and traditional, while lower sheens such as satin or eggshell feel softer and more contemporary.
Choose semi-gloss for formal, ornate profiles; pick satin or eggshell for clean, minimalist lines.
Match finish to period and furnishings.
Blending trim with wall colors and ceilings
1 simple rule makes blending trim with wall colors and ceilings easier: pick a finish and tone strategy that either lets the trim recede, subtly contrast, or deliberately pop against surrounding surfaces.
Choose flat or low-sheen for trim to disappear with matte walls, or semi-gloss to highlight contours.
Match undertones to walls and ceilings, test swatches in different light, and trust visual balance.
Maintenance routine to keep crown molding looking new
Because crown molding sits where dust, grease, and moisture collect, a short, regular maintenance routine will keep it looking fresh and prevent costly repairs later.
Wipe monthly with a soft microfiber cloth, use a mild detergent for greasy spots, and dry immediately.
Touch up chips with matching paint, inspect caulking annually, and address mold or peeling sooner to preserve finish and profile.
When to hire a professional painter
If you’re facing extensive damage, intricate profiles, or a large repaint that requires color matching and smooth, consistent coverage, hire a professional painter— they’ll bring the right tools, experience with primers and finishes, and techniques for crisp seams and even sheen that DIY efforts often can’t match.
You should also call a pro if you lack time, steady technique, or need flawless touch-ups for resale.
Material-Specific Recommendations
When choosing a finish, you’ll match sheen and prep to the material—use satin or semi-gloss on painted wood for durability and to show detail.
For MDF and factory-primed trim, use high-quality acrylic latex or enamel that bonds to primed surfaces and hides seams.
With polyurethane or PVC molding, pick a paint and primer formulated for plastics (or a stain-blocking bonding primer plus a 100% acrylic or enamel topcoat) to prevent peeling.
Wood crown molding: ideal sheens and finishes
Though wood has a natural warmth that you want to showcase, choosing the right paint sheen and finish will determine how that detail reads in your room.
Satin and semi-gloss are common choices for crown molding because they balance durability, light reflection, and flaw-masking, while higher glosses highlight profiles but reveal imperfections and flats can mute the wood’s character.
You’ll often prefer satin for subtlety and semi-gloss for easy cleaning.
MDF and primed trim: best paint choices
Wood crown moldings look different from MDF or factory-primed trim, so you’ll pick paint and sheen with the substrate in mind.
For MDF and primed trim, choose a durable, water-based enamel or acrylic latex. Use semi-gloss for easy cleaning and sharper details; satin works if you want less shine but still washable.
Confirm proper sanding and high-quality primer for smooth results.
Polyurethane and PVC molding: recommended paints and primers
Because polyurethane and PVC don’t absorb paint like natural wood, you should pick primers and paints formulated for non-porous plastics to guarantee adhesion and durability.
Use a high-quality bonding primer labeled for plastics, then apply a water-based acrylic or alkyd enamel for easy cleanup and toughness.
Avoid cheap latex; lightly scuff surfaces first. Finish with semi-gloss for easy cleaning and durability.
Real-World Scenarios and Solutions
When you’re choosing a finish, think about how the room is used: for high-traffic areas like kitchens and hallways, pick durable, washable finishes and slightly higher sheen to resist scuffs.
For formal rooms or ornate ceilings, go with a smoother, lower-sheen finish that highlights detail without glare.
In low-light or historic homes, choose softer, warmer sheens and colors that preserve period character while minimizing visible imperfections.
High-traffic rooms (kitchen, hallway): recommended approach
If you want crown molding in high-traffic areas like kitchens and hallways to stay looking good, choose a durable, washable finish and keep detailing practical—semi-gloss or satin paints resist scuffs and wipe clean without showing every fingerprint.
Use a slightly darker trim color than the wall to hide wear, seal edges with quality primer, and clean gently to maintain sheen.
Formal rooms and ceilings with ornate molding: recommended approach
High-traffic rooms benefit from durable, easy-to-clean finishes, but formal spaces with ornate molding call for a different touch: pick a paint that highlights detail without overwhelming it.
Use semi-gloss on moldings to catch light and reveal profiles, then choose an eggshell or satin ceiling to balance sheen.
Keep trims crisp with careful brushwork and thin, even coats for a refined, elegant finish.
Low-light or historic homes: recommended approach
Because low natural light and older architectural details change how paint reads, you’ll want finishes that lift shadowed rooms without erasing historic character.
Choose a soft satin or low-sheen semi-gloss on crown molding to reflect light subtly, reveal profile details, and resist scuffs.
Pair with warm, slightly lighter trim tones than walls to keep proportions balanced and period-appropriate.
Frequently Asked Questions
You’ll find answers to common concerns about sheens—like whether semi-gloss is only for crown molding or can go on ceilings, and if it highlights brush strokes more than flat.
We’ll also cover whether satin is a good middle ground, how to touch up scuffs on semi-gloss without obvious patches, and if trim and baseboards should match.
Read on for straightforward, practical guidance you can use.
Can I use semi-gloss on ceilings or only on crown molding?
Can you use semi-gloss on ceilings, or should it be reserved just for crown molding?
You can use semi-gloss on ceilings, especially in kitchens, bathrooms, or low ceilings where durability and cleanability matter.
It reflects more light, so it can highlight imperfections and make rooms feel brighter.
Choose based on maintenance needs and the look you want, not just tradition.
Will semi-gloss show brush strokes more than flat?
Will semi-gloss show brush strokes more than flat? Yes, higher-sheen finishes like semi-gloss highlight surface irregularities, so brush marks can be more visible.
You can minimize visibility by sanding between coats, using a high-quality brush or foam roller, applying thin even coats, and thinning slightly if needed.
Proper primer and technique reduce brush stroke appearance on crown molding.
Is satin an acceptable compromise between flat and semi-gloss?
If semi-gloss shows brush strokes more than flat, satin often sits comfortably between them: it gives a soft sheen that hides minor imperfections better than semi-gloss while offering more washability and durability than flat.
You can use satin on crown molding when you want subtle reflectivity, easier cleaning, and less highlight of flaws—especially in living areas where a balanced look matters.
How do I touch up scuffs on semi-gloss trim without it showing?
Wondering how to fix scuffs on semi-gloss trim so repairs disappear?
Clean area with mild detergent, sand tiny burrs lightly, then wipe with a tack cloth.
Use matching semi-gloss paint, applied sparingly with a fine brush or feathered touch, blending into edges.
For larger gouges, spot-prime first.
Let dry fully and compare in different light to confirm seamless results.
Should trim and baseboards always match in sheen?
After you’ve blended scuffs into semi-gloss trim, you might wonder whether your baseboards should share the same sheen. They don’t have to, but matching creates cohesion and simplifies touch-ups.
Use semi-gloss for high-traffic areas for durability and flat or satin on walls to minimize reflection.
If you mix sheens, keep shifts intentional and consistent within connected rooms.