What Do Moisture Meter Readings Mean and How to Use Them Correctly
A moisture meter tells you how wet a material is so you can spot leaks, decay, or unsuitable conditions for finishing. Choose the right meter (pin for spot checks, pinless for scans, hygrometer for air), calibrate it, and log several readings across a grid. Compare values to material-specific ranges—wood, drywall, concrete differ—and factor in temperature and coatings. If results look odd, probe deeper or call a pro; keep going to get practical tips and examples.
What Moisture Meter Readings Mean Quick Answer
You’ll typically see readings as percentages or on a scale, and “normal” varies by material and species—wood often has safe ranges around 6–12% while elevated or dangerous levels are much higher.
Treat readings above the expected range as elevated and investigate for leaks or rot; readings in the danger zone mean immediate action.
Remember pin meters measure electrical resistance and give spot values, while pinless meters use radar-like sensing for broader, noninvasive readings.
Direct answer: Interpreting common reading ranges (percentages, scales, species-specific values)
When you check a moisture meter, read ranges as shorthand: percentages usually show wood or material moisture content (MC%).
To interpret what do moisture meter readings mean, note general bands: low percentages = dry, mid-range = conditioned or acceptable for specific species, higher percentages approach green or wet wood.
Pin and pinless scales differ; species tables adjust target MC% for accurate decisions.
When a reading indicates normal, elevated, or dangerous moisture levels
Now that you know how meter scales and species tables shape readings, consider what those numbers actually signal about risk.
Typically, low readings mean dry, safe conditions; moderate readings warn of elevated moisture and possible future problems; high readings indicate dangerous wetness, active rot, or mold risk.
You should compare readings to material-specific thresholds, document locations, and act—dry, ventilate, or repair—accordingly.
How reading types differ between pin and pinless meters
Although both pin and pinless moisture meters measure moisture, they do it differently and give you different kinds of readings:
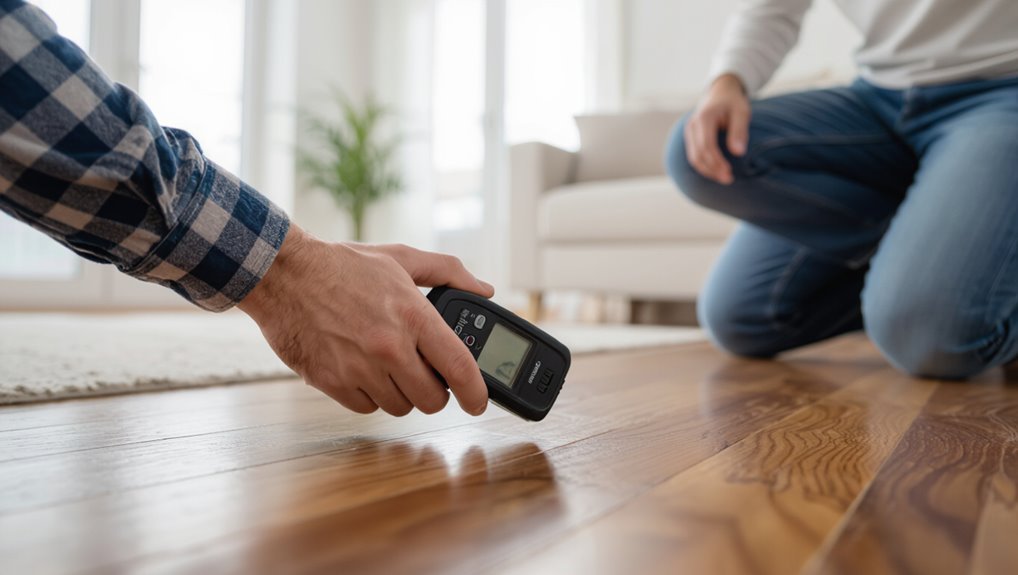
Pin meters show localized, percentage-based readings from inserted probes, ideal for spot checks and depth-specific moisture.
Pinless meters scan a surface area and display relative or calibrated values, letting you quickly map moisture patterns without damaging material.
Choose based on precision versus coverage.
Basic Understanding What Is a Moisture Meter and Why It Matters
You’ll learn that moisture meters come in pin, pinless, and hygrometer types, each measuring moisture differently for materials like wood, drywall, concrete, soil, and insulation.
Readings show either percent moisture content or relative moisture, and many meters include built-in scales calibrated for specific materials.
Knowing which type and scale to use helps you get accurate, actionable results.
How moisture meters work: pin vs pinless vs hygrometer
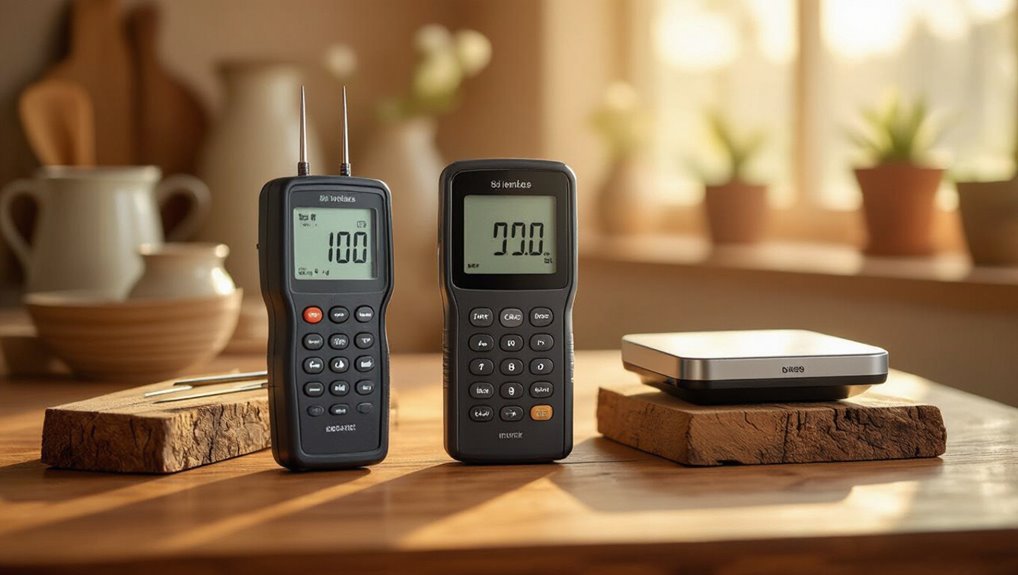
When you need to measure moisture in wood, drywall, or concrete, three main meter types handle the job differently:
- Pin meters measure electrical resistance by contacting the material.
- Pinless meters scan moisture noninvasively with electromagnetic signals.
- Hygrometers read the air’s relative humidity to infer drying conditions.
You choose pin for deep, localized checks, pinless for quick surface scans, and hygrometers for ambient monitoring.
Units and scales: % moisture content, relative moisture, built-in scales for materials
Because different meters and materials demand different interpretations, you’ll see moisture reported in a few common ways: percent moisture content (%MC), relative moisture or moisture equivalent (a comparative scale often used by pinless meters), and manufacturer-specific built-in scales calibrated for particular materials like wood species or drywall. You’ll learn to read %MC as absolute, relative as comparative, and built scales as material-specific.
| Unit | Meaning | When used |
|---|---|---|
| %MC | Absolute moisture by weight | Pin meters |
| Relative | Comparative index | Pinless meters |
| Built scale | Material-calibrated reading | Manufacturer tables |
Typical materials tested: wood, drywall, concrete, soil, insulation
Different materials demand different meter types and interpretations, so you’ll want to match the tool to what you’re testing: wood commonly uses pin meters reporting %MC or species-calibrated scales; drywall and other gypsum boards are often measured with pinless or relative scales to spot wet spots without surface damage; concrete needs concrete-specific probes or moisture meters that read regarding moisture content or relative humidity equivalents;
soil measurements use specialized probes for volumetric moisture or relative indices; and insulation is typically assessed indirectly—by checking surrounding materials and using non-invasive pinless scans to find damp zones.
You’ll interpret readings based on material-specific thresholds, calibration, and moisture sources to decide remediation or further testing.
How to Use a Moisture Meter Correctly
Before you start, pick the right meter and calibrate it so readings are reliable.
Inspect the surface and mark test locations, then set the meter’s mode, species, and probe depth.
Use consistent technique for pin meters (steady pressure, correct pin spacing) or pinless meters (full contact, overlapping scans) to get comparable results.
Preparation: selecting the right meter and calibrating
When you’re preparing to measure moisture, pick a meter that fits the material and the job—pin meters for dense lumber and plaster, pinless for finished surfaces and quick scans—and make sure you calibrate it to a known reference or the manufacturer’s instructions before you start.
Calibrate, verify, and prepare:
- Confirm material type and depth
- Check battery and probes
- Use calibration block or wet/dry reference
- Set correct mode/unit
- Note baseline reading for comparison
Step 1 Surface inspection and identifying test locations
Start by visually scanning the area and tapping suspect spots so you can spot soft, discolored, or warped sections that likely hold moisture; these cues help you choose test locations that represent both problem areas and nearby controls for comparison.
- Check along baseboards and near plumbing
- Inspect ceilings under rooflines
- Compare stained vs. unstained zones
- Note recent spills or leaks
- Mark spots for repeat readings
Step 2 Meter setup: mode, species setting, probe depth
Now that you’ve marked suspect and control spots, set up the meter so its readings will be meaningful.
Choose the correct mode (pin or pinless) for the material. Select the species or material setting to calibrate for density differences.
For pin meters, insert probes to the recommended depth; for pinless, guarantee sensor contact and consistent pressure.
Verify zero or calibration before testing.
Step 3 Taking consistent readings: technique for pin meters
1. Position pins squarely into the material, spacing them consistently. Press firmly until pins contact internal tissue but avoid overdriving.
Take multiple readings across a grid pattern, noting depth and location for each. Remove debris from pins between measurements and recalibrate if readings shift.
Record averages and anomalies; repeat suspect spots. Consistency in pressure, spacing, and pattern yields reliable pin-meter data.
Step 4 Taking consistent readings: technique for pinless meters
While pinless meters scan surface and near-surface moisture without piercing the material, you’ll still need a consistent approach to get reliable readings: hold the sensor flat and steady, maintain the same contact time for each measurement, and use a fixed grid pattern so location and depth are comparable.
Keep the device perpendicular, avoid tilting, press evenly, wait the meter’s settle time, and repeat each spot twice.
Step 5 Recording and mapping readings for analysis
Step 5 focuses on recording and mapping your readings so you can spot patterns and compare areas over time; use a consistent grid or labeled plan, note meter type, depth setting, date/time, and environmental conditions, and record each spot twice to confirm accuracy.
- mark grid coordinates on your plan
- log meter model and settings
- timestamp each entry
- note temperature/humidity
- repeat readings for consistency
Understanding Readings by Material and Context
You’ll interpret moisture readings differently depending on the material—wood has species- and thickness-specific acceptable MC ranges, while drywall, plaster, concrete, and masonry each have their own thresholds and surface vs. internal moisture distinctions.
For soil and gardening you’ll look for moisture bands that support plant health, and for finished surfaces you’ll account for coatings that can skew meter accuracy.
Keep those context-specific limits and influences in mind so you can compare readings to the right benchmarks.
Wood: acceptable MC ranges, how species and thickness affect readings
Because wood species and thickness change how moisture moves and balances, acceptable moisture-content (MC) ranges aren’t one-size-fits-all. You should target 6–12% for interior hardwoods, 9–14% for softwoods, and allow slightly higher for thick stock; check core depth, not just surface.
| Material | Typical MC |
|---|---|
| Hardwood | 6–12% |
| Softwood | 9–14% |
| Thick stock | +2–3% allowance |
Drywall and plaster: what elevated readings mean and thresholds
When drywall or plaster registers elevated moisture readings, treat those numbers as flags that call for context: compare them to ambient RH and substrate type, verify whether the meter hit surface efflorescence or deeper dampness, and check for visible signs like staining, soft spots, or mold.
Generally, readings above manufacturer-recommended baselines (often ~1–2% above dry reading) or persistent increases signal investigation and remediation.
Concrete and masonry: surface vs internal moisture interpretation
Concrete and masonry demand a different reading approach than wood or drywall, because surface measurements can mask deeper moisture that will persist or recur.
You should use invasive probes or long‑wave sensors for internal moisture, compare surface and core readings, and note ambient humidity and recent wetting events.
Interpret results against material porosity and drying time; shallow low readings don’t guarantee dry structure.
Soil and gardening: moisture levels for plant health
Shifting from hard building materials to living soil, you’ll find moisture readings serve a different purpose: they guide plant health rather than structural integrity.
Use meters to check root-zone moisture, not surface dampness. Match readings to species-specific ranges, avoid overwatering when values stay high, and irrigate when readings drop below recommended thresholds.
Calibrate for soil type and take multiple spot checks for accuracy.
Building materials and finishes: how coatings affect meter accuracy
If you rely on a moisture meter to judge building materials, remember that surface coatings and finishes can mask true moisture content beneath them.
Paint, varnish, sealers and adhesives alter surface conductivity and depth sensitivity, causing false lows or erratic spikes.
Remove or test through thin spots, use pin-type probes for core readings, and cross-check with humidity sensors or invasive sampling for confirmation.
Common Scenarios and How to Interpret Results (Case-based)
When you map readings to spot patterns, you’ll spot hidden leaks by clusters of elevated values.
Before painting or laying flooring, check that moisture falls within the material-specific acceptable range to avoid failures.
After floods or when troubleshooting HVAC condensation, use sequential readings and humidity-linked meters to confirm safe drying and diagnose moisture sources.
Detecting hidden leaks: patterns to look for in mapped readings
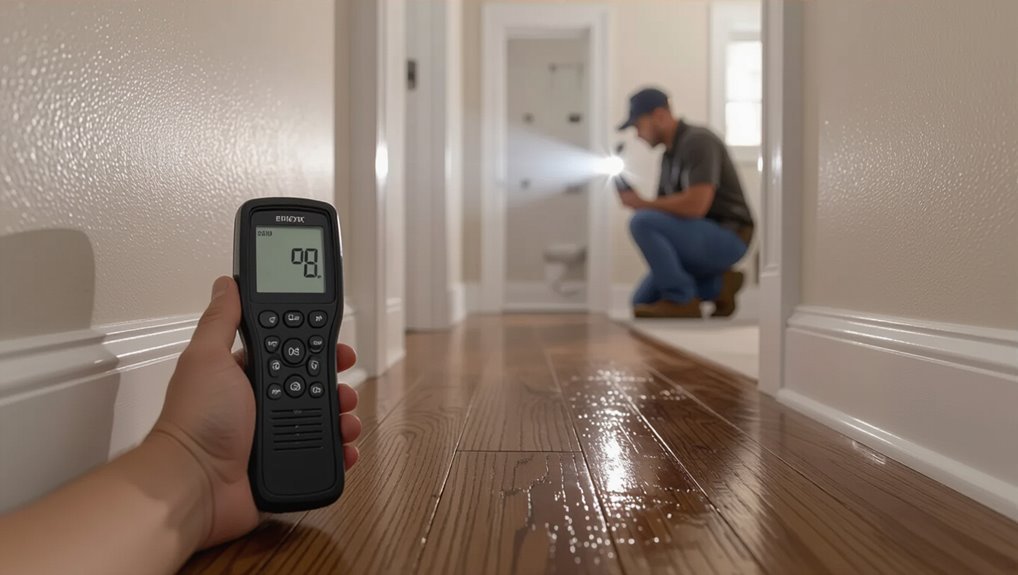
Because hidden leaks often leave subtle, repeatable signatures on moisture maps, you’ll learn to spot them by recognizing consistent gradients, isolated hotspots, and anomalous patterns that don’t match known wet sources like sinks or exterior walls.
Trace readings outward from hotspots, compare adjacent materials, repeat measurements over time, and correlate with plumbing lines or roof penetrations to confirm a concealed leak.
Pre-paint or flooring checks: acceptable moisture criteria
1 clear rule will save you time and drywall: confirm substrate moisture falls within the material manufacturer’s specified limits before you paint or lay flooring.
Use the meter type recommended for the substrate, take multiple readings across the area, and compare to manufacturer tolerances.
If readings exceed limits, delay installation, dry to target levels, and recheck; proceed only when all spots comply.
Post-flood drying verification: what readings signal safe restoration
If you’ve just finished drying a flooded space, you’ll need clear moisture targets to decide if restoration is safe. This section lays out common scenarios, the meter types to use, and how to interpret readings so you can make practical go/no-go decisions.
Check surface and in-depth readings: wood ≤12–16% depending on species, drywall backer near ambient, concrete moisture mapping with relative humidity probes under slabs; recheck 24–48 hours.
HVAC and condensation issues: using meters with humidity data
Once you’ve confirmed materials are dry, turn attention to HVAC-driven moisture and condensation, since systems can recontaminate a space if humidity control’s off.
Use meters that log relative humidity and dew point alongside moisture content. Compare surface and ambient readings to spot cold spots where condensation forms.
If RH nears dew point at surfaces, adjust HVAC, increase airflow, or add dehumidification to prevent recurring damp and mold.
Comparison: Pin vs Pinless vs Hygrometer
You’ll want to weigh the strengths and limitations of pin, pinless, and hygrometer devices to pick the right tool for each job.
Consider pin meters for spot checks and wall penetration, pinless for fast surface scans, and hygrometers for accurate ambient and equilibrium readings.
Often the best approach is to combine tools—use pinless to screen, pins to confirm, and hygrometers to verify long-term moisture levels.
Strengths and limitations of each type
Although each moisture-measurement method gives useful information, their strengths and limits differ enough that you’ll choose one over another depending on the material, accuracy needed, and whether the test can be destructive. You’ll weigh pin (accurate, invasive), pinless (non-destructive, shallow), and hygrometer (true moisture content, slower).
| Pin | Pinless | Hygrometer |
|---|---|---|
| Accurate | Non-invasive | Lab-grade |
| Invasive | Surface-limited | Time-consuming |
Best use-cases for each device
When choosing between pin, pinless, and hygrometer meters, think about the material, the level of precision you need, and whether you can damage the sample.
Pin meters work best when you need spot-accurate readings in penetrable materials.
Pinless meters are ideal for quick, non‑destructive scans of surface or near‑surface moisture.
Hygrometers are the right choice when you need true, lab-grade moisture content for whole‑air or sealed‑sample measurements.
- Pin: localized, high precision
- Pinless: fast scans, non‑destructive
- Hygrometer: air/sealed-sample accuracy
- Woodworking: pins for core checks
- HVAC/dehumidification: hygrometers for control
Combining tools for accurate diagnosis
Because each meter measures moisture differently, combining a pin, a pinless, and a hygrometer gives you a more reliable diagnosis than relying on one tool alone: use a pin meter for depth and pinpointing, a pinless for quick surface scans without damage, and a hygrometer to track ambient RH and dew point.
Cross-check readings to confirm hotspots, hidden moisture, and drying progress.
Common Mistakes and Misinterpretations
Watch where and how you measure—surface contamination or the wrong spot can give false highs, and coatings or salts will skew readings.
Don’t ignore material-specific settings or confuse relative and absolute scales, and avoid trusting a single reading instead of mapping trends.
Also account for environmental factors like temperature that can alter results so you can interpret moisture correctly.
Measuring on the wrong spot or surface contamination
If you place the meter on a visible high spot or on dusty, painted, or soiled areas, you’ll get readings that don’t represent the material’s true moisture content; always clean the surface and test multiple locations, including low and sheltered spots, to avoid misleading results.
Also avoid grout lines, fasteners, and gloss finishes that skew contact meters; mark tested areas and retest after cleaning.
Ignoring material-specific calibration and settings
Cleaning and testing multiple spots helps, but you’ll still get wrong readings if the meter isn’t set for the material you’re measuring.
Always choose the correct calibration/profile for wood, concrete, drywall, or masonry. Don’t assume one setting fits all—density and conductivity differences change results.
Verify manufacturer-recommended settings, adjust for species or mix, and recheck after changing materials.
Misreading scale types (relative vs absolute)
When you grab a moisture meter, remember it may report either a relative percentage or an absolute moisture content, and mixing those up will skew every decision you make.
Check the meter’s scale and manual so you know which it gives. Relative readings depend on wood species and conditions; absolute values are mass-based.
Don’t assume interchangeability—apply the correct interpretation and thresholds.
Over-reliance on single readings instead of mapping/trends
Knowing whether your meter shows relative or absolute moisture is only the start; relying on a single spot reading will still mislead you.
You should map multiple points, note patterns, and retest over time to spot trends. That approach reveals moisture distribution, identifies hotspots, and reduces false conclusions from anomalies.
Document readings and locations so decisions rest on trends, not one value.
Environmental factors that skew results (temperature, salts, coatings)
Although your meter gives a number, environmental factors like temperature, salts, and surface coatings can shift that number enough to mislead you if you don’t account for them.
You should calibrate or compensate for temperature, recognize salt contamination raises apparent moisture, and remove or note coatings that block contact.
Always cross-check with multiple spots and methods to avoid false positives or negatives.
Prevention, Best Practices, and Tips for Reliable Readings
You should start by setting up regular calibration and verification routines so your meter stays accurate.
Establish baseline readings with reference samples and use a clear measurement protocol for inspections to guarantee consistency.
Call a professional or send samples to a lab when results are critical, inconsistent, or suggest hidden moisture.
Calibration and verification routines
Because a meter’s accuracy can drift with time and use, regularly calibrating and verifying your moisture meter is essential to getting reliable readings.
You should:
- Check calibration against manufacturer standards.
- Use a stable reference block or solution.
- Verify before critical jobs and after drops.
- Log calibration dates and results.
- Recalibrate when temperature or battery changes might affect readings.
Establishing baseline readings and reference samples
After verifying and calibrating your meter, establish baseline readings and reference samples to give your measurements context and spot anomalies quickly.
Record dry, typical, and damp values for each material and location, noting temperature and conditions. Label and store reference samples for comparison.
Recheck baselines after environmental changes or seasonal shifts so you can distinguish true moisture issues from normal variation.
Creating a measurement protocol for inspections
When setting up a measurement protocol for inspections, define clear steps for who does what, which areas get checked, how often readings are taken, and how results are recorded so everyone follows the same process and you get comparable data.
Create templates, train staff, and schedule checks. Use consistent meter settings and note environmental conditions.
- Assigned inspector
- Sample locations
- Frequency/timing
- Meter model/settings
- Recording format
When to call a professional or use lab testing
If your moisture readings are inconsistent, unusually high for visible conditions, or you’re finding suspicious stains or odors, call a professional or consider lab testing to avoid missing hidden problems.
You should also seek help when readings persist after remediation, involve structural elements, or cover large areas.
Pros evaluate sources, use calibrated instruments, perform invasive probes, and send samples to labs for definitive analysis and remediation planning.
Tools, Accessories, and Recommended Features
When you’re choosing a moisture meter, consider useful accessories like extension probes, moisture pens, and infrared cameras to reach different materials and hard-to-access spots.
Look for key features—accuracy, sensing depth, species settings, and data logging—that match the jobs you’ll do.
Balance cost versus capability by picking entry-level meters for occasional checks and professional models when you need higher precision and advanced features.
Useful accessories: extension probes, moisture pens, infrared cameras
Although a basic meter tells you a lot, adding accessories like extension probes, moisture pens, and infrared cameras expands what you can inspect and how precisely you can locate moisture.
You’ll probe deep, scan surfaces, and mark hotspots quickly.
- Extension probes for hard-to-reach spots
- Moisture pens for pinpoint readings
- Infrared camera for thermal mapping
- Protective cases
- Replacement electrodes and batteries
Key features to look for when buying: accuracy, depth, species settings, data logging
Accessories extend what your meter can do, but choosing the right device matters just as much—accuracy, sensing depth, species settings, and data logging determine how useful readings are on-site and later.
You’ll want a meter with proven accuracy, adjustable probe depth for different materials, species-specific calibration for wood, and reliable logging or export options so you can track, compare, and verify measurements over time.
Cost vs capability: entry-level vs professional meters
Because budget and task scope shape what you need, choosing between an entry-level and a professional moisture meter comes down to where you’ll use it and how you’ll rely on the readings. You’ll want basic pin or pinless models for occasional checks; opt for calibrated, deeper-read, data-logging pro units for inspections and jobs.
| Type | Cost | Best use |
|---|---|---|
| Entry | Low | Occasional checks |
| Professional | High | Inspections, contracts |
FAQ
You’ll want clear answers to common concerns like accuracy, calibration frequency, and why two meters might disagree.
You’ll also ask whether meters can indicate mold risk, what moisture level is safe for hardwood installation, and how long to wait after drying before retesting.
Let’s address each question so you can trust your readings and next steps.
How accurate are moisture meters and how often should they be calibrated?
How accurate are moisture meters and how often should you calibrate them?
Accuracy varies by type: pin meters give localized readings; pinless read averaged zones. Expect ±1–3% for quality devices; cheap models can be less reliable.
Calibrate per manufacturer guidance, typically every 6–12 months, or after drops, heavy use, or suspect readings.
Verify with known-moisture samples regularly.
Can moisture meters detect mold risk or only moisture presence?
Can a moisture meter tell you whether a surface will grow mold, or does it only show moisture?
You get moisture presence, not a mold diagnosis. Meters measure water content or relative humidity; mold risk depends on moisture plus temperature, nutrients, ventilation, and exposure time.
Use meter data to identify wet areas, then inspect, dry, and remediate.
Consider lab testing or visual confirmation for active mold.
Why do two meters give different readings on the same spot?
Why do two meters disagree?
Because meters use different methods—pin meters measure electrical resistance between probes; non‑contact meters read moisture content via dielectric properties.
Surface conditions, material density, temperature, salts, and calibration settings also affect results.
You should know each meter’s operating principle, guarantee proper calibration, use consistent placement, and interpret readings relative to the tool used rather than expecting identical numbers.
What is the safe moisture content for installing hardwood floors?
Wondering what moisture levels are safe before you install hardwood floors?
You should aim for 6–9% MC for solid hardwood over concrete with a proper vapor barrier, or 6–12% for engineered wood, depending on species and local climate.
Subfloor and wood should be within 2–4% of each other.
Follow manufacturer specs; exceedances risk cupping, gapping, and failure.
How long after drying should I wait before retesting?
After you’ve dried the subfloor and brought wood down to the target moisture content, don’t rush to retest — materials need time to re‑equilibrate.
Wait 24–72 hours before retesting in stable indoor conditions; longer if humidity fluctuates.
Test in the same spots and use the same meter and method.
If readings stay consistent across two checks spaced a few days apart, you’re safe to proceed.