What Is the Difference Between Acrylic and Oil Paint? Full Comparison
You’ll pick acrylic when you want fast-drying, forgiving layers, easy clean-up, and lower starter costs; choose oil when you need long open time for smooth blending, rich glazing, and deeper impasto textures. Acrylics use water-based polymer binders and dry in minutes to hours, while oils use drying oils like linseed and cure over days to months. Each has different surface prep, tools, and safety needs, so keep going to uncover practical tips and trade-offs.
Which Suits Your Goals: Acrylic or Oil?
Wondering which medium fits your goals? You’ll weigh Acrylic advantages and Oil benefits against Artistic styles and Personal preferences.
Match Medium versatility to Project goals: choose quick-drying acrylics for fast layering and bold Color mixing, or slow-drying oils for richer blending and advanced Texture techniques.
Consider Budget considerations and Beginner tips—acrylics suit novices and tight budgets, while oils reward patience and longer workflows.
How Acrylic and Oil Paints Are Made
You’ll see that both acrylic and oil paints start with pigments mixed into binders, but the binders and production methods differ a lot.
You’ll also learn how manufacturers add solvents, stabilizers, and other additives or mediums to change drying time, texture, and handling.
Understanding these components and processes will help you choose the right paint for your technique.
Pigment And Binder
Pigments and binders are the two essential components that define how acrylic and oil paints behave, look, and age. You’ll compare pigment properties and pigment sources, plus binder types, binder functions and binder ratios. Understand pigment mixing, color consistency, and binder interactions so you can choose media confidently.
| Component | Role |
|---|---|
| Pigment properties | Color, opacity |
| Binder types | Film, adhesion |
| Pigment sources | Organic, inorganic |
| Binder interactions | Drying, flexibility |
Production Processes
Now that you’ve seen how pigments and binders shape paint behavior, it’s helpful to look at how those components are combined during manufacture.
You’ll learn production techniques: acrylic variations emulsify polymer resins for fast drying effects, while oil textures result from grinding pigments into drying oils.
Historical context informs methods, environmental conditions influence consistency, and makers tailor application methods to artist preferences.
Additives And Mediums
Although binders and pigments form the paint’s core, additives and mediums let manufacturers and artists fine-tune drying time, flow, gloss, and texture.
You choose Acrylic additives or Oil mediums to alter handling:
- Texture modifiers for body,
- Color enhancers for vibrancy,
- Flow agents for smooth application,
- Drying retarders to extend working time.
Key Chemical Differences: Binders and Solvents
You’ll notice acrylics use a water-based polymer binder while oils rely on drying oils like linseed that cure by oxidation.
You’ll also use water or mild solvents with acrylics versus turpentine or mineral spirits for oils, which affects drying time and handling.
Those binder and solvent choices shape long-term chemical stability and conservation concerns for each medium.
Binder Composition Differences
Because the binder is what holds pigment particles together and to the painting surface, understanding its chemistry is central to comparing acrylic and oil paints.
You’ll note distinct binder properties: polymers in acrylics versus drying oils in oils.
Consider binder flexibility, binder adhesion, and binder durability when choosing.
- Elasticity differences
- Surface bonding strength
- Long-term resilience
- Interaction with pigments
Solvent And Drying
When comparing solvents and drying, note that acrylics use water as their primary carrier while oils rely on organic solvents and the oxidative curing of drying oils; this difference shapes how you thin, clean, and speed up drying. You’ll choose solvent types and drying methods differently for each medium.
| Acrylics | Oils |
|---|---|
| Water | Mineral spirits |
| Fast skin-dry | Slow oxidative cure |
| Water cleanup | Solvent cleanup |
| Retarders | Drying agents |
Long-Term Chemical Stability
Although acrylics and oils both make durable paintings, their long-term chemical stability diverges because of different binders and solvents: acrylics use synthetic polymer emulsions that form a flexible, water-resistant film, while oils rely on drying oils that oxidize and cross-link into a harder, more brittle film over time.
You should weigh chemical durability and stability factors:
- Flexibility vs. brittleness
- UV and yellowing risk
- Solvent sensitivity
- Conservation needs
Drying Time: Acrylic vs Oil
If you need a quick turnaround, acrylics are the better choice because they dry by evaporation in minutes to hours, while oils cure through slow oxidation and can take days to months to become touch-dry.
You’ll notice acrylic drying yields fast drying, useful for rapid layering techniques and sharper texture differences, while oil drying’s slow drying favors subtle blending effects, richer finish variations and prolonged manipulation.
Working Time and Open Blending
Because acrylics skin over fast and oils stay wet much longer, you’ll have very different windows for open blending and adjustments.
You adjust working time with retarders or solvents; choose blending methods and drying techniques to control texture effects and layering impacts.
Consider application styles for color mixing.
- Acrylics: quick layers
- Oils: long wet edges
- Additives alter time
- Different texture outcomes
Color Vibrancy and Saturation
You’ll notice acrylics often look brighter straight from the tube because their binders dry clear and hold pigment tightly, while oils can appear richer and more luminous when layered.
Consider how each medium’s pigment concentration and binder affect immediate color intensity.
Also weigh long-term color stability—oils can yellow slightly over time, whereas acrylics tend to retain their original saturation.
Color Intensity Differences
While both acrylic and oil paints can produce vivid colors, they achieve and maintain that vibrancy differently: acrylics dry quickly and often appear slightly darker and more saturated when wet, while oils stay glossy and luminous longer, letting you build richer depth and subtle shifts in saturation as you blend.
You’ll notice differences in:
- pigment concentration and color mixing
- saturation levels and hue vibrancy
- transparency effects and layering capabilities
- brightness comparison, color depth, tonal richness and visual impact
Long-Term Color Stability
Having compared how acrylics and oils handle color intensity and blending, let’s look at how those differences hold up over time.
You’ll judge color retention by lightfast ratings and pigment stability; oils often deepen, acrylics resist yellowing.
Consider fading resistance, exposure effects and environmental factors.
For archival quality, weigh longevity comparison, varnishing and proper storage to maximize lifespan.
Pigment Behavior: Tinting Strength & Lightfastness
Because pigments determine both how strongly a color tints and how long it lasts, you should pay close attention to a pigment’s tinting strength and lightfastness when choosing between acrylic and oil paints.
Because pigments control tinting strength and longevity, always check pigment strength and ASTM lightfastness when choosing paints
Consider these points for a clear tinting strength and lightfastness comparison:
- Some pigments are stronger in oil.
- Acrylic binds can mute some dyes.
- Check ASTM lightfast ratings.
- Test mixtures for permanence.
Sheen Differences: Gloss, Matte, Satin
When you compare acrylic and oil paints, sheen is one of the most noticeable differences: oils often sit glossier on the surface, while acrylics can range from matte to high gloss depending on the medium or additive you use.
You’ll choose sheen types to control surface effects and light reflection; pick finish options deliberately to match mood, durability, and varnish needs.
Opacity and Transparency Compared
Although both acrylic and oil can produce translucent glazes or solid, opaque strokes, they handle opacity differently: oils naturally lay down more opaque due to their longer drying time and higher pigment loading, while acrylics let you choose opacity more deliberately through heavier body paints, thinned washes, or opaque fillers.
You’ll consider:
- opacity levels vs transparency effects
- paint application and light behavior
- medium compatibility and color mixing
- visual impact, layering techniques, artistic styles, creative expression
Layering and Glazing Techniques by Medium
If you want luminous depth, understand that layering and glazing work differently with acrylics and oils: oils let you build rich, translucent glazes and seamless wet-on-wet blends because they stay open longer, while acrylics demand faster, thinner glazes or intentionally textured layers since they dry quickly and can lock in each pass.
You’ll choose layering techniques and glazing techniques based on drying time, medium, and desired finish.
Imprimatura and Underpainting: Oils vs Acrylics
When you start an imprimatura, note that acrylics give you fast, even washes while oils let you build richer toned grounds that stay workable longer.
Your choice of underpainting will hinge on drying times: acrylics dry quickly so you can paint over them the same day, whereas oils demand patience and longer curing before glazing.
Think about how those timing differences affect your workflow and final surface.
Imprimatura Techniques Compared
Because imprimatura sets the tonal groundwork, you’ll want to understand how oil and acrylic approaches differ before you start an underpainting.
You’ll choose methods based on Surface preparation, Underpainting techniques, and desired effects. Acrylic layering favors fast builds; Oil glazing enables subtle Color mixing and rich depth.
Consider Texture building, Impasto effects, and Brush techniques.
- acrylic underlayers
- oil glazes
- controlled color mixing
- varied texture building
Underpainting Drying Times
1 key difference you’ll notice between oil and acrylic imprimatura is how long each layer takes to become touch-dry and ready for the next pass. You’ll choose underpainting techniques based on drying effects: acrylics dry fast, letting you glaze sooner; oils dry slowly, enabling extended blending but requiring patience.
| Medium | Typical Touch-Dry Time |
|---|---|
| Acrylic | Minutes–hours |
| Oil | Days–weeks |
Fat-Over-Lean Rule and Oil Compatibility
If you want your oil paintings to dry evenly and avoid cracking, follow the fat-over-lean rule: apply progressively fatter (more oil-rich) layers over leaner ones so each layer can flex as it ages.
You’ll manage oil absorption, drying techniques, medium interactions and avoid compatibility issues by controlling application techniques and surface effects.
Tips:
- Start lean
- Increase oil in fat layers
- Monitor drying
- Layer responsibly
Preventing Cracking in Acrylic Layers
To prevent cracking in acrylic layers, you’ll start with proper surface preparation so the paint bonds evenly and flexes with the support.
You’ll also control drying conditions—avoid rapid drying, extreme heat, or drafts that stress the film.
Together these steps greatly reduce the risk of crazing and flaking.
Proper Surface Preparation
When you’re preparing a surface for acrylics, make certain it’s clean, dry, and stable so the paint adheres evenly and won’t crack as it cures.
Use surface priming techniques and effective prep methods to guarantee longevity. Follow these steps:
- Clean dust and oils thoroughly
- Sand lightly for tooth
- Apply an even acrylic gesso
- Let primer fully cure before painting
Controlled Drying Conditions
Because acrylics dry from the outside in, controlling the environment prevents rapid surface skinning that can trap solvent and stress underlying layers.
So keep humidity steady, avoid direct drafts or heat sources, and work in thin, even layers to reduce cracking risk.
You should use controlled drying techniques like humidifiers, timed glazing, and isolation coats; monitor humidity effects and cure slowly to maintain film flexibility.
Texture and Impasto: Which Builds More Relief
How do acrylic and oil behave when you want real raised texture and heavy impasto?
You’ll find oils naturally hold peaks longer for classic impasto effects, while acrylics dry faster but can build relief with layering and tooth.
Consider these texture techniques:
- Oils retain buttery peaks
- Acrylics allow rapid layering
- Oils blend smoothly wet-on-wet
- Acrylics harden more quickly for quick reworking
Acrylic Mediums and Additives: Gels, Retarders, Extenders
Acrylic paints respond to additives in predictable ways, so you can tailor drying time, thickness, and finish with gels, retarders, and extenders. You’ll use gel mediums and texture additives for body, acrylic retarders for drying extensions, and extenders for glazing, enhancing color mixing, layering effects, and painting techniques through controlled medium application.
| Additive | Effect | Use |
|---|---|---|
| Gels | Increase body | Impasto |
| Retarders | Slow drying | Blending |
| Extenders | Thin without weakening | Glazing |
| Texture | Create relief | Surface work |
Oil Solvents and Mediums: Linseed, Turpentine, Alkyds
Switching from water-based additives to oil painting means you’ll work with solvents and mediums that change viscosity, drying time, and final sheen in different ways.
You’ll choose linseed oil for gloss and oil clarity, learn turpentine properties for thinning, and try alkyd mediums to speed drying.
Consider solvent types, medium viscosity, drying speeds, and painting techniques.
- linseed oil
- turpentine properties
- alkyd mediums
- solvent types
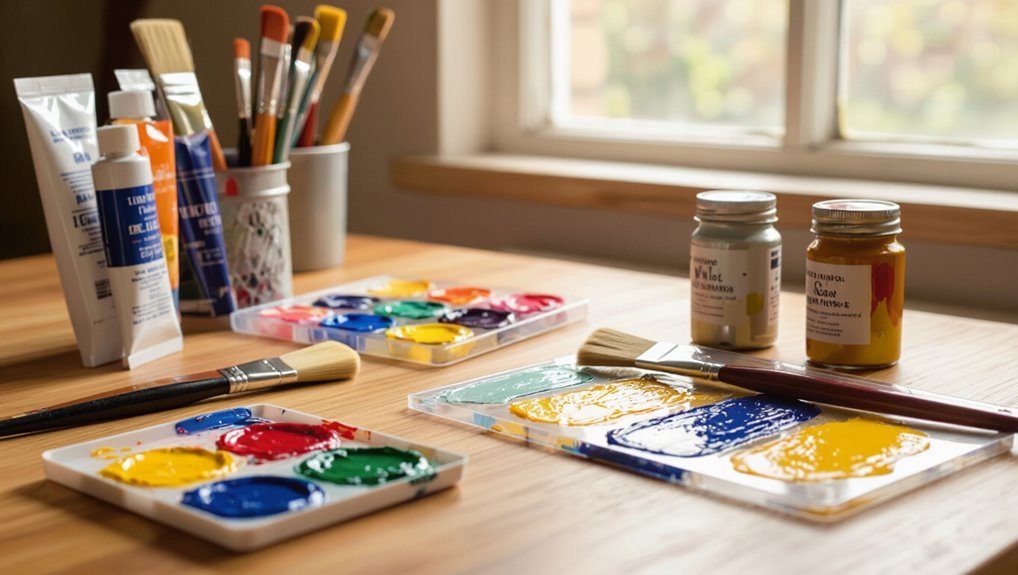
Brushes and Tools for Acrylics vs Oils
Because oil and acrylic paints behave so differently, you’ll need distinct brushes and tools for each to get the results you want.
Choose brush types and brush shapes suited to medium—synthetic for acrylics, natural or hog for oils. Prioritize ergonomic brushes for comfort.
Match brushes to your medium—synthetics for acrylics, natural or hog bristles for oils—and choose ergonomic handles for comfort.
Use palette knives and specialty tools for texture.
Learn proper tool selection, cleaning techniques, and simple tool maintenance to extend lifespan.
Surfaces: Canvas, Paper, and Board Choices
When choosing a surface for acrylic or oil, you’ll want to contemplate the canvas tooth and whether it’s primed for the medium.
Paper can work for acrylics if it’s heavyweight and primed, while board gives a rigid, stable option for either paint.
Think about absorbency, texture, and priming needs to match your technique and longevity goals.
Canvas: Tooth And Priming
Although canvas might look uniform from a distance, its tooth—the texture of the weave—and the primer you choose shape how paint adheres, blends, and dries.
So you should match these factors to your medium and style.
Consider canvas texture, tooth variation, priming techniques, and surface preparation to control absorbency and tooth:
- Choose tooth for brushwork
- Use gesso layers
- Sand between coats
- Seal for oils
Paper Vs Board Choices
Pick paper if you want a lightweight, absorbent surface for sketches, studies, or media like watercolor and gouache; choose board when you need a sturdy, archival support for heavy paint, repeated reworking, or mixed media. Consider paper types, board textures, surface finishes, durability factors, weight differences, cost variances, absorption rates, and archiving methods.
| Surface | Traits | Best for |
|---|---|---|
| Paper | Light, absorbent | Sketches |
| Board | Rigid, archival | Oils, mixed media |
Preparation and Priming Best Practices
Because proper preparation sets the foundation for durable, predictable paint behavior, you should clean, sand, and prime your surface before layering acrylic or oil paint.
Because proper preparation ensures durable, predictable paint behavior—clean, sand, and prime before layering acrylic or oil.
Use correct surface types and priming techniques for longevity. Follow concise preparation tips and best practices:
- Remove dust and oils
- Sand for tooth
- Use acrylic gesso for acrylics
- Use oil-based or sized ground for oils
Cleaning and Brush Care for Each Medium
When you finish a session, clean your brushes promptly to prevent paint from hardening in the bristles; for acrylics rinse with water and mild soap until the water runs clear.
For oils, first wipe excess with a rag, then use a solvent (or solvent-free cleaner) followed by soap and water.
For brush cleaning follow maintenance tips: reshape bristles, dry flat, rotate tool storage, and keep labeled cleaning solutions.
Health and Safety: Fumes, VOCs, and Pigments
Although both acrylic and oil paints let you work freely in the studio, you should know they carry different health risks: oils and some solvents release volatile organic compounds (VOCs) and stronger fumes, while acrylics mainly pose inhalation risks from aerosols and potential irritation from certain pigments and additives.
Take fume exposure seriously; follow VOC concerns and pigment safety guidelines.
Take fume exposure seriously — heed VOC risks and follow pigment safety guidelines for healthier studio practice.
Use these health precautions:
- Ventilate well
- Wear respirator/mask
- Avoid skin contact
- Store solvents safely
Environmental Impact and Disposal Differences
Beyond personal health, you should also consider how acrylic and oil paints affect the environment and how you dispose of them.
You should favor eco-friendly practices: use minimal solvents, collect and recycle excess paint, and choose low-VOC or water-based options.
Proper disposal methods matter—never pour solvents or paint down drains; follow local hazardous-waste guidelines to reduce contamination and landfill impact.
Cost Comparison: Beginner to Pro Budgets
When you’re choosing between acrylic and oil, your starter kit costs can steer your decision—acrylics usually let you get painting cheaper upfront.
Consider that oils often demand additional supplies and longer-term care, which raises the investment over time.
We’ll compare what you’ll spend as a beginner versus what pros typically budget to show where your money goes.
Starter Kit Costs
1 simple kit can get you painting today, but the gap between a basic acrylic starter set and a professional oil rig can be huge.
You’ll weigh starter kit essentials and budget considerations: acrylic kits often cost less; oils need solvents and canvases.
Consider:
- Brushes
- Paint quality
- Mediums/solvents
- Supports
Choose based on goals, space, and willingness to invest.
Long-Term Investment
Although your initial outlay might be small, long-term costs quickly add up and will shape what you can achieve: you’ll weigh investment longevity—oils often demand more varnishes and storage—against acrylic’s lower maintenance costs and faster turnover.
Consider resale value if you plan to sell, and follow archival practices for both mediums to protect works and maximize returns over a pro career.
Color Ranges and Brand Availability
Curious which medium gives you the widest palette? You’ll find color availability varies: acrylics offer modern pigments and vibrant synthetics; oils provide traditional pigments and subtle blends.
Consider brand reputation and artist preferences when choosing. Market trends push expanded ranges in both.
- acrylics: bright modern colors
- oils: deep traditional hues
- niche brands: specialty pigments
- major brands: reliable consistency
Longevity and Archival Qualities Compared
When you care about how a painting will age, the chemistry of the medium matters: oil films dry slowly and can develop rich patinas over decades, while acrylics form a flexible, fast-drying plastic skin that resists yellowing and brittleness.
You’ll weigh longevity factors like pigment permanence, support stability and environmental control; proper archival storage and handling extend life for either medium.
Risks: Yellowing, Cracking, and Aging
You’ll want to know how yellowing and other color shifts can affect oil and acrylic paintings over decades.
Oils are more prone to yellowing as varnishes and some oil components age, while acrylics generally resist yellowing but can suffer surface changes under UV exposure.
Both media can develop craquelure or larger cracks if the paint layer becomes too brittle or the support moves, so proper materials and environmental control matter.
Yellowing Over Time
1 key long-term difference between acrylic and oil paint is how they age: oil tends to yellow and become brittle over decades, while acrylic remains more stable and flexible.
You should monitor yellowing causes and take long term care steps; consider varnish effects and archival practices to reduce aging effects from light exposure and environmental factors.
- Inspect regularly
- Control humidity
- Limit light exposure
- Use archival varnish
Craquelure And Cracking
Yellowing and brittleness can set the stage for another common long-term issue: craquelure and cracking.
You’ll notice distinct craquelure patterns: oil paint often forms networked, deep fissures as its surface tension changes with aging effects, while acrylic cracking can appear as fine, irregular lines from flexibility loss.
Understand causes and pursue appropriate restoration techniques to stabilize and conserve works.
Varnishing and Restoration Practices
When caring for finished paintings, varnishing and restoration demand careful choices because they affect appearance, longevity, and future treatment.
You’ll need to know how varnishes behave on acrylic versus oil and what conservators recommend for cleaning and retouching.
You should learn varnishing techniques and restoration methods, follow reversible materials, and consult pros.
Consider:
- Reversible varnishes
- Solvent sensitivity
- Retouching isolation
- Documentation
Response to Humidity, Temperature, and Light
Varnish and restoration choices won’t protect a painting from environmental stresses, so you also need to manage humidity, temperature, and light to preserve surface integrity and color.
You’ll monitor humidity effects to prevent cupping or mold, account for temperature sensitivity that can crack oils or warp acrylics, limit light exposure to avoid fading, and choose conditions that boost environmental resilience.
Timeline Fit: Speed vs Patience by Project
You’ll pick acrylics when you need fast drying times and quicker turnover between layers, while oils suit projects that allow for slow curing and long blending.
Consider how much working and retouching time you want—oils give you hours to adjust, acrylics force quicker decisions or the use of retarders.
Match the paint to your schedule and the project’s tolerance for patience.
Drying Time Comparison
Because drying time shapes both workflow and expectations, picking acrylic or oil will depend on whether your project needs speed or patience.
You’ll weigh drying techniques, acrylic advantages, oil disadvantages, environmental factors, working conditions, and artist preferences when choosing.
Consider how these affect timing:
- Fast tack-dry for acrylics
- Slow cure for oils
- Humidity impacts both
- Workspace ventilation matters
Working And Retouching Time
When your schedule demands quick turnarounds, acrylics let you work, refine, and finish in hours or days, while oils ask for patience as drying and safe reworking can take weeks to months.
You’ll choose acrylics for fast layered working techniques and quick corrections; pick oils when blending and slow drying enhance depth, but expect longer retouching methods and cautious timing to avoid cracking or tackiness.
Learning Curve: Best for Beginners
Both acrylic and oil offer clear paths for beginners, but they teach different habits: acrylics dry fast and forgive mistakes, so you’ll learn quick layering and color-mixing discipline, while oils dry slowly and demand patience, solvent handling, and planning for blending.
You’ll choose based on Medium preferences and pursue Skill development through:
- Beginner tips
- Acrylic techniques
- Oil basics
- Creative exploration
Techniques That Favor Oil (Alla Prima, Glazing)
If you want to work alla prima, oil’s slow drying lets you blend wet-on-wet to shape forms and changes in one sitting.
You can also build luminous effects with traditional glazing, layering thin transparent colors over dried passages.
That same slow drying gives you precise control for soft edges and subtle shifts you can’t get as easily with fast-drying acrylics.
Alla Prima Wet-On-Wet
Because oil stays workable for hours (or even days), you’ll often hear artists recommend alla prima, the wet-on-wet approach that lets you mix, blend, and finish passages directly on the canvas without waiting for underlayers to dry.
You’ll use alla prima techniques and wet on wet applications to capture immediacy.
Benefits include:
- faster completion
- rich color blending
- expressive brushwork
- unified surface texture
Traditional Glazing Layers
When you work in traditional oil glazing, you build depth and luminosity by applying multiple thin, transparent layers of color over a dried ground; each glaze modifies the tones beneath without obscuring them.
You’ll use glazing techniques rooted in traditional methods for precise color layering and subtle visual effects.
Historical context and artistic styles shape application processes, drying effects, medium interactions, and artist preferences.
Slow Blending Control
Moving from glazing’s layered luminosity to techniques that exploit oil’s slow drying, you’ll find slow blending gives you fine control over edges, subtle shifts, and painterly modeling.
You can use flexible techniques and blending methods to manage color changes, edge softening, texture control, atmospheric effects, and layering strategies.
Try:
- Wet-on-wet alla prima
- Soft brushes
- Scumbling changes
- Thin glazes
Techniques That Favor Acrylic (Fast Layers, Mixed Media)
Layer quickly and keep experimenting: acrylic’s fast drying, thin-bodied nature makes it ideal for building rapid layers, glazing, and collage work where you want to lock down each step and move on.
You’ll favor acrylic for rapid revisions, texture paste, and mixed media assemblies. It lets you layer stencils, inks, paper, and gel mediums without long waits, keeping momentum and creative spontaneity.
Choosing by Genre: Portrait, Landscape, Abstract
You’ve seen how acrylic’s speed and layering fit mixed-media and rapid revisions; now think about how genre shapes your paint choice.
You’ll pick based on portrait styles, landscape techniques, or abstract expression.
Consider drying time, blending needs, and finish to match your genre preferences.
- Fast corrections
- Slow glazing
- Textured impasto
- Smooth blends
Studio Setup and Ventilation Needs
Because solvents, mediums, and aerosol sprays affect air quality, you’ll want a studio layout that prioritizes ventilation and safe storage.
You should plan airflow, place ventilation systems near work zones, and separate oil supplies from acrylics.
Good studio organization includes labeled containers, sealed waste bins, and a respirator station.
Regularly inspect filters and store flammables in approved cabinets to reduce risks.
Transporting, Framing, and Selling Artwork
Shipping, framing, and pricing your work all affect how it’s perceived and protected, so plan each step before a piece leaves the studio.
You’ll consider transport logistics, archival framing choices, and pricing strategies to fit the art market. Protect surfaces, insure shipments, and present professionally.
- Measure and choose glazing
- Pack with archival materials
- Get shipping insurance
- Research comparable prices
Hybrid Approaches: Combining Acrylic and Oil Safely
When you want the fast drying and flexibility of acrylic with the rich blending and slow open time of oil, plan a clear layering strategy so the materials won’t fail over time.
You’ll start with stable acrylic grounds and varnish between stages, use acrylic blends for underpainting, then apply oil layering for glazes.
These hybrid techniques enable creative fusion in mixed media while minimizing adhesion and cracking risks.
Decision Checklist: Pick a Medium for Your Project
Now that you’ve seen how to combine acrylic and oil safely, pick the medium that fits your project’s timeline, surface, and desired finish.
Consider Acrylic advantages for fast Drying influence and Cost efficiency; choose Oil advantages for richer Color mixing, Texture effects, and slow Layering strategies.
Evaluate Surface compatibility and Mixing techniques.
- Finish options
- Texture effects
- Cost efficiency
- Surface compatibility
Quick Comparison Cheat Sheet for Reference
Here’s a one-page cheat sheet you can use to pick between acrylic and oil at a glance: it lists drying time, working time, color qualities, texture options, typical surfaces, cleanup, cost, and recommended beginner vs. advanced uses so you can match a medium to your project quickly.
Use Acrylic advantages for fast drying, Oil benefits for blending, Mixing techniques, Surface preparation, Color mixing, Texture creation, Application methods, Maintenance tips, Safety practices, Cost efficiency.
Frequently Asked Questions
Can Acrylic Paintings Be Reworked Years Later Like Oils?
About 70% of conservators report treating acrylics decades old; yes, you can rework acrylics years later, though acrylic longevity varies, so you’ll adapt reworking techniques—like scumbling, isolation layers, or retouch varnish—to the paint’s condition.
Do Either Medium Attract Mold or Mildew Over Time?
Both acrylic and oil can attract mold or mildew if stored damp, but acrylics dry to a less hospitable surface and offer better mildew resistance; you’ll guarantee mold prevention by keeping paintings dry, ventilated, and using archival varnish.
Are There Pigment Restrictions for Plein Air Painting With Oils?
Like a tuned palette, you can choose almost any pigment for plein air oils, but you’ll avoid unstable or fugitive pigments; balance pigment selection with plein air techniques, working fat-over-lean and testing mixes for lightfastness.
Can Acrylics Be Used for Encaustic or Fresco Techniques?
You can’t use acrylics for true encaustic techniques or traditional fresco applications because encaustic needs heated wax and fresco needs wet lime plaster, but you can mimic both with acrylic-based faux encaustic or fresco-like methods.
How Do Framing and Glazing Choices Differ Between the Two Media?
You’ll choose framing techniques and glazing options differently: acrylics like sleek, modern frames and polymer glazes for protection, while oils suit classic, deep frames and traditional varnish glazing; you’ll avoid airtight seals on oils to breathe.
Conclusion
Stand in front of two palettes: one dries like sunlight—acrylic, fast and crisp—allowing quick layers and bold, immediate marks; the other glows slow and buttery—oil, letting you blend clouds and flesh over days. Choose acrylic for speed, travel, and clean studio days; pick oil for depth, subtle shifts, and luxuriant glazing. Mix carefully if you must, but respect each medium’s nature—then follow the painting where it wants to go.