The Correct Order to Paint Ceiling, Walls, and Trim Every Time
Start with the ceiling, then paint the walls, and finish with the trim so you get crisp edges, fewer drips, and less rework. Prep carefully: clean, patch, sand, prime, and protect floors and furniture. Cut in before rolling, work top-to-bottom and big-to-small, and keep a wet edge to avoid lap marks. Use appropriate sheens and sand between trim coats for smooth results. Keep going to grab step-by-step techniques, timing, and pro tips.
Quick Answer The Correct Order at a Glance
You’ll start with prep, then ceilings, walls, trim, and finally touch-ups — that sequence keeps paint clean and efficient.
Below is a one-sentence summary you can memorize and a short checklist for bedrooms, kitchens, bathrooms, and living rooms.
Follow these quick steps and you’ll avoid common mistakes while working faster.
One-sentence summary of the ideal painting sequence
Start with the ceiling, then paint walls, trim, doors and windows, and finish with cabinets and baseboards—tackling areas from top to bottom and from large planes to fine details keeps edges clean and minimizes rework.
When deciding what order to paint ceiling walls and trim, follow that top‑down, big‑to‑small flow so you’ll cut masking, avoid smudges, and make touchups far easier.
Short checklist for common room types
1 quick checklist gives you a go-to order for each common room: ceiling, walls, trim, doors/windows, then cabinets/baseboards—follow the top-to-bottom, big-to-small rule so you can mask less and touch up faster.
- Living room: ceiling, walls, trim, doors.
- Bedroom: ceiling, walls, trim, closet doors.
- Kitchen: ceiling, walls, cabinets, baseboards.
- Bathroom: ceiling, walls, trim, vanity.
Why Order Matters Basic Understanding
You’ll get cleaner overlap and crisper trim lines when you follow the right sequence, which also helps prevent drips and touch-up headaches.
You’ll save time and avoid rework by sequencing tasks around drying times and a logical workflow.
You’ll also prevent finish problems by painting ceilings, walls, and trim in an order that respects how different paint types interact.
How paint overlap, drips, and trim lines affect final appearance
Because paint layers interact at their edges and where gravity pulls, the order you paint determines visible overlaps, drip behavior, and the crispness of trim lines.
Paint the ceiling first to avoid drips on fresh walls, then walls to back up trim, and finish trim last for sharp edges.
Proper sequence minimizes sanding, touch-ups, and messy overlap lines you’ll need to correct.
Time, drying, and workflow considerations
After sequencing ceiling, walls, and trim to control overlaps and drips, you’ll also need to plan your timing and workflow so each coat can dry and cure properly before the next step.
Work in zones, allow recommended dry times between primer and topcoat, and tack-rag dust between coats.
Paint trim last where possible, and schedule ventilation and light to speed consistent drying without rushing.
Paint type interactions (ceilings, walls, trim finishes)
When you plan the order, think about how ceiling, wall, and trim paint chemistries interact so you don’t trap oils over latex or glossy finishes over matte—each combination affects adhesion, sheen contrast, and touch-up ease.
Use primer when switching bases, apply ceiling first, then walls, then trim.
Match finish levels intentionally: durable, higher-sheen trim over lower-sheen walls for easier cleaning and repairs.
Tools, Materials, and Preparation Before You Start
Before you start, gather the right tools and supplies—brushes, rollers, trays, sandpaper, patching compound, primer, and drop cloths—to avoid interruptions.
Pick paints with appropriate finishes and sheens for ceilings, walls, and trim so each surface performs and cleans up well.
Clean, patch, sand, and prime surfaces, then mask and protect floors, furniture, and fixtures for a smooth, professional result.
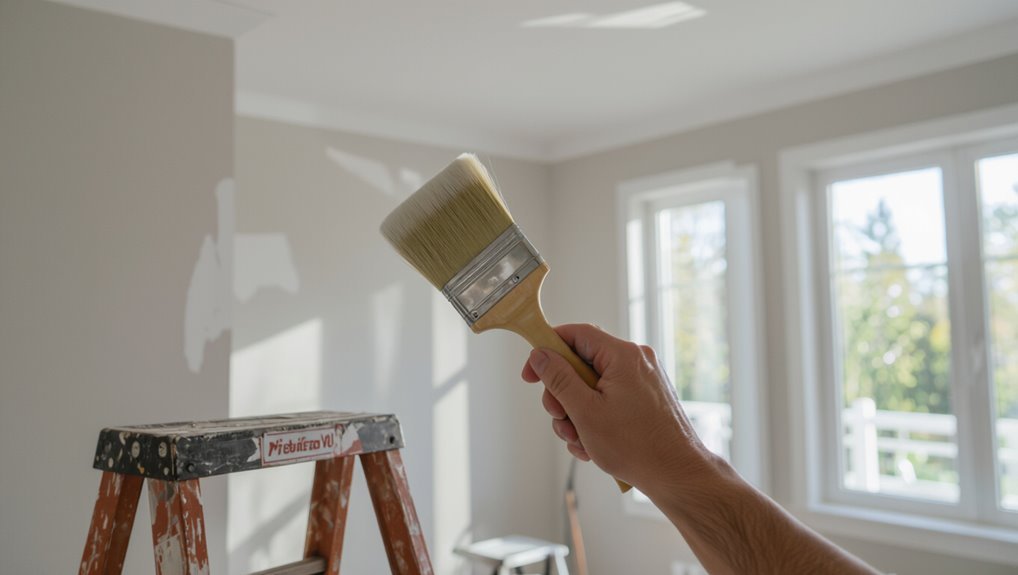
Required tools and supplies
Gathering the right tools and supplies will save you time and prevent mistakes; you’ll need quality brushes and rollers, drop cloths, painter’s tape, a sturdy ladder, trays, sandpaper, spackle, a putty knife, primer, and the paint itself in the correct finish and quantity.
Gather clean rags, a bucket, mask, and gloves. Prepare surfaces and test tape adhesion.
- Brushes/rollers
- Prep tools
- Protection
- Ladder/trays
Paint selection: finishes and sheens for ceiling, walls, trim
Now that you’ve assembled your tools and prepped surfaces, pick finishes that match each surface’s wear and light: flat or matte for ceilings to hide imperfections, eggshell or satin for most walls for a balance of durability and subtle reflection, and semi-gloss or gloss for trim and doors where scuffs and cleaning are more likely.
Choose finish by room function, traffic, and desired sheen consistency.
Surface prep: cleaning, patching, sanding, priming
Start by stripping surfaces of dust, grease, and old loose paint so new coats will adhere and look their best.
Wash with mild detergent, rinse, and let dry.
Fill holes and cracks with spackle, sand smooth, and remove dust.
Prime patched areas and bare drywall with appropriate primer.
Use high-quality sandpaper and a tack cloth to guarantee a flawless, durable finish.
Masking and protection: floors, furniture, fixtures
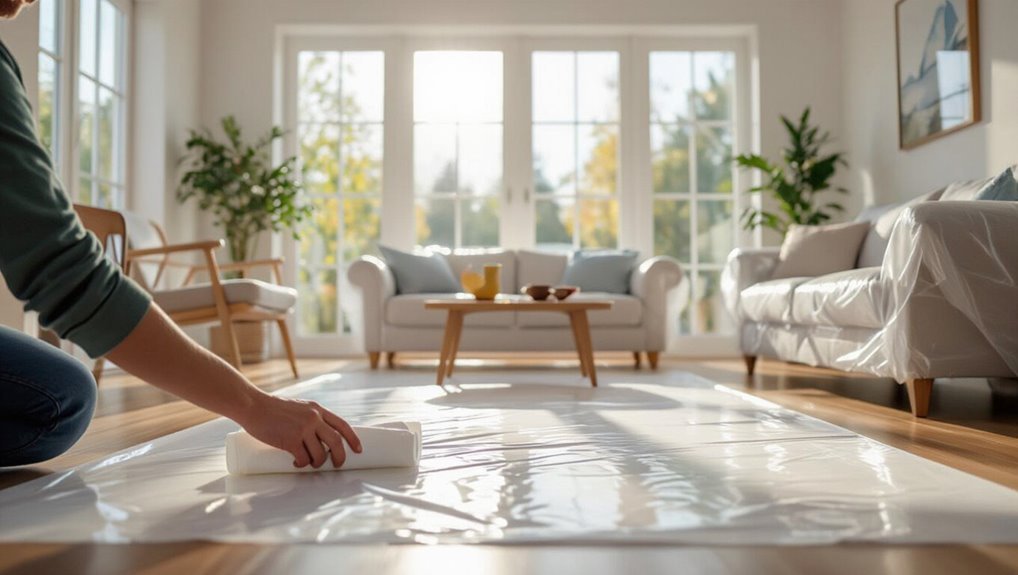
Before you raise a brush, protect floors, furniture, and fixtures so accidental splatters and dust won’t undo your prep work.
Move furniture away or cover with drop cloths; use plastic for delicate items.
Tape baseboards, light switches, and hardware with painter’s tape.
Lay rosin paper or canvas drop cloths, secure edges, and cover vents.
Keep a tarp handy for quick spill containment.
Step-by-Step Correct Painting Order
Start by prepping and priming all surfaces so paint adheres evenly.
You’ll cut in and paint the ceiling first, then the walls, and finish with the trim—baseboards, doors, and window casings.
After everything’s dry, do touch-ups and blend any edges for a clean, professional result.
Step 1 Prep and prime surfaces (ceilings, walls, trim)
Gather your tools and clear the room so you can prep and prime efficiently: repair holes, sand glossy spots, clean dirt and grease, and apply a quality primer to ceilings, walls, and trim.
You’ll protect surfaces, improve adhesion, and block stains before painting.
Follow these quick steps:
- Patch and sand
- Clean surfaces
- Mask and protect floors
- Apply primer evenly
Step 2 Cut in and paint the ceiling first
Once the primer’s dry, cut in and paint the ceiling first so drips and roller splatter won’t ruin freshly painted walls or trim.
Use a steady brush to cut tight along edges, then roll in overlapping strokes for an even finish.
Work methodically across the room, keeping a wet edge and checking for thin spots.
Let the ceiling fully dry before moving on.
Step 3 Cut in and paint the walls second
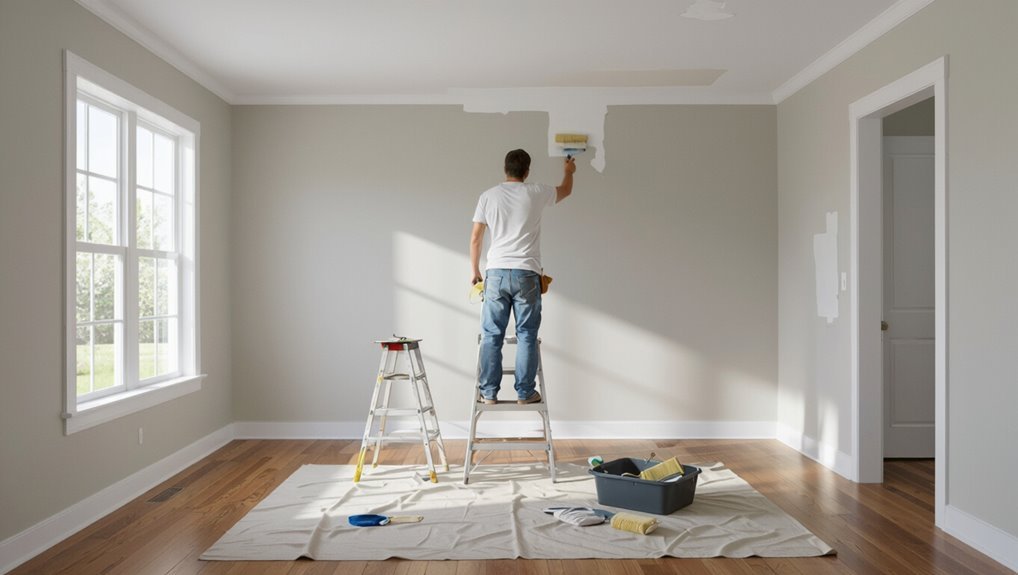
After the ceiling is fully dry, move on to the walls so you don’t risk splatters on fresh paint.
Tape edges and protect floors, then cut in around trim, corners, and ceilings with a steady brush.
Work in manageable sections, rolling between cut lines for an even finish.
Maintain a wet edge to avoid lap marks and touch up any thin spots as you go.
Step 4 Paint the trim last (baseboards, doors, window casings)
4. Paint the trim last so edges stay crisp after walls dry.
Work room by room: protect floors and hardware, remove switch plates, and sand or caulk gaps.
Use a steady brush or trim roller for smooth coverage, painting doors and window casings carefully.
Let each coat dry fully between applications, and keep a steady, confident stroke to avoid lap marks and drips.
Step 5 Touch-ups and blending after all coats dry
Step 5 focuses on touching up and blending so your finished paint looks seamless and professional.
Wait until all coats are fully dry, then inspect under good light.
Use a small brush or foam roller to feather edges and fix drips, matching texture and sheen.
Clean tools, remove tape, and revisit any thin spots.
- Spot-check lighting
- Feather edges
- Match texture
- Final inspection
Detailed Techniques for Each Step
Start by mastering ceiling rolls so you use consistent patterns and avoid lap marks, and learn how to handle high or awkward angles with poles or scaffolding.
Then cut in and roll walls in a single direction, plan for multiple thin coats, and finish trim with proper brushing, sanding between coats, and careful use of painter’s tape.
These focused techniques will keep each step clean, efficient, and professional.
Ceiling techniques: rolling patterns, avoiding lap marks
When you roll a ceiling, work in manageable sections and keep a wet edge so your strokes blend seamlessly; this prevents lap marks and gives an even finish.
Load the roller evenly, use a 9–12″ nap for texture, and roll in overlapping “M” or “W” patterns.
Maintain consistent pressure, feather edges, and backroll lightly to uniformize sheen before the paint skins.
Wall techniques: cutting in, rolling direction, multiple coats
Begin by cutting in around trim and ceilings with a steady hand and a quality angled brush so you create a clean band to roll into; then work in 3–4-foot sections, rolling vertically and finishing with light cross-rolls to blend, keeping a wet edge between sections and allowing proper dry time between coats for uniform coverage.
Inspect for thin spots, sand light imperfections, and apply subsequent coats as needed for full, consistent color.
Trim techniques: brushing methods, sanding between coats, using painter’s tape
Prep trim by sanding smooth, wiping dust away, and taping off adjacent surfaces so your brushwork stays crisp.
Use a high-quality angled brush, load it lightly, and feather strokes toward the painted area to avoid ridges.
Sand between coats with fine grit, remove dust, then apply thin, even layers.
Remove tape while paint is tacky for the cleanest edges.
Dealing with ceilings higher than reach and awkward angles
After you’ve finished taping and smoothing trim, tackle high or awkward ceilings with the right gear and a clear plan.
Use extension poles with a roller, stable ladders or scaffolding, and angled brushes for tight seams.
Work in manageable sections, keep paint wet for seamless blending, and enlist a helper to steady equipment and spot missed areas for safety and efficiency.
Variations & Special Cases
Sometimes you’ll need to flip the usual sequence—paint trim first if it’s spray-applied or part of a contractor workflow, or when stain/varnish is involved.
In open-plan rooms and multi-room jobs you’ll sequence by sightlines and traffic flow to avoid overlaps and fresh-edge problems.
For two-tone walls, accent ceilings, or feature trim, plan the order around masking priorities and which surfaces need the cleanest edges.
When to paint trim before walls (e.g., spray-applied trim, contractor workflows)
If you’re working with spray-applied trim or a contractor crew on a tight schedule, it’s often smarter to paint trim before the walls so overspray and touchups don’t contaminate freshly rolled surfaces.
You’ll save time masking and re-cutting. Spray trim first, allow proper cure, then roll walls.
Communicate sequence with contractors to minimize rework and protect finished trim from wall prep abrasion.
Open-plan spaces and multi-room sequencing
Choosing to paint trim before walls can save time in tight schedules, but open-plan homes and multi-room jobs bring different sequencing challenges.
You’ll plan zones: paint ceilings first, then tackle walls room-by-room to avoid wet-edge conflicts.
For interconnected spaces, finish trim in one continuous pass to prevent overlap and drying delays.
Schedule work to minimize traffic and recoat waits.
Stained or varnished trim vs. painted trim
When trim is stained or varnished rather than painted, your sequencing and prep change because you’re working with clear coats that highlight grain and resist touch-ups.
Sand, clean, and seal before walls to avoid contaminating finishes. Mask carefully where trim meets freshly painted walls.
Apply stain/varnish after wall priming but before final wall coat if possible, so edges stay crisp and repairs stay minimal.
Two-tone walls, accent ceilings, and feature trim considerations
Although they add drama and depth, two-tone walls, accent ceilings, and feature trim need a clear plan so colors meet neatly and shifts read intentional. You’ll paint ceilings first, tape crisp edges, run the lighter color upward, then cut in the darker band. Feature trim gets final touchups.
| Step | Order | Tip |
|---|---|---|
| 1 | Ceiling | Pick accent color first |
| 2 | Walls | Paint lighter then darker |
| 3 | Trim | Finish last, touch edges |
| 4 | Cleanup | Remove tape after tacky dries |
Common Mistakes and How to Avoid Them
Watch the order and timing or you’ll face issues like damaged trim from painting it too early, tacky layers from insufficient drying, and paint bleed from poor taping.
If that happens, you can sand and repaint trim, allow extra cure time or use fast-dry formulas, and reseal tape edges or use a paintable caulk to stop bleed-through.
Also check sheen choices—wrong gloss can highlight flaws or dull color, so swap to a more suitable finish if needed.
Mistake: painting trim too early consequences and fixes
If you paint trim before the walls are finished, you’ll invite drips, scuffs, and a lot more touch-ups than you’d expect; it’s tempting because trim feels smaller and quicker, but that order creates extra sanding, scraping, and repainting later.
Wait to cut in and finish trim after walls are done so you avoid overlap corrections.
Fix early-painted trim by protecting, spot-sanding, and repainting once walls are complete.
Mistake: not allowing adequate drying time troubleshooting
When you skip or rush drying times, paint won’t cure properly and you’ll end up with tacky surfaces, smudges, or runs that force extra sanding and recoating.
To troubleshoot, check humidity and temperature, increase ventilation, and use a fan or dehumidifier.
Wait the manufacturer’s recommended recoat time, test a small patch before continuing, and avoid touching or stacking wet pieces.
Mistake: poor taping technique and bleed-through prevention
After you’ve let layers dry properly, tape lines and edges become the next place mistakes show up—poor taping lets paint bleed under the edges, creating ragged lines and wasted touch-ups.
Press tape firmly, use quality painter’s tape, and seal the edge with a thin coat of the base color before cutting in.
Remove tape at a 45° angle while paint’s tacky, not fully cured.
Mistake: wrong sheen choices visual effects and remedies
Because sheen affects how light hits a surface, choosing the wrong one can magnify flaws, highlight texture, or make colors read differently than you expect.
Pick lower sheens (flat/matte) for walls to hide imperfections, satin for durability without glare, and semi-gloss for trim to resist scuffs.
Test samples under room light, then adjust sheen to balance look and practicality.
Best Practices and Time-Saving Tips
For a single room you’ll sequence tasks differently than for a whole-house project, so plan rooms, shutters and doors to minimize rework.
Use quick-dry paints, drying accelerators, and good ventilation to shorten wait times without sacrificing finish quality.
If the job’s big or technical, hire pros and be clear about prep, drying windows, and the exact finish you want.
Efficient workflow sequencing for one room vs. whole-house jobs
When you’re planning a painting job, think regarding sequence and scale: a single room lets you work top-to-bottom and finish in a day, while a whole-house project needs staged zones, crew coordination, and supply drops to keep momentum without redoing work.
For one room, tape, cut, ceiling, walls, trim, then touch-ups.
For whole-house, plan phases, assign teams, protect finished areas, and track progress.
Using drying accelerators, quick-dry paints, and proper ventilation
Speed up dry times smartly by combining quick-dry paints, approved drying accelerators, and effective ventilation so you don’t sacrifice finish quality for speed.
Choose products labeled compatible with your paint, follow manufacturer ratios, and test a small area.
Open windows, run fans, and control humidity with a dehumidifier.
Work in sections to avoid re-coating too soon and inspect for tackiness before finishing.
Hiring pros vs. DIY: when to outsource and what to specify to contractors
Decide whether to hire pros by matching the job’s scale and complexity to your skills and schedule: take on small, low-risk tasks like touch-ups or single-room repainting if you’ve got time and steady hands, but outsource whole-house jobs, high ceilings, textured surfaces, or projects with strict finish requirements to contractors.
- Specify scope, timeline, and paint brands.
- Request written estimates and warranties.
- Ask for prep and cleanup details.
- Confirm color samples and final walk-through.
Cost, Time Estimates, and Scheduling Tips
Plan each room by estimating typical time per step—prep, priming, cutting in, rolling, and cleanup—so you know how many hours it’ll take.
Consider cost factors like paint quality, tools, and whether you’ll hire labor, since they’ll change both budget and schedule.
Schedule work around drying times and your household’s routines to avoid redoing work or disrupting daily life.
Typical time per step for an average room
A typical mid-size room takes roughly 6–10 hours of actual work spread over a day or two, and knowing how that time breaks down by step lets you schedule effectively.
Prep and taping: 1–2 hours.
Ceiling painting: 1–2 hours plus drying.
Walls (two coats): 2–3 hours plus drying.
Trim (cutting in and rolling): 1–2 hours.
Touch-ups: 15–30 minutes.
Cost factors: materials, tools, labor
Knowing how long each step takes helps you estimate labor costs and coordinate when to buy supplies, since time on the job affects both hourly rates and paint drying windows.
Factor paint quality, primer, tape, rollers, brushes, and drop cloths into material totals. Count tool wear and replacement.
Estimate labor by skill level and pace. Add contingency for mistakes, touch-ups, and unexpected repairs.
Scheduling around drying times and living patterns
If you’re scheduling a paint job around drying times and household routines, map out each coat’s cure window and align work hours to minimize disruption.
Prioritize high-traffic zones during low-use periods, stagger rooms so one dries while you paint another, and choose fast-dry formulations where needed.
Factor in ventilation, humidity, and weekend availability.
Communicate timelines to household members to avoid rework.
FAQ Quick Answers to Common Questions
You’ll get quick, practical answers to common worries like whether trim can ever go before walls and what changes if you’re using a paint sprayer.
I’ll also cover realistic wait times between coats for ceilings, walls, and trim, what to do about ceiling drips on fresh trim, and the best sheen combos for easy upkeep.
Read on and you’ll be ready to make fast, confident choices on the job.
Can I paint trim before walls in any situation?
Sometimes it makes sense to paint trim before walls—especially when you’re working with detailed molding or a tricky color contrast that needs crisp lines.
You can paint trim first if you mask carefully, protect floors, and accept extra touch-ups where wall paint meets trim.
Dry time matters: let trim cure so wall paint won’t smudge it, and use high-quality tape for sharp edges.
What order if I’m using a paint sprayer?
1 clear rule: spray the ceiling first, then walls, and finish with trim — that order prevents overspray from landing on freshly finished surfaces and makes masking simpler.
Prep carefully: cover floors, windows, and fixtures.
Work with consistent overlap and keep the sprayer at the recommended distance.
Spray trim last with low pressure and a narrower tip, touching up edges by hand if needed.
How long should I wait between coats for ceiling, walls, and trim?
Because drying times vary by surface and product, wait for each coat to dry to the touch and follow the paint manufacturer’s recoat window: typically 2–4 hours for ceilings and walls with latex, 4–24 hours for oil-based paints, and 24 hours (or as directed) for trim before sanding or recoating;
when in doubt, check the can and test a small area for tackiness. You’ll avoid smudges and guarantee proper adhesion.
How to handle paint drips from ceiling onto freshly painted trim?
Catch drips quickly—while the ceiling paint’s still wet, blot any runs with a clean, damp cloth or a foam brush to lift excess before it bonds to the trim.
If paint has dried, gently sand the spot, clean dust, then touch up with matching trim paint using a small brush.
Finish by feathering edges for a seamless repair and allow proper drying time.
Is there a best paint sheen combination for easy maintenance?
If you’ve just fixed trim drips, you’ll want a sheen combo that makes future cleaning easier.
Use flat or matte on ceilings to hide flaws, eggshell or satin on walls for wipeability, and semi-gloss or gloss on trim for durability and stain resistance.
This trio balances appearance and maintenance: higher sheen where you clean most, lower sheen where light and texture matter.
Final Checklist Before Calling It Done
Before you call the job finished, walk each room with fresh eyes to check edges, outlets, and ceilings for missed spots.
Do touch-ups as soon as you spot thin coverage or drips, and wait the recommended cure time before moving furniture back.
Label and store leftover paint tightly sealed in a cool, dry place so you can match colors later.
Room-by-room final inspection steps
With the paint dried and trim reinstalled, walk each room like a picky homeowner and make a final checklist: inspect walls and ceilings for drips, missed spots, or roller texture inconsistencies; check corners, edges, and trim for clean lines and touch-ups; test switches, outlets, and fixtures for paint on covers; and confirm flooring and furniture are free of splatters before you call the job done.
- Scan surfaces under bright light.
- Verify straight trim lines.
- Operate every switch and fixture.
- Remove debris and vacuum flooring.
When to perform touch-ups and how to store leftover paint
When you spot small flaws during your final walkthrough, tackle touch-ups right away so they blend seamlessly with the dried finish; meanwhile, label and store leftover paint properly to make future fixes easy.
Use a clean brush, feather edges, and match sheen.
Pour remaining paint into a smaller airtight container, note color, date, room, and number; keep in a cool, dark place.