Best Paint Finish for Shutters That Stands Up to Weather
You should use a high-quality exterior acrylic (latex) paint in a satin or semi-gloss sheen for shutters because it balances UV and weather resistance with easy cleaning and good adhesion. Prep well: clean, sand, and prime based on material, then apply two thin topcoats for long life. For metal or coastal exposure, choose rust-inhibiting primers or marine-grade finishes. Follow proper application and maintenance for best longevity, and keep going to see specific product, material, and prep tips.
Quick Answer Best Paint Finish for Exterior and Interior Shutters
For exterior shutters, go with a durable semi-gloss or gloss for weather resistance and easy cleaning.
For interior shutters, you can choose satin for a soft, low-sheen look or semi-gloss for higher durability in high-traffic rooms.
Pick matte only for low-touch rooms, satin for a balanced look, semi-gloss for durability, and gloss when you want maximum sheen and wipeability.
Direct recommendation summary for exterior shutters
Pick a high-quality exterior acrylic latex with a satin or semi-gloss sheen for your exterior shutters—it offers the best balance of durability, UV resistance, and easy cleaning while still hiding minor surface imperfections.
For long-term performance, choose a good brand, prep and prime properly, and apply two coats.
If you’re asking what paint finish for shutters, satin or semi-gloss is ideal.
Direct recommendation summary for interior shutters
When painting interior shutters, go with a satin or semi-gloss acrylic latex—these finishes resist scuffs, wipe clean easily, and highlight the shutters’ details without looking too shiny.
Use a high-quality water-based primer on bare wood or repaired areas, sand lightly between coats, and apply two thin topcoats for durable, even coverage.
You’ll get low-maintenance, crisp-looking shutters that stand up to daily use.
When to choose satin vs semi-gloss vs gloss vs matte
You’ve got the right basics for interior shutters; now let’s decide which sheen fits your situation.
Choose matte for a modern, low-reflective look that hides imperfections.
Pick satin for durable, subtle sheen in high-traffic rooms.
Use semi-gloss for easy cleaning and trim contrast.
Reserve gloss for bold, high-impact trim or shutters you want to spotlight.
Consider exterior durability and maintenance.
What Affects Paint Performance on Shutters (Basics)
What affects paint performance on your shutters starts with the material—wood, vinyl, composite, or metal—because each absorbs and flexes differently.
You’ll also face environmental stresses like sun, rain, humidity, salt air, and temperature swings, plus surface wear from cleaning, impacts, and UV degradation.
Finally, the finish you choose determines durability, sheen, and how much maintenance you’ll need.
Material types: wood, vinyl, composite, metal
Different shutter materials—wood, vinyl, composite, and metal—each demand specific paint choices and prep because their porosity, flexibility, and surface chemistry affect adhesion and durability.
You’ll sand and prime wood to seal pores; choose flexible, adhesion-promoting primers for vinyl; use composite-specific primers and high-build coatings to bridge textures; and deoxidize, prime, and use rust-inhibiting paints on metal for long-lasting protection and finish.
Environmental factors: sun, rain, humidity, salt air, temperature swings
After choosing the right primer and paint for your shutter material, you’ll need to contemplate the environment those shutters face—sun, rain, humidity, salt air, and temperature swings each change how paint holds up.
You’ll pick UV-resistant formulas for sun, mildew-resistant coatings for humidity, flexible finishes for thermal expansion, and corrosion-inhibiting paints near salt air.
Match finish to exposure for lasting protection.
Surface wear factors: cleaning, impact, UV degradation
Because shutters get handled, bumped, and cleaned far more than walls, those everyday interactions shape how paint performs over time.
You’ll scrub away dirt, scuff from furniture and tools, and expose surfaces to sunlight that breaks down binders.
Regular cleaning, occasional impacts, and UV-driven chalking all accelerate wear, so plan for periodic touch-ups and use coatings that resist abrasion and fading.
How finish impacts durability, sheen, and maintenance
Those everyday scrubs, bumps, and sun exposure don’t just wear paint—they reveal how the finish itself will perform.
You’ll pick satin or semi-gloss for durability and easy cleaning, gloss for maximum toughness and water resistance, and matte if you prioritize appearance over scrubbability.
Higher sheen hides fewer flaws but wipes clean better; lower sheen needs gentler maintenance and recoats sooner.
Comparison of Paint Finishes for Shutters
You’ll want a quick, practical comparison of finishes so you can match durability, washability, UV resistance, appearance, and touch-up ease to your shutter material and exposure. Below is a concise chart showing recommended finishes by common materials and conditions to get you started. Use this as a reference when picking gloss level and formula for long-lasting results.
| Material / Exposure | Best Finish | Why it works |
|---|---|---|
| Wood, sunny | Satin or semi-gloss | Good UV resistance, easy to clean |
| Vinyl/fiberglass, wet areas | Semi-gloss | Durable, wash-friendly, resists moisture |
| Painted metal, high-traffic | Gloss | Highest washability and touch-up ease |
Key attributes compared (durability, washability, UV resistance, appearance, touch-up ease)
When choosing a paint finish for your shutters, focus on five practical attributes—durability, washability, UV resistance, appearance, and touch-up ease—that determine how well the finish performs over time and under real-world conditions.
You’ll weigh longevity against maintenance: durable finishes resist chipping, washable surfaces tolerate cleaning, UV-resistant coatings prevent fading, appearance matches style, and easy touch-ups save time and money.
Side-by-side finish recommendations by material and exposure
Although materials and exposure vary, the right finish depends on the shutter substrate and how much sun, rain, or handling it sees; here’s a concise, side-by-side guide that matches common materials (wood, MDF, vinyl, aluminum, composite) with the best finishes for low, moderate, and high exterior exposure.
Wood: satin oil-modified for low, semi-gloss acrylic for moderate, high-build urethane for high.
MDF: semi-gloss acrylic;
vinyl: gloss latex for low, acrylic for moderate, 100% acrylic for high.
Aluminum: satin epoxy for low, polyurethane for moderate, fluoropolymer for high.
Composite: semi-gloss acrylic for low, urethane for moderate, 100% acrylic/urethane blend for high.
Recommended Finishes by Scenario
Now you’ll match finishes to the material and setting so your shutters perform and look right.
For exteriors, you’ll pick durable, weather-resistant sheens for wood, vinyl/composite, or metal, while interiors get tailored finishes by room—satin for kitchens, moisture-resistant for bathrooms, and softer sheens for living spaces.
For historic or decorative shutters, you’ll choose finishes that replicate period textures and patinas to keep the style authentic.
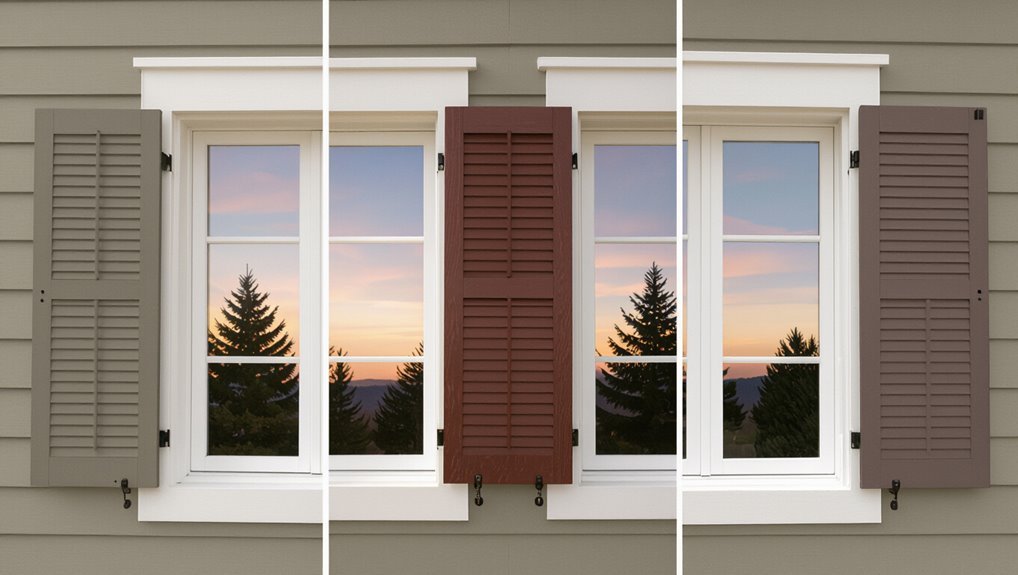
Exterior wooden shutters best practice finish and why
If your shutters face the elements, pick a finish that balances protection, maintenance, and appearance—solid stain or high-quality exterior paint for harsh sun and rain, and penetrating oil or semi-transparent stain for milder, rustic looks.
You should prime end-grain, use UV-resistant topcoats, follow manufacturer drying times, and recoat or touch up every few years.
Regular cleaning prevents buildup and decay.
Exterior vinyl/composite shutters best finish and why
For exterior vinyl or composite shutters, choose finishes that preserve color, resist UV fading, and won’t crack or peel—typically a high-quality acrylic latex paint formulated for plastics or a fade-resistant spray designed for vinyl.
Prep by cleaning and scuffing lightly, use primer if manufacturer recommends, apply thin multiple coats, and pick low-gloss sheens to hide imperfections while maximizing durability and color retention.
Exterior metal shutters best finish and why
When you’re choosing a finish for exterior metal shutters, pick coatings that prevent rust, stick to metal, and tolerate sun and weather exposure—powder coating, high-build polyurethane, or rust-inhibiting acrylics usually fit the bill depending on the scenario.
For coastal homes choose marine-grade powder or polyurethane with UV stabilizers; inland properties benefit from rust-inhibiting primers plus topcoat; choose color and sheen for maintenance and heat absorption.
Interior shutters best finish options by room (kitchen, bathroom, living areas)
Exterior metal shutters need coatings that block rust and UV, but interior shutters call for finishes tuned to room conditions, aesthetics, and cleaning habits.
In kitchens, pick semi-gloss for grease resistance and easy wiping.
Bathrooms benefit from satin or semi-gloss with mildew-resistant primer.
Living areas suit eggshell or satin for subtle sheen and durability.
Match color and sheen to trim for cohesion.
Historic or decorative shutters finish considerations to match period style
If you want your shutters to look authentic and period-appropriate, pick a finish that reflects the era’s materials and paint technology—flat or matte oils for Colonial styles, hard-wearing gloss for Victorian millwork, and muted satin or shellac for Craftsman or early 20th-century homes.
Match sheen and pigments to historic samples, use traditional application methods, and choose durable formulations that replicate texture while resisting weather and UV.
How to Prepare Shutters for a Long-Lasting Finish
Before you paint, inspect each shutter for rot, cracks, and loose hardware and make repairs so the finish will last.
Then clean and degrease, sand and feather edges, and apply the proper primer for your material.
Finally, choose the right paint—acrylic latex, oil-based, or enamel—based on durability and the look you want.
Step 1 Inspect and repair (rot, cracks, hardware)
Start by giving each shutter a close, systematic inspection so you can catch rot, cracks, loose hardware, and other issues before you paint.
Probe soft spots, pry away deteriorated wood, and mark areas needing filler or replacement.
Tighten or replace hinges, screws, and fasteners.
Repair or splice rotten sections, sand repaired areas smooth, and verify shutters operate properly before priming and finishing.
Step 2 Clean and degrease surfaces
1 good cleaning sets the stage for a durable finish, so wash each shutter thoroughly to remove dirt, mildew, and grease that will prevent primer and paint from adhering.
Use a mild detergent or trisodium phosphate solution, scrub with a soft brush, then rinse. Let shutters dry completely.
Remove stubborn residue with a degreaser, following manufacturer instructions and wearing gloves and eye protection.
Step 3 Sanding and feathering edges
Grab fine-grit sandpaper and a sanding block to smooth old paint drips, rough spots, and the edges where panels meet — this creates a uniform surface so primer and paint grab evenly.
Work with the grain, feather shifts between bare wood and old finish, and remove loose fibers.
Wipe dust with a tack cloth, inspect for imperfections, and repeat light sanding as needed before priming.
Step 4 Priming: types of primer for different materials
Before you paint, apply a primer matched to your shutter material so paint adheres properly and lasts longer.
For wood, use a stain-blocking, oil- or shellac-based primer to seal tannins and knots.
For bare metal, use a rust-inhibiting, etching primer.
For PVC or vinyl, choose a bonding primer formulated for plastics.
Let primer dry fully before topcoating.
Step 5 Choosing paint type: acrylic latex vs oil-based vs enamel
Once your primer’s fully dry, pick a paint that matches the shutter material, exposure, and desired sheen—choices here change how the paint wears and how often you’ll need to repaint.
For exterior shutters, acrylic latex resists UV and flexes with wood; oil-based offers tough adhesion but yellowing risk; high-quality waterborne enamel combines durability and quick drying.
Match sheen to maintenance needs.
Step 6 Application methods: brush, roller, spray and recommended techniques
Step 6 covers three main application methods—brush, roller, and spray—and shows when to use each so your shutters get a smooth, durable finish.
Use a high-quality angled brush for corners and louvers, a short-nap roller for flat panels to avoid texture, and a HVLP or airless sprayer for uniform coats.
Keep overlapping passes light and maintain wet edges.
Step 7 Drying, curing times, and recoating intervals
Drying and curing determine how tough and long-lasting your shutter finish will be, so you’ll need to follow specific times and conditions rather than guessing.
Check product labels for tack-free and full-cure times—typically hours to days. Recoat only after the recommended window; otherwise sand between coats if required.
Allow extended curing in cool or humid weather before reinstalling to avoid damage.
Step 8 Final sealing or topcoat options (if applicable)
After you’ve respected the curing windows, add a final seal to lock in durability and appearance.
Choose a UV-resistant clear coat—waterborne polyurethane for painted shutters, or spar urethane for exterior wood.
Apply thin, even coats with a high-quality brush or spray, sanding lightly between coats.
Two coats usually suffice; inspect for runs and verify full cure before rehanging to maximize weather resistance.
Common Mistakes That Shorten Shutter Paint Life and How to Avoid Them
You can wreck a great paint job by cutting corners, but a few simple fixes will keep shutters looking fresh longer.
Here are the top troublemakers to watch for:
- Skipping primer or using the wrong type
- Using interior paint or painting in bad weather
- Poor prep, thin fast coats, and ignoring UV protection/sheEN choices
Addressing these will prevent peeling, fading, and premature wear.
Skipping primer or using wrong primer
If you skip primer or pick the wrong one, paint won’t bond properly and your shutters will peel, chip, or blister much sooner than they should.
Always use a primer formulated for exterior surfaces and your shutter material—wood, MDF, or metal.
Clean and sand first, then apply the recommended primer to improve adhesion, block tannins, and extend the topcoat’s life.
Using interior paint on exterior shutters
Because interior paints aren’t formulated to withstand sun, moisture, and temperature swings, they’ll break down quickly on exterior shutters and leave you repainting sooner than you’d expect.
Don’t use interior formulas; choose exterior acrylic or oil-based paints labeled for trim. They resist UV, mildew, and expansion.
Proper exterior paint plus the right primer and prep will keep shutters looking good far longer.
Applying paint in unsuitable weather conditions
When you paint shutters in sticky humidity, freezing temperatures, or under direct midday sun, the finish won’t cure properly and will fail sooner than expected.
Wait for mild, dry days and follow manufacturer temperature and humidity guidelines. Work in the morning or late afternoon, avoid painting before rain, and use thin, even coats.
Proper timing prevents blistering, cracking, and premature peeling.
Overlooking UV protection and proper sheen selection
While you might focus on color and prep, overlooking UV protection and the right sheen will shorten your shutters’ life and dull their look faster.
Choose exterior-grade paints with UV inhibitors to prevent fading and chalking.
Match sheen to exposure: satin or semi-gloss resists dirt and moisture better than flat, but avoid high gloss where imperfections show.
Recoat with UV-resistant topcoats.
Poor surface preparation and fast, thin coats
Good UV protection and the right sheen only help if the paint can actually bond to the shutters, so surface prep deserves equal attention.
You should sand, clean, and prime properly; otherwise paint won’t adhere and will peel.
Don’t rush with thin, watery coats—apply two even, full-coverage coats, allowing proper drying time between them to build durable protection against weather.
Maintenance and Repair Strategies to Extend Finish Life
Keep your shutters looking good longer by cleaning them regularly with mild, non-abrasive cleaners and a soft cloth to remove dirt and pollutants.
When you spot chips or wear, assess whether a targeted spot repair will blend well or if a full repaint is safer, and follow a recoating schedule based on fading, peeling, or moisture penetration.
Before seasonal weather changes, check and lubricate hardware and movable parts so the finish and function both stay protected.
Routine cleaning and recommended cleaners
Because dirt, pollen, and airborne grime build up slowly, you should clean your shutters on a regular schedule to preserve the finish and prevent long-term damage.
Dust monthly, wash quarterly with mild dish soap and warm water, and rinse thoroughly.
For stubborn grime, use a soft-bristled brush or a non-abrasive cleaner rated for painted surfaces.
Avoid bleach and harsh solvents that strip finishes.
Spot repair vs full repaint: how to assess and proceed
When you notice small chips, peeling, or isolated fading, decide whether a spot repair will restore appearance and protection or if the damage signals a need for a full repaint.
Assess the extent, underlying causes (moisture, sun exposure, or poor adhesion), and whether the substrate is sound before starting any work.
For spot repairs, sand to firm edges, prime bare areas, and match finish; reserve full repaint when damage is widespread or adhesion fails.
Recoating schedule and signs you need a new finish
A regular recoating schedule helps you protect shutters from sun, moisture, and wear, and it also keeps small issues from becoming big jobs.
Inspect annually for fading, chalking, cracking, or lifting. Recoat every 3–7 years depending on exposure and product.
Spot-sand and prime bare areas before recoating. If rot, persistent peeling, or widespread failure appears, plan a full refinishing instead.
Protecting shutters seasonally (hardware checks, movable parts)
If you want your shutters to keep looking and working their best through changing seasons, schedule a quick seasonal check of hinges, fasteners, and movable parts.
Lubricate hinges with a silicone spray, tighten loose screws, replace corroded hardware, and realign warped slats.
Test shutters’ operation after storms, address squeaks promptly, and touch up exposed metal to prevent rust and finish failure.
Cost, Longevity, and Aesthetic Tradeoffs
You’ll want to weigh how long each finish lasts on different shutter materials against upfront and long-term costs for paints, primers, and application methods.
Compare budgets for options like acrylic, oil-based, and two-part systems and consider whether spray, brush, or factory finishing fits your timeline and wallet.
Finally, pick a sheen that gives the look you want while standing up to wear—higher sheens clean better but can show imperfections, while lower sheens hide flaws but may scuff sooner.
Expected lifespan by finish and material
When choosing shutters, weigh upfront cost against how long each finish and material will actually last—cheaper paints need more frequent touch-ups, while premium finishes and durable materials stretch replacement intervals and can save money over time.
Expect latex on wood to last 5–7 years outdoors, oil-based or polyurethane finishes 8–12 years, and factory-applied powder coats or composite panels 15+ years with minimal maintenance.
Cost comparison of common paint systems and application methods
Compare costs, longevity, and looks side-by-side so you can pick the paint system and application method that fits your budget and maintenance plans.
Primer plus quality acrylic latex is cheapest, brushes or rollers suffice, lasts 5–10 years.
Alkyd or oil-based costs more, needs solvent cleanup, lasts longer.
Spray application ups labor and equipment cost but gives smooth, durable finish—ideal for higher-end shutters.
Balancing appearance (sheen) with practical durability
Although sheen might seem like just a style choice, it directly affects cost, durability, and how often you’ll need to repaint, so pick it with both looks and upkeep in mind.
You’ll choose gloss for easy cleaning and weather resistance but pay more and see flaws. Satin hides imperfections, balances durability and cost. Flat masks flaws but needs frequent touch-ups.
Product and Brand Selection Tips
When you’re comparing paints, learn to read technical data sheets and warranties so you know coverage, recoat times, and what’s actually guaranteed.
Decide whether pro-grade durability is worth the extra cost or if a consumer formula meets your needs.
For coastal, high-sun, or high-humidity locations, look for UV stabilizers, high-salt resistance, and mildew inhibitors.
How to read technical data sheets and warranties
Before you pick a paint or a brand, learn to read the technical data sheet (TDS) and warranty so you know exactly what the product promises and what it won’t cover.
Check cure and recoat times, recommended substrates, UV and moisture resistance, and coverage rates.
Note exclusions, required prep, and claim limits.
Keep copies and document application to support any warranty claims.
Choosing pro-grade vs consumer-grade paints
Now that you know how to read TDSs and warranties, you can use that information to decide whether a pro-grade or consumer-grade paint makes sense for your shutters.
Choose pro-grade for higher pigment load, better adhesion, longer warranties and fewer coats if you want durability and professional results.
Pick consumer-grade to save money on short-term projects, but expect more maintenance and modest longevity.
Recommended product features for coastal, high-sun, and high-humidity climates
Because shutters face salt spray, intense sun, and persistent moisture in coastal and humid areas, pick paints formulated for extreme exterior exposure that resist UV breakdown, salt corrosion, and mildew.
Choose 100% acrylic or elastomeric exterior coatings with high UV inhibitors, corrosion inhibitors, and biocides.
Look for low-VOC, flexible films, excellent adhesion, and long-term colorfast warranties to reduce maintenance and peeling.
FAQs Shutter Paint Finish Questions
You probably have specific questions like whether spray paint will hold up, if semi-gloss always beats satin outside, or how to match a new finish to what’s already on your shutters.
You’ll also want to know if vinyl can be painted and which finish sticks best, plus how long to wait before rehanging or exposing shutters to weather.
Let’s answer these FAQs so you can pick the right product and timing.
Can I use spray paint on shutters and will it last?
Wondering if spray paint will work on your shutters and hold up over time? Yes—spray paint can give smooth, even coverage quickly, but prep matters: clean, sand, and prime.
Use exterior-grade spray enamel or acrylic formulated for outdoors, apply thin coats, and seal with a durable clear coat or UV-resistant topcoat. Proper application greatly extends longevity.
Is semi-gloss always better than satin for exterior shutters?
Is semi-gloss always the better choice for exterior shutters? Not always.
Semi-gloss offers superior durability and easier cleaning, but satin hides surface flaws and gives softer curb appeal.
Pick semi-gloss for high-traffic, exposed locations; choose satin for historic styles or imperfect wood.
Consider climate, maintenance willingness, and desired sheen rather than assuming one finish always wins.
How do I match a new paint finish to existing shutters?
Looking to match a new paint finish to your existing shutters? Start by identifying the current sheen—hold a bright light at an angle to see reflectivity.
Clean a small area, test sample swatches in natural light, and let them cure before comparing.
Match sheen and color, then use the same type of exterior-grade paint and primer for consistent durability and appearance.
Can I paint over vinyl shutters and which finish adheres best?
If your existing shutters are vinyl, you can still give them a fresh coat, but you’ll need to prep differently than with wood or metal.
Clean thoroughly, sand lightly with fine-grit, and use a plastic-adhesion primer.
Choose a high-quality exterior acrylic latex or 100% acrylic paint formulated for vinyl—these flex with temperature and resist peeling.
Avoid oil-based paints; they won’t bond well.
How long after painting can shutters be reinstalled or exposed to weather?
You can reinstall shutters once the paint has fully cured, not just dry to the touch; drying is quick, but curing takes longer and determines when the finish can withstand handling and weather.
- Wait manufacturer cure time—usually 24–72 hours for latex, longer for oil.
- Test a hidden edge for hardness before rehanging.
- Avoid rain or high humidity during curing to prevent blushing or tackiness.
Visual Guides and Quick Reference Resources
You’ll find a finish-sheen visual comparison chart especially useful for seeing how gloss, semi-gloss, and satin look on shutters in different lights.
Pair that with a prep-and-application sequence infographic to follow the exact steps in order without guesswork.
Together they’ll speed decisions and help you get consistent results.
Finish sheen visual comparison chart
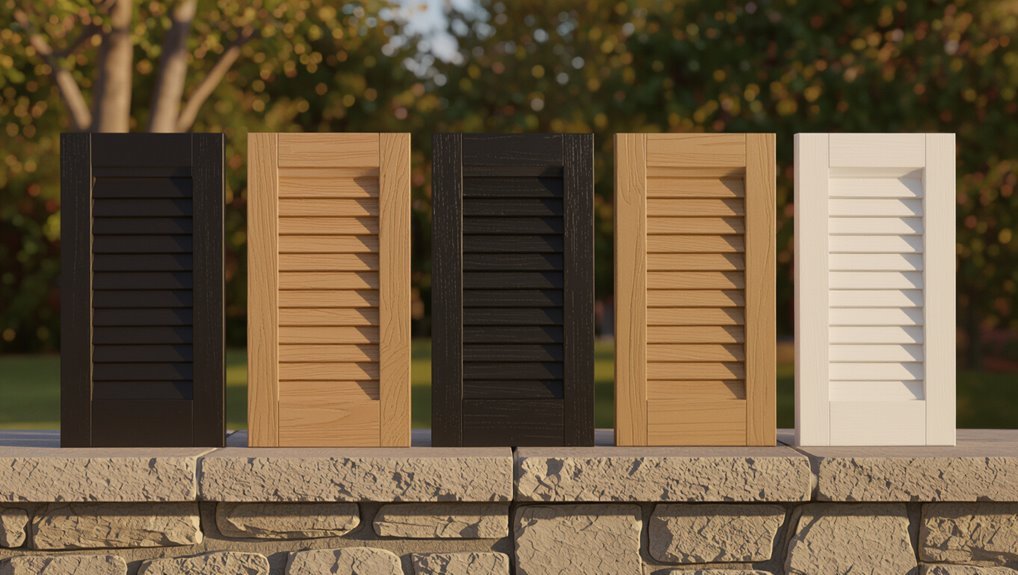
A simple visual comparison chart lets you see at a glance how flat, matte, eggshell, satin, semi-gloss, and gloss sheens reflect light and hide imperfections on shutters.
Use side-by-side swatches showing light reflection, durability, and cleaning ease.
You’ll quickly match sheen to exposure and desired look: flatter for low-reflective, higher sheens for wet climates and frequent cleaning, balancing aesthetics with weather resistance.
Prep and application sequence infographic
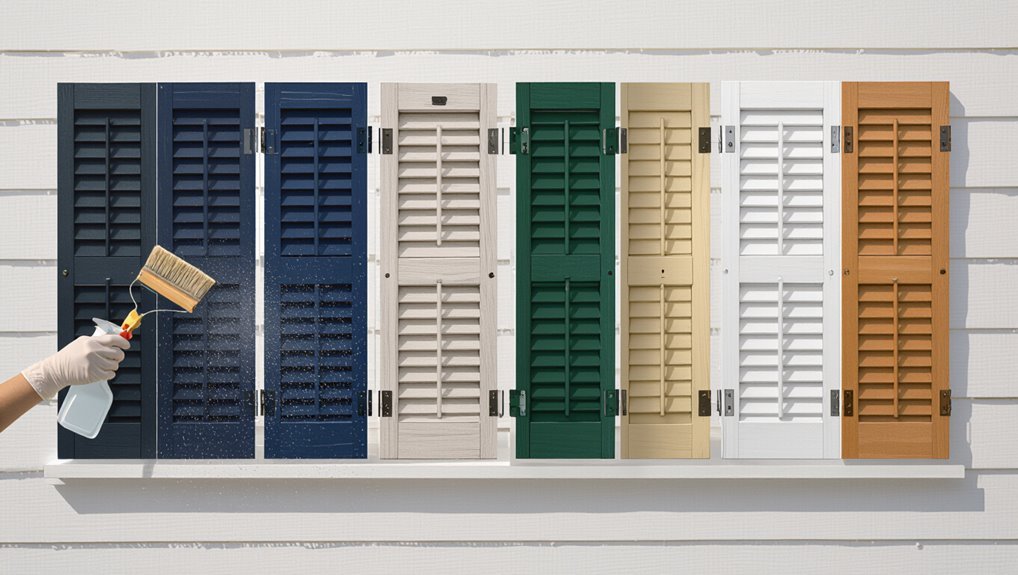
When prepping shutters, start with a clear, step-by-step sequence so you won’t miss surface cleaning, sanding, priming, and topcoating in the right order.
Use an infographic that shows tools, drying times, and grit progression. Number each step, include safety reminders, and highlight common mistakes.
Keep visuals simple so you can follow the process quickly and get durable, weather-resistant results.