What Paint Roller Gives the Smoothest Finish? Expert Picks
For the smoothest finish, pick a short-nap (3/16″–1/4″) microfiber or dense foam roller and match it to your paint and surface; microfiber holds more paint and levels beautifully on walls, while dense foam is best for glossy trim and doors. Avoid long naps on flat surfaces to prevent stipple and shedding. Clean and store rollers properly to keep performance consistent. Keep going and you’ll find tips on nap selection, materials, techniques, and pro picks.
Quick Overview: How This Guide Helps You Pick the Smoothest Roller
This guide shows you exactly what to look for in a paint roller to achieve a smooth, professional finish—covering nap length, material, frame type, and surface prep so you can choose the right roller for your project and avoid common texture issues.
You’ll learn to compare roller brands, evaluate cover materials, practice finish techniques, and prep surfaces properly so you get consistent, low-texture results every time.
Quick Answer: Which Roller Gives the Smoothest Finish?
Now that you know what factors affect texture, here’s the quick answer: for the smoothest finish pick a short-nap (1/4″ to 3/16″) microfiber or woven natural-fiber cover on a quality, rigid frame—use it on properly primed, sanded surfaces and roll thin, even coats.
You’ll compare roller types, follow proven finish techniques, and avoid thick load or excessive pressure for glassy results.
Why Roller Choice Matters More Than Technique Alone
Because the roller determines how paint lands and levels, choosing the right cover matters more than perfect technique alone.
The roller controls how paint lands and levels, so choosing the right cover outweighs flawless technique.
You’ll affect finish quality, finish durability, and paint application by selecting roller types that suit surface preparation and avoiding common mistakes.
Follow expert recommendations and prioritize roller maintenance.
- Match roller types to surface.
- Prep thoroughly.
- Maintain covers regularly.
How Nap (Pile) Length Controls Smoothness by Surface
Think of nap length as the slider that controls how much texture your roller leaves: short naps lay down a finer, smoother coat on flat surfaces, while longer naps carry more paint into grooves and uneven textures.
You’ll match nap length to surface texture so paint absorption is appropriate, avoiding overloading or missed crevices, and ensuring consistent finish quality across walls and trim.
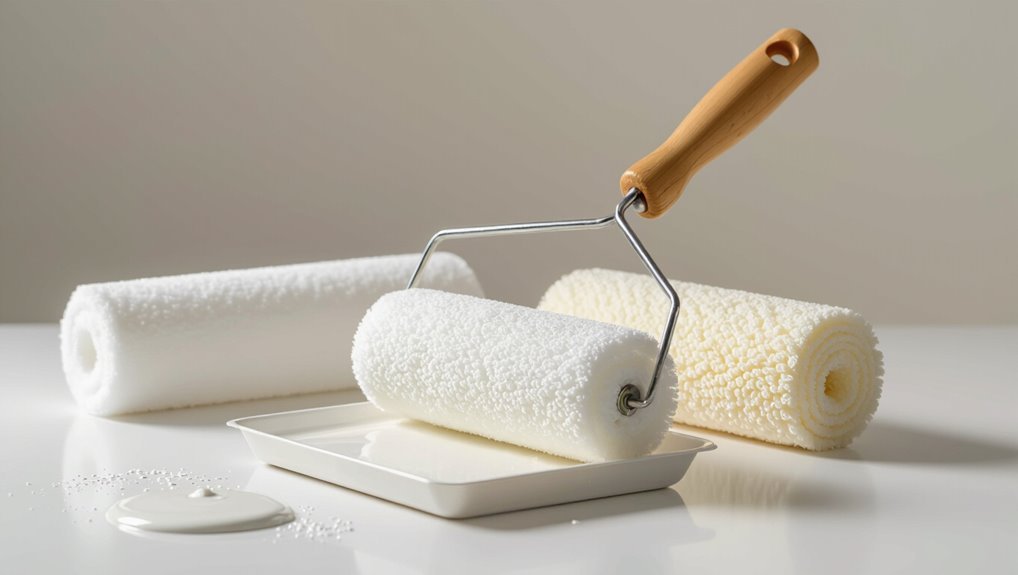
How Roller Material (Microfiber, Woven, Foam) Changes Finish
When you pick a roller, the material—microfiber, woven, or foam—directly affects how paint transfers, levels, and textures the surface.
You’ll notice different results across roller material types; use this finish comparison to choose:
- Microfiber: holds more paint, smooth leveling, minimal stipple.
- Woven: durable, consistent laydown, slight texture.
- Foam: ultra-smooth on gloss, prone to bubbles on heavy coats.
Best Rollers for Drywall: Low-Nap and Specialty Covers
When you’re working on drywall, ultra-low nap covers give the smoothest, nearly brushless finish on skim coats and primed surfaces.
You’ll also want to contemplate specialty drywall rollers—designed to pack and level compound without leaving texture. Pick the one that matches your paint or joint compound for the cleanest result.
Ultra-Low Nap Covers
Detail matters with drywall, and ultra-low nap covers deliver the precise, smooth finish you’re after by holding less paint and leaving minimal texture.
You’ll appreciate how nap textures and roller materials affect laydown; choose denser fabrics for control.
Consider these priorities:
- Surface smoothness
- Minimal stipple
- Easy touch-ups
Use thin, tightly woven covers to reduce roller marks and overspray.
Specialty Drywall Rollers
Specialty drywall rollers bring targeted solutions for tricky textures and finishes, so you can match the tool to the job and get professional results faster.
You’ll choose microfibers, foam, or ribbed covers to replicate or smooth drywall texture precisely.
Use proper roller maintenance—clean after each use, store dry, and replace worn covers—to preserve edge definition and prevent lap marks on sensitive surfaces.
Best Rollers for Trim and Doors: Foam and Short-Nap Picks
When you’re painting doors, foam rollers give a glassy, brush-mark-free surface that’s ideal for flat panels.
For narrow trim and molding, short-nap covers hold just enough paint to lay down a smooth, consistent coat without texture.
You’ll want both on hand so you can match the roller to the profile for the best finish.
Foam Rollers For Doors
Foam rollers are one of the best choices for doors and trim because they lay down ultra-smooth, lint-free coats that cut brush marks and require minimal back-brushing.
You’ll get a professional-looking finish with less effort. You’ll appreciate foam roller benefits and foam roller techniques.
Use them to:
- Minimize texture
- Speed small jobs
- Control drips and edges
Short-Nap For Smooth Trim
For truly smooth trim and door surfaces, choose a short-nap roller cover — its dense, low-profile fibers lay paint down evenly without leaving texture, so you’ll get crisp edges and minimal brushwork.
You’ll appreciate short nap advantages for shallow profiles and satin or semi-gloss finishes.
For precise trim application, work in controlled strokes, maintain light pressure, and reload sparingly to avoid lap marks.
Best Rollers for Cabinetry and Furniture: Microfiber and Foam
Choosing the right roller makes a big difference when you’re refinishing cabinets or furniture: microfiber and high-density foam rollers each offer distinct advantages for achieving a smooth, professional result.
- Microfiber benefits: lifts and levels paint, reducing stipple for clear panels.
- Foam durability: resists tearing, gives sharp edges.
- Use microfiber for cabinetry faces; foam for flat surfaces and trim touch-ups.
Top Professional Roller Picks by Use Case (Drywall, Trim, Cabinets)
For drywall, you’ll want an ultra-smooth nap roller to minimize texture and leave a flat, even surface.
For cabinets and trim, choose high-density foam rollers to achieve crisp edges and a near-spray finish.
Below we’ll compare specific pro-grade options and when to use each.
Drywall: Ultra-Smooth Nap
When you’re tackling drywall, an ultra-smooth nap roller gives you the finest, most consistent finish without texture or stipple; it lays down paint evenly and minimizes the need for touch-ups.
You’ll get professional drywall finishes by pairing proper roller techniques with quality nap.
- Choose 1/8″–3/16″ nap
- Load evenly, avoid drips
- Maintain a wet edge
Cabinets & Trim: Foam Rollers
Drywall gets its glassy flatness with an ultra-smooth nap, but cabinets and trim demand a different tool: foam rollers give you a streak-free, high-build finish that mimics a sprayed surface.
You’ll appreciate foam benefits for smooth edges, minimal lint, and even gloss.
Use light pressure, multiple thin coats, and proper roller maintenance—clean immediately and store dry—to keep results consistent and professional.
How to Match Roller Nap to Paint Sheen and Viscosity
Because sheen and viscosity change how paint levels and hides, matching your roller nap to both is essential for a smooth finish.
You’ll choose nap by sheen and paint viscosity so coverage and texture align.
Consider these steps:
- Low sheen + low viscosity: short nap (smoother).
- Medium sheen/viscosity: medium nap (balanced).
- High sheen or thick paint: longer nap for even build.
Foam vs. Woven/Knit Covers: When to Use Each
Matching nap to sheen and viscosity sets you up for the right texture, but picking the cover material matters just as much.
You’ll choose foam for ultra-smooth, lacquer-like results and foam durability on slick surfaces, while woven/knit covers offer woven versatility for textured or rougher substrates and hold more paint.
Use foam on trim; pick woven/knit for walls needing even coverage.
Nap Lengths to Avoid for a Smooth Finish : and Why
If you want a truly smooth finish, steer clear of very short naps (1/8″ or less) and very long naps (3/4″ and up), because each creates problems that sabotage smoothness:
- Short naps: leave streaks, resist even coverage — nap length considerations matter.
- Long naps: shed fibers, trap texture.
- Mid naps: balance pickup and layoff for reliable smooth finish techniques.
How Roller Diameter and Core Stiffness Change Finish and Reach
After you’ve picked the right nap, roller diameter and core stiffness become the next things to contemplate because they directly affect how the roller applies paint and how far you can reach.
You’ll want a larger roller diameter for faster coverage and smoother finish quality on flat walls, while a stiffer core stiffness preserves shape for reach capability and reduces bounce on ceilings and textured areas.
Technique Tips Pros Use to Get a Smooth, Brushless Finish
Start each wall by cutting in with a steady hand, then roll in broad, overlapping W-patterns to spread paint evenly without visible strokes; pros also keep a wet edge, maintain consistent pressure, and reload the roller often enough to avoid dry patches so you get a smooth, brushless finish.
- Use steady pressure.
- Work wet-to-wet.
- Inspect for laps.
These roller techniques boost finish quality.
Load, Roll, and Back-Roll for an Even, Brushless Finish
Once you’ve cut in and established a wet edge, load the roller evenly, apply paint in broad W-patterns, then immediately back-roll to flatten and blend for a brushless finish.
You’ll master roller techniques by keeping consistent pressure, working small sections, and overlapping strokes.
For efficient paint application, reload before drag marks appear, smooth edges with light passes, and avoid reworking drying areas.
Sanding and Prep Steps That Prevent Texture Telegraphing
When you want a truly smooth finish, sand and prep thoroughly so paint can’t telegraph underlying textures; that means knocking down high spots, feathering edges of old texture, and filling pinholes or seams with a lightweight compound.
You’ll use precise sanding techniques and focused surface preparation to achieve texture reduction before paint application.
- Sand, clean, prime.
- Fill, feather, sand.
- Vacuum, tack, inspect.
Troubleshooting Common Texture Problems and Fixes
When your finish looks off, check roller nap compatibility first—using the wrong nap can telegraph texture or leave uneven coverage.
You’ll also want to adjust technique and pressure to avoid roller marks, like keeping a wet edge and overlapping passes.
If you get orange peel, thin the paint slightly or switch to a finer nap and re-roll lightly to smooth it out.
Roller Nap Compatibility
Roller nap size matters because it directly affects how paint lays down and how texture appears on your walls; choosing the wrong nap can leave streaks, uneven coverage, or an undesired stipple.
You should match roller nap to surface compatibility and paint type. Consider:
- Smooth surfaces — 1/4″ nap for ultra-smooth finish.
- Slightly textured — 3/8″ nap for even laydown.
- Rough — 1/2″–3/4″ nap for full coverage.
Avoiding Roller Marks
1 simple habit will prevent most roller marks: keep a wet edge and maintain consistent pressure as you work.
You should load the roller evenly, overlap passes slightly, and avoid stopping mid-panel.
Match nap to surface to control roller texture, and use steady, even paint application motions.
If you notice lap lines, blend immediately—don’t let edges dry before smoothing.
Fixing Orange Peel
If your freshly painted wall has a bumpy, dimpled surface—commonly called orange peel—you can usually smooth it out without redoing the whole job by identifying the cause and choosing the right corrective step.
You should assess roller texture and paint application, then:
- Sand lightly and dust.
- Thin and reapply with a smoother nap.
- Use skim coat or spray for uniform finish.
How to Prevent Lint, Shedding, and Roller Marks
When you want a flawless finish, start by choosing the right nap and a quality, lint-free cover, and inspect it for loose fibers before you load it with paint.
Use lint free techniques like light brushing or a tack cloth on surfaces, apply paint evenly without overloading, and practice roller maintenance—replace worn covers and roll off edges to avoid shedding and marks.
Cleaning and Storing Rollers to Keep Them Smooth
After you finish painting, rinse the roller immediately to prevent paint from drying into the nap.
Use a roller comb or brush to remove trapped paint and rinse until the water runs clear.
Let the roller dry fully and store it covered in a clean, dry place to keep the nap smooth.
Rinse Immediately After Use
Rinse your roller the moment you finish painting to prevent paint from drying into the nap and ruining its smoothness.
You’ll protect roller maintenance and use proper cleaning techniques by acting fast.
Follow these steps:
- Flush under warm water until runoff is clear.
- Squeeze excess paint without twisting the nap.
- Store damp in a ventilated spot to avoid dried residue.
Use Proper Cleaning Tools
1 simple change to your cleanup routine is using the right tools: grab a quality roller scraper or comb, a soft-bristled brush, and a bucket with warm water or the recommended solvent so you can remove paint thoroughly without damaging the nap.
You’ll extend roller life by consistent cleaning frequency, rinse until clear, and perform basic roller maintenance to prevent buildup and preserve a smooth finish.
Store Dry And Covered
Once your roller’s thoroughly cleaned, let it dry completely before storing to prevent mildew and trapped solvent odors; you’ll protect nap and performance.
Use proper roller storage and moisture control to keep fibers smooth.
- Wrap in breathable bag.
- Store upright in a dry area.
- Label date and paint type for next use.
Cost vs. Performance: When to Splurge on Pro Rollers
While a cheap roller can get paint on the wall, when you want a truly smooth, professional-looking finish you’ll notice the difference a pro roller makes.
You should splurge when project scale, tricky surfaces, or high-gloss paints demand precision. Pro rollers offer better roller durability and consistent nap, reducing streaks.
Follow maintenance tips like proper cleaning and dry storage to protect your investment.
Accessories That Improve Smooth Results (Frames, Grids, Trays)
Pick a roller frame that fits your cover snugly and has a comfortable handle so you can keep an even pressure across the wall.
Use a proper tray with a textured grid to load the roller evenly and shed excess paint before you roll.
Those simple accessories cut splatter and roller marks, making it much easier for you to get a smooth finish.
Right Roller Frames
Choosing the right roller frame makes a big difference in how smooth your finish turns out, because the frame controls roller stability, pressure, and reach.
You’ll weigh roller frame types and frame materials for balance, durability, and comfort. Consider:
- Lightweight aluminum for reach and control.
- Heavy-duty steel for durability.
- Ergonomic plastic for reduced fatigue and consistent pressure.
Proper Trays & Grids
If you want a truly smooth finish, start by using the right tray and grid to control how paint loads onto your roller.
Choose tray materials that resist sticking and won’t deform; metal or rigid plastic work best.
Use grids for even paint distribution across roller types so you avoid overloading, drips, and uneven nap pickup, resulting in consistent, smooth coverage.
Shopping Checklist: Pick the Smoothest Roller for Your Project
1 clear criterion will guide your roller choice: surface texture.
You’ll use roller selection tips and weigh finish quality factors to match nap length and material.
Prioritize shed resistance, even coverage, and ease of cleaning.
Follow this compact checklist:
- Match nap to surface.
- Check material and shed rating.
- Consider maintenance and compatibility.
Quick Comparison: Best Roller by Smooth-Finish Scenario
Now that you’ve narrowed choices with the checklist, here’s a quick side-by-side look at the best rollers for common smooth-finish scenarios so you can pick fast:
For trim and doors, use a dense foam roller for top finish quality.
For walls, a short-nap microfiber offers smoothness and coverage.
For textured surfaces, a thicker nap roller balances finish quality and paint hold.
Frequently Asked Questions
Can Roller Covers Be Customized or Blended for Unique Surfaces?
Yes — you can customize and blend roller cover materials to match surface texture compatibility; you’ll mix nap lengths, foam, or synthetic fibers, testing combos for porosity and finish, ensuring ideal paint pickup and even application.
Do Temperature and Humidity Affect Roller Performance?
Yes — temperature and humidity affect roller performance: you’ll need to adjust roller material selection and account for paint viscosity effects, since heat or moisture changes drying times and flow, altering nap pickup, release, and overall finish quality.
Are There Eco-Friendly Roller Materials With Smooth Finishes?
Like a soft breeze smoothing ripples, yes—you’ll find eco friendly options like recycled polyester and natural wool blends that give smooth finishes; material comparisons show recycled synthetics resist shedding while wool absorbs more paint for seamless coverage.
How Do Specialty Primers Interact With Different Roller Types?
Specialty primers interact differently: you’ll choose roller material compatibility based on primer absorption rates, using low-nap synthetic rollers for thin, low-absorption primers and higher-nap or natural fibers for thicker, high-absorption primers to guarantee even coverage.
Can Rollers Transfer Odor or VOCS Between Projects?
Yes — think of a roller as a sponge that remembers smells: if you don’t clean or dispose it, it’ll retain odor and enable VOC transfer, so you should thoroughly wash or replace rollers between aromatic or solvent-based projects.
Conclusion
You might’ve heard that microfiber rollers always beat foam for the smoothest finish — and that’s mostly true, but only if the nap matches your surface and you use the right technique. Choose a short nap (3/16″–1/4″) for ultra-smooth walls, prefer woven or high-density microfiber over cheap foam, and use quality frames and a grid. Small upgrades and proper prep make the biggest visible difference, so don’t skimp where it counts.