What Temperature Can You Paint Exterior: Ideal Conditions Explained
You can confidently paint most exterior surfaces when both air and surface temps sit about 50°F to 85°F (10–29°C); this range helps paints adhere and cure without freezing or drying too fast. Check surface temperature with an infrared thermometer and avoid painting in high humidity, strong wind, or direct midday sun that causes rapid skinning. Plan jobs for mid‑morning to mid‑afternoon on stable spring or fall days, and keep going to learn tips for humidity, primers, and problem fixes.
Quick Answer: Best Temperatures for Exterior Paint
If you want a reliable result, aim to paint exterior surfaces when temperatures are between 50°F and 85°F (10°C–29°C); most manufacturers recommend this range because paint adheres and cures properly without freezing or drying too fast.
You’ll avoid temperature extremes that ruin finish. Consider seasonal considerations like humidity, sun exposure, and forecasted overnight lows to pick days that guarantee even drying and lasting coverage.
Why Temperature Matters for Exterior Paint Adhesion and Durability
Because paint relies on chemical reactions and physical drying, temperature directly affects how well it bonds to exterior surfaces and how long that bond lasts. You’ll notice temperature effects on paint adhesion, surface interaction, material compatibility, weather influences, and overall paint performance. Consider environmental conditions, application timing, durability factors, and avoid temperature extremes to preserve finish and lifespan.
| Factor | Impact |
|---|---|
| Adhesion | Reduced in extremes |
| Durability | Shortened by poor timing |
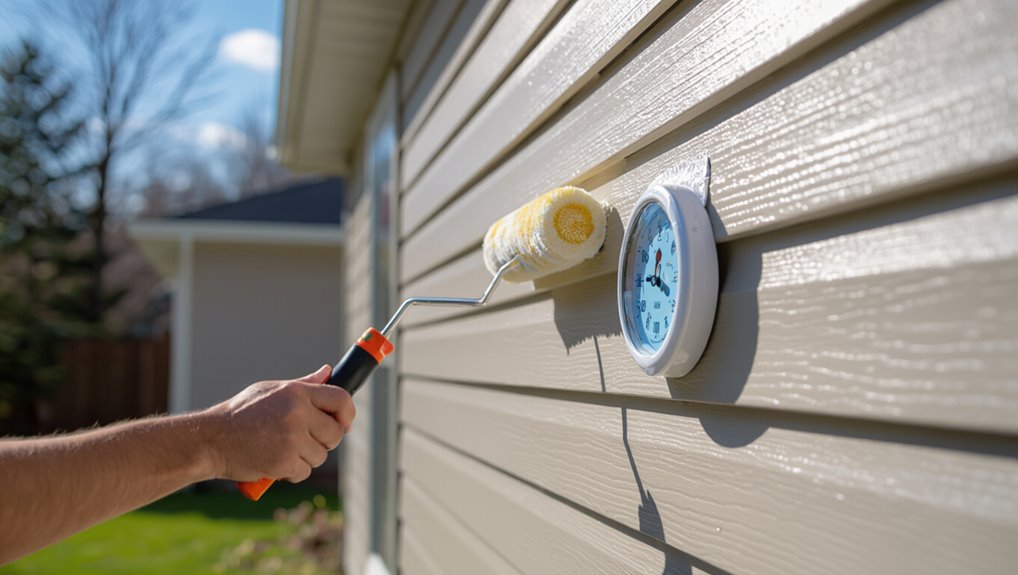
Surface Temp vs. Air Temp: Which to Check First?
Before you start painting, check the surface temperature first because paint bonds to the substrate, not the air.
Use the air temperature as a timing guide—if it’s too cold or heading toward freezing, you shouldn’t paint even if the surface is warm.
Carrying a surface thermometer lets you make the right call quickly.
Surface Temperature Matters More
While the air temperature gives you a general idea, the surface temperature is what actually controls paint drying and adhesion, so check the material you’re painting first.
You’ll measure the actual substrate, account for temperature fluctuation, and adjust timing or materials during surface preparation.
Paint won’t bond properly on too-cold or hot surfaces, so prioritize accurate surface readings before you start.
Air Temperature Guides Timing
If you’re planning the job, check the air temperature to time your work windows—air temp tells you how long paint will stay workable and when coatings will cure across the whole structure.
You should prioritize surface temperature first for adhesion, but use air temperature to set your painting schedule, sequence tasks, and avoid rapid humidity or temperature swings that ruin finish and drying consistency.
How Humidity Affects Drying and Adhesion
You’ll notice humidity plays a big role in how paint cures, because high moisture slows solvent evaporation and can extend tack time.
Too much surface moisture also prevents proper adhesion, leading to peeling or blistering later.
Check relative humidity and avoid painting when it’s above the product’s recommended range.
Humidity And Paint Cure
High humidity slows paint’s solvent evaporation and can trap moisture against the surface, so you’ll see longer tack times and higher risk of blistering or poor adhesion when you paint in muggy conditions.
You should monitor humidity effects because they alter the curing process, extending cure time and reducing hardness.
Plan longer dry intervals, choose humidity-tolerant formulas, and avoid painting before predicted damp or fog.
Moisture Impact On Adhesion
When humidity climbs, it slows solvent evaporation and leaves moisture trapped at the paint–substrate interface, so your paint may stay tacky longer and struggle to form a strong bond. You must monitor moisture levels and weather conditions, adjust application techniques, and improve surface preparation to avoid adhesion issues, poor paint performance, and extended drying times influenced by environmental factors.
| Damp | Tacky | Poor |
|---|---|---|
| Wet | Slow | Fail |
| High | Long | Peel |
Wind, Sun, Shade: Microclimates That Change Conditions
Because microclimates can turn a single wall into several different painting zones, you’ll need to assess wind, sun, and shade before you brush on primer or paint.
Account for wind effects, sun exposure, shade influence, microclimate variations, temperature fluctuations, climate considerations, localized conditions, and weather impacts.
Consider:
- Sunny, hot façades
- Windy, fast-drying areas
- Shaded, cooler spots
Manufacturer Temperature Ratings: How to Read Labels
Those microclimate differences tell you why the temperature range on a paint can matters: manufacturers test products under specific conditions and print the limits you should follow.
Read the paint label interpretation carefully—look for minimum and maximum application temps, substrate and curing notes, and humidity limits.
Follow those temperature guidelines to guarantee adhesion and drying. If unclear, contact the manufacturer for clarification.
How Paint Type Changes the Temperature Window (Latex vs. Oil vs. Alkyd)
Although all exterior paints aim to protect and beautify, the temperature window you can work in shifts considerably with the binder: latex (water-based) needs higher minimum temps to dry, oil-based paints tolerate cooler conditions and longer open times, and alkyds—essentially oil formulas with synthetic modifications—sit between the two.
- Latex: watch drying times, temperature effects, and adhesion issues.
- Oil: better surface compatibility in cool, challenging environmental factors.
- Alkyd: balances paint performance, application challenges, and paint selection.
Minimum/Maximum Temps for Priming, Topcoat, and Caulking
When you’re prepping an exterior, you need to know the primer’s temperature range so it can bond properly and cure.
Also check the topcoat’s application limits—too cold or too hot will ruin sheen and adhesion.
And don’t forget the caulking temperature window, since sealants need the right conditions to cure and stay flexible.
Primer Temperature Range
If you’re painting exterior surfaces, check temperature limits for primer, topcoat, and caulking before you start, because each product has a specific minimum and sometimes maximum temperature for proper adhesion and curing.
You’ll follow primer application guidance and match primer types to conditions.
Typical ranges:
- Acrylic latex primer: 50–90°F
- Oil/alkyd primer: 40–85°F
- Specialty low-temp primer: 35–60°F
Topcoat Application Limits
Now that you’ve matched primers to temperature ranges, turn to the topcoat and caulking limits so your finish will adhere and cure properly.
For topcoat application, follow manufacturer minimums (often 40–50°F) and avoid painting above recommended highs (often 90–100°F). Apply when dew point and surface temps meet ideal conditions; allow primer cure time.
Hold caulking until surfaces are stable within specified temperature ranges.
Caulking Temperature Window
Because caulking seals and bonds differently than paint, you should follow specific minimum and maximum temperatures for priming, topcoating, and caulking to guarantee adhesion and cure.
You’ll adjust caulking techniques and select caulking materials by temperature limits:
- Primer: 40–90°F (apply when substrate’s within range)
- Topcoat: 50–85°F (avoid extremes)
- Caulk: 40–100°F (check product specs)
Cold-Temperature Failure Modes and Prevention
When temperatures drop, paint can fail in predictable ways you need to watch for: poor adhesion, extended drying times that invite dust and moisture, film cracking from frost, and surface bloom or blushing in humid cold.
In cold weather you’ll face paint adhesion and curing issues; control paint consistency, improve surface preparation, use temperature monitoring, plan application timing, and expect drying challenges to prevent failures.
Hot-Temperature Failure Modes and Prevention
When it’s very hot, paint can dry so fast that it doesn’t level properly and leaves brush marks or lap lines.
You may also see heat-related adhesion loss where the coating fails to bond and peels later.
We’ll cover how to avoid these problems by timing your work and adjusting technique.
Paint Drying Too Fast
Although high heat speeds up drying, it can actually ruin an exterior paint job by causing surface cure before the paint has had time to flow and level; you’ll see blistering, poor adhesion, and a rough, powdery finish if paint dries too fast.
- Adjust application techniques and paint consistency to match temperature extremes and weather conditions.
- Focus on surface preparation to prevent paint film defects.
- Monitor drying time to avoid common drying issues.
Heat-Related Adhesion Loss
If exterior paint gets applied in extreme heat, it can fail to stick to the surface as the binders and solvents evaporate unevenly, leaving you with peeling, flaking, and blistering within weeks or months.
You’ll face adhesion issues from temperature extremes and shortened drying times.
Prevent paint failures by improving surface preparation, adjusting application techniques, ensuring material compatibility, and accounting for environmental factors.
Painting Wood Siding: Ideal Temps and Timing
Because wood expands and contracts with temperature and moisture, you’ll get the best, longest-lasting finish by painting siding when conditions are steady and mild.
You should follow wood siding maintenance steps and proper painting techniques to prevent cracking and peeling.
- Paint between 50–85°F, low humidity.
- Avoid direct sun on hot days.
- Prime exposed wood and wait for dry conditions.
Painting Stucco, Brick, and Masonry: Temp Tips
For stucco, brick, and other masonry, you’ll get the best results when temperatures stay between about 50°F and 85°F, avoiding extremes that slow curing or prevent adhesion.
You’ll also want surfaces to be dry and at or above the minimum application temperature—cold, damp masonry can trap moisture and ruin the finish.
Before you paint, check for frost, recent rain, or rapid temperature swings and correct any issues so the paint can bond properly.
Optimal Temperature Range
When you’re planning to paint stucco, brick, or other masonry, aim for a consistent ambient temperature between about 50°F and 85°F (10°C–29°C) so the paint can properly cure and adhere.
Consider weather considerations and seasonal variations when scheduling work.
Quick tips:
- Avoid painting during rapid temperature swings.
- Pick dry days with mild humidity.
- Clockwork curing gives durable adhesion.
Surface Preparation Temps
Although surface prep can feel tedious, getting the temperature right before you clean, patch, or prime is essential for adhesion and long-term durability.
You should perform surface prep techniques when masonry and ambient temps sit within manufacturer temperature guidelines, typically 50–85°F (10–30°C).
Work in shaded areas, avoid freezing nights, and let repaired areas fully cure. That prevents peeling, blisters, and uneven coverage.
Painting Metal and Trim: Temp and Prep
If you’re painting metal trim, pick a day with steady temperatures—cold nights or sudden heat spikes can ruin adhesion and drying.
You should focus on metal preparation and precise trim techniques, stripping rust, degreasing, and using compatible primer.
Follow these quick steps:
- Remove loose paint and rust
- Clean with solvent, then dry
- Apply metal primer, then topcoat
Preparing Surfaces When Temps Are Outside the Ideal Range
Because temperatures can swing outside the ideal range, you’ll need to adjust surface prep to protect adhesion and finish quality.
Inspect for frost, dew, contaminants and postpone if substrates are wet. Use appropriate cleaners, allow full drying, and sand or prime as needed.
Maintain temperature monitoring during prep and before coating so you only paint when surfaces and ambient conditions meet the adjusted criteria.
How to Safely Warm or Cool Surfaces Before Painting
When you can’t wait for the weather to cooperate, you’ll need safe ways to warm or cool surfaces so paint will stick and dry properly.
Use gentle, controlled approaches and monitor temps closely.
Try these surface warming techniques and cooling methods:
- Use space heaters or heat lamps at a safe distance.
- Apply temporary insulation or tents.
- Mist shaded areas, improving airflow and evaporation.
Choosing Paints and Additives for Cool or Hot Conditions
Although cool or hot conditions change how paint behaves, you can still get reliable results by picking the right formulations and additives.
Use cool weather techniques like slow-curing acrylics and hot weather strategies such as fast-flash enamels.
Focus on paint additives selection, paint performance factors, surface preparation tips, temperature sensitive paints, and environmental considerations to guarantee adhesion, drying control, and long-term durability.
Nighttime Temperature Drops and Dew: When to Stop?
If evening temps are set to fall below the paint’s minimum cure temperature or dew’s likely to form on your freshly coated surface, stop painting for the day.
Nighttime humidity and temperature fluctuations increase dew formation and paint condensation, interrupting surface drying and compromising finish.
Monitor dew point and weather patterns, practice moisture control, and resume when conditions stabilize.
- Check forecast hourly
- Skip low dew point nights
- Protect fresh paint
Best Practices for Spring and Fall Shoulder Seasons
In spring and fall you’ll want to aim for the paint maker’s ideal temperature range—usually between about 50°F and 85°F—to guarantee proper curing.
Time your work for mid-morning to mid-afternoon so you avoid chilly mornings and rapid evening cooling that can ruin the finish.
Watch for moisture and dew, and only paint when surfaces are dry and the forecast shows several hours above the dew point.
Optimal Temperature Range
When planning exterior painting in the spring or fall shoulder seasons, aim for a consistent daytime temperature between about 50°F and 85°F so your paint can dry and cure properly; colder mornings or nights below that lower limit can slow drying and trap moisture, while temperatures above the upper limit can cause rapid skinning and poor adhesion.
- Monitor temperature effects daily.
- Adjust painting techniques for humidity.
- Pause if dew or frost threatens.
Morning And Evening Timing
Having picked a day in that 50–85°F window, plan your work around cooler mornings and evenings to avoid midday heat or overnight moisture that can ruin a fresh coat.
Start in gentle morning light to tack up and cut in, then pause midday.
Resume late in the evening calm for final touch-ups, ensuring film formation proceeds steadily before temperatures drop.
Moisture And Dew Control
Because spring and fall mornings often bring cool, damp air, you’ll need to monitor dew points and surface temps before you paint exterior surfaces.
You’ll control moisture, adjust timing to weather conditions, and complete surface prep to guarantee adhesion.
Tips:
- Check dew point and don’t paint if surface temp ≤ dew point.
- Use fans or heat for moisture control.
- Delay if humidity stays high.
Scheduling Tips: How to Pick the Right Days to Paint
If you want reliable results, pick days with steady temperatures, low humidity, and little chance of rain so paint can cure properly.
Check local weather patterns and forecasts for multi-day windows, avoiding temperature swings that slow paint drying.
Schedule work for mid-morning to afternoon when surfaces are warm but not hot.
Have backup days ready if humidity spikes or storms approach.
Troubleshooting Temperature-Related Paint Failures
When paint fails after application, temperature is often the culprit, and knowing what to look for helps you diagnose and fix problems fast.
Use targeted troubleshooting techniques to identify paint failure causes and act quickly.
Use targeted troubleshooting to pinpoint paint failure causes quickly, then act fast to correct them.
- Check blistering or cracking: was it applied in heat or frost?
- Test adhesion: scrape small area to assess cure.
- Adjust recoating timing and drying conditions.
Checklist for Painting Day: Temps, Humidity, and Tools
Start with three quick checks: confirm the temperature and humidity are within the paint manufacturer’s recommended range, inspect the forecast for wind or sudden temperature shifts, and gather the specific tools and materials you’ll need.
Use a temperature checklist, verify humidity levels with a hygrometer, complete tool preparation, and assess surface conditions for cleanliness and dryness.
Proceed only when all items meet specs.
Quick Reference Chart: Temperature, Humidity, Recommended Actions
Now that you’ve confirmed temps, humidity, and tools, use a quick reference chart to match specific temperature and humidity ranges with the recommended actions for exterior painting.
Keep temperature effects and humidity levels in mind so you act fast and smart:
Keep temperature and humidity in mind so you act quickly and choose the right painting conditions.
- 50–90°F, low humidity: ideal — proceed with standard prep and painting.
- 45–50°F, moderate humidity: delay primer, use slow-dry formulas.
- <45°F or high humidity: postpone to avoid adhesion and curing failures.
Frequently Asked Questions
Can Temperature Affect Exterior Paint Color Fading Rate?
Yes — temperature affects fading; higher heat accelerates breakdown and, combined with UV exposure, shortens color longevity. You’ll notice pigments degrade faster in hot, sunny conditions, so protect surfaces to preserve color longevity.
Do Different Primer Brands React Differently to Cold?
Yes — different primer brands react differently to cold. You’ll find primer performance varies with formulation; some thicken or cure slowly in cold weather, while others maintain adhesion and drying times, so choose cold-rated primers.
Will Lingering Paint Odors Be Worse in Heat?
Yes — you’ll notice paint odor retention increases with heat exposure effects; warmer temperatures speed solvent release, making smells stronger initially, though they dissipate faster overall, so ventilate well and use low‑VOC products to reduce odor.
How Does Temperature Influence Brush vs. Spray Application?
About 70% of painters report faster jobs with sprayers: you’ll find brush technique slows as paint thickens in cold, while spray efficiency peaks in moderate warmth, drying faster but risking runs if it’s too hot or windy.
Can Temperature Extremes Impact Paint Cure Time for Masonry Sealers?
Yes — temperature extremes slow or speed cure time for masonry sealers, and you’ll see that high humidity or freezing temps disrupt curing; you’ll need to control moisture levels and temperature to guarantee full, timely cure.
Conclusion
So you want to paint outside like a responsible adult instead of staging a weather-themed reality show. Don’t grab paint when it’s freezing, boiling, or feeling dramatic—stick to the manufacturer’s temperature range, watch surface temp, humidity, and wind, and pick calm, mild days. Follow the checklist, and you’ll avoid peeling, blistering, or starring in a cautionary tale about bad timing. Paint smart, not theatrically.