Why Is My Ceiling Paint Bubbling? Causes and Solutions
Your ceiling paint is bubbling because moisture, heat swings, poor prep, or trapped air has broken the paint’s grip and lifted the finish. Leaks, high humidity, damp insulation, or condensation force water under the paint and expand with temperature changes, creating blisters and peeling. Fast application, dirty surfaces, or incompatible primer can also trap air and ruin adhesion. You should stop leaks, dry and prep the area, then patch and prime properly — keep going to learn practical fixes and prevention.
Quick Checklist: Fix Ceiling Paint Bubbles (DIY vs. Pro)
If you spot bubbling in your ceiling paint, don’t panic—addressing it quickly saves time and money.
You’ll follow Inspection Methods, assess Material Selection, and choose DIY Techniques or Professional Solutions.
Prioritize Surface Preparation, weigh Cost Analysis, improve Ventilation Strategies, and schedule Seasonal Maintenance.
Prioritize surface prep, balance costs, boost ventilation, and stick to seasonal maintenance for lasting results.
Decide whether you’ll repair, repaint, or hire pros based on skill, budget, and long-term durability.
Quick Answer: Why Ceiling Paint Bubbles Form
Because moisture, heat, poor adhesion, or trapped air gets between the paint and ceiling, bubbles form as the coating lifts and separates.
You’ll see blistering where paint adhesion failed or where surface integrity was compromised by leaks, condensation, or improper prep.
Address the root—drying, fixing leaks, sanding, and priming—to restore adhesion and protect surface integrity before repainting.
How To Tell If Bubbling Is Cosmetic Or A Bigger Problem
Check the size and spread of the bubbles — a few small, isolated blisters are usually cosmetic, while large or spreading patches signal a bigger issue.
Tap or press a bubble; if it feels soft or gives way, there may be moisture trapped underneath.
If you spot dampness, discoloration, or recurring bubbling, don’t ignore it because that indicates an underlying moisture problem.
Size And Spread
When you inspect bubbling, focus on size and spread since those clues tell you whether the issue is merely cosmetic or a sign of deeper damage; note that size impacts urgency — tiny pinheads usually stay cosmetic, larger blisters demand attention.
Also study spread patterns: clustered spots that grow or radiate suggest progressive failure, while isolated bubbles often mean localized paint or adhesion defects.
Underlying Moisture Presence
Size and spread give you initial hints, but underlying moisture is the deciding factor that separates cosmetic bubbling from a serious problem.
Check for dampness with moisture detection tools or touch—freshly soft or cool spots mean active water.
Trace stains to sources, inspect attic or plumbing, and act quickly.
Address leaks and prioritize leak prevention to stop paint failure and structural damage.
Common Bubble Types: Pinholes, Blisters, And Peeling
You’ll usually see two basic bubble types: pinholes and small bubbles that look like tiny dots, and larger blisters where paint lifts from the surface.
Pinholes often mean trapped air or solvent, while blisters and peeling point to moisture, adhesion failure, or old paint.
Understanding which type you have helps you choose the right fix.
Pinholes And Small Bubbles
If tiny pinholes, small blisters, or slight peeling appear on your ceiling, they usually signal trapped moisture, poor adhesion, or contamination beneath the paint.
You should dry the area, test for leaks, and gently sand contaminated spots.
Use proper primer and breathable paint for pinhole prevention and active bubble resolution.
Monitor humidity and ventilate to prevent recurrence.
Blisters And Paint Peeling
While pinholes often point to localized contamination or moisture, larger blisters and peeling signal more extensive adhesion failure or ongoing moisture intrusion beneath the paint film.
You’ll notice different blister types—air pockets from trapped solvent, heat, or moisture—and peeling causes like poor surface prep, water leaks, or incompatible coatings.
Scrape, dry, repair substrate, then prime and repaint with suitable products.
How Trapped Moisture Creates Bubbles In Paint
Because moisture trapped beneath a paint film expands as temperatures rise, it pushes the coating away from the surface and forms bubbles you can see and feel.
You’ll notice that hidden moisture sources—like high indoor humidity or damp insulation—undermine paint adhesion. As vapor accumulates, pressure lifts the film, creating blisters.
Fixing ventilation and drying substrates prevents recurrence and restores a stable paint bond.
Roof Leaks As A Cause Of Ceiling Paint Bubbling
If you see water stains, sagging, or fresh drips on the ceiling, you’re likely dealing with an active roof leak that’s causing paint to bubble.
You’ll want to stop the source by repairing the roof or flashing and catch any remaining water to prevent more damage.
After the leak is fixed, dry the area thoroughly before scraping, priming, and repainting to guarantee the bubbles don’t return.
Signs Of Active Leaks
Noticing damp spots or fresh discoloration on your ceiling often signals an active roof leak rather than an old, settled issue. You should do a quick ceiling inspection for water stains, sagging, peeling paint, or mold—signs of water intrusion and interior damage that threaten ceiling integrity. Prompt leak detection locates moisture sources before worsening.
| Sign | What to look for | Urgency |
|---|---|---|
| Water stains | Brown/yellow patches | High |
| Sagging | Soft or bulging area | High |
| Paint bubbles | Blisters or flaking | Medium |
| Drips | Visible water | Immediate |
| Mold | Black/green spots | High |
Repair And Drying Steps
Start by stopping the leak and drying the area thoroughly before you touch the bubbled paint.
Once dry, remove loose paint, cut away damaged drywall, and apply appropriate repair techniques—patching, sealing, or replacing affected sections.
Use targeted drying methods like fans and dehumidifiers to guarantee no residual moisture.
Prime repaired areas with a mold-resistant primer before repainting to prevent recurrence.
Plumbing Leaks And Hidden Pipe Damage Signs
When hidden pipe damage occurs, you’ll often see subtle ceiling paint bubbling before any obvious water stains appear. Small, localized blisters or soft spots can signal a slow leak overhead that’s been seeping into the drywall.
You should perform a ceiling inspection, moisture assessment and leak detection, check pipe insulation, and address hidden plumbing issues promptly for damage prevention and routine plumbing maintenance.
Condensation Issues That Lead To Ceiling Bubbles
Besides hidden leaks, condensation can cause ceiling paint to bubble by soaking drywall from the room side rather than from above.
You’ll spot bubbles where warm, moist air meets a cool ceiling. Identify condensation sources and improve humidity management quickly.
- Poor ventilation in bathrooms or kitchens
- Uninsulated ceiling cold spots
- Continuous indoor drying or cooking without exhaust
How Poor Surface Preparation Causes Bubbling
If you don’t remove old loose paint, dirt, grease, or glossy finishes before repainting, the new coat won’t bond properly and will soon blister or peel.
You must perform thorough surface inspection, use proper cleaning techniques and sanding methods, choose primer selection for paint compatibility, and address moisture control.
Good surface preparation guarantees strong paint adhesion and prevents bubbling.
Why Incompatible Paint Layers Blister And Peel
Poor surface prep reduces adhesion, but mismatched paint types or improper primer choices create a chemical and mechanical mismatch that makes layers bubble and peel.
Poor prep weakens adhesion, but incompatible paints or wrong primers cause chemical and mechanical mismatch, leading to bubbling and peeling.
You’ll see incompatible paint fail where solvents, flexibility, or curing differ, triggering blister formation and eventual peeling. Prevent it by matching systems and using proper primers.
- Check compatibility
- Use recommended primer
- Test a small patch
How High Humidity During Painting Causes Bubbles And How To Avoid It
If you paint when humidity is high, the paint won’t dry fast and trapped moisture can form bubbles on the ceiling.
You can also get bubbling when the surface itself is damp from leaks or recent cleaning.
To prevent this, wait for drier conditions or use proper ventilation and time your work for lower humidity periods.
Paintn’t Dry Fast
When humidity’s high while you’re painting a ceiling, the water in the paint can’t evaporate quickly and the film stays soft long enough for bubbles to form as solvents try to escape.
To avoid this, keep the room’s relative humidity below about 50% and raise ventilation so the paint can dry evenly. You should manage paint drying with active humidity control.
- Use dehumidifiers.
- Increase airflow.
- Wait between coats.
Moisture From Surface
You’ve already seen how humid air slows drying; moisture can also come directly from the surface you’re painting and cause bubbling even if room humidity is controlled. You should check for hidden moisture sources like leaks, damp plaster, or recent repairs. Address surface imperfections, dry thoroughly, and use a moisture barrier before repainting.
| Problem | Fix |
|---|---|
| Leak | Repair |
| Damp plaster | Dry |
| New patch | Seal |
| Stains | Prime |
Proper Ventilation Timing
Because high humidity slows paint film formation, painting in damp air traps moisture and causes bubbles as the surface dries; you can prevent this by timing ventilation to lower relative humidity before and during application.
Use ventilation strategies and timing considerations to plan workdays, reduce dew point, and keep fans running until dry.
- Check humidity forecast
- Pre-ventilate room
- Maintain airflow
Temperature Problems That Ruin Paint Adhesion
If temperatures swing too far from the paint’s recommended range during application or drying, the finish can fail to bond and bubbles will form.
You’ll notice bubbling when temperature fluctuations cause uneven curing or trap moisture.
Work within the manufacturer’s specified range, avoid painting during cold nights or hot afternoons, and use heaters or ventilation to stabilize conditions so paint adhesion remains consistent.
Oil-Based Vs. Latex Paint Conflicts Explained
Temperature swings can also reveal another common cause of ceiling bubbles: incompatible paint types. You’ll see bubbles when oil-based and latex paints clash because paint compatibility fails, altering surface tension and preventing proper bonding.
Avoid mixing without proper primer; strip or sand old oil layers first.
- Test adhesion
- Use bonding primer
- Sand to roughen surface
Old Paint And Multiple Layers: Risks For Bubbling
When you paint over many old layers, the ceiling may start to bubble as underlying coatings lose adhesion or trap moisture and solvents. Each additional coat increases the chance of hidden contaminants, brittleness, and uneven flexibility that force new paint to lift.
You should assess Old Paint and Multiple Layers for Bubbling Risks, strip or sand compromised areas, and prioritize Surface Preparation to guarantee adhesion.
How Primer: Or Lack Of It: Affects Ceiling Bubbles
Moving from old paint layers to the role of primer, understand that skipping primer or using the wrong one often causes ceiling bubbles by preventing a stable bond between the substrate and new paint.
Skipping primer—or choosing the wrong one—often leads to ceiling bubbles by failing to form a stable paint bond.
You should focus on primer types, primer benefits, primer sealing and primer compatibility to avoid primer mistakes.
- Primer application timing and primer drying
- Match primer texture to surface
- Prep, apply, inspect
How Drywall Or Plaster Damage Shows As Paint Bubbles
If you see peeling or blistering paint on your ceiling, it can signal underlying drywall or plaster damage that’s letting moisture or movement break the bond.
You’ll also notice soft spots or hairline cracks in the plaster where bubbles form and spread.
Addressing the damaged drywall or plaster first prevents the problem from returning after you repaint.
Peeling Or Blistering Paint
Although paint bubbles often look like a surface issue, peeling or blistering usually signals underlying drywall or plaster damage that needs attention before you repaint.
You’ll notice paint texture changes, peeling paint, and other surface flaws. Address moisture management and paint compatibility to restore paint longevity and reduce aesthetic concerns.
Repair techniques matter for ceiling maintenance.
- Identify source
- Strip affected area
- Patch and prime
Soft Or Cracked Plaster
Peeling or blistering paint often masks more serious substrate problems, like soft or cracked plaster, that will keep bubbling unless you fix the base.
You’ll see bubbles over soft plaster or along hairline faults where cracked plaster has weakened adhesion.
Probe, remove loose material, and repair or replaster affected areas before priming and repainting so bubbles don’t return.
Signs Of Mold Behind Bubbling Paint
When paint starts bubbling, you should check for specific clues that point to mold rather than simple adhesion problems.
You’ll want to perform mold detection during a thorough paint inspection. Look for musty odors, discolored patches, and recurring dampness that reappears after drying.
- Dark or fuzzy stains
- Persistent musty smell
- Recurrent damp spots
Pest-Related Causes Of Ceiling Bubbling
You should check for pest-related causes when you see ceiling paint bubbling, since insect nests can trap moisture and weaken the paint layer.
Look for rodent activity like droppings, gnawed insulation, or tunnels that let in humidity and cause blistering.
Also note bird droppings on outdoor eaves or attic vents, which are acidic and can stain or degrade paint over time.
Insect Nesting Damage
If insects take up residence above your ceiling—especially wasps, hornets, or large fly species—their nesting activity can cause paint to bubble and discolor.
You’ll notice trapped moisture, debris and acids from insect behavior and nesting materials degrading paint. Check for stains, soft spots, or sound of activity.
- Look for entry points
- Inspect attic spaces
- Call an exterminator
Rodent Activity Signs
Just as insect nests can mar your ceiling, rodents cause their own distinct signs of damage that lead to paint bubbling.
You’ll spot rodent droppings, greasy trails, chewed insulation, and nesting signs in attics or walls. Include these in a damage assessment, document locations, and call pest control promptly.
Removing nests and sealing entry points stops moisture and prevents further bubbling.
Bird Droppings Effects
When birds roosting near your roof leave droppings on eaves or vents, those acidic deposits can eat into paint and create stains that promote bubbling and peeling.
Check rooflines and attic vents for splatter patterns, hardened guano, and odors to pinpoint affected areas quickly.
- Document bird droppings impact areas.
- Clean and disinfect to restore ceiling hygiene.
- Seal entry points and remove roosts.
Chemical Contamination And Solvent Entrapment
Because chemical contamination and trapped solvents can break the bond between paint and substrate, you’ll often see bubbling even after a seemingly careful paint job.
Cleaning products, old adhesives, waxes, or oil residues react with fresh paint or prevent solvents from evaporating, causing lifts and blisters.
You should inspect for surface contamination, recognize chemical reactions, remove residues, and allow full drying before repainting.
How Paint Application Mistakes Create Bubbles
Chemical contamination and trapped solvents aren’t the only culprits; how you apply paint can create bubbles even on a clean, dry surface.
You’ll cause issues by rushing, overworking, or using wrong tools. Mind proper paint techniques and application timing to avoid entrapment of air and uneven film formation.
- Fast coats
- Heavy rollers
- Poor overlap
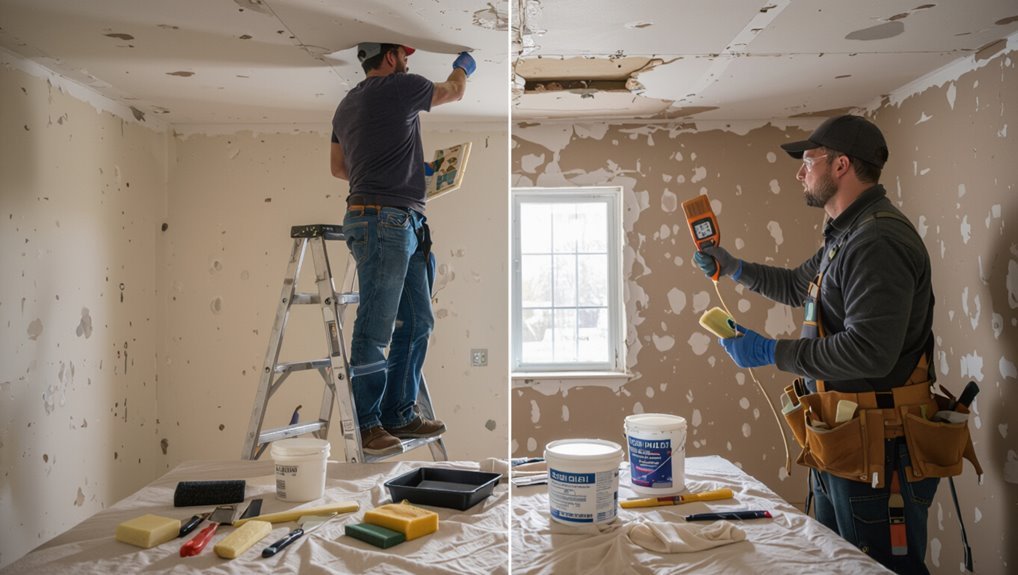
Safety Gear And Tools To Inspect Wet Or Damaged Ceilings
Before you climb a ladder, gather the right safety gear and inspection tools so you can assess wet or damaged ceilings without risking injury or missing signs of hidden problems. Wear goggles, gloves, a mask, and non-slip shoes; bring a sturdy ladder, flashlight, moisture meter, and phone.
| Safety Gear | Inspection Tools |
|---|---|
| Goggles | Flashlight |
| Gloves | Moisture meter |
| Mask | Ladder |
| Non-slip shoes | Phone |
Diagnosing Ceiling Paint Bubbles: Step-By-Step
Start by inspecting the ceiling for water stains, soft spots, or mold that point to active leaks.
Then test paint adhesion by gently pressing or scraping a small area to see if it flakes or stays put.
Finally, measure humidity and ventilation to determine if moisture buildup is causing the bubbling.
Inspect For Water Damage
1 quick visual check can reveal whether moisture’s behind those paint bubbles: look for stains, peeling drywall, warped trim, or soft spots around the affected area.
Then inspect for water stains, trace likely leak sources, and schedule ceiling inspections or moisture testing if needed.
- Trace roof or plumbing above the area
- Check attic, vents, and flashing
- Document damage and shut off water sources
Test For Adhesion
Once you’ve ruled out active moisture, you’ll want to check whether the paint’s actually adhering to the ceiling or just sitting on top of a failing layer.
Lightly score a small area, press tape, then peel to perform an adhesion test. If paint lifts, remove loose material, clean and sand—proper surface preparation—before priming and repainting to guarantee a durable finish.
Check For Humidity Levels
After you’ve confirmed the paint’s bonding and addressed loose flakes, check the room’s humidity—excess moisture in the air often causes bubbles to form even when the surface itself is sound.
Measure seasonal humidity, watch for condensation, and note climate impact. Use humidity control, dehumidifier usage, ventilation strategies, moisture barriers, and proper paint selection to prevent water damage.
- Test levels
- Improve air circulation
- Install barriers
When To Call A Professional For Inspection
If the bubbling is widespread, recurring after repairs, or accompanied by stains, sagging, a musty smell, or peeling that reaches multiple layers, call a professional for an inspection—you may be facing a moisture or structural issue that needs more than a simple repaint.
Seek professional consultation promptly to determine causes, prioritize repairs, and establish an inspection timeline so you don’t risk worsening damage or hidden mold.
How To Dry A Wet Ceiling Before Repair
Before you patch or repaint, stop the leak and remove the water source so the ceiling can start drying.
Use fans, dehumidifiers, and open windows to speed up drying and monitor moisture with a meter or by touch.
Only begin repairs when the area is fully dry to prevent bubbling or mold.
Remove Water Source
Step 1: stop the leak and cut off the water feeding it so you can dry the ceiling properly.
You’ll perform a ceiling inspection and moisture detection, then isolate the water source for leak prevention. This preserves paint adhesion and aids surface preparation.
Follow repair techniques, control humidity, and use ventilation solutions alongside proven drying methods.
- Locate source
- Shut valves
- Monitor moisture
Speed Up Drying
Once you’ve stopped the leak and removed standing water, speed up drying by increasing air movement and lowering humidity so the ceiling dries evenly and quickly. Use fans, dehumidifiers, and open windows as drying techniques; check for moisture before repairs.
| Tool | Purpose |
|---|---|
| Fan | Airflow |
| Dehumidifier | Humidity control |
| Heater | Faster evaporation |
| Window | Ventilation |
| Moisture meter | Verify dry status |
How To Fix Minor Pinholes And Small Blisters Yourself
Start by evaluating the size and location of the pinholes or blisters so you know whether you can repair them yourself.
Small, isolated defects are usually easy fixes that only need basic tools and a little patience.
Use DIY Techniques and proper Repair Tools.
Steps:
- Lightly sand, puncture bubbles, and remove loose paint.
- Fill with spackle, smooth, dry.
- Prime and touch up with matching ceiling paint.
How To Repair Large Blisters And Peeling Sections
Start by evaluating the extent of the damage so you know whether patching, skim-coating, or full replacement is needed.
Remove all loose paint and damaged drywall, then clean and dry the area thoroughly.
Finally, sand and apply a proper primer to guarantee the repaired surface bonds and the new paint won’t bubble again.
Assess Damage Extent
Before you grab tools, take a careful look at the ceiling to gauge how widespread the blisters and peeling are: note the size and depth of each blister, whether the paint is flaking in thin sheets or large strips, and any underlying substrate exposure like plaster or drywall paper.
Use damage assessment to plan repair techniques.
- Map affected areas.
- Rank by severity.
- Note moisture signs.
Proper Surface Preparation
1. You’ll remove loose paint and large blisters with a putty knife, sand edges smooth, and perform thorough surface cleaning to eliminate dust and grease.
Patch holes with compound, sand again, and vacuum debris.
Choose primer selection based on substrate and stain-blocking needs, apply evenly, and let fully dry before repainting to guarantee adhesion and prevent future peeling.
Replacing Damaged Drywall Or Plaster Patches
When bubbling has left the drywall or plaster crumbling, you’ll need to cut out the damaged section and fit a clean patch before repainting; doing this prevents future paint failure and restores structural integrity.
You should perform proper drywall replacement or plaster repair, guarantee a snug fit, and feather joint compound smoothly.
- Cut and remove damaged area
- Fit patch securely
- Sand, prime, repaint
Treating Mold And Mildew Under Bubbling Paint
Scrape away loose paint and gently probe the bubbled area to see if mold or mildew has taken hold beneath the surface.
If you find discoloration, apply a commercial mold treatment or a diluted bleach solution, scrub, rinse, and let dry completely.
Sand and prime with a mold-resistant primer.
Maintain ventilation and humidity control for ongoing mildew prevention before repainting.
Addressing Plumbing And Roof Leaks Before Repainting
Before you repaint, find any hidden water sources like attic pipes, wall voids, or roof leaks so the problem won’t return.
Repair roof flashing and damaged shingles promptly to stop external water intrusion.
Inside, fix any leaking plumbing fittings or valves before you prep and paint the ceiling.
Locate Hidden Water Sources
If you suspect bubbling came from moisture, start by tracing likely sources—check attic insulation for damp spots, inspect roof penetrations and flashing after rain, and run plumbing tests by turning off fixtures one at a time while watching for changes.
- Use moisture detection and moisture mapping for hidden sources.
- Perform leak inspection and water testing during ceiling assessment.
- Document water damage, perform plumbing evaluation, and plan repair strategies.
Repair Roof And Flashing
When you find bubbling caused by roof or flashing failures, fix those leaks first so new paint won’t fail again; start with a thorough roof inspection and address damaged shingles, seals, and flashing maintenance. After repairs dry, scrape and prime affected areas before repainting.
| Task | Action |
|---|---|
| Inspect | Roof inspection, check flashing |
| Repair | Replace seals, patch leaks |
Fix Interior Plumbing Faults
Because interior plumbing leaks can soak ceiling drywall and insulation, you should locate and stop any active leaks before repainting so bubbling doesn’t return.
- Schedule plumbing inspections to find hidden issues and prioritize repairs.
- Use professional leak detection for persistent stains or damp spots.
- Replace damaged drywall and insulation only after leaks are fixed, then prime and repaint to prevent recurrence.
Choosing The Right Primer For Ceiling Repairs
Picking the right primer can make or break your ceiling repair, so focus on stain-blocking, adhesion, and compatibility with your topcoat. You’ll choose primer types by surface, follow correct primer application, and value primer benefits like sealing and bonding. Check primer compatibility with your paint to prevent bubbling.
| Surface | Primer Type | Key Benefit |
|---|---|---|
| Stained drywall | Oil-based | Stain-blocking |
| New drywall | PVA | Sealing |
| Plaster | Acrylic | Adhesion |
| Previously painted | Universal | Bonding |
Best Paint Types For Ceilings Prone To Moisture
After you’ve sealed and primed properly, choose paints that stand up to humidity and resist bubbling. Primers help, but the paint itself must block moisture and flex with slight substrate movement.
Pick ceiling paint with a formulated moisture barrier and mold prevention additives.
Consider these moisture resistant options:
- 100% acrylic latex — flexible, breathable, durable.
- Epoxy-modified enamel — hard, water-tolerant.
- Specialty mildew-resistant formulations.
Proper Surface Prep: Sanding, Cleaning, And Priming
When you’re prepping a ceiling, good sanding, thorough cleaning, and a compatible primer are the trio that prevents paint from bubbling later on.
You’ll perform surface evaluation to spot loose texture or residue, use appropriate sanding techniques for smooth adhesion, apply targeted cleaning solutions to remove dust and grease, then choose priming methods matched to substrate and moisture history for lasting paint bond.
Painting Conditions: Humidity And Temperature Targets
You should paint ceilings when indoor humidity is between about 40–60% to guarantee proper drying and adhesion.
Aim for an ambient temperature of roughly 50–85°F (10–29°C) while painting and during the curing period.
Working outside these ranges raises the risk of blistering, extended tackiness, or poor film formation.
Ideal Humidity Range
Humidity plays a big role in how paint cures, so aim for a stable relative humidity between about 40% and 60% while you’re painting and for at least 24 hours afterward.
Lower humidity speeds drying but can cause blistering if too fast, while higher humidity slows drying and raises the risk of bubbling and adhesion problems.
- Use a hygrometer to monitor perfect humidity.
- Run a dehumidifier for best conditions.
- Avoid painting during rainy, muggy days.
Optimal Temperature Window
After stabilizing humidity, focus on temperature: paint performs best in a narrow band—roughly 50°F to 85°F (10°C to 29°C) for most water-based and oil-based products—because extremes either slow curing or trap solvents and moisture, which leads to bubbling and poor adhesion.
You should monitor temperature variations during application and drying, and choose products for paint compatibility with your local climate to prevent problems.
Application Tips To Avoid Future Bubbling
When you prep the surface properly and follow a few key techniques during application, you’ll greatly reduce the chance of ceiling paint bubbling later on.
Use proper application techniques and thorough surface preparation. Follow these steps:
- Apply thin, even coats and let each dry fully.
- Use breathable primers on stained or repaired areas.
- Maintain recommended temperature and humidity while curing.
How To Blend Repaired Patches For A Seamless Finish
Once your repaired areas are fully cured and primed, blend them into the surrounding ceiling so the patch disappears under the paint. Use feathered brush strokes, thin coats, and texture matching. For Blending techniques, sand lightly and apply finish coats while wet edges meet. Focus on Patch repair edges until invisible.
| Step | Tool | Tip |
|---|---|---|
| 1 | Sand | Feather edges |
| 2 | Primer | Thin coat |
| 3 | Texture | Match pattern |
| 4 | Paint | Wet edge |
| 5 | Blend | Feather finish |
Ceiling Repair Costs: DIY Vs. Hiring A Contractor
You can save money by doing small ceiling repairs yourself, so we’ll break down typical DIY costs for materials and tools.
If the job’s bigger or you want guaranteed results, compare that to contractor pricing, which covers labor, permits, and warranties.
We’ll compare line items so you can pick the most cost-effective option for your situation.
DIY Cost Breakdown
Deciding whether to tackle ceiling bubbling yourself or hire a pro comes down to time, skill, and budget: DIY saves labor costs but can stretch over weekends and risks mistakes that raise long-term expenses, while a contractor charges more upfront for speed and guaranteed results.
- Tools/materials: ladders, patch compound, primer, paint — cost effective solutions.
- Time: estimate hours for repair.
- Budget planning: factor mistakes and replacement parts.
Contractor Pricing Comparison
If your DIY estimate starts to look lengthy or uncertain, compare that to what a contractor will charge so you can judge real value.
You’ll weigh contractor rates against material costs and labor expenses, factoring project scope and regional differences.
Consider pricing factors like service quality and warranty details; sometimes paying more buys expertise, speed, and protection you can’t get doing it alone.
When Replacement Is Cheaper Than Repeated Patching
When small repairs keep recurring, you’ll save time and money by replacing the damaged ceiling instead of patching it again.
Repeated fixes can hide underlying issues like widespread moisture damage, compromised drywall integrity, or failing joists that only get worse over time.
- Cost effective solutions: replace once, avoid recurring contractor fees.
- Long term benefits: restored structure and finished surface.
- Faster, cleaner result with warranty coverage.
Preventing Future Bubbles: Ventilation And Insulation Fixes
Replacing a damaged ceiling gives you a clean slate, but you also need to stop the conditions that caused bubbling in the first place.
You should install proper exhaust fans, add soffit or ridge vents, and guarantee airflow with ventilation improvements.
Pair those with targeted insulation upgrades around fixtures and ductwork to reduce temperature differentials and moisture migration, preventing future paint bubbles effectively.
How Attic Sealing And Insulation Reduce Ceiling Moisture To Prevent Paint Bubbles
Because warm, moist air from your living spaces can migrate into the attic and condense on cold surfaces, sealing air leaks and adding proper insulation stops that moisture before it soaks your ceiling paint and causes bubbles.
You should:
- Improve attic ventilation and ceiling airflow while choosing correct insulation materials.
- Install moisture barriers and seal penetrations for temperature regulation.
- Match paint compatibility to dry, stable conditions.
Improving Bathroom And Kitchen Ventilation To Stop Bubbling
Good bathroom and kitchen ventilation keeps humid air from lingering where it can seep into ceiling paint and form bubbles, so you should make exhaust performance a priority.
Install or upgrade fans, vent ducts to the outside, and use timers or humidity sensors.
These ventilation improvements give active moisture control, reduce condensation, and stop recurring bubbles by removing humid air before it damages paint.
Seasonal Maintenance To Prevent Ceiling Paint Problems
When seasons change, check your ceilings for early signs of bubbling, peeling, or water stains and take quick action to prevent bigger repairs.
Do seasonal checks each quarter, clear gutters, and inspect attic insulation. Consider ventilation upgrades if humidity’s high.
- Inspect for stains or soft spots.
- Clear nearby vents and gutters.
- Repair flashing and seal roof penetrations.
How To Monitor For Recurrent Leaks After Repair
After you’ve fixed a leak, keep watching the repaired area closely for signs it’s coming back so you can act before paint bubbles or mold appears. Check weekly: look for stains, soft spots, or musty smells. Use basic leak detection and simple moisture monitoring habits. Track observations and dates.
| Observation | Action |
|---|---|
| Stain | Inspect roof |
| Dampness | Dry/repair |
Product Recommendations For Humid Rooms And Ceilings
Pick paints and primers designed for high humidity and mold resistance to protect ceilings in bathrooms, kitchens, and basements.
Use moisture resistant paints with mold resistant finishes and high humidity coatings, pair with bathroom primers, and seal edges with ceiling sealants.
Also make certain ventilation fans work properly.
- Mold resistant finishes
- Bathroom primers
- Ceiling sealants
Warranties And Guarantees To Ask Contractors About
Having chosen moisture- and mold-resistant paints, you’ll want to make sure the work protecting those finishes is backed up by solid warranties and guarantees from your contractor.
Ask for clear warranty terms covering adhesion, moisture damage, and mold-related failures, plus written contractor guarantees on workmanship and materials.
Confirm duration, exclusions, and remediation steps, and get everything signed before work begins to avoid disputes.
Common Repair Mistakes That Cause Bubbles To Return
When repairs fail to address the real cause, bubbles almost always come back—so don’t assume a quick skim coat or surface sanding will fix underlying problems.
You should avoid common mistakes and use proper repair techniques and prevention strategies:
- Skipping moisture remediation before repainting.
- Applying incompatible primers or paints.
- Ignoring substrate damage like mold or loose plaster.
Case Studies: Real Fixes For Different Bubble Causes
1 clear case study can make the difference between a temporary patch and a permanent fix: in the examples below you’ll see how professionals diagnose the root cause—moisture, heat, old oil-based finishes, or substrate failure—and apply targeted repairs like waterproofing, compatible priming systems, or plaster replacement so bubbles don’t return. You’ll learn bubble prevention techniques and paint adhesion strategies.
| Cause | Fix | Result |
|---|---|---|
| Moisture | Waterproofing | Durable |
| Heat | Ventilation | Stable |
| Old finish | Compatible primer | Bonded |
Quick Checklist Before Repainting A Repaired Ceiling
Before you pick up the roller, run a quick systems check: confirm the repaired area is fully dry, any loose material’s been removed, and the substrate is sound and clean so the new paint can bond properly.
- Check for remaining dampness and inspect seams — key ceiling inspection tips.
- Sand, primer, and wipe dust.
- Verify paint type selection matches substrate and room conditions.
How Long Repaired Ceilings Should Be Left To Cure
Because different repair materials and environmental conditions cure at different rates, you should allow the full recommended cure time before painting or loading the ceiling.
Check manufacturer guidance for each ceiling materials patch, joint compound, or primer. Typical curing time ranges from 24 hours to several days; humid or cold conditions slow curing.
Wait the full period to guarantee adhesion and prevent new bubbling or failure.
Further Reading And Resources On Ceiling Paint Issues
Want more reliable fixes and deeper explanations? Check curated guides and pros’ advice to master ceiling maintenance tips and safe paint removal techniques. Explore these resources:
- Manufacturer manuals for compatible primers and moisture solutions.
- DIY forums and video tutorials demonstrating proper stripping and repair.
- Professional blogs and contractor directories for hiring vetted specialists and advanced diagnostics.
Frequently Asked Questions
Can Ceiling Paint Bubbling Indicate Structural Ceiling Failure?
It can, but it usually signals moisture issues rather than immediate structural integrity failure; you should inspect for leaks, sagging, or cracks, and call a pro if you suspect hidden water damage compromising the ceiling’s structural integrity.
Can New HVAC Systems Cause Ceiling Paint Bubbles?
Yes — new HVAC systems can trigger ceiling paint bubbles; if installation or HVAC maintenance neglects humidity control, trapped moisture or uneven airflow will make paint blister like a rising tide, so address vents, seals, and dehumidification.
Do Warranties Cover Paint Bubbling After a Home Sale?
Sometimes — but it depends. You’ll need to review warranty terms and proof of paint quality, documented defects, and sale disclosures; if issues fall under covered defects or misrepresentation, the warranty or seller’s policy may pay for repairs.
Can Exterior Siding Issues Lead to Interior Ceiling Bubbles?
Yes — exterior moisture from siding damage can seep into your walls and attic, causing trapped dampness that lifts ceiling paint; you’ll need to repair the siding, dry affected areas, and address any insulation or ventilation issues.
Are There Health Risks From Paint Bubbles Containing Lead?
About 3 million kids still face elevated lead levels yearly, so you should treat bubbling paint seriously: lead exposure risks neurological harm, and paint toxicity can release particles you’ll want tested and remediated promptly for safety.
Conclusion
Now you know why ceiling paint bubbles, how to spot if it’s cosmetic or a bigger issue, and what fixes to try yourself or call a pro for. Address the root cause—moisture, leaks, or poor prep—before repainting so bubbles don’t come back. Take your time to dry and cure repaired areas. With patience and the right steps, your ceiling will look smooth again, like a calm sky after a storm, and you can relax knowing it’s truly fixed.