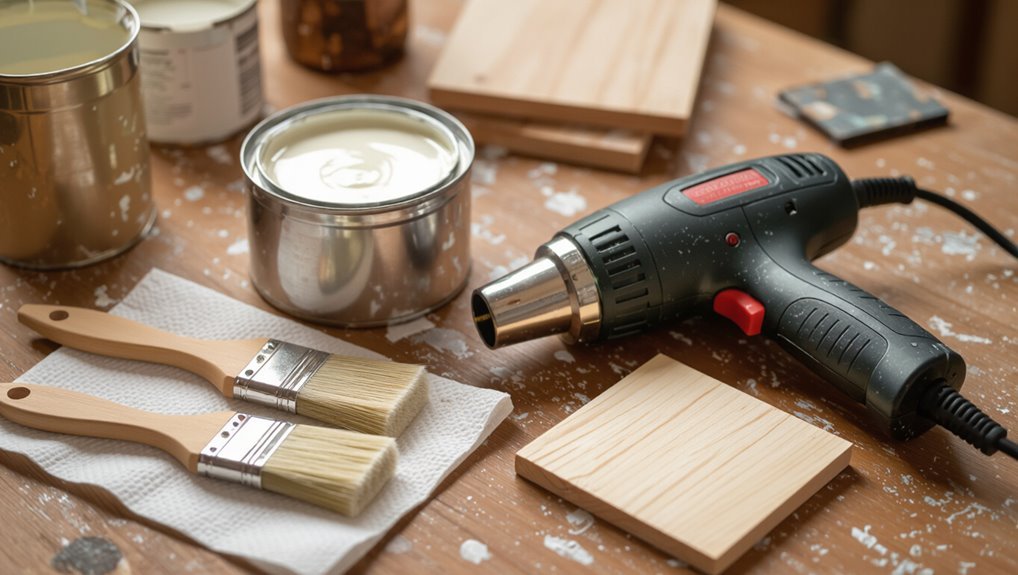
Will a Heat Gun Dry Paint Faster? Safe Drying Guide
Yes — a heat gun can speed surface drying, but you’ll need low, even heat, steady motion, and good ventilation to avoid blistering or solvent hazards. It works best on small spots, metal, or nonporous surfaces and for tacky or thick coats, not delicate plastics or full-room jobs. Keep distance, test a patch, and allow chemical curing time despite surface hardening. Follow safety procedures and precautions, and keep going to learn practical temps, timing, and alternatives.
Quick Answer: Will a Heat Gun Speed Paint Drying?
Curious whether a heat gun will speed paint drying? You can accelerate surface drying and influence paint curing with careful heat settings, but it’s not a cure-all.
Low, even heat helps moisture escape; high heat risks blistering, cracking or trapping solvents.
You’ll still need correct ventilation, compatible paint types, and patience for full chemical curing despite faster surface hardening.
When Using a Heat Gun Makes Sense
You’ll want to reach for a heat gun when you’re working on small, targeted areas that need faster drying without heating an entire room.
It’s also useful for speeding cure times on thick or multiple coats where surface tackiness persists.
Heat guns work best on metal or other nonporous surfaces that won’t absorb heat or solvents.
Small, Targeted Areas
When you only need to dry or soften paint in a tiny patch — a trim touch-up, a chip repair, or peeling paint around a window — a heat gun gives you precise, quick control that a heat lamp or hair dryer can’t match.
Use low heat, keep moving, and maintain distance. Targeted techniques help you work on small areas without spreading heat or damaging surrounding finishes.
Thick Or Multiple Coats
Small, targeted patches are one thing, but thick or multiple paint coats change the game — you’re dealing with deeper layers that trap solvents and take much longer to cure.
You should assess paint thickness, moisture content, paint types and surface preparation before using controlled heat settings.
For multiple applications, combine proper application methods, gentle drying techniques, and approved drying agents to aid the curing process.
Metal Or Nonporous Surfaces
Although nonporous metals trap solvents and slow drying, a heat gun can make sense on these surfaces if you control temperature and movement.
You’ll use gentle, even passes to speed solvent evaporation on metal surfaces without blistering.
Focus on surface preparation—cleaning, degreasing, and scuffing—to preserve paint adhesion.
Keep the gun moving, monitor heat, and test a small area before treating larger nonporous surfaces.
When You Should Not Use a Heat Gun
If you’re working near flammable materials, using a heat gun can quickly turn safe jobs into fire hazards, so don’t use one around solvents, petrol, aerosols, or piles of oily rags.
Avoid heat on delicate plastics, thin veneers, or varnished surfaces that can blister.
Consider heat gun alternatives and gentler paint drying techniques like air movement, dehumidifiers, or controlled warm rooms to protect finishes.
How Heat Speeds Evaporation and Curing in Paint
When you apply heat to a painted surface, you speed two linked processes: evaporation of solvents and the chemical reactions that cure the binder.
You’ll accelerate the evaporation process by raising solvent vapor pressure, shortening surface tack time. Higher temperature also speeds polymer crosslinking, reducing curing times, but beware excessive heat—which can blister, soften, or discolor the finish.
Use moderate, controlled warmth.
How to Patch-Test a Small Area for Blistering
Because heat can both speed curing and damage a finish, you should always patch-test a small, inconspicuous area for blistering before using a heat gun on the whole surface.
Use brief, controlled heat cycles at low settings, inspect for bubbles or soft spots, and cool between passes.
These patch testing methods help blistering prevention; document results and adjust temperature or abandon heat if damage appears.
Step-By-Step: Drying a Painted Wall With a Heat Gun
Before you start, make sure the room’s ventilated, the paint has passed your patch test, and you’ve got safety gear on (gloves, eye protection, and a mask for fumes).
Plan project planning, assess paint types and surface preparation. Use low heat settings, steady application techniques, and sweep the gun; monitor drying times.
Follow safety precautions, perform equipment maintenance, and work methodically to avoid scorching or bubbles.
Step-By-Step: Heat-Gun Drying for Trim and Moulding
If you’re tackling trim and moulding, work in short passes with the heat gun held about 6–10 inches away and moving continuously to prevent scorching or paint blistering.
Do trim preparation first: clean, sand lightly, and mask surrounding areas.
Match heat technique to paint selection—latex vs oil behave differently.
Keep tool moving, monitor temperature, and allow thin layers to cool before recoating.
Best Distance and Angle for Heat-Gun Drying
You’ll want to hold the heat gun about 4–6 inches from the surface to concentrate heat without blistering the paint.
Aim the nozzle at a shallow angle so hot air skims across the film rather than blasting one spot directly.
For thicker or oil-based coatings, move a bit farther and keep the gun in constant motion to avoid overheating.
Optimal Distance From Surface
Set the heat gun about 6–8 inches from the painted surface to start, then adjust based on paint type and heat setting; that distance concentrates heat enough to speed drying without scorching or causing bubbles.
You’ll pair this with ideal heat settings and effective drying techniques: move steadily, monitor temperature, and increase distance if paint softens or blisters, ensuring even, safe curing.
Best Heat Gun Angle
Now that you’ve got distance dialed in, think about the angle you hold the gun—aiming slightly off-perpendicular (about 20–30°) spreads heat more evenly and lowers the risk of localized blistering.
You’ll follow best practices by adjusting heat settings for paint types, using gentle drying techniques, keeping safety measures in place, and performing regular equipment maintenance to guarantee consistent, controlled results without damaging surfaces.
Adjusting Distance For Paint
Although distance and angle work together, getting the spacing right is the first thing you should focus on: you’ll adjust based on paint thickness and paint types, balancing heat distribution and drying techniques.
Control equipment handling and safety precautions during surface preparation and choose appropriate drying methods.
- Start 6–12 inches away; move constantly.
- Reduce distance for thin coats; increase for thick.
- Test on scrap first.
Safe Temperature Ranges for Latex and Acrylic Paints
When you’re drying latex or acrylic paint, keep the temperature moderate—typically between about 50°F and 85°F (10°C–29°C)—so the water in the binder evaporates steadily without causing cracking, bubbling, or poor adhesion.
You should apply temperature control to respect paint chemistry, avoid aggressive heat effects, and support the drying process.
Proper surface preparation and application techniques reduce problems and guarantee even curing.
Safe Temperature Ranges for Oil-Based and Alkyd Paints
Because oil-based and alkyd paints cure through oxidation and solvent evaporation, you should keep the ambient and surface temperatures in a narrower, warmer band than for waterborne finishes—typically between about 50°F and 90°F (10°C–32°C), with 65°F–80°F (18°C–27°C) being ideal for consistent drying and film formation.
You’ll follow oil based standards and alkyd properties to manage temperature sensitivity, paint durability, drying effectiveness, and surface characteristics.
- Check manufacturer specs for oil based standards
- Monitor temperature sensitivity to preserve paint durability
- Aim for steady conditions to optimize drying effectiveness and surface characteristics
How to Avoid Blistering and Cracking When Heating Paint
If you heat painted surfaces too quickly or unevenly, you’ll invite blistering and cracking as solvents vaporize and the film stresses against a still-tacky underlayer.
To avoid that, work low heat, keep the gun moving, and maintain distance. Allow layers to cool between passes, thin heavy coats, and follow manufacturer dry times.
These blister prevention and cracking solutions minimize stress and preserve finish.
How to Prevent Discoloration and Gloss Changes
Although heat speeds drying, it can also alter pigments and resins, so keep temperatures moderate and even to prevent discoloration and unwanted gloss shifts.
You should test a hidden area, use low heat settings, and move the gun constantly to protect color matching and finish consistency.
- Test on scrap or hidden spot first
- Use low, steady heat
- Keep constant motion to avoid hotspots
Ventilation and Fume Safety When Heating Paint
Heating paint can speed drying, but it also releases solvents and fumes that you need to control. You should use fume extraction and ventilation systems, improve air circulation, and follow clear safety precautions.
| Measure | Action |
|---|---|
| Fume extraction | Use local extractor |
| Ventilation systems | Open windows/ducts |
| Air circulation | Use fans |
How to Prevent Fires and Electrical Accidents With a Heat Gun
Keep your work area clear of flammable materials and clutter so a stray heat stream can’t start a fire.
Make sure the heat gun and any extension cords are properly grounded and in good condition before you turn it on.
If you spot frayed wires or sparks, stop immediately and replace the equipment.
Keep Clear Work Area
Clear your work area before you pick up the heat gun so nothing flammable, cluttered, or obstructive is within reach; you’re reducing fire risk and preventing trips that could knock the tool into something combustible or into a wet power source.
Focus on workspace organization and clutter reduction to keep clear sightlines and escape routes.
- Remove flammable materials
- Coil cords safely
- Keep a clear exit
Use Proper Grounding
After you’ve cleared the area of flammables and tripping hazards, make sure your heat gun is properly grounded to prevent shocks and electrical fires.
Check cords for damage, use a three-prong outlet or GFCI, and avoid adapters that defeat grounding.
Follow grounding techniques in the manual, keep connections dry, and prioritize electrical safety so you’ll reduce fire risk and stay protected while drying paint.
Tools and Accessories That Make Heat-Drying Safer
When you speed up paint drying with a heat gun, the right tools and accessories will keep the process safe and controlled. Use a heat-resistant pad or drop cloth to protect surfaces, a temperature gauge to avoid overheating, and a nozzle attachment to focus heat and reduce fire risk.
You’ll also need proper safety gear and thoughtful work area setup for different paint types and drying techniques.
- Heat gun accessories: nozzles, reflectors
- Temperature control: infrared thermometer, gauge
- Safety gear: gloves, goggles, respirator
When Slower Drying Gives a Better Finish
Speeding up paint drying has its place, but there are times you’ll get a better result by slowing things down.
When you embrace slow drying, you protect finish quality: brush marks level, solvent evaporation evens out, and paint texture stays consistent.
Adjust your application technique—thinner coats, proper brushing or rolling—and you’ll avoid defects and achieve a smoother, more durable finish.
Alternatives to Heat: Dehumidifiers, Fans, and Open Windows
You don’t need a heat gun to speed paint drying—dehumidifiers, fans, and open windows often do the job more safely and evenly.
You can rely on humidity control and moisture removal plus airflow enhancement to reduce drying time while considering environmental factors.
- Dehumidifier effectiveness depends on room size and runtime.
- Fan placement guides airflow enhancement across surfaces.
- Window ventilation balances fresh air with humidity control.
Using Dehumidifiers and Fans to Speed Paint Drying
If controlling humidity and airflow worked better for your project than using a heat gun, you can focus on two reliable tools: dehumidifiers to pull moisture from the air and fans to move that drier air across painted surfaces. Adjust dehumidifier settings for target RH, position fans for ideal fan placement, and monitor temps to avoid over-drying.
| Tool | Purpose | Tip |
|---|---|---|
| Dehumidifier | Remove moisture | Set RH ~40-50% |
| Fan | Air circulation | Aim across surface |
| Monitor | Check progress | Use hygrometer |
Heat Guns vs. Heat Lamps and Infrared for Drying Paint
Wondering whether a heat gun, heat lamp, or infrared heater will work best for drying paint? You’ll weigh portability, surface control, and risk: heat gun efficiency gives focused blasts; heat lamps offer gentle, wider coverage; infrared penetrates deeper without overheating surfaces.
Choose based on paint type and safety. Use safe drying techniques and keep distance to avoid blistering.
- Heat gun: focused control
- Heat lamp: gentle spread
- Infrared: deeper penetration
How Temperature, Humidity, and Airflow Change Dry Times
You’ll see drying speed change a lot with temperature — warmer air speeds solvent evaporation and accelerates film formation.
Higher humidity slows curing by keeping solvents and water in the paint longer, which can tack up finishes and extend recoat times.
Increasing airflow speeds evaporation without raising temperature much, but too-strong airflow can cause uneven drying or dust contamination.
Temperature Effects On Drying
When you’re trying to speed up paint drying, remember that temperature, humidity, and airflow act together rather than independently. You can boost drying effectiveness by raising ambient temperature, but watch for overheating that harms finish.
Consider controlled, moderate heat to optimize temperature impact without causing skinning or bubbling.
- Use gentle, even warmth
- Monitor surface temperature
- Combine with steady airflow
Humidity’s Role In Cure
Heat and airflow speed solvent evaporation, but humidity often determines how fast that evaporated moisture actually leaves the surface.
You should monitor humidity levels because high moisture content slows the curing process and increases paint absorption back into substrates.
Low humidity speeds surface set but can trap solvents beneath.
Adjust drying conditions considering environmental factors to balance cure time and finish quality.
Airflow And Evaporation Speed
Although raising temperature speeds solvent evaporation, airflow and humidity together dictate how quickly that vapor actually leaves the paint film and surrounding air.
You’ll speed drying by managing airflow dynamics and lowering humidity to boost evaporation rates, but don’t overheat or trap solvent vapors. Use controlled ventilation and gentle heat to avoid defects.
- Point a fan for steady exchange
- Avoid stagnant, humid rooms
- Combine low heat with airflow
How Paint Thickness and Multiple Coats Change Your Approach
Because thicker paint holds more solvent and takes longer to set, you’ll need to change how you dry and apply successive coats.
Space thin, even layers and follow paint application techniques to avoid trapping solvent.
Account for drying time factors by increasing intervals between coats, using low heat and airflow rather than high temperatures, and testing a small area before continuing to prevent soft layers or runs.
Signs Paint Is Drying Properly After Heating
After you heat the paint, check the surface for a uniform matte or cured sheen to confirm it’s drying.
Lightly touch an inconspicuous spot—if it feels dry and there’s no sticky residue, the solvents have likely evaporated.
If it still tacky or soft, keep drying at a lower temperature and recheck frequently.
Surface Dryness Check
How can you tell if heat is actually helping your paint dry? Check surface texture and paint adhesion quickly:
- Lightly tap; a firm sound and smooth surface mean proper drying.
- Run your fingertip gently; no tackiness indicates good curing.
- Inspect edges for uniform sheen; bubbling or lifting signals uneven adhesion and needs cooling and slower drying.
No Sticky Residue
While you’re using a heat gun, check for sticky residue by lightly pressing a clean fingertip to the paint—if it leaves no tack and your skin comes away clean, the surface is drying properly.
You’ll gauge paint curing and drying times across paint types, adjust drying techniques and environmental factors, and confirm paint adhesion, finish quality, surface texture, and correct paint application and surface preparation.
Troubleshooting Common Problems After Heat Drying
If you used a heat gun to speed up drying and now see issues, don’t panic—you can usually fix them with a few targeted steps.
Check paint adhesion and drying uniformity, consider paint types and surface preparation, review environmental factors and safety precautions, and note user experience for future project planning.
- Inspect for heat damage; adjust equipment maintenance.
- Sand and recoat.
- Improve ventilation and temp control.
Cost-Benefit: Is a Heat Gun Worth It for Small Jobs?
You’ll want to weigh the upfront equipment cost against how often you’ll use a heat gun for small jobs.
If you only need faster drying occasionally, renting or using alternatives might save you money even if it takes a bit longer.
For frequent small projects, the time saved can justify the expense.
Upfront Equipment Cost
Deciding whether a heat gun is worth buying for small paint jobs comes down to comparing the upfront cost against how often you’ll use it and what alternatives cost.
You’ll weigh the initial investment versus potential long term savings if you keep and reuse the tool.
- Basic model: lower cost, limited features
- Mid-range: balanced performance and durability
- Professional: higher cost, best lifespan
Time Vs. Expense
While a heat gun can cut drying time dramatically, whether it’s worth the expense for small jobs depends on how often you’ll use it and the time value you place on faster turnaround.
Do a brief cost analysis: compare rental or purchase against saved labor and project speed.
If time management gains outweigh costs for recurring tasks, it’s a sensible investment; otherwise skip it.
When to Hire a Pro Instead of DIY Heat Drying
When should you call in a pro instead of trying heat-drying yourself? You should get a professional assessment when project complexity, hazardous materials, or large surfaces raise risks you can’t manage.
A pro guarantees proper technique, ventilation, and permits.
- Extensive lead or oil-based paint
- Complex restorations or structural concerns
- Tight timelines with high stakes
Quick Safety Checklist: Heat-Gun Drying Every Time
Keep the heat gun a safe distance from the surface to avoid scorching or blistering the paint.
Make sure you’re working in a well-ventilated area and use a respirator if fumes are present.
Stay alert to heat buildup and move the gun constantly to prevent hot spots.
Safe Distance From Surface
If you hold the heat gun too close, the paint can blister, scorch, or even catch fire, so aim to maintain a steady distance that lets heat speed evaporation without damaging the surface.
Use ideal distance and proper heating techniques: adjust nozzle, sweep evenly, and test.
- Keep 6–12 inches for broad areas.
- Use 3–6 inches for trim with constant motion.
- Start cooler, increase if needed.
Ventilation And Fume Control
Because heat guns speed solvent evaporation, you’ve got to control fumes and bring fresh air to the work area; inadequate ventilation can make vapors build up, irritate lungs, or create a fire hazard.
Position fans to guarantee steady air circulation, open windows or use fume extraction when available, wear a respirator rated for organic vapors, and stop work if you detect strong odors or poor airflow.
Further Resources and How-To Templates (Timing & Temps)
When you need quick, reliable guidance on drying times and safe heat-gun settings, this section points you to tested timing-and-temperature templates, charts, and trusted sources you can apply to common paints and surfaces.
Use them as starting points and adjust for humidity, layer thickness, and airflow to avoid scorching or blistering. You’ll find practical paint drying techniques and heat gun safety guidance.
- Quick timing/temperature templates
- Surface-specific charts
- Links to safety standards and tutorials
Frequently Asked Questions
Can a Heat Gun Damage Nearby Wallpaper or Adhesive Seams?
Yes — you can damage wallpaper or adhesive seams if you use high heat settings; you should test on a hidden area because different wallpaper materials react differently, and you’ll need low, controlled heat to avoid lifting.
Are There Paint Types That Release Toxic Gases When Heated?
Like a simmering pot, yes — some paints (especially oil-based, alkyds, and old lead-containing coatings) can emit toxic fumes when heated; you should prioritize ventilation importance and respect heat sensitivity to protect yourself and surroundings.
How Long Should I Wait Between Heat-Drying and Recoating?
Wait at least the manufacturer’s recommended recoat time, usually 2–24 hours; with heat-drying shorten cautiously. You’ll monitor paint consistency and use gentle drying techniques to avoid skinning or soft layers before recoating.
Will a Heat Gun Affect Paint Adhesion to Glossy Surfaces?
Yes — heat effects can weaken paint adhesion on glossy surfaces if you overheat; you should use gentle drying techniques, degloss or scuff first, and avoid high temperatures so paint adhesion remains reliable.
Can Heat-Gun Drying Cause Microbubbles Invisible at First?
Like a kettle’s whisper, yes—you can get microbubble formation from heat exposure. If you blast paint too fast you’ll trap tiny invisible bubbles that later rise, pop, or mar the finish, so go gentle and steady.
Conclusion
You could speed paint drying with a heat gun, sure — but only if you’re willing to flirt with blistering, outgassing, and ruined finish. You’ll save time on small, tough spots, yet risk more work fixing mistakes hot-gunned in haste. So test first, keep temps low, and don’t pretend a heat gun replaces proper ventilation and cure times. Use it like a last-resort cheat — not a shortcut you brag about later.