Will Paint Bubbles Go Away? Causes and Solutions Explained
You shouldn’t expect paint bubbles to go away on their own because they signal adhesion or moisture problems that need fixing; you’ll want to inspect and diagnose the cause rather than hope they resolve. Start by checking for leaks or damp, test adhesion by probing a bubble, and thin or remove loose paint before resealing and repainting with compatible primer and paint under proper humidity. Followed properly, repairs last longer, and the rest of the guide explains how to diagnose and act.
Quick Answer: Will Paint Bubbles Go Away on Their Own?
Wondering if those paint bubbles will disappear by themselves? You shouldn’t count on it.
Bubbles usually signal failed paint adhesion from poor surface preparation, moisture, or contaminants. Left alone, they’ll likely grow, peel, or expose bare substrate.
To fix permanently you’ll need to address the root cause, remove compromised paint, and restore proper adhesion through correct cleaning and priming before recoating.
What to Try Now: 3 Fast Checks and Fixes
Start by checking that the surface is fully dry before you do anything else.
If you find loose bubbles, scrape or sand them away and clean the area.
When you repaint, use thin, even coats to prevent new bubbling.
Check Surface Dryness
How dry is the surface really before you reach for a brush?
Do a quick surface inspection: press a clean finger or a moisture meter to check damp spots. If it’s tacky, pause.
Use faster drying techniques—fans, dehumidifier, warm air—until surface reads dry.
Only paint on fully dry surfaces to prevent new bubbling and poor adhesion.
Remove Loose Bubbles
Scrape away any loose paint chips and poppy bubbles before you repaint—leaving them lets new paint lift and fail.
Next, sand edges smooth and vacuum debris so coatings adhere. Treat rust or damp spots, prime bare areas, and check for underlying causes. These surface preparation techniques are essential.
Follow bubble prevention tips: remove all loose material, clean, and prime to guarantee a lasting finish.
Apply Thin Coats
Once you’ve removed loose chips and smoothed edges, apply paint in thin, even coats to prevent new bubbles from forming.
For effective paint application, focus on surface preparation and moisture control so paint adhesion improves.
Use proper drying techniques, consider environmental factors, and employ careful paint layering.
Match product compatibility to repair methods, and test a small area to guarantee bubble prevention before finishing.
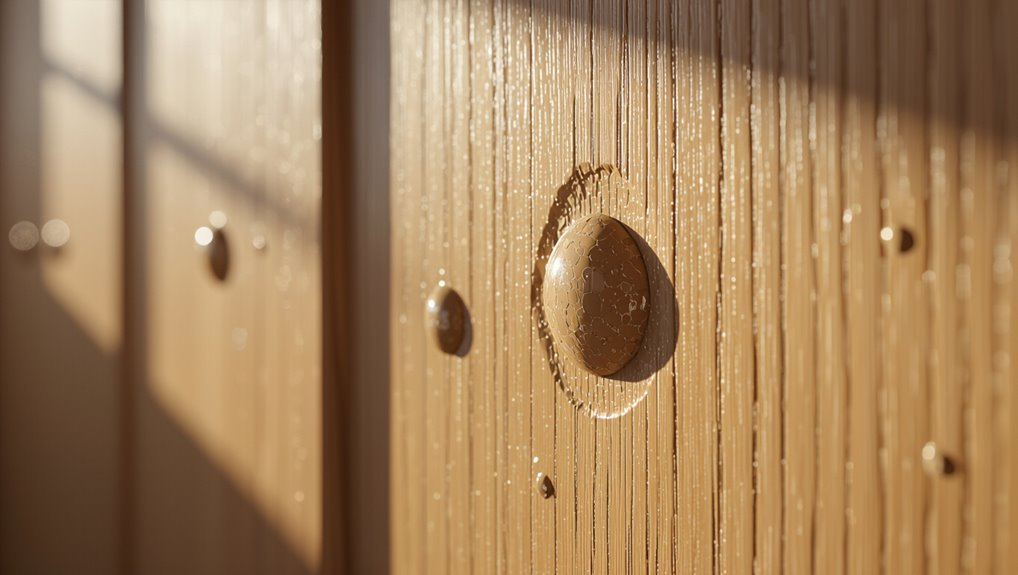
How to Tell If a Bubble Is Active or Dormant
To tell if a paint bubble is active or dormant, look for tight surface tension and a smooth, domed skin — active bubbles often feel taut.
Gently press near the edge; if the area is soft or the bubble flexes, it’s likely active, while a firm, inflexible spot suggests dormancy.
Also check surrounding paint: if the nearby coating is still tacky or soft, the issue is probably ongoing.
Visible Paint Surface Tension
When you look closely at a paint bubble, the surface tension gives the clearest clue about whether it’s active or dormant: a glossy, taut dome with a shiny highlight usually means trapped moisture or gas is still expanding, while a dull, wrinkled skin or tiny fissures indicate the bubble has lost pressure and is likely dormant. You’ll assess paint viscosity, bubble formation, adhesion issues, curing process, environmental factors, application techniques, paint types, moisture barriers, drying conditions.
| Sign | Likely State | Action |
|---|---|---|
| Glossy taut dome | Active | Monitor/vent |
| Dull wrinkled skin | Dormant | Sand/prime |
| Tiny fissures | Dormant | Repair |
Softness And Flexibility
Although you might first judge a paint bubble by how it looks, feel is often the clearest indicator of whether it’s active or dormant: You’ll press gently—active bubbles feel springy and less attached, dormant ones flat and rigid.
Consider these softness factors and flexibility benefits cues:
- Springy bounce
- Slight give
- Crusty firmness
- No give at all
Surrounding Paint Dryness
If the paint around a bubble feels tacky or darker than nearby areas, you’re likely looking at an active bubble still drying or releasing moisture; dry, uniformly textured surrounding paint usually signals a dormant, stabilized defect.
You should assess paint adhesion, surface preparation and prep methods, consider paint compatibility and application techniques, and check drying conditions, air circulation, temperature control, moisture management and other environmental factors.
How to Inspect Bubbled Paint Safely
How do you tell if bubbled paint is a minor cosmetic issue or a sign of deeper damage? You’ll use careful inspection techniques, simple diagnostic tools, and safety precautions while judging paint adhesion and surface evaluation.
Follow these steps to stay calm and confident:
- Visual scan for pattern and spread.
- Note nearby cracking or warping.
- Record texture and firmness.
- Photograph for comparison.
Quick Tests: Pop, Probe, and Moisture Checks
Start with a pop test by gently pressing a pin into a bubble to see if it releases air or liquid.
Then probe the paint edge with a small screwdriver or putty knife to check how well it’s adhered.
Finish by using a moisture meter on the substrate to confirm if trapped dampness is causing the bubbling.
Pop Test Method
A simple pop test lets you quickly tell whether paint bubbles are shallow film defects or signs of deeper adhesion or moisture problems.
You’ll press, pop, and inspect; that pop test is your first bubble assessment. Follow steps to decide if patching or stripping’s needed:
- Gently press center
- Pop if loose
- Smell for dampness
- Note surrounding adhesion
Probe Edge Inspection
Once you’ve popped and sniffed for dampness, move on to probing the bubble’s edges to check adhesion and hidden moisture.
You’ll perform edge inspection to gauge surface integrity and bubble analysis, using gentle pressure for coating evaluation and adhesion testing.
Note substrate assessment cues and paint compatibility issues, recording signs that suggest ongoing moisture evaluation or poor bond before choosing repair steps.
Moisture Meter Check
Curious whether that damp-feeling or swollen paint is still active? Use a moisture meter to confirm.
Check meter calibration, note humidity levels, and map moisture sources during surface evaluation. Proper tool selection guides damp detection and predicts paint adhesion risks.
Then choose repair methods based on readings.
- Trust readings
- Act fast
- Isolate source
- Plan repair
Tools You Need for Diagnosing and Fixing Bubbles
You’ll need a few essential tools to diagnose and fix paint bubbles: a utility knife or scraper to open blisters, a wire brush or sandpaper to remove loose material, alcohol or a solvent to test for contamination, a putty knife and filler for repairs, and clean brushes or rollers for repainting. Use diagnostic tools for bubble prevention and precise repair.
| Tool | Purpose |
|---|---|
| Utility knife | Open blisters |
| Wire brush | Remove loose paint |
| Solvent | Test contamination |
| Putty knife | Apply filler |
| Roller/brush | Repaint smoothly |
Size Matters: Pinholes vs Large Blisters
When evaluating paint bubbles, size tells you a lot: tiny pinholes usually point to air or solvent trapped in the film, while large blisters signal moisture, adhesion failure, or trapped contaminants under the coating.
You’ll use Pinholes analysis for inspection and Blisters prevention for repairs.
Consider reactions:
- Frustration
- Alarm
- Relief
- Determination
What Small Pinholes Mean : And When to Ignore Them
Large pinholes are usually less dramatic than blisters, but they still tell you what’s happening in the coating: tiny trapped air, solvent popping as the film cures, or a slightly contaminated surface can produce small pinholes that rarely affect adhesion.
You can often ignore their pinhole significance if surface feel and adhesion stay sound; they’re cosmetic, unlikely to impact bubble longevity, and won’t spread.
When Large Blisters Mean Deeper Trouble
If a blister’s more than about a quarter-inch across or feels soft and hollow under the paint, it’s not just cosmetic—you’ve likely got trapped moisture, poor adhesion, or a failing substrate beneath the film.
You should use diagnostic tools, assess paint compatibility and surface treatment, and choose repair techniques that address environmental factors.
Preventative measures and maintenance practices matter.
- Panic
- Frustration
- Resolve
- Relief
Moisture: How Damp Causes Paint Bubbles
You’ve learned how big blisters signal deeper problems; now look at the most common culprit: moisture.
You’ll find moisture sources like leaks, rising damp, and condensation undermine paint adhesion and surface integrity.
Humidity effects swell substrates and trap vapor beneath coatings.
Consider weather conditions that drive wetting cycles.
Prioritize damp prevention—fix leaks, improve ventilation, and dry surfaces before repainting.
Using Moisture Meters to Find Hidden Dampness
You’ll want a meter that fits the job—pin types for deep readings, pinless for quick surface scans.
Readings need context, so compare values to manufacturer guidelines and nearby dry spots before deciding.
Move methodically across walls and floors to pinpoint hidden damp areas causing the bubbles.
Choosing The Right Meter
When hunting for hidden dampness, pick a moisture meter that matches the material and depth you need to test—pin meters read moisture near the surface in wood, while non‑invasive (pinless) meters scan deeper into drywall and plaster without damaging the finish.
You’ll want reliable meter calibration for accurate moisture detection. Choose features that fit your project and budget.
Interpreting Moisture Readings
How do you read those numbers so they actually tell you where the problem is? You’ll use moisture dynamics and focused reading techniques to compare spots, note trends, and verify with repeat scans. Trust relative differences more than single values. Record timestamps, probe depth, and surface conditions to interpret causes, not just presence, before planning repairs.
| Location | % Reading |
|---|---|
| Surface | 12% |
| Midwall | 18% |
| Cavity | 24% |
| Baseline | 10% |
Locating Hidden Damp Spots
Before you pull off trim or open walls, use a moisture meter to map likely damp zones so you can target inspections and repairs.
You’ll get precise damp detection, spot moisture sources, and apply inspection techniques and surface assessment.
Use location strategies and material evaluation to plan repair methods and preventive measures.
- Shock
- Relief
- Urgency
- Control
Rising Damp and Salt-Related Bubbling Explained
Although it might look like simple paint failure, rising damp and soluble salts are often the real culprits, and they’ll keep causing blistering until you address moisture and salt migration through the masonry. You’ll check damp conditions, identify moisture sources, remove salt buildup, improve surface preparation and paint adhesion, consider environmental factors, and apply targeted repair techniques for lasting bubble prevention.
| Issue | Action |
|---|---|
| Damp conditions | Dry and ventilate |
| Salt buildup | Desalt and neutralize |
| Moisture sources | Fix leaks |
| Paint adhesion | Use primers |
| Surface preparation | Clean and repair |
Heat and Sun Damage: Blistering From UV and Heat
Ever notice paint bubbling on sun‑facing walls even when there’s no leak?
You see blistering from UV and heat when environmental factors and poor surface preparation combine.
Choose paint formulations with heat resistance and UV protection to improve paint longevity, reduce color fading, and consider insulation impact.
Pick paints with UV and heat resistance to keep color lasting longer—also check insulation to prevent sun‑side blistering.
Use proper application techniques and maintenance strategies.
- Frustration
- Urgency
- Relief
- Confidence
How Humidity and Temperature Affect Bubble Formation
When you paint in high humidity or on a cold day, moisture and slow drying trap solvents and water under the film, causing bubbles and lifting as the paint cures; conversely, painting in extreme heat can make the surface dry too fast, sealing moisture beneath and creating blisters later. You’ll see humidity effects and temperature fluctuations alter curing, so control conditions to prevent bubbles.
| Condition | Effect | Tip |
|---|---|---|
| High humidity | Slow cure, bubbles | Wait or dehumidify |
| Cold | Trapped solvents | Warm area |
| Hot | Rapid skinning | Shade or cool |
Seasonal Patterns: When Bubbles Are Most Likely
You’ll notice paint bubbles show up most in hot, humid weather when moisture and heat trap air or solvents under the film.
They can also appear in cold, damp conditions where slow drying and condensation reactivate trapped moisture.
Understanding these seasonal triggers helps you pick the right time and conditions for painting.
Hot, Humid Weather
Summer’s high heat and sticky humidity create prime conditions for paint bubbles, because moisture trapped under the coating expands and breaks the film as temperatures rise.
You’ll notice humidity effects, weather impacts, temperature fluctuations and seasonal changes worsening bubbles.
Control moisture levels, improve air circulation, meet ventilation needs, choose proper paint types, nail application timing and monitor drying conditions.
Cold, Damp Conditions
Hot, humid months make bubbles common, but cold, damp conditions bring their own risks: moisture can seep into porous surfaces and stay trapped under paint, and low temperatures slow curing so the film never fully bonds.
In cold weather you’ll need better surface preparation to combat moisture retention, adjust paint types, control humidity levels and temperature fluctuations, improve air circulation, and allow extended drying time outdoors.
Poor Surface Prep: Contamination, Poor Adhesion, and Dust
A bad paint job often starts before the brush ever touches the surface: contaminants, weak adhesion, and dust all create conditions where bubbles form and won’t go away.
You must address contamination sources, adhesion issues, and dust prevention with surface cleaning, primer selection, moisture control, and paint compatibility.
Follow repair techniques to prevent chemical reactions.
- Clean
- Prime
- Control moisture
- Sand
Trapped Solvents and Outgassing: Fresh-Coat Mistakes
When you apply paint too thick or over a damp surface, trapped solvents can’t evaporate properly and will cause bubbles.
You can prevent outgassing by thinning coats to the manufacturer’s recommendations, letting each layer fully dry, and ensuring the substrate is dry and primed.
If bubbles still appear, you’ll need to remove the affected area and allow complete solvent release before recoating.
Solvent Evaporation Issues
If solvents don’t fully escape before the topcoat dries, they’ll stay trapped and form bubbles or blisters as they try to evaporate later; that’s what “outgassing” looks like on a fresh coat.
You must consider solvent types and evaporation rates.
Feel the frustration, urgency, and disappointment:
- Shock
- Regret
- Anger
- Resolve
Outgassing Prevention Steps
You felt the sting of outgassing in the last section—now let’s fix it before your next coat goes on.
Let surfaces dry fully, sand between coats, and use lower-solvent primers to reduce trapped moisture.
Ventilate and apply thinner, even paint application layers to let vapors escape.
Test on scrap, wait recommended cure times, and avoid sealing over damp substrates to minimize outgassing effects.
Incompatible Paint and Primer Systems: Oil vs Latex
Curious why bubbles sometimes reappear after a repaint? You’ll face paint compatibility problems when mixing oil and latex systems.
Check primer selection, surface preparation, product labels, testing methods, and environmental factors before you paint.
Review primer choice, prep surfaces, read labels, test methods, and consider environment before painting.
Follow precise application techniques and respect drying times to avoid adhesion issues between finish types.
- Panic
- Frustration
- Relief
- Confidence
Why Oil-Over-Latex Causes Blisters : And How to Fix It
If you slap oil-based paint over latex, you’re likely to get blisters because the oil can’t bond well and traps moisture or air beneath the film.
To fix it, strip or sand the bubbled area back to sound substrate and remove any loose paint, dirt, or grease.
Then prime with a compatible bonding primer before repainting with the finish coat you want.
Oil Overlays Cause Blisters
When oil paint is applied over existing latex, the two coatings often fail to adhere properly and small blisters form as moisture and solvent vapors try to escape through the weaker latex film.
You’ll notice rapid bubble formation from adhesion issues and poor paint compatibility influenced by drying conditions, environmental factors, surface treatments, and application techniques.
- Frustration
- Urgency
- Relief
- Confidence
Proper Surface Repair
Start by stripping away the loose, incompatible layers so you’re left with a stable base: remove all peeling oil and failing latex back to sound substrate, sand glossy surfaces to dull them, and clean off dust, grease, and mildew so primers can bond properly. Then address adhesive properties and environmental factors before priming and repainting.
| Step | Action | Purpose |
|---|---|---|
| 1 | Strip | Stable base |
| 2 | Sand | Improve adhesion |
| 3 | Clean | Remove contaminants |
| 4 | Prime | Restore adhesive properties |
Rust and Chemical Reactions That Force Paint to Lift
Because metal corrodes beneath paint, rust becomes a powerful force that lifts coatings and ruins their bond to the surface.
You’ll notice lost paint adhesion and damaged surface integrity as chemical interactions eat away layers.
Focus on rust prevention and moisture control to restore paint durability.
Feel urgency:
- Panic at spreading rust
- Frustration over failed adhesion
- Resolve to act fast
- Relief after proper repair
Common Places Bubbles Appear and What They Indicate
Although bubbles can show up almost anywhere paint’s failed, you’ll most often find them on exterior metal surfaces, bathroom ceilings, and around window and door trim where moisture, heat, or corrosion congregate.
You’ll learn bubble formation clues about paint adhesion failure, need for surface preparation, moisture control, temperature effects and environmental factors, plus paint compatibility, inspection methods, repair techniques and blister prevention.
Materials Checklist: Surfaces That Blister Most (Wood, Metal, Masonry)
Check the type of surface before you decide how to fix bubbling paint, because wood, metal, and masonry blister for different reasons.
Wood often traps moisture under finish or has old paint failing, while metal can rust and masonry can absorb water or have salt issues.
Knowing which material you’re dealing with helps you pick the right prep and repair steps.
Wood Surfaces Prone To Blistering
When paint bubbles form on wood, they’ll usually tell you where moisture, poor adhesion, or sun damage is concentrated; softwoods, exterior siding, and old trim are especially vulnerable.
You’ll face wood blistering causes like surface moisture impact and paint adhesion challenges. Consider wood treatment options, varnish compatibility issues, paint expansion factors, environmental effects, and seasonal maintenance tips.
- Panic
- Frustration
- Resolve
- Relief
Metal And Masonry Risks
After you’ve identified wood trouble spots, look next at metal and masonry—both show blistering for different reasons and demand different fixes.
On metal, address metal corrosion risks: remove rust, prime with metal-specific products, and seal.
On masonry, tackle masonry adhesion issues by cleaning, repointing, and using breathable masonry primers.
Proper prep prevents bubbles and prolongs finish.
How to Handle Bubbles on Wood Siding and Trim
If paint bubbles are forming on your wood siding or trim, don’t ignore them—addressing them promptly will prevent moisture damage and rot.
You should follow bubble prevention strategies and siding maintenance tips:
- Pry out loose paint, dry wood thoroughly.
- Sand and prime exposed areas.
- Caulk gaps and improve flashing.
- Repaint with breathable, exterior-grade paint to protect wood.
How to Handle Bubbles on Drywall and Plaster
Because drywall and plaster sit beneath paint and paper, bubbles there usually signal trapped moisture, poor adhesion, or underlying damage. You’ll want to diagnose the cause before patching.
Inspect for leaks, dry thoroughly, and remove loose material. Sand, clean, and use appropriate primer for surface preparation.
Patch with joint compound, sand smooth, and repaint. Good bubbling prevention starts with fixing the source.
How to Handle Bubbles on Metal and Rusted Surfaces
Drywall and plaster issues often come from trapped moisture or loose adhesion, but metal surfaces present different challenges—especially rust, which lifts paint and keeps bubbles returning if you only paint over them.
You should remove rust, treat bare metal, and use proper metal surface treatments and rust prevention methods.
- Scrape
- Sand
- Prime
- Seal
How to Handle Bubbles on Concrete and Masonry
When concrete or masonry develops paint bubbles, it’s usually from trapped moisture, poor adhesion, or efflorescence pushing the coating away from the surface.
When concrete or masonry forms paint bubbles, trapped moisture, poor adhesion, or efflorescence is usually to blame.
You should remove loose paint, clean and dry the substrate, and treat efflorescence.
Use compatible masonry primers, follow bubble prevention techniques, and perform paint compatibility testing before full application.
Proper sealing and ventilation reduce recurrence.
Small-Scale Fix: Pop Pinholes and Touch Up Paint Bubbles
Start by locating and evaluating each bubble to see if it’s just a tiny pinhole or a larger blister that needs more work.
Gently pop the pinholes with a pin or needle, press out any air, and sand the area smooth.
Repaint carefully with thin, even coats so the repair blends and the bubble doesn’t return.
Locate And Assess Bubbles
A careful scan of the painted surface will tell you where bubbles are hiding; inspect walls and trim at eye level and from different angles to catch pinholes and raised blisters.
Use inspection methods and diagnosis tools to evaluate bubble formation, paint adhesion, surface tension, moisture control, climate impact, coating compatibility, and long term prevention.
Rate urgency:
- Panic
- Annoyed
- Determined
- Relieved
Pop And Repaint Carefully
Carefully pop any pinholes or small blisters with a pin or needle, then gently press out trapped air so the surface lies flat before you repaint.
You’ll sand lightly, clean dust, and apply primer to seal exposed substrate.
Use precise pop techniques to avoid tearing, then follow measured repaint strategies—thin, even coats and proper drying times—to blend repairs and prevent new bubbling.
When Spot Repairs Work : And When They Fail
When bubbles appear in a small, isolated area, spot repairs can work well if you act quickly and address the root causes—moisture, contamination, or a failed primer layer.
You’ll use spot repair techniques and follow bubble prevention strategies, but know limits.
Consider:
- Small, stable blisters
- Clean, dry substrate
- Intact surrounding paint
- Widespread failure—replace entire panel
How to Drain, Dry, and Reseal Small Blisters
First, you’ll locate the blister and score it carefully to release trapped paint or moisture.
Then drain and let the area dry thoroughly before sanding back to sound substrate, priming, and resealing with compatible paint.
Take your time on each step to prevent the bubble from returning.
Locate The Blister
Anyone can spot a paint blister by scanning for raised, rounded spots where the coating has lost adhesion; you’ll usually find them along edges, seams, or areas exposed to moisture or heat.
You’ll check blister types and consider paint lifespan before acting. Then note size, pattern, location, and texture to decide repair urgency:
- Size
- Pattern
- Location
- Texture
Drain Paint Carefully
If a blister is small and the paint hasn’t fully separated, you can drain and reseal it without stripping the whole panel; puncture the blister near its edge with a fine pin, squeeze out fluid, and blot gently to remove paint residue.
Let the cavity dry fully, apply a compatible sealer sparingly, and use careful drain techniques to avoid expanding the defect.
Sand, Prime, Reseal
Start by carefully sanding the drained blister and the surrounding paint to feather the edges and expose solid substrate; you want a smooth shift so the primer and topcoat will adhere evenly.
Then follow clear steps to guarantee sand types, surface cleaning, primer selection, resealing techniques, and paint compatibility match.
- Dry
- Clean
- Prime
- Reseal
Proper Sanding Technique for Bubbled Areas
Because bubbled paint traps moisture and weak adhesion, you’ll need to remove loose material and feather the edges before repainting.
You’ll use sanding techniques that target loose paint layers while preserving substrate. Choose sanding tools for controlled abrasion, blend into surrounding paint for proper surface preparation, and follow finishing methods that restore paint adhesion.
This improves coating durability and aids long-term bubble prevention.
How to Strip Paint Back to Sound Substrate
When you strip paint back to a sound substrate, remove all loose, bubbled, and delaminated material until you reach firmly adhered paint or the bare substrate; this guarantees the new coating will bond properly.
You’ll use paint removal techniques and thorough substrate preparation. Follow steps that feel decisive:
- Scrape damaged areas
- Sand to solid edges
- Clean and degrease
- Inspect for defects
Choosing the Right Primer After Bubble Removal
After you’ve stripped back to solid substrate and confirmed all loose paint is gone, pick a primer that matches both the substrate and the topcoat to guarantee adhesion and block remaining stains. You’ll assess primer types, surface compatibility, application techniques, environmental factors and adhesion quality. Choose product recommendations and finish options; consult brand comparisons for durability.
| Primer types | Surface compatibility |
|---|---|
| Oil, latex | Wood, metal, drywall |
| Bonding | Damp-prone surfaces |
Matching Paint Systems to Avoid Future Bubbling
If you want bubbles to stay gone, match your primer, paint, and finish into a single compatible system so each layer chemically and mechanically bonds to the next.
You’ll prevent mismatched solvents and adhesion failures by prioritizing paint compatibility and proper surface preparation.
Follow steps that reassure you:
- Verify manufacturer system.
- Use recommended primer.
- Test a small area.
- Inspect adhesion regularly.
Correct Drying Times and Ventilation to Stop Bubbling
You’ll want to follow the paint manufacturer’s drying time guidelines before applying additional coats to prevent trapped moisture from causing bubbles.
Make sure the room has steady ventilation—open windows, use fans, or run an exhaust to speed drying and carry solvents away.
Proper timing and airflow together greatly reduce the chance of bubbling.
Drying Time Guidelines
Because paint continues to release solvents long after it feels dry to the touch, letting each coat cure for the manufacturer’s recommended time and ensuring steady ventilation are the most reliable ways to prevent bubbles.
You’ll monitor drying conditions and adjust paint thickness to avoid trapping solvents.
Follow these steps to stay calm and confident:
- Wait full cure time.
- Apply thin coats.
- Keep airflow steady.
- Check humidity.
Improve Room Ventilation
When paint fumes and moisture can’t escape, bubbles form as solvents try to evaporate through trapped layers, so set up steady airflow and proper drying conditions to stop the problem. You’ll boost ventilation improvement by opening windows, using fans, and pacing coats for drying; better air circulation prevents re-trapping solvents and reduces bubbling.
| Method | Placement | Timeframe |
|---|---|---|
| Window | Opposite sides | Continuous |
| Fan | Near exit | During drying |
| Dehumidifier | Center | Until dry |
| Vent | Exhaust | As needed |
| Space coats | Thin layers | 1–4 hrs |
Climate Control Tips for Painting in Humid or Hot Conditions
If humidity or heat’s high, don’t expect flawless results without adjusting your environment; control is the simplest way to prevent bubbles and blistering.
You’ll need humidity control, temperature regulation, ventilation strategies, drying techniques, proper paint selection, surface preparation, moisture barriers, and environment monitoring.
Follow steps to act fast:
- Dehumidify
- Cool space
- Boost airflow
- Slow drying to cure properly
Preventing Bubbles During New Paint Projects: Prep Checklist
Before you paint, clean and degrease the surface thoroughly so the new coat can bond properly.
You’ll also want to sand rough spots and feather edges for an even finish.
Finally, keep the temperature and humidity in the recommended range to prevent bubbles from forming as the paint dries.
Surface Cleaning And Degreasing
Because oils, dust, and old wax can trap solvents and lift fresh paint, you’ve got to clean and degrease surfaces thoroughly before you roll or brush.
Use proper surface preparation and cleaning methods: choose degreasing solutions and cleaning agents for residue removal, follow application techniques, perform surface inspection, use cleaning tools, enforce contamination control, and maintain maintenance practices to guarantee adhesion promotion and paint compatibility.
- Start decisive
- Feel confident
- Avoid regrets
- Finish proud
Proper Surface Sanding
Cleaning and degreasing set the stage, but proper sanding gives paint a mechanical grip that prevents bubbles and lifting later on. You’ll use Surface preparation techniques and Sanding tools options to control Surface texture effects and guarantee Paint adhesion importance. Follow Proper sanding methods, Material compatibility checks, and Effective sanding tips for Smooth surface requirements and Bubble prevention strategies to avoid Bubbles and finishes.
| Tool | Grit | Purpose |
|---|---|---|
| Sandpaper | 120–220 | deglossing |
| Block | medium | even texture |
| Vacuum | fine | dust removal |
Right Temperature And Humidity
When you paint in the wrong temperature or humidity, solvents and water in the finish evaporate unevenly and trapped moisture creates bubbles and fisheyes.
You should monitor temperature fluctuations and humidity levels to control paint curing and drying time. Consider environmental factors and seasonal changes; adjust application techniques and check surface conditions.
- Test climate
- Delay if risky
- Use heaters/dehumidifiers
- Follow manufacturer limits
Long-Term Remedies That Prevent Recurrence of Bubbles
To stop paint bubbles from coming back, you need a combination of proper surface prep, the right materials, and controlled application conditions.
Use preventive measures like thorough surface treatments and strict environmental controls.
Prioritize product selection and quality materials, follow correct application techniques, schedule routine inspections, and implement maintenance strategies to catch issues early and permanently reduce recurrence of bubbling.
Eco-Friendly and Low‑VOC Approaches to Bubble Prevention
Besides surface prep and application technique, you can reduce bubbling by choosing low‑VOC, eco‑friendly products and methods that still perform well.
You’ll protect health and finish quality using eco friendly materials and low VOC options, while embracing sustainable practices and green painting. Feel empowered by choices:
- Select certified low‑VOC paints.
- Use natural primers.
- Improve ventilation.
- Reuse tools and dispose responsibly.
Common Mistakes That Make Paint Bubbles Worse During Repairs
When you sand too aggressively you can thin the paint and damage the substrate, which often makes bubbles reappear.
Don’t repaint over damp surfaces either, because trapped moisture will push new blisters up through fresh coats.
Addressing both sanding technique and surface dryness before you repaint prevents small errors from turning into bigger problems.
Sanding Too Aggressively
Sand aggressively and you can make paint bubbles worse instead of better; removing too much surrounding paint or sanding down to bare metal breaks the seal and exposes fresh surface that traps moisture and undercuts adhesion.
You need a controlled sanding technique for bubble prevention. Feel frustrated? Try these steps:
- Stop and assess
- Use finer grit
- Preserve edges
- Clean thoroughly
Repainting Over Moisture
If you rush back into painting without dealing with trapped moisture, you’ll just trap more air and make bubbles reappear.
You must dry the substrate thoroughly and identify leaks first. Ignoring moisture effects weakens paint adhesion, causing blistering and peeling.
Use moisture meters, ventilation, and proper primers before repainting.
Don’t cover wet spots—fix them, then repaint for lasting results.
Quick Fixes That Mask Bubbles But Don’t Solve Them
Curious how a snap solution can make paint bubbles look better overnight? You’ll spot masking techniques and quick cover ups that act as temporary solutions, creating visual distractions rather than fixing moisture or adhesion.
You might feel relieved, then frustrated when bubbles return.
- Taping edges
- Spot priming
- Heavy topcoat
- Decorative camouflaging
When Full Paint Removal Is the Only Reliable Solution
Because bubbles usually mean the coating has failed at the substrate level, you’ll often need to strip the paint back to bare material to get a lasting fix.
You’ll assess substrate damage, choose appropriate removal (chemical, heat, or mechanical), and prep surfaces properly.
Follow repair strategies that include cleaning, priming, and correct repainting.
Use maintenance tips to prevent recurrence and extend the new finish.
When to Call a Pro: Signs You Need Professional Help
Stripping paint back to bare substrate solves many bubbling problems, but some situations are beyond a DIY fix and call for a pro.
Stripping paint to the bare substrate often fixes bubbling, but some situations require a professional’s experience.
You should seek help when issues exceed your bubble prevention techniques or match strict professional assessment criteria.
Signs include:
- Widespread bubbling beyond cosmetic repair
- Structural moisture damage
- Repeated failures after fixes
- Hazardous coatings or unknown substrates
Cost Comparison: DIY Repair vs Professional Refinishing
Deciding whether to tackle paint bubbles yourself or hire a pro comes down to scope, skill, and budget: DIY saves money on labor but adds time, tools, and risk of recurring problems, while professional refinishing costs more upfront but delivers faster, guaranteed results and proper substrate prep.
Compare DIY Costs vs Professional Rates, estimate Repair Duration, weigh Quality Comparison, Material Selection, Skill Levels, Warranty Coverage, and Long term Savings.
Warranties and Manufacturer Guidance That Affect Fixes
If your paint is still under warranty, check the terms before you touch anything—you could void coverage by attempting repairs that the manufacturer says must be done by a certified pro.
Follow warranty coverage and manufacturer recommendations closely.
Note repair limitations, product lifespan, maintenance guidelines, and troubleshooting tips.
- Fear of voided claim
- Frustration over limits
- Relief with clear steps
- Empowerment to call pros
How to Document Bubbles for Insurance or Contractor Claims
Anyone documenting paint bubbles for insurance or contractor claims should act quickly and methodically: photograph affected areas from multiple angles, include close-ups and context shots with a scale, note dates, locations, and conditions, and save purchase or warranty records.
Create a clear written timeline, keep original samples if possible, and use concise insurance documentation and contractor communication to support your claim.
Deciding: Repair, Reseal, or Replace
When you spot bubbling paint, weigh the scope, cause, and costs before choosing to repair, reseal, or replace. Small, localized bubbles from moisture or adhesion problems often respond to targeted repairs.
When you notice bubbling paint, assess scope, cause, and cost to decide repair, reseal, or replace.
However, widespread blistering, persistent leaks, or structural damage usually call for resealing or full replacement.
You’ll consider repair techniques, reseal options, replacement materials, paint compatibility, surface preparation, moisture control, adhesion testing, weather considerations, and professional assessment.
- Fear
- Relief
- Urgency
- Confidence
Case Studies: Residential Bubble Causes and Outcomes
Although every house is different, you’ll see the same four causes show up repeatedly: trapped moisture, poor surface prep, incompatible coatings, and underlying structural leaks.
You’ll read cases where bubble formation followed rushed repainting, prevented proper paint adhesion, or traced to rising damp.
Inspectors documented fixes: drying, stripping, substrate repair, and correct coating selection, showing outcomes range from simple touch-ups to full replacement.
Maintenance Checklist to Keep Bubbles From Returning
To keep bubbles from returning, follow a simple, regular maintenance routine that targets moisture, adhesion, and coating compatibility so minor issues never become major repairs.
You’ll monitor surfaces, control humidity, and choose products wisely to guarantee bubble prevention with good surface preparation, moisture control, paint compatibility, drying techniques, repair methods, environmental factors, and product selection.
- Inspect weekly
- Dry thoroughly
- Patch promptly
- Use right product
How to Test Paint Compatibility Before Full Application
Before you commit to rolling out a whole wall, run a small compatibility test so you can catch adhesion, color, and chemical reactions early.
Before repainting an entire wall, test a small patch to check adhesion, color match, and reactions.
You’ll check paint adhesion, surface preparation, primer selection, and product compatibility on a discreet patch.
Vary application technique and note environmental factors.
Use inspection methods to watch for bubble formation and test repair strategies across different paint types.
Final Quick-Reference Flowchart: Diagnose and Act
When bubbles appear, follow this quick-reference flowchart to diagnose the cause and pick the right fix fast; you’ll move from simple checks—surface cleanliness, tackiness, and solvent compatibility—to targeted remedies like spot-sanding, re-priming, or stripping depending on the branch you hit.
- Check surface
- Test tackiness
- Match solvents
- Choose repair
Use bubbling paint troubleshooting techniques to act calmly and fix it.
Frequently Asked Questions
Can Old Paint Bubbles Emit Harmful Fumes Over Time?
Yes — bubbling paint can release fumes over time, and you should consider health concerns; if the paint’s old, damaged, or contains lead/solvents, you’ll want ventilation, testing, and professional removal to reduce exposure risks.
Do Paint Bubbles Affect Home Resale Value?
Yes — paint bubbles can lower resale value. Think of your home as a book with dog-eared pages; poor paint quality signals neglect, and buyer perception will judge care, making offers smaller or negotiations tougher for you.
Will Wallpaper Over Bubbled Paint Hide Moisture Issues?
No, you shouldn’t; wallpaper adhesion will fail if underlying moisture persists, and you won’t get reliable moisture detection once covered, so you’ll need to fix leaks, dry the wall, then apply proper priming before wallpapering.
Can Pets or Pests Cause Paint Bubbling?
A neighbor’s scratching dog proved it: yes, pet behaviors and pest infestations can cause paint bubbling by trapping moisture or chewing surfaces; you’ll spot localized blisters, chew marks, or damp patches and should inspect promptly.
Are Specialized Warranties Available for Bubble-Prone Paints?
Yes — you can find specialized warranty options for bubble-prone paints; manufacturers and retailers often offer coverage tied to bubble prevention performance, application conditions, and approved installers, so you should review terms, exclusions, and required maintenance.
Conclusion
You’ll want to act fast — some bubbles fade, but many don’t. Check whether they’re soft or hard, damp or dry; pop a tiny one and probe around it to see if paint’s loose. If it’s active or caused by moisture, repainting after proper drying and prep will be necessary. If it’s dormant and small, sanding and spot-priming might hide it. Make a plan now, because waiting could mean a much bigger, messier job later.