How Long Does Parking Lot Paint Take to Dry
Expect parking lot paint to be touch-dry in about 15–60 minutes and ready for light foot traffic in 1–3 hours, but don’t let vehicles on it for at least 24–72 hours for full cure. Water-based formulas dry slower than solvent-based; thermoplastic sets fast on the surface but needs longer to reach full hardness. Weather, coat thickness, surface type and beads affect times, so plan work windows and protections — keep going for tips on timing and care.
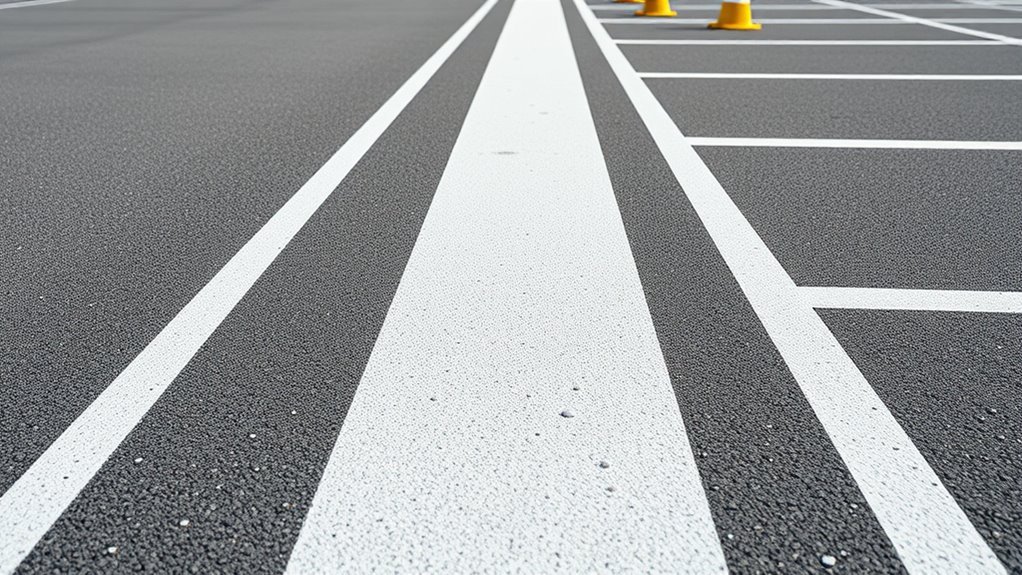
Quick Answer: Parking Lot Paint Wait Times by Type
If you’re trying to estimate how long paint will need before you can drive or park on fresh markings, most common formulas break down like this: water-based latex dries to the touch in 30–60 minutes and can handle light traffic in 1–2 hours.
Alkyd (oil-based) dries to the touch in 1–2 hours and tolerates traffic after 4–6 hours.
Fast-dry traffic paints and solvent-based industrial coatings often dry to the touch in 15–30 minutes and can accept traffic in 1–3 hours, depending on conditions.
You’ll pick paint based on parking lot design and paint color choices, balancing visibility and durability.
Follow manufacturer specs and watch weather for best results.
What “Dry to Touch” vs “Fully Cured” Means
When paint is “dry to touch,” you can gently touch the surface without transfer because the top layer has set.
“Fully cured” means the coating has completed its chemical hardening and reached full durability and adhesion.
You’ll need to wait much longer for full cure than for touch-dry before driving or placing heavy loads.
Dry to Touch Defined
Although the surface may feel dry to the touch within minutes to an hour, “dry to touch” just means paint no longer transfers to your fingers and isn’t tacky—it isn’t the same as being fully cured.
You can walk near freshly striped areas and avoid smudging, but you shouldn’t drive or park there yet.
Dry-to-touch timing varies with product, color options, temperature, humidity, and film thickness. Low-VOC choices may alter drying behavior, so consider environmental impact and manufacturer guidance.
Always test a small patch: if it resists light contact without staining, it’s dry to touch—but still fragile until fully cured.
Fully Cured Explained
Because “fully cured” means the paint has completed its chemical drying process, it’s the stage when the coating reaches its designed hardness, adhesion, and resistance to wear—not just when it feels dry. You’ll notice texture, durability, and true paint color stabilize only after full cure.
Factors like temperature, humidity, and solvent type change curing time and environmental impact. Don’t reopen lanes too soon or you’ll scuff lines and waste materials.
- Relief — you’ll stop worrying about smudges.
- Pride — crisp color and finished edges look professional.
- Regret — rushing causes costly repairs and safety risks.
Typical Drying Time: Water-Based Parking Lot Paint
If you pick water-based parking lot paint, expect it to become touch-dry in about 30 minutes to an hour and ready for light traffic within 1–2 hours under ideal conditions. You should factor drying into parking regulations and budget planning: cooler temperatures, humidity, and heavy coats slow drying. Plan overnight or low-use windows, and schedule cone placement to prevent scuffs. Use quick-dry additives only if compatible. Below is a quick comparison to help you decide.
| Condition | Impact |
|---|---|
| Temperature | Faster when warm |
| Humidity | Slows drying |
| Coat Thickness | Thicker = slower |
| Traffic | Avoid until ready |
| Additives | May speed up |
Typical Drying Time: Solvent-Based Parking Lot Paint
When you choose solvent-based parking lot paint, expect it to dry to the touch faster than many water-based formulas—typically within 15–30 minutes in warm, dry conditions—and be ready for light traffic in about 1–3 hours. However, cooler temperatures, high humidity, or heavy application can extend tackiness and full curing times.
You’ll appreciate brisk set times that let you finish projects sooner while maintaining parking lot aesthetics and crisp lines. Consider thicker coats for durability but know they need longer to cure. Choose paint color options carefully to boost visibility and brand image.
- Relief — quick reopening
- Pride — sharp markings
- Confidence — lasting results
Typical Drying Time: Thermoplastic Parking Lot Markings
Thermoplastic markings typically set almost instantly after application but need several minutes to cool and fully harden.
You’ll often see surface cure within 5–15 minutes and full mechanical cure in a few hours.
Your actual timeline will depend on factors like ambient temperature, humidity, traffic load, and layer thickness.
Keep those variables in mind when scheduling traffic reopening or additional layers.
Typical Drying Timeline
Although thicker and more durable than most coatings, thermoplastic parking lot markings still follow a predictable drying timeline you should plan around. You’ll see surface set in 10–30 minutes; that’s enough to walk around without smudging, and it preserves your parking lot aesthetics and paint color options.
Within 1–2 hours, lines handle light foot traffic. After 6–12 hours, most markings accept vehicle traffic cautiously.
Full hardness and maximum reflectivity develop over 24–48 hours, so avoid heavy loads until then.
- Immediate relief: quick set so you’re not frustrated.
- Patience: visible progress calms you.
- Confidence: final cure restores pride.
Factors Affecting Cure
Surface set and initial traffic windows tell you what to expect, but several variables will actually control how quickly thermoplastic markings cure. You’ll watch temperature, humidity, and surface cleanliness closely: heat speeds reactions, high moisture slows bonding, and contaminants prevent adhesion.
Application thickness and ambient wind influence cooling and solvent evaporation, while substrate type—concrete versus asphalt—affects heat retention. Additives and paint color options matter too; darker pigments absorb more heat and can cure faster, while reflective or heavy-fill formulations take longer.
For reliable parking lot signage, test a small area under current conditions to confirm cure times before reopening.
How Temperature Affects Parking Lot Paint Drying
Because temperature controls how quickly solvents evaporate and binders cure, it has a direct impact on how fast parking lot paint dries. You’ll notice warm conditions speed drying, letting you reopen areas sooner, while cold slows chemical reactions and prolongs tackiness.
Warm temperatures speed solvent evaporation and binder curing, letting fresh parking lot paint dry faster while cold prolongs tackiness.
Consider environmental impact when scheduling jobs; extreme heat can increase VOC emissions, and cold may force reheats or additives.
Paint color selection matters too—darker colors absorb more heat and dry faster than light ones in sunlight.
- You’ll feel relief when fast drying prevents delays.
- You’ll worry if cold stalls work.
- You’ll appreciate planning around temps.
How Humidity Changes Parking Lot Paint Drying
Humidity plays a big role in how quickly your parking lot paint dries. In high humidity, moisture slows evaporation and can tack up paint or extend curing times.
In low humidity, paint loses solvents faster, which speeds drying but can cause cracking or poor adhesion if it dries too quickly.
High Humidity Effects
When moisture hangs heavy in the air, paint on your parking lot will take noticeably longer to dry because high humidity slows evaporation of solvents and water from the coating. You’ll see extended tack times, slower curing, and increased risk of tracking or smudging.
Understand the humidity impact on the drying process so you can plan delays, choose slower-release formulations, or wait for lower moisture windows.
- Frustration — jobs take longer and reopenings get postponed.
- Anxiety — risk of ruined lines or footprints rises.
- Caution — you’ll need stricter timing and monitoring to avoid rework.
Low Humidity Effects
If the air’s very dry, paint on your parking lot will set and cure faster because solvents and water evaporate more quickly. You’ll notice shorter tack times and quicker recoat windows.
However, low humidity also raises the risk of surface skinning that traps solvents underneath. Monitor humidity impact by checking dew point and using recommended thinner or slower-drying formulations when needed.
Wind and direct sun amplify effects, so work in shaded periods or early morning.
Pay attention to temperature effects since higher heat speeds evaporation further; balance temperature, humidity, and application thickness to avoid cracking, poor adhesion, or uneven finish.
How Wind and Sun Change Parking Lot Paint Drying
How do sun and wind change how fast parking lot paint dries? You’ll notice sun heats and speeds solvent evaporation, while wind whisks moisture away—both cut drying time but can stress coating and alter finish.
Sun heats and speeds evaporation; wind whisks moisture away—both shorten drying but can stress and alter the finish.
Consider environmental impact: faster drying may boost emissions from volatile compounds. Paint color matters too; darker hues absorb more heat, drying quicker but risking surface defects.
- You feel urgency when drying’s too fast—cracking worries you.
- You savor quick reopening, but worry about fumes and durability.
- You want predictable results, so you monitor conditions and adjust timing.
How Asphalt vs Concrete Porosity Alters Drying Time
If you’re painting on asphalt, expect the higher porosity to soak up more binder and slow surface curing.
On concrete, lower porosity and higher absorption of thin liquids can pull solvents into the substrate and alter drying time differently.
You’ll need to adjust paint type and drying expectations based on which surface you’re working with.
Asphalt Porosity Effects
Because asphalt soaks up solvents and binder differently than concrete, you’ll see noticeable differences in how quickly paint dries on each surface. You’ll notice asphalt porosity and surface texture pull solvents into tiny voids, making the paint seem to disappear before the top cures. That can speed initial set but leave binder migrating, so full cure takes longer.
You should adjust mix and application thickness and allow extra flash time.
Consider these emotional reactions to asphalt’s behavior:
- Frustration when lines vanish into porey blacktop.
- Relief when tack diminishes faster than expected.
- Patience as full cure slowly establishes.
Concrete Absorption Rates
While asphalt draws solvents into its tiny voids, concrete soaks up water-based and solvent paints differently due to its higher capillary absorption and varied pore structure. You’ll notice concrete often requires sealers or priming to prevent rapid wicking that extends tack time.
You should test porosity, adjust thinner or choose acrylic formulations, and allow longer cure periods in shaded or cool conditions. These choices affect environmental impact—more solvent use raises emissions—so pick low-VOC options when possible.
Also consider paint color options: lighter hues reflect heat and speed drying, while dark colors retain heat and can alter cure rates.
Does Coating Thickness or Extra Coats Change Drying?
When you add more paint or apply thicker coats, you change how moisture and solvents leave the film, and that directly affects drying time. You’ll notice coating consistency matters: a heavy, uneven coat traps solvents and slows cure, while proper surface preparation lets thinner layers bond and dry faster.
Extra coats compound this—each layer adds barrier and time. Balance thickness with environmental conditions and product specs so you’re not waiting unnecessarily.
- Frustration when lines smudge and schedules slip.
- Relief when thin, consistent coats dry on time.
- Confidence from good prep and measured application.
How Reflective Beads and Additives Affect Drying
When you add reflective beads, their size changes how quickly solvent can evaporate from the film, with larger beads sometimes slowing surface drying.
You’ll also notice that certain additives interact with the paint’s solvent system and can speed or slow cure times depending on compatibility.
Finally, the rate and amount you apply—both beads and additives—directly influence drying, so you should adjust application to match drying goals.
Bead Size Effects
If you add larger reflective beads to your line paint, you’ll notice the coating sheds heat and solvent differently than a fine-bead mix, which changes drying rate and surface tack.
You’ll see bead size influence sheen, color fading resistance, and how quickly traffic-safe tack disappears. Larger beads can slow surface set while improving retroreflectivity; smaller beads speed skin-dry time but may dull brightness sooner.
Choose beads to balance appearance and cure.
- You’ll feel relief when lines dry fast.
- You’ll worry if beads cause uneven set.
- You’ll celebrate improved nighttime visibility.
Additive Solvent Interaction
Because additives and solvents change how beads interact with the paint film, you’ll notice drying times shift as soon as you mix them in.
You should expect additive interaction to alter surface tension, causing beads to sink or float, which changes exposed area and drying speed.
Solvent effects speed or slow evaporation; fast solvents shorten tack time but can trap beads under a brittle skin, while slow solvents prolong curing and let beads settle.
Balance matters: choose additives that maintain bead suspension and solvents matched to ambient conditions.
Test mixes on a sample panel so you can predict final reflectivity and dry time.
Application Rate Impact
Although the rate you apply paint seems like a small detail, it directly changes how reflective beads and additives influence drying: heavier coats bury beads and trap solvents, slowing tack and cure, while lighter coats leave beads exposed and let solvents evaporate faster.
You’ll want to match application thickness to your parking lot design and paint color options so bead retroreflectivity isn’t sacrificed for speed. Thinner coats dry faster but may need extra layers; thicker coats protect against wear yet prolong curing.
Consider additives that adjust viscosity and evaporation. Pick a consistent technique to guarantee predictable drying and durable markings.
Best Time of Day to Paint for Fastest Drying
When you pick the right time of day, paint dries faster and you avoid rework; aim for mid-morning to early afternoon when temperatures are warm, humidity is lower, and dew has evaporated. You’ll get consistent curing and reduce tackiness, preserving parking lot aesthetics and minimizing traffic delays.
Wind should be light to prevent overspray but enough to discourage moisture buildup. If you use eco-friendly paints, check manufacturer temperature and humidity windows before starting.
Plan layout and masking beforehand so you can work efficiently during the most suitable window, finishing coats while conditions remain stable for reliable adhesion and longevity.
How to Test If Parking Lot Paint Is Dry
To check if your parking lot paint is dry, start with a gentle surface touch test—lightly tap an inconspicuous spot to feel for tackiness.
Then inspect for potential tire marks by rolling a vehicle wheel slowly over a small painted stripe or using a test wheel if available.
If there’s no transfer or tacky residue, the paint is ready for normal traffic.
Surface Touch Test
If you want a quick, hands-on check to see whether parking lot paint is dry, try a surface touch test—lightly tap a hidden edge or corner with your fingertip or the back of a gloved hand. You’ll feel tackiness versus crisp dryness, which helps when planning parking lot signage placement or confirming paint color options won’t smear.
Don’t press hard; you’re checking topcoat cure, not adhesion.
- Relief — a dry snap says you can proceed.
- Frustration — tacky feel means wait longer.
- Confidence — smooth, non-transfer means durable striping.
Tire Mark Inspection
Although you’ve checked the surface by touch, you’ll still want to verify that tires won’t leave marks—drive a vehicle slowly over a small, inconspicuous test strip and then inspect for fresh skid or rubber transfer.
For tire mark inspection, pick a corner or stripe out of sight, use a clean tire, and roll forward and back without hard braking. Wait a few minutes, then examine for glossy smears, black streaks, or lifting paint.
If marks appear, let the coating cure longer and repeat. Document results for parking lot maintenance records and inform crews before reopening areas to traffic.
When to Allow Pedestrian Traffic on Fresh Paint
When the paint on a walkway feels dry to the touch, resist the urge to walk on it right away—surface dryness doesn’t mean the coating has cured enough to handle foot traffic. You should wait the manufacturer’s recommended cure time, usually several hours to a day, depending on temperature and humidity.
Treat the area like an art gallery: protect the finish and preserve traffic flow with clear signage and barriers so people respect the drying period.
- Frustration — you want to cross, but patience preserves the lines.
- Relief — barriers prevent smudges and rework.
- Pride — a crisp, durable finish rewards restraint.
When to Allow Vehicle Traffic on Fresh Paint
After you’ve kept pedestrians off freshly painted walkways until the coating has cured, you’ll need to be more cautious before letting vehicles roll over parking stripes or lot markings. You should wait until paint reaches full cure for the specific product—often 24–72 hours for traffic-grade coatings—checking manufacturer specs and local temperature or humidity conditions.
Coordinate with your parking lot design so vehicle flow isn’t diverted onto still-wet areas; use clear signage, cones, and temporary barriers. Test a small section first if unsure.
Prioritize slower vehicle speeds during initial use, and re-inspect markings after 48 hours to confirm durability before removing protections.
How to Schedule Painting for a Busy Lot
You’ll want to plan painting around peak hours to minimize disruption, targeting overnight or off-peak times when possible.
Use staged lane closures to keep parts of the lot open while crews work, shifting closures as sections cure.
That way you’ll maintain access and let paint dry properly without shutting the whole lot.
Peak Hour Scheduling
Because downtown lots get heavy traffic during predictable windows, plan painting around peak hours to minimize disruption and rework. You’ll coordinate crews for off-peak nights or early mornings, balancing drying time with safety.
Preserve parking lot aesthetics by choosing paint color options that still read clearly under low light. Communicate closures and detours clearly so drivers cooperate and you avoid premature tire marks.
- You’ll feel relief when overnight work finishes before rush.
- You’ll gain pride seeing crisp, durable lines after smart timing.
- You’ll avoid frustration by reducing repainting and complaints.
Staged Lane Closures
With peak-hour scheduling handled, break the lot into manageable sections and close lanes in stages so you can keep traffic moving while crews work. You’ll plan closures around Parking lot design, directing vehicles to open lanes and clear freshly painted areas to preserve Marking visibility. Assign teams to alternating lanes, stagger start times, and post clear signage and attendants. Communicate schedules to tenants and update digital maps. Use quick-dry paint on high-traffic segments first, then finish low-traffic zones. Review progress daily and adjust closures to minimize disruption and maintain consistent, durable markings.
| Stage | Area | Duration |
|---|---|---|
| A | Entrances | 2 hrs |
| B | Main lanes | 3 hrs |
| C | Side aisles | 2 hrs |
Quick Steps to Speed Up Parking Lot Paint Drying
If you need paint to dry faster on a hot or busy lot, take a few targeted steps that cut drying time without compromising adhesion. You’ll plan around parking lot design, choose paint color options that dry visibly quicker, and prep surfaces so paint bonds fast. Work in narrow sections, keep traffic diverted, and monitor conditions.
- Prep aggressively: sweep, degrease, repair cracks—clean surfaces cure faster.
- Pick the right formula and lighter color to reduce heat absorption and speed setting.
- Apply thin, even coats and time them during mild humidity for reliable, quicker drying.
When to Use Heaters, Fans, or Tents to Control Drying
You’ve sped up drying by prepping, picking the right paint, and working in thin coats; now decide whether mechanical aids will help finish the job faster or protect fresh markings. Use heaters when temperatures dip below recommended ranges; fans for humidity or slight breeze issues; tents when storms threaten or to control light. Consider parking lot design and asphalt repair timing so equipment won’t block traffic or disturb curing edges. Match tool choice to paint type and forecast.
| Aid | When to use | Feeling |
|---|---|---|
| Heater | Cold nights | Relief |
| Fan | Humid days | Confidence |
| Tent | Rain forecast | Calm |
Safety Precautions While Paint Is Still Curing
While the paint’s still curing, stay clear of freshly marked areas and keep vehicles, pedestrians, and equipment off them until they’re fully set. You’ll post barriers and clear signage, and you’ll choose Eco friendly coatings when possible to reduce fumes.
Follow Historical parking standards for line placement and spacing so markings’re correct the first time, avoiding rework that prolongs exposure. Monitor conditions, and don’t rush reopening if humidity or temperature slow curing.
Use cones, tape, and attendants to enforce closures. You’ll inspect before allowing traffic back, protecting the finish and public safety.
- Sense of relief
- Protective care
- Civic pride
Signs of Improperly Cured Parking Lot Paint
After you’ve kept people and vehicles off fresh markings and followed curing precautions, watch for clear signs that paint hasn’t set properly. You’ll notice tacky or rubbery surfaces when you touch lines, scuffing from light traffic, or footprint impressions.
Uneven sheen, color bleeding, or fading suggest issues with paint color selection or improper application. Cracking, flaking, or premature wear reduce parking lot aesthetics and signal incomplete curing.
Paint that smears under light abrasion or picks up on tires needs attention. Record locations, limit traffic, and consult your applicator for next steps before repainting to protect longevity and appearance.
Troubleshooting Slow-Drying or Tacky Paint
When paint stays tacky longer than expected, act quickly to identify the cause and prevent further damage. Start by checking recent weather, surface temperature, and ventilation, since humidity and cold are the most common culprits. You’ll inspect the mix, application thickness, and substrate contamination.
If solvent-based paints feel sticky, improve airflow or use gentle heat. Waterborne paints need time and lower humidity. Consider how tackiness affects parking lot signage visibility and whether paint color selection hid defects.
Fixes may include spot-sanding, recoat with compatible product, or removing failed areas. Trust tests on a small section before full remediation.
- Panic
- Relief
- Confidence
How Seasonal Weather Changes Affect Paint Choice
If you’ve traced tacky paint back to humidity or cold, consider how seasonal shifts should guide your paint choice and timing: summer heat and high humidity favor fast-evaporating solvent-based formulas or specially rated waterborne coatings.
Whereas cooler, drier fall and spring days let waterborne paints cure properly without additives. You’ll plan around seasonal weather to optimize paint adhesion: avoid painting before storms, during heatwaves, or when temperatures drop near freezing.
Check local forecasts and select coatings rated for your temperature and humidity range. That way you’ll reduce failures, rework, and safety hazards caused by poor cure or bond.
Choosing Paint for Drying Time and Durability
Because you’ll balance traffic uptime with long-term performance, choosing parking lot paint means weighing drying speed against durability rather than just picking the fastest option. You’ll consider surface prep, expected wear, and how quickly lines must reopen.
Balance drying speed and durability when choosing parking lot paint—match prep, wear, and reopening needs to your schedule.
Faster-drying acrylics get you back to work sooner; tougher epoxies resist abrasion longer. Also factor environmental impact and paint recycling: low-VOC options cut emissions and make reuse easier.
Trust manufacturer cure charts, but test small areas in-site. Choose what matches your schedule and climate, then stick to recommended coats and temps to relieve lasting, visible markings.
- Relief
- Confidence
- Responsibility
Cost vs Drying-Time Tradeoffs for Paint Types
Balancing drying time against cost means you’ll weigh how quickly paint lets you reopen areas against what you’re willing to pay for faster return-to-service.
You’ll compare water-based, solvent-based, and thermoplastic options: water-based costs less and dries moderately fast, solvent-based dries quicker but often costs more, and thermoplastic offers longest durability with highest upfront expense.
Consider Environmental impact—low-VOC water-based choices reduce emissions and might influence long-term costs or compliance.
Look at Historical trends showing shifts toward quicker-drying, eco-friendlier formulations.
Factor project scale, labor downtime, and lifecycle cost to choose the best tradeoff for your lot.
Maintenance Tips to Protect Newly Painted Markings
When you want your new lines to stay crisp and visible, take a few proactive steps right after the paint cures: limit traffic for the recommended time, put up cones or temporary barriers, and post clear signage to prevent accidental abrasion.
You’ll keep markings sharp by following simple maintenance schedules and routine inspections. Clean gently with low-pressure washing, avoid harsh chemicals, and remove oil stains quickly. Track wear and repaint before contrast fades.
Emotional pride in a neat lot comes from consistent care and planning.
- Protect now — preserve future pride.
- Inspect often — prevent regret.
- Repaint timely — restore confidence.
When to Hire a Pro for Parking Lot Striping
If your lot needs consistent, durable lines—especially for large areas, ADA compliance, or complex layouts—hire a pro to guarantee correct measurements, materials, and application.
You’ll save time and avoid rework when specialists handle parking lot design, marking placement, and surface prep. Pros know best paint color selection for visibility and durability, and they’ll choose coatings suited to traffic and climate.
Hire a contractor when timelines are tight, when you need permits coordinated, or when safety and liability are priorities. Get written estimates, check references, and confirm that drying times, traffic reopening, and warranty terms are clearly documented.
Local Marking Regulations That Affect Paint Timing
Because local regulations dictate where and how you can paint, they also shape your timing and sequencing, from allowable hours to required curing periods before reopening lanes. You’ll need permits, follow paint compliance specs, and schedule work when inspectors approve. Missing rules forces rework, fines, or unsafe lots.
- Frustration — delayed openings when inspections require longer curing.
- Relief — clear Local regulations let you plan night shifts with minimal disruption.
- Responsibility — meeting paint compliance protects users and avoids costly corrections.
Check municipal codes, document approvals, and coordinate crews to keep projects on time and lawful.
Frequently Asked Questions
Can Rain Within 24 Hours Ruin Newly Applied Parking Lot Paint?
Yes — rain within 24 hours can ruin fresh markings. You’ll face rain interference disrupting the curing process, causing smudges, poor adhesion, and longer curing times, so you’ll want to protect or delay application during forecasts.
Can Paint Be Applied Over Oil-Stained Asphalt Without Longer Drying Time?
Yes — but don’t be complacent: oil-stained asphalt isn’t a paint’s spa day. You’ll need thorough surface preparation before applying oil based coatings, or the new paint’ll fail, stick poorly, and shorten its lifespan.
Do VOC Regulations Restrict Fast-Drying Paint Options in My Area?
Yes — you’ll face VOC regulations that can limit fast-drying paint options; check local limits and compliant paint formulations. You’ll compare solvent-based versus waterborne paint formulation details to find approved, quick-dry alternatives.
Can Parking Lot Paint Staining Transfer to Tires or Shoes During Curing?
Yes — while curing, fresh paint can cause tire transfer and shoe staining if it’s still tacky; you’ll avoid smudges by keeping vehicles and pedestrians away until it’s dry, especially with slower‑curing solvent paints.
How Long Before Power-Washing Is Safe After Paint Fully Cures?
You can power-wash once the curing process is fully complete, usually 7–30 days depending on drying time and paint type; wait the manufacturer’s full cure recommendation to avoid lifting or damage during cleaning.
Conclusion
When you’re planning lot striping, remember that paint often dries to the touch in 20–60 minutes but can take up to 7 days to fully cure — and in fact, thermoplastic markings can be driven on after about 30 minutes yet reach full strength in 24–48 hours. That 30-minute window for some materials lets you reopen quickly, but keep traffic light for at least a day to protect longevity and follow local regs.