How to Paint a Door Exterior Like a Pro
You can paint an exterior door like a pro by prepping thoroughly, sanding smooth, removing hardware, and filling dents and gaps so the finish sits evenly. Use a rust- and weather-resistant primer on metal or exterior primer on wood, then apply two thin coats of quality exterior paint with an angled sash brush and short-nap roller, allowing proper dry time between coats. Reattach hardware, add weatherstripping, and follow touch-up and maintenance tips to get lasting results—keep going to learn the full method.
Quick Answer: Paint an Exterior Door Like a Pro in Five Steps
If you want a professional-looking exterior door without a lot of fuss, follow these five clear steps. You’ll prep by cleaning, sanding, and removing hardware to guarantee adhesion.
Next, repair dents and caulk gaps so finishes look smooth.
Fill dents and seal gaps with caulk for a seamless, professional finish before painting.
Prime with a rust- and weather-resistant product, especially if historical preservation matters.
Choose paint guided by color psychology—pick hues that convey warmth, trust, or boldness depending on curb appeal.
Apply two thin coats, letting proper drying time between.
Reattach hardware, add weatherstripping, and inspect for touch-ups so your door lasts and looks intentional.
How This Guide Helps You Paint an Exterior Door
Because painting an exterior door involves prep, materials, and technique, this guide breaks the process into clear, manageable steps so you can get professional results without guesswork.
You’ll follow concise prep checklists, learn tool choices, and use step-by-step application tips that cut mistakes and save time.
The guide ties finish options to historical styles so your door complements architectural character.
It also explains color psychology to help you pick hues that convey mood and curb appeal.
Practical troubleshooting, drying times, and maintenance advice keep results durable.
You’ll finish confident, efficient, and with a door that looks intentional.
DIY or Hire a Pro?
Deciding whether to paint your exterior door yourself or hire a pro comes down to your skill level, time, and tolerance for risk. You’ll weigh cost savings against finish quality, historical preservation needs, and whether you’re comfortable selecting eco friendly finishes.
If the door’s original fabric or complex trim matters, a pro can protect value. If you enjoy hands-on work and have steady time, DIY can satisfy.
- Assess your skill honestly
- Factor in time and weather
- Consider historical preservation concerns
- Compare long-term finish durability
- Choose eco friendly finishes when possible
Tools You Need for a Professional Exterior Door Paint Job

Before you start, gather the essential painting tools—brushes, rollers, a quality door paint, and a tray—so you won’t stop midway.
Prep supplies like sandpaper, a scraper, filler, and a degreaser will help the paint adhere and look smooth.
Finish with sealant, weatherstripping, and a protective topcoat to lock in durability and appearance.
Essential Painting Tools
When you want a durable, professional-looking exterior door finish, having the right tools makes all the difference. They speed the job, improve coverage, and prevent costly mistakes. You’ll want items that protect the door handle, boost weather resistance, and help you apply paint smoothly. Choose quality tools to save time and avoid touch-ups.
- High-quality angled sash brush for edges and panels
- Foam roller (short nap) for smooth faces
- Synthetic-bristle brush for trim and detailed work
- Small artist brush for hardware gaps around the door handle
- Sturdy paint tray and liner for consistent load and cleanup
Surface Preparation Supplies
You’ve got the right brushes and rollers; now focus on surface preparation supplies that make the paint stick and last. You’ll need sandpaper (coarse to fine), a scraper, chemical stripper for old finishes, a quality exterior primer, wood filler, and rust converter for metal. Cleaners and degreasers remove grime; tack cloths catch dust. Consider how color psychology and historical styles influence your prep choices—smoothness and substrate condition affect final appearance. Use this simple table to weigh priority:
| Task | Tool | Impact |
|---|---|---|
| Remove old paint | Scraper/stripper | Adhesion |
| Smooth surface | Sandpaper/filler | Finish |
| Clean | Degreaser/tack cloth | Durability |
Finishing And Protection Materials
Although the paint job looks great on its own, lasting protection depends on the right finishing materials and tools. You’ll seal edges, safeguard door hardware, and apply weatherproofing techniques to extend life and appearance.
Choose a compatible exterior clear coat or topcoat, corrosion-resistant screws, and a quality brush or foam applicator for smooth coverage. Pay attention to recommended drying times and apply thin, even layers.
Finally, protect hinges and locksets during application, and inspect seals annually to maintain performance.
- Exterior clear/topcoat
- Corrosion-resistant screws
- Foam applicator or fine brush
- Weatherstripping and sealant
- Masking tape for hardware
Paints and Primers Recommended for Exterior Doors
Because exterior doors face weather and frequent handling, you should pick paints and primers that balance durability, adhesion, and appearance.
Exterior doors need paints and primers that balance durability, strong adhesion, and a lasting attractive finish
Use a high-quality exterior acrylic latex primer for bare wood or previously painted doors; it blocks tannin bleed and promotes adhesion.
For metal doors, choose a bonding primer that resists rust and pairs with enamel or exterior acrylic paint.
Pick products labeled UV-resistant and mildew-resistant.
Remove or mask door hardware before priming to avoid tackiness and guarantee clean edges.
Combine paint selection with proper weatherproofing techniques—sealing edges and thresholds—to extend finish life and reduce maintenance.
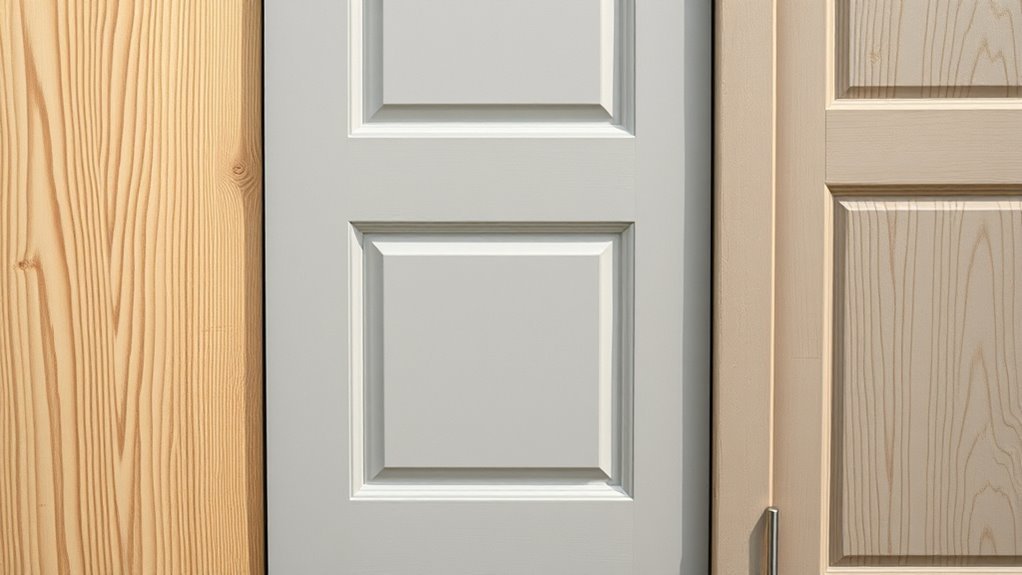
Choosing the Right Finish: Gloss, Semi-Gloss, or Satin
Having picked the right primer and paint, you’ll want to choose a finish that matches how the door will perform and look over time.
Gloss gives max durability and easier cleaning—great if your door hardware gets frequent handling.
Semi-gloss balances sheen and subtlety, resisting scuffs while still highlighting trim.
Satin hides imperfections better, offering a softer look with decent weather resistance.
Consider exposure, maintenance, and desired sheen when deciding.
Test a small panel first.
- Gloss: toughest, highest shine
- Semi-gloss: versatile, durable
- Satin: low sheen, forgiving
Cleaning: easier with higher gloss
Hardware: finish affects appearance and wear
Match Paint Type to Door Material: Wood, Metal, or Fiberglass
Match the paint to your door’s material to get durable, attractive results.
For wood, pick an exterior acrylic or oil-based paint that seals and flexes with the grain.
Use metal-specific coatings for steel or aluminum and a fiberglass-compatible paint or primer for molded doors.
Choose Paint For Wood
1 key step before you buy paint is to identify your door’s material—wood, metal, or fiberglass—since each needs a compatible paint and prep routine.
For wood, pick high-quality exterior acrylic latex or an oil-based enamel if you want extra durability. Sand, prime with a stain-blocking primer, and respect grain direction.
Consider color psychology and historical styles when choosing sheen and hue to match your home. You’ll want UV resistance and mildewcide for longevity.
- Choose acrylic latex for flexibility
- Use oil enamel for high-traffic doors
- Sand and fill imperfections
- Apply a quality exterior primer
- Pick finish by exposure and style
Use Metal-Specific Coatings
If your door is metal, choose coatings formulated for metal surfaces so they’ll adhere, resist rust, and handle temperature changes without cracking. You’ll want a primer and topcoat labeled for metal to prevent metal rusting and guarantee long-term paint adhesion.
Clean and degloss the surface, remove loose rust with a wire brush, then apply a rust-inhibiting primer.
Use oil-based or specially formulated acrylic enamel topcoats for durability and weather resistance. Apply thin, even coats, sanding lightly between layers for better bond.
Proper product choice and prep stop corrosion and keep the finish looking professional for years.
Select Fiberglass-Compatible Paint
For fiberglass doors you’ll want paint formulated for non-porous, flexible surfaces so it won’t peel or crack as the door expands and contracts. You should pick a high-quality exterior acrylic or polyurethane that bonds to fiberglass, resists UV, and tolerates temperature shifts.
Prep thoroughly: clean, sand lightly, and use a primer made for fiberglass.
Consider how your paint color complements door accessories and trim.
Apply thin, even coats and allow full cure between layers to avoid surface defects.
- Choose exterior acrylic or polyurethane
- Use fiberglass-specific primer first
- Sand and thoroughly clean surface
- Match paint color to accessories and trim
- Allow full cure between coats
How to Check Door Condition Before You Start
Before you grab paint or sandpaper, walk around the door and inspect it closely so you can spot any damage that will affect adhesion or finish. Check for peeling, cracking, rot, or swelling at edges and thresholds. Test for loose panels, warped areas, and gaps that need sealing.
Note existing finish type—gloss, semi, or matte—to choose proper primer. Consider whether you’ll pursue hardware upgrades later and whether new finishes will match the door’s condition.
Think about color psychology for curb appeal and neighborhood harmony, but don’t commit until you’ve confirmed substrate soundness and moisture levels.
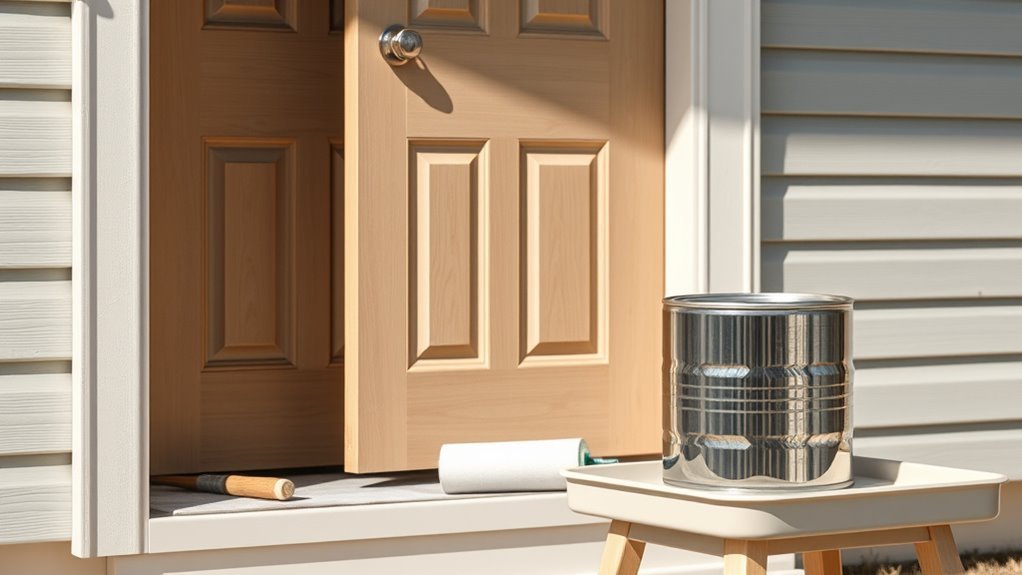
Removing Hardware and Preparing the Door for Painting
Now that you’ve assessed the door’s condition and noted any repairs or finish types, remove the hardware so you can work cleanly and avoid accidental paint buildup. You’ll label and bag screws, loosen knobs, and take off kickplates.
Clean, sand, and fill gouges; wipe dust with tack cloth.
Consider weather considerations: avoid prepping in high humidity or rain.
Store hardware in a safe, dry spot to prevent corrosion.
- Label and bag screws by location
- Remove knobs, locks, and strike plates
- Unscrew hinges if taking door off
- Sand and clean surfaces thoroughly
- Protect hardware from moisture during storage
When to Paint With the Door On Versus Off the Hinges
Whether you leave the door on its hinges or take it down depends on the door’s material, the amount of detail, and how much control you want over finish quality.
Decide to paint it in place or remove it based on material, detail, and how much finish control you want
If the door’s heavy, paneled, or has lots of trim, remove it so you can lay it flat and avoid drips; you’ll also get easier access to the edges and can match the paint color precisely.
Keep it on when frame alignment matters or you can’t remove it easily, but mask and remove or protect door hardware first.
Removing the door takes more effort but gives a cleaner, more professional result overall.
Set Up a Safe Workspace and Choose the Right Weather
Want your paint job to last and look professional? Set a safe, clutter-free workspace and pick calm, dry weather. Move pots and tools used for garden maintenance away from the work zone. Guarantee stable scaffolding or ladders, cover nearby surfaces, and check exterior lighting for evening touch-ups.
Aim for temperatures between 50–85°F and humidity under 70% to avoid blistering or slow curing. Windy days scatter debris; rainy days ruin wet paint.
- Clear the area and protect plants
- Stabilize ladders and use nonslip pads
- Mask hardware and nearby trim
- Confirm good exterior lighting
- Monitor forecast for consecutive dry days
Cleaning an Exterior Door: Degreasing and Mildew Removal
Before you prime or paint, thoroughly clean the door to remove grease, dirt, and mildew so the finish will adhere and last. Start by removing hardware or masking around locks and hinge areas; doing basic door hinge maintenance now prevents grime transfer later.
Mix a mild detergent and water for general dirt, and use a 1:3 bleach-to-water solution or a commercial mildew remover for black spots—test in an inconspicuous area first. Scrub with a soft brush, rinse thoroughly, and let dry completely.
Check exterior lighting considerations so fixtures don’t drip onto a freshly cleaned surface and cause stains.
Repairing Cracks, Gouges, and Rotten Wood
Start by evaluating how deep and widespread the damage is so you know whether you can repair it or need to replace parts.
Fill cracks and gouges with an appropriate exterior-grade wood filler or epoxy, then sand smooth once cured.
If wood is rotten or structurally compromised, cut out the bad section and install a replacement piece before priming and painting.
Assess Damage Extent
Curious how badly the door’s surface is damaged? You’ll inspect for soft spots, splits, missing paint, and rot, noting how visible areas affect historical accuracy and whether damaged zones alter color psychology impressions.
Tally small versus structural defects, and decide if replacement’s needed.
- Probe edges and bottom for softness
- Tap for hollow sounding panels
- Scrape loose paint to reveal substrate
- Measure gouge depth and length
- Check joint integrity and frame fit
Document locations with photos, prioritize safety, and plan repairs only after you’ve mapped all defects and assessed moisture sources.
Fill Cracks Properly
Now that you’ve mapped every defect and noted moisture sources, proceed to repairing cracks, gouges, and rotten areas so the surface will hold primer and paint.
Remove loose material, sand to sound wood, and treat small rot with a consolidant.
For cracks and gouges use an exterior-grade filler or epoxy, packing firmly and overfilling slightly. Sand flush, dust off, and apply a compatible primer.
In historical restoration, match filler texture and profile to preserve character.
For graffiti removal-damaged spots, verify substrate is stable before filling.
Let repairs cure fully; test adhesion before painting to ensure a durable finish.
Replace Rotten Sections
When rotten wood won’t respond to consolidant or filler, cut it out and replace the damaged section so the door’s structure and finish will last. You’ll remove soft material, fit a new piece or epoxy patch, and guarantee tight joints. Clamp and fasten, sand smooth, and blend profiles before priming.
Don’t skip surface sealing—apply a quality primer or sealer to protect repairs and prevent moisture return. Match paint layers and finish for uniformity.
- Remove soft, discolored wood to sound substrate
- Fit a new wood or epoxy repair piece
- Clamp, fasten, and sand flush
- Prime and surface sealing immediately
- Paint to match surrounding finish
Addressing Rust and Dents on Metal Doors
If your metal door shows rust or dents, tackle those problems before priming and painting so the finish will adhere and look smooth.
Start rust removal by sanding to bare metal, treating with a rust converter if pitting remains, then wipe clean.
For dent repair, tap out shallow dings from the inside with a rubber mallet or use body filler for deeper depressions; sand filler flush once cured.
Feather edges to blend with surrounding metal.
Clean the area, apply a metal-etching primer, and inspect for flaws.
Addressing rust removal and dent repair properly prevents future corrosion and guarantees a professional-looking paint job.
Smoothing Fiberglass Doors and Filling Imperfections
After handling rust and dents on metal doors, you’ll find fiberglass doors behave differently and need a gentler approach. You’ll inspect for hairline cracks, gouges, and seam separations, because keeping door security and weather resistance starts with a smooth, intact surface.
Use a flexible filler made for fiberglass, apply thin layers, and let each cure fully. Prime repaired spots with a bonding primer before painting.
- Clean surface with mild detergent
- Remove loose material, dust thoroughly
- Apply polyester or epoxy filler sparingly
- Shape filler while pliable, avoid overfilling
- Prime and check seal integrity before paint
Sanding Basics: Grit Progression and Technique
Though sanding might feel tedious, it’s the step that makes paint look professional and stick long-term. You’ll follow a clear grit progression: start coarse to remove flaws, move medium to refine, finish fine for adhesion. Your sanding technique should use even pressure, follow grain, and keep moving to avoid dips. Clean dust between steps and inspect edges. Stay patient—proper sanding prevents peeling and shows care.
| Step | Emotion | Result |
|---|---|---|
| 80–120 | Frustration → Relief | Remove old finish |
| 150–180 | Focused | Smooth flaws |
| 220–320 | Satisfaction | Paint-ready surface |
| Final | Pride | Long-lasting finish |
How to Use a Chemical Stripper Safely, If Needed
When paint or varnish won’t sand off cleanly, a chemical stripper can save hours—but you’ll need to handle it with care. You’ll follow safety steps, choose the right product, test a small area, and work outdoors or with ventilation.
Focus on chemical safety and proven stripping techniques to protect yourself and the door.
- Wear gloves, goggles, and a respirator rated for organic vapors.
- Read and follow the product label fully before use.
- Work on drop cloths; contain and collect residue.
- Use plastic scrapers to avoid gouging wood.
- Neutralize and dispose of waste per local regulations.
Choosing and Applying Exterior Primer Correctly
Because primer bonds paint to the door and seals wood or bare metal, choosing the right type and applying it correctly is the single best step you can take to guarantee a durable, attractive finish.
You’ll pick primer based on substrate—oil-based for knotty wood, rust-inhibiting for metal, or acrylic for general use—and consider color psychology: tinted primers can enhance final hue and hide underlying stains.
Check VOC levels and disposal instructions to minimize environmental impact.
Apply evenly, avoid drips, and allow proper cure time so topcoat adhesion and durability aren’t compromised.
Inspect for missed spots before painting.
How to Apply Primer Step-by-Step
Now that you’ve chosen the right primer and checked surfaces, it’s time to apply it correctly. Work systematically: mask hardware installation areas and any door decoration, sand glossy spots, clean dust, and lay a drop cloth.
Start with edges, then panels, then flat faces. Use a brush for detail and a roller for flats. Keep wet edges to avoid lap marks and apply thin, even coats. Let primer dry fully before light sanding and a second coat if needed.
- Mask trim and hardware
- Sand and clean thoroughly
- Brush edges first
- Roll flats with even pressure
- Lightly sand between coats
Spot-Priming Versus Full Priming: When to Do Each
Check the door for bare wood, stains, or patched areas—those spots usually only need spot-priming.
If the old finish is chalky, peeling, or uneven in color, you’ll want to prime the whole door for consistent adhesion and coverage.
Always clean, sand, and repair the surface first so the primer sticks where you need it.
When To Spot-Prime
If your door has only a few small areas of bare wood, stains, or patch repairs, spot-priming will usually do the job and save time; reserve full priming for doors with widespread peeling, severe staining, or multiple exposed surfaces.
You’ll spot-prime when damage is limited, existing finish is sound, or you’re matching a small repaired area. Consider color psychology when choosing primer-tint and respect historical styles if restoring an old door.
Prep thoroughly: sand edges, remove dust, feather out repairs, use compatible primer, and let it dry completely before topcoating.
- Sand and clean only affected spots
- Match primer type to topcoat
- Feather surrounding paint
- Use tinted primer when needed
- Dry fully before paint
When To Full-Prime
When should you skip spot-priming and prime the whole door? Prime the whole door when bare wood, multiple repairs, tannin bleed, or extreme color changes demand uniform adhesion and coverage.
You’ll also full-prime if the door’s finish is flaking or you’re switching between dramatically different hues; color psychology choices like bold reds or deep blues need consistent opacity.
For doors in historic homes—matching historical styles or preserving period authenticity—full priming guarantees the topcoat looks even and true to era.
Full-priming saves time by preventing later touch-ups and gives you a reliable base for any finish.
Surface Prep Considerations
Although spot-priming saves time and paint on small repairs, you’ll choose full priming whenever you need uniform adhesion, stain blocking, or an even base for dramatic color changes.
You assess surface condition: bare wood, tannin bleed, or multiple old coats demand full priming; small gouges or isolated repairs suit spot-priming.
Consider color psychology when shifting to bold hues and think about historical styles if matching period doors.
Full priming evens absorption and prevents flash.
Spot-prime to save time, but don’t compromise longevity.
- Bare wood
- Tannin/stain issues
- Bold color changes
- Historical styles matching
- Localized damage
Taping and Masking for Crisp Edges and Glass Protection
Before you unwrap your brush, mask off edges and glass so your paint lines stay sharp and easy to fix if needed. You’ll choose tape that won’t lift finish or damage frames, align edges tightly, and press seams for crisp lines. Consider color psychology and historical accuracy when planning trim versus panel hues. Protect glass by overlapping tape with craft paper, cutting out panes cleanly. Remove tape when paint’s tacky, not fully cured, for best edges. The table below captures the feeling this care creates.
| Anticipation | Pride |
|---|---|
| Calm | Joy |
| Confidence | Home |
Protecting Surrounding Surfaces and Landscaping
Masking the door and glass sets the stage, but you’ll also need to shield the surrounding surfaces and landscaping so overspray, drips, and splatters don’t undo your neat work. Lay drop cloths, secure them with weights, and temporarily move pots and delicate plants.
Consider landscaping integration when planning placement and protect soil with plastic sheeting. Choose neutral barriers so paint color psychology won’t clash with nearby beds or siding.
Work from top down and check for stray splatters as you go.
- Heavy-duty canvas drop cloths
- Plastic sheeting for soil
- Painter’s tape for trim
- Weights or clips
- Temporary plant relocation
Best Brushes and Rollers for Exterior Doors
You’ll want the right brushes and rollers to get a smooth, durable finish on an exterior door. Choose brush types for cutting in and trim.
Pick roller sizes that match flat panels versus recessed details, and decide between synthetic bristles for latex paints or natural for oil-based finishes.
I’ll explain the pros and cons of each so you can pick the best tools for your door.
Brush Types Explained
When you want a smooth, durable finish on an exterior door, choosing the right brushes and rollers makes all the difference. You’ll select brush types based on paint type and detail work; natural-bristle for oil-based, synthetic for latex. Practice brush techniques to avoid streaks, and keep bristles flexible by proper paint mixing and thinning.
Use angled sash brushes for corners and flat trim brushes for panels. Clean and store brushes carefully to prolong life.
- Angled sash brush: crisp edges
- Flat trim brush: broad strokes
- Round shader: detail control
- China bristle: tough finishes
- Synthetic blend: versatile for latex
Roller Size Choices
Although rollers seem simple, picking the right size and nap transforms how quickly and evenly you cover an exterior door. You’ll usually choose a 4-inch mini roller for panels and a 7–9-inch for flat faces; narrower rollers help navigate around door hardware without muddying details.
Select a short nap (1/4″–3/16″) for smooth, primed surfaces to avoid texture; use slightly thicker nap on rough or previously weathered doors to fill minor imperfections.
Rollers speed work, but you’ll still cut in with a brush near trim and door hardware. Proper roller choice complements weatherproofing techniques and yields a professional finish.
Synthetic Vs Natural
Now that you’ve picked the right roller size, you’ll want to match materials to the job: synthetic and natural bristles behave very differently on exterior doors.
You’ll choose synthetic for water-based paints to achieve a smooth synthetic finish and easy cleanup. Pick natural bristles for oil-based enamels when you want richer natural texture and better leveling.
Use hybrids when you need versatility. Match nap and brush shape to panels and rails, and always test a small area first.
- Synthetic brushes for latex
- Natural brushes for oil enamel
- Foam rollers for smooth panels
- Short-nap for detail areas
- Hybrid for mixed projects
Using a Paint Sprayer: Pros, Cons, and Setup Tips
If you want a fast, professional-looking finish, a paint sprayer can be your best tool for exterior doors. You’ll save time, get even coverage, and better highlight color psychology choices suggested by your paint manufacturer. Downsides: overspray and setup time, plus masking needs. Prep thoroughly, use PPE, and test spray pattern on cardboard. Aim for thin, even passes and keep the nozzle parallel to the door.
| Advantage | Drawback | Setup Tip |
|---|---|---|
| Speed | Overspray | Mask meticulously |
| Smooth finish | Learning curve | Test spray |
| Coverage | Waste | Use correct tip |
Thinning and Mixing Paint for Spray or Brush Application
When preparing paint for a sprayer or brush, you’ll want a uniform consistency that flows easily but still hides well. Thin too much and coverage suffers, thin too little and you’ll get runs or clogging. Measure thinner or water per manufacturer directions, test on cardboard, and adjust slowly.
For tinted jobs, do color mixing carefully to match samples before thinning. Keep a separate small cup for touch-ups and clean tools promptly to aid brush cleaning and prevent dried residue. Strain the paint for sprayers to avoid clogs.
- Follow label ratios
- Stir thoroughly, not violently
- Test spray first
- Note batch for matching
- Clean immediately
Brush Technique to Avoid Visible Brush Marks
Pick a high-quality synthetic brush that matches your paint for cleaner coverage.
Load the brush without overloading it—tap excess off and work with a thin, even ribbon of paint.
Use long, continuous strokes and finish each pass lightly to blend and prevent visible brush marks.
Choose The Right Brush
Although it’s tempting to grab the cheapest brush, choosing the right sash or angled-bristle brush will help you lay down smooth, even strokes and avoid visible brush marks. You’ll pick synthetic bristles for water-based paint and natural bristles for oil.
Match brush width to door panels and keep a firm, steady wrist. Consider color psychology when selecting finish sheen, and respect historical accuracy for period doors. Use a quality brush to reduce dragging and overworking.
- Choose synthetic vs natural by paint type
- Match brush size to detail
- Use angled sash for corners
- Maintain steady strokes
- Clean and store properly
Load Paint Properly
Now that you’ve chosen the right brush, load it correctly to prevent brush marks and get an even coat. Dip only a third of the bristles into paint, tap off excess on the can’s inner ridge, and brush along the can to distribute paint through the ferrule. You’ll avoid globs that cause streaks and uneven drying.
Maintain a consistent paint load as you work each section so color blending stays subtle and seamless. Reload before the brush runs thin to preserve paint durability and finish.
Clean edges with light feathering; don’t scrub or press hard, which invites marks and uneven film.
Smooth Long Strokes
When you’re ready to paint each panel, use long, continuous strokes that run the full length of the surface so the bristles lay down an even film and the paint levels out as it dries. You’ll start near an edge, maintain steady pressure, and finish each stroke beyond the panel to avoid stops that show.
Work wet edges into one another for seamless color blending and smoother sheen. That disciplined technique also improves paint durability by preventing thin spots. Clean, quality brushes and light, decisive strokes give pro results without visible marks.
- Load evenly, don’t overload
- Stroke full length
- Feather ends lightly
- Blend wet edges
- Inspect for drags
Roller Technique for Even Coverage on Recessed Panels
Want the recessed panels to look smooth and professional? Use a small foam roller after brushing edges; it blends brush marks and respects color psychology and historical styles by preserving crisp lines and period-appropriate finishes.
Load the roller lightly, roll off excess, and work in short, overlapping passes following the panel grain. Roll toward the center, then out to the stile, keeping a wet edge to avoid lap marks.
For tight corners, finish with a soft-bristle brush immediately to blend.
Let each thin coat dry fully before sanding lightly and repeating; two thin coats beat one heavy coat every time.
Sprayer Technique for Uniform Coats and Avoiding Runs
Pick the right nozzle for your paint and sprayer so the atomization matches the finish you want.
Keep the gun at a steady distance from the door and move at a consistent speed to avoid heavy spots.
Overlap each pass by about 30–50% and watch for runs so you can slow down or feather the edge.
Proper Nozzle Selection
Although the right nozzle might seem like a small choice, it determines spray pattern, droplet size, and how smoothly paint lays down—so choose one that matches your door’s profile and the paint’s viscosity.
You’ll want to match nozzle types to material: thinner latex needs larger orifices, thicker enamels need finer tips. Consider spray patterns for flat panels versus recessed details.
Test on scrap, adjust pressure, and look for even atomization to avoid runs. Clean or replace clogged tips. Use trial passes to confirm coverage before committing to the door.
- Flat tip for broad, even coverage
- Fan pattern for panels
- Round tip for trim
- Fine tip for enamel
- Replace worn nozzles
Maintain Consistent Distance
Now that you’ve matched your nozzle to the paint and door profile, keep your sprayer at a steady distance to get uniform coats and prevent runs. Hold the gun 8–12 inches away, depending on tip size, and maintain that gap as you move. Use a simple marker or tape on a jig to train your hand if needed.
Consistent distance preserves edge definition and avoids pooling that ruins finishes inspired by historical styles. Think about color psychology: even coverage keeps hues true and avoids darker streaks that shift perception.
Pause only to refill or inspect; don’t vary the gap mid-pass.
Control Overlap And Speed
When you overlap each spray pass by about 30–50% and keep a steady, moderate sweep speed, you’ll build uniform, drip-free coats. Too little overlap leaves striping, while too slow or inconsistent motion causes runs. You’ll control finish by practicing consistent rhythm, blending edges before paint skins over, and adjusting pressure for thin, even layers.
Consider color psychology when choosing saturation—bolder hues need extra thin coats to avoid pooling. Pick eco-friendly options to reduce fumes and improve flow. Keep the can or hose parallel, work wet edges, and inspect under varied light between coats.
- Maintain 30–50% overlap
- Use steady sweeping motion
- Adjust pressure, nozzle size
- Blend wet edges immediately
- Inspect under different light
How Many Coats and Drying Times
Because proper coverage and durability depend on both coat count and cure time, you’ll want to plan the number of coats and the interval between them before you start painting. Decide between one, two, or three coats based on primer use, paint quality, and surface wear. Consider color psychology and historical styles when choosing gloss—darker or high-gloss shades may need extra coats. Expect recoat windows of 2–4 hours for fast‑dry acrylics, 6–24 for alkyds, and full cure in days to weeks.
| Coat | Dry time | Notes |
|---|---|---|
| 1 | 2–24 h | Primer or base |
| 2 | 2–24 h | Standard topcoat |
| 3 | 24+ h | Deep color/refinement |
| Cure | days–weeks | Full durability |
Avoiding Runs and Drips When Painting Vertical Surfaces
After letting coats dry to the recommended recoat time, you’ll want to focus on techniques that keep paint from running on vertical surfaces. Work in short vertical strokes, keep your brush or roller loaded but not dripping, and inspect in bright outdoor lighting so you catch early sagging. Mind color mixing viscosity; thinner mixes run easier, so follow manufacturer ratios. If a drip forms, gently smooth it immediately with a light stroke.
After coats reach recoat time, use short vertical strokes, keep tools loaded—not dripping—and smooth any drips immediately.
- Use moderate pressure and steady tempo
- Reload often instead of overloading
- Tilt the door slightly if possible
- Work from top downward in sections
- Check edges for buildup
Achieving Crisp Lines Around Glass and Trim
Before you start, clean and mask the glass and surrounding trim so paint won’t bead or seep under the edges. Use a high-quality painter’s tape, pressing it down firmly and removing any loose bits for a tight seal.
Then cut in carefully with a steady brush, feathering your strokes away from the tape for a crisp line.
Prep Around The Glass
When you’re working around glass, take time to mask and seal so your paint lines stay crisp and clean. Remove or cover door hardware, do glass cleaning, and make sure weatherstripping is protected.
Run a thin bead of clear caulk where trim meets glass to prevent bleed. Press tape firmly, peel at 45° after paint tack dries, and touch up with a fine brush for micro-corrections.
- Remove or shield door hardware before masking
- Clean glass thoroughly for flawless edges
- Apply thin caulk between trim and glass
- Use low-tack tape and press edges firmly
- Peel tape slowly at 45° for crisp lines
Use High-Quality Tape
Masking and good sealing set you up, but high-quality painter’s tape makes the difference between a pro-looking edge and a ragged one. You’ll choose a tape rated for exterior use and smooth surfaces so paint won’t seep under edges.
Press tape firmly along glass and trim, smoothing with a plastic card to guarantee a tight seal. Remove tape at a 45° angle while paint is tacky for the sharpest line.
This care highlights your color psychology choices and complements finishes from eco-friendly paints, keeping lines crisp without chemical residue or staining on surrounding trim.
Cut In With A Brush
If you want razor-sharp paint lines around glass and trim, cut in with a steady, angled sash brush and steady wrist control. You’ll load the brush lightly, tap off excess, and follow crisp edges with short, confident strokes.
Work wet edges to avoid lap marks, watch paint drying times, and blend where panels meet so color mixing stays intentional. Take breaks to inspect lines, correct mistakes with a damp brush, and keep a clean rag handy.
- Use an angled sash brush
- Load moderately, remove excess
- Paint toward the glass edge
- Feather strokes to blend
- Check drying and touch up
Painting Door Hardware or Replacing It for a Facelift
Because hardware attracts the eye, you can dramatically change your door’s look by painting the existing pieces or swapping them for updated finishes. You’ll pick door decor that matches your curb appeal and consider hardware styles—matte black, polished brass, or aged bronze. Remove pieces, sand lightly, prime, and spray for a factory finish; or buy new sets for instant impact. Reinstall carefully, checking alignment and latch function. Small changes make the whole entrance pop.
| Finish | Mood |
|---|---|
| Matte black | Modern |
| Polished brass | Classic |
| Aged bronze | Warm |
| Satin nickel | Sleek |
Weatherproofing Edges and the Bottom Sweep
Don’t skip sealing the bottom gap—proper caulk or a threshold seal keeps drafts and moisture out.
Pick a durable sweep that resists wear and matches your door’s clearance and climate.
Also protect the edge joints with weatherproof sealant so paint and trim stay intact.
Seal The Bottom Gap
When you finish painting the door, seal the bottom gap to keep drafts, moisture, and pests out by installing or replacing a bottom sweep and weatherstripping along the edges. You’ll also check door hinge lubrication so the door rides smoothly against the sweep; while your exterior paint mixing finishes, let seals cure.
Fit a sweep flush to the threshold, trim to length, and screw or adhesive it in place. Test the sweep with a dollar bill for uniform contact and adjust for clearance.
- Choose a compatible sweep material
- Clean the threshold first
- Trim for a snug fit
- Fasten securely
- Test operation
Choose Durable Sweep
After fitting and testing the bottom sweep, pick materials that’ll stand up to weather and daily use so your seal actually lasts. Choose stainless steel or heavy-duty rubber for longevity; aluminum alloys resist corrosion but can dent.
Match the sweep’s profile to the door style—slim for modern, broader for traditional—so color psychology and historical accuracy stay intact when viewers judge the entrance.
Pick a finish that complements your paint, and select fasteners rated for exterior use.
Measure twice, trim precisely, and install with consistent pressure to avoid gaps.
Test with a hose and adjust to ensure a tight, durable seal.
Protect Edge Joints
Because edge joints are the most vulnerable points for water and air infiltration, you should seal them carefully before installing the bottom sweep. Focus on edge sealing and joint caulking to stop drafts and rot.
Clean the joint, remove old sealant, and use a compatible exterior-grade caulk. Press the sealant into gaps, smooth it, and let it cure fully.
Measure and fit the bottom sweep so it compresses evenly without stressing sealed joints. Check for gaps after installation and touch up with caulk.
- Clean gaps thoroughly
- Choose exterior caulk
- Apply steady bead
- Smooth with a tool
- Inspect and retouch
Curing Time and When to Rehang the Door and Hardware
While paint can feel dry to the touch within hours, it needs substantially more time to cure fully, so wait the manufacturer’s recommended period before rehanging the door or reinstalling hardware.
You’ll protect door security by delaying installation until the finish hardens; hinges and locks set into tacky paint can stick or peel. Use gentle handling when you lift the door back—support edges and avoid scraping newly cured surfaces.
Consider paint color psychology only when choosing timing for guest arrival or staging: brighter colors may show imperfections sooner, so let the finish cure completely before final inspection and reassembly.
Touch-Up Strategy for Chips and Scratches Later
Once the door’s finish has fully cured and you’ve reinstalled the hardware, plan a simple touch-up strategy so small chips and scratches don’t become larger problems. Keep a small kit with matching paint color, fine brush, mild cleaner, and a clear coat for seals.
Inspect edges and around door hardware monthly, address nicks quickly, and record the paint color formula.
- Clean the area before applying paint
- Feather edges to blend repairs
- Use thin layers, letting each dry
- Protect repaired spots with clear coat
- Store spare paint and label the can with date
Seasonal Maintenance to Extend Your Door’s Finish
To keep your door’s finish looking sharp through changing weather, set up a simple seasonal check routine you can do each spring and fall. Inspect seams, caulking, and paint edges; clean with mild soap; wax or recoat as needed. Refresh door decoration gently and test hardware upgrades for fit and finish. Tighten screws, lubricate locks, and touch small nicks immediately.
| Task | Frequency | Action |
|---|---|---|
| Clean | Spring/Fall | Mild soap, rinse |
| Inspect | Spring/Fall | Seals, paint edges |
| Lubricate | Annually | Locks, hinges |
| Touch-up | As needed | Small nicks |
| Update | Every few years | Hardware upgrades, decoration |
Common Mistakes That Cause Peeling and How to Prevent Them
Peeling usually starts with rushed surface prep, so you’ll want to remove old loose paint, sand glossy spots, and clean away dirt and grease before you prime.
Choosing the wrong paint — like interior latex for an exterior door or a low-quality finish — will cut the life of your job no matter how well you prep.
I’ll show how to avoid these pitfalls so your paint stays put.
Surface Prep Errors
Why didn’t your last paint job stick? You likely skipped proper surface prep, leaving surface inconsistencies that ruin paint adhesion. Fixing this prevents peeling and extends the finish.
- Clean thoroughly: remove dirt, grease, and chalk with a mild detergent.
- Sand evenly: smooth old gloss and feather edges to eliminate bumps.
- Repair defects: fill cracks and rot, then prime bare wood or metal.
- Degloss and wipe: remove sanding dust and residues before coating.
- Use primer correctly: choose a bond-promoting primer and apply recommended dry times for best paint adhesion.
Wrong Paint Selection
Which paint did you grab for the job? If you picked paint meant for interiors or low-UV areas, you’ll face peeling fast.
Choosing an incorrect color isn’t just aesthetic — darker hues absorb more heat, stressing the finish and shortening paint durability.
Use exterior-grade formulas labeled for doors or trim, ideally acrylic latex for flexibility and weather resistance.
Match sheen to use: semi-gloss or satin for easier cleaning and protection.
Always check the label for UV and moisture resistance, and do a small test panel.
Proper selection prevents peeling, extends life, and keeps your door looking professional.
How to Remove Stubborn Paint and Refinish an Old Door
If the old paint won’t budge with a scraper, you’ll need a more deliberate approach to strip and refinish the door safely and effectively. You’ll remove door hardware, work outdoors or in a well-ventilated area, and choose a chemical stripper or heat gun based on the grain and age of the door.
Sand to smooth the surface, repair gouges with filler, then prime bare wood. Reattach hardware after the paint cures and seal edges with weatherproofing techniques to prevent moisture ingress.
- Wear gloves, goggles, and a respirator
- Test stripper on a hidden area first
- Use progressively finer sandpaper
- Clean dust before priming
- Check hinge alignment before rehanging
Low‑VOC Paints for Exterior Doors and Eco-Friendly Options
Because you’ll be spending time sanding, priming, and letting the door cure, choosing a low‑VOC or eco‑friendly exterior paint reduces toxic fumes and environmental impact without sacrificing durability.
Pick acrylic latex low‑VOC for easy cleanup and adhesion, or consider VOC free options like water‑based alkyds for tougher surfaces.
Look for Eco friendly coatings certified by reputable labels and check weather and UV resistance ratings.
Prep and primer remain key with these paints; they cure slower in cool, damp conditions.
You’ll protect finishes and occupants while cutting odors—just follow manufacturer dry times and apply thin, even coats for best results.
Color Selection Tips to Boost Curb Appeal
When choosing a color for your exterior door, think about how it will contrast with the siding, trim, and landscaping to create instant curb appeal. You’ll want to balance boldness with cohesion, borrow cues from interior decor, and use color psychology to evoke warmth, trust, or energy.
Consider lighting, neighborhood context, and resale value. Test samples on different days before committing.
- Pick a focal shade that complements but stands out
- Use a neutral trim to let the door pop
- Match hardware finish to the chosen tone
- Try two-inch swatches in sunlight
- Remember seasonal landscaping effects
Pairing Door Color With House Style and Exterior Palette
Think about your home’s era and architectural style when choosing a door color—Victorian, Craftsman, and modern homes each suit different palettes.
Pick a hue that complements your exterior trim, siding, and roof so the door feels intentional, not tacked on.
A well-matched color will boost curb appeal and keep the whole facade balanced.
Match Era And Architecture
Although your door can be a bold personal statement, matching its color to your home’s era and architectural style keeps the look cohesive and authentic. You should prioritize historical accuracy and architectural harmony: pick hues used when the house was built, then tweak saturation to suit current materials.
Research period palettes, consult preservation guides, or examine older photos. Avoid trendy tones that clash with original details. Use finish choices that reflect the era—gloss for Victorian, muted for Craftsman.
Test swatches in daylight and at dusk before committing.
- Study period color samples
- Match trim and feature tones
- Respect original materials
- Choose era-appropriate finish
- Test colors on-site
Complement Exterior Color Scheme
If you want your door to enhance the whole facade, pick a hue that complements the house’s main colors and architectural details rather than competing with them. Consider existing trim, roof, and brick tones; sample swatches at different times of day to see shifts in light.
Use complementary or analogous colors to create contrast without clashing—bold for focal points, muted for cohesion. Tie in landscaping by echoing flower or foliage hues, and coordinate with garden maintenance routines so plantings stay tidy and color-balanced.
Follow basic landscaping tips to frame the door and reinforce your chosen palette for lasting curb appeal.
Quick Updates: Painting Only the Front Face Versus the Full Door
When you’re pressed for time, painting just the front face of your exterior door can give it a fresh look in a couple of hours. But be aware this shortcut affects durability and appearance compared with painting the entire door.
You’ll save time and avoid moving door hardware and disturbing exterior lighting fixtures, yet edges, top, and sides stay exposed to weather. If you choose the quick route, prep the face carefully and touch up exposed edges regularly. Consider full-door paint every few years for protection.
- Faster refresh for curb appeal
- Keeps door hardware undisturbed
- Less paint waste
- Visible edge wear risk
- Easier weekend project
Cost Breakdown: Paint, Primer, Tools, and Time (Per Door)
Choosing to paint just the front face can save time, but you’ll want to weigh that shortcut against the actual costs involved per door.
Expect one quart of exterior paint ($20–$40) and a pint of primer ($8–$15).
Brushes, rollers, sandpaper, and tape add $10–$30 if you don’t already own them.
Factoring time, plan 3–6 hours spread over two days for prep, priming, and two coats.
Value your labor accordingly.
If you need to remove or mask door hardware or adjust outdoor lighting fixtures, add small parts or electrician costs.
Total DIY range: $40–$120 per door.
When to Refinish Versus Replace an Exterior Door
Although a fresh coat can extend a door’s life, you’ll want to weigh condition, cost, and goals before committing—refinish when the frame and core are solid, damage is cosmetic (peeling paint, minor scratches), and the existing door style still suits your home.
Replace when there’s rot, structural warping, severe water damage, security or energy-efficiency concerns, or you want a different material or design.
You should also consider Door security upgrades and Weather considerations: insulation, seals, and threshold condition.
If repairs plus paint cost near replacement, swap it. Prioritize safety, efficiency, and curb appeal.
- Inspect frame and core
- Assess rot and warping
- Evaluate seals and insulation
- Compare repair vs replacement cost
- Choose material for durability
Real-World Troubleshooting: Runs, Orange Peel, and Sags
You’ll learn how to spot paint runs quickly and sand or recoat them before they cure.
If your finish shows orange peel, I’ll show the right grit and technique to smooth it without damaging the panel.
You’ll also get simple tips to prevent brush sags so the door looks professional the first time.
Identifying Paint Runs
When paint starts to sag, run, or form an uneven texture on your door, it’s usually because the finish was applied too heavily, the surface was too cold or humid, or the product wasn’t properly thinned for the job.
You’ll spot runs as glossy streaks or drips that pooled before curing; they catch light differently than surrounding paint. Check edges, recessed panels, and the bottom of the door.
Note that color psychology and choosing eco-friendly finishes won’t prevent poor technique. If you identify a run, mark it and plan to sand and feather before recoating.
- Inspect under strong light
- Feel for ridges
- Trace the drip path
- Note paint type
- Mark problem areas
Fixing Orange Peel
Ever notice a bumpy, dimpled texture after your door dries and wonder how to get back to a smooth factory finish? That’s orange peel. Lightly sand with 320–400 grit, wipe with a tack cloth, then recoat with thinner, even sprays or a foam roller for minimal texture.
If deep, wet-sand with 600–800 grit between coats, then buff. Match sheen to preserve color psychology—matte hides flaws, gloss shows them—so choose finishes that suit your door’s historical styles. Test a small area first.
Work patiently; omitting rushes prevents repeat problems and restores a professional, smooth surface.
Preventing Brush Sags
Although thin paint and poor technique often cause sags, you can prevent them with the right tools, mix, and brush control. Work in thin, even coats; let each dry fully before recoating. Choose quality brushes made for exterior enamel and consider eco-friendly paints that flow smoothly. Adjust thinning per manufacturer, not by guesswork. Mind temperature and humidity to avoid slow drying that invites sags.
Color psychology can guide you to finishes that mask minor imperfections without heavy layers.
- Load brush moderately, tap off excess
- Stroke with steady, light pressure
- Feather edges quickly
- Keep a wet edge
- Sand between coats
Post-Paint Care Checklist: Cleaning, Seasonal Checks, and Touch-Ups
Because a freshly painted exterior door looks best and lasts longer with a little regular attention, you’ll want a simple post-paint care routine that covers cleaning, seasonal inspections, and quick touch-ups.
Wipe dirt and pollen monthly with mild soap and water, avoiding abrasive pads that harm finish.
Check door hardware for loose screws and lubricate hinges annually.
Inspect seals and thresholds each season for gaps or swelling; re-caulk or plane as needed.
Keep a small matching paint pot for chips; feather edges and thin layers to blend.
Ventilate after touching up to dissipate paint fumes and let finishes cure fully.
One-Day Step-By-Step Workshop Plan
Now that you’ve covered post-paint care, let’s focus on running a one-day workshop that gets participants from prep to a finished exterior door in a single session.
You’ll start with a safety and materials briefing, demonstrate surface prep, guide paint selection with color psychology and historical styles context, lead hands-on sanding and priming, and finish with topcoats and hardware refit.
Time each segment, keep tools ready, and encourage questions. Provide take-home care tips.
- Safety and materials
- Color selection demo
- Prep and sanding practice
- Priming and painting rounds
- Finishing touches and Q&A
Frequently Asked Questions
Can I Paint My Door Late in the Evening Under Porch Lights?
Yes—you can paint late under porch lighting, but evening painting risks poor visibility and dust; use bright, shadow-free porch lighting, work when temps and humidity are stable, and avoid tacky finishes by allowing proper dry time.
How Do I Prevent Insects From Getting Trapped in Wet Paint?
Like a porch light drawing moths, set up barriers: drape netting, create a temporary canopy, and run gentle fans. For insect prevention, use sticky traps nearby and quick-dry wet paint strategies so bugs avoid your door.
Will a Painted Door Affect My Home Insurance or Warranty?
Generally, a painted door won’t void your home insurance or warranty coverage, but you’ll want to check policy terms and manufacturer warranty details; if you alter structural components or use improper coatings, claims or coverage could be affected.
How Long Before Rain Damages a Freshly Painted Exterior Door?
Rain can start harming fresh paint in as little as an hour if it’s still tacky, but proper drying time usually needs 4–24 hours; you should check weather considerations, humidity and temperature before exposing it to drizzle.
Can I Use Interior Paint for a Temporary Exterior Fix?
You can use interior paint for a temporary fix, but it won’t hold up long outdoors; interior paint lacks UV, mildew, and adhesion properties, so expect quicker fading, peeling, and frequent reapplications compared with proper exterior paint.
Conclusion
You’ve got this—painting your exterior door like a pro is just five focused steps away. With the right prep, tools, and paint, you’ll turn weathered wood or dull metal into a fresh, protected entry that welcomes and lasts. Follow the troubleshooting tips and seasonal care plan so small issues don’t become big ones, and treat touch-ups like routine maintenance. Like tuning a guitar, a little attention keeps your door looking and performing its best.