How to Paint a Wall to Look Like Concrete: Industrial Style
You can create a convincing industrial concrete wall without demolition by layering a neutral base coat, translucent glazes, and a breathable sealer for depth and durability. Work in small sections, use rollers, natural sponges, rags, and feathered strokes to build mottling and subtle veining, and sand or blend edges as you go. Prep, primer, and proper ventilation matter. Pair the finish with warm woods and layered lighting for balance, and keep going to learn exact steps and tips.
Goal: Realistic Faux Concrete Wall Without Demo
If you want the look of poured concrete without tearing down drywall, you can achieve a convincing finish using paint, glaze, and simple tools—no demo required.
You’ll layer basecoat, glaze, and sealant, practicing faux concrete techniques for texture and depth. Use controlled strokes, sponges, and rags, and follow color blending tips to mimic veining, subtle mottling, and realistic tonal variation.
Best Rooms and Surfaces for Faux Concrete
Think about where faux concrete will make the biggest impact: you’ll often want it in living rooms, home offices, entryways, and modern kitchens where its industrial look complements clean lines.
You can apply the technique to drywall, plaster, and smooth masonry, but textured surfaces and wallpaper may need prep or skim-coating first.
For damp areas like bathrooms, use a moisture-resistant primer and sealer to protect the finish.
Best Rooms For Concrete
Concrete-look finishes work well in more places than you might expect, and choosing the right room will maximize their impact and durability.
Use them in living rooms for urban aesthetics, kitchens for easy-clean modernity, bathrooms where moisture-resistant coatings help, and home offices to add focus.
Accent walls, hallways, and entryways benefit from texture variations and a restrained palette to keep spaces balanced and functional.
Suitable Surface Types
When you’re planning a faux concrete finish, pick surfaces that accept thin, adhesive coatings and hold texture well—smooth drywall, plaster, cement backerboard, and properly primed MDF are all good candidates.
You’ll focus on surface preparation to remove dust, seal porous spots, and repair cracks so paint adhesion is reliable.
Avoid glossy or peeling surfaces; they’ll compromise finish and longevity.
Tools & Materials for a Concrete Finish
To create a convincing concrete finish you’ll need a handful of specific tools and materials: quality primer and paint (including a base coat and a textured or metallic topcoat), masonry or concrete glaze, various rollers and brushes, a trowel or putty knife for texture, sanding tools, painter’s tape, drop cloths, and protective gear. You get a concise tools overview and material selection table below.
| Item | Purpose |
|---|---|
| Primer | Seals surface |
| Base coat | Even foundation |
| Glaze | Creates depth |
| Trowel | Texture application |
| Sandpaper | Smooths imperfections |
Paint Types: Latex, Acrylic, Masonry Explained
After gathering your tools and choosing a glaze, you’ll need to pick the right paint system—latex, acrylic, or masonry—because each behaves differently on walls and affects texture, adhesion, and durability.
After picking your glaze and tools, choose latex, acrylic, or masonry paint for proper texture, adhesion, and durability.
You’ll weigh paint comparisons: latex finishes are user-friendly, acrylic durability suits higher-wear areas, and masonry texture bonds to porous surfaces.
- Latex finishes: easy application
- Acrylic durability: long-lasting
- Masonry texture: grip for concrete glaze
Color Palette for Authentic Concrete Tones
Start by picking a gray base that matches the mood you want—lighter for airy spaces, darker for industrial vibes.
Then decide on warm or cool undertones to give the surface a subtle cast that reads as natural concrete.
Finish by layering soft highlights and lowlights to build convincing depth and texture.
Choosing Gray Base Shades
Pick two to three gray base shades that’ll anchor your concrete look: a mid-gray as the primary field color, a slightly warmer gray for subtle depth, and a cooler, bluish-gray for shadowed areas.
Choose base shades with varied gray undertones to mimic real concrete. Blend subtly during application so shifts read natural.
- Mid-gray primary
- Warmer depth gray
- Cooler shadow gray
Adding Warm Or Cool Undertones
One simple way to make your painted concrete read as authentic is to introduce one or two subtle undertones—warm tans, soft browns, or cool bluish-grays—so the surface feels lived-in rather than flat.
You’ll use warm undertone techniques like diluted washes or ragging for warmth, or cool undertone effects with thin glazes of blue-gray.
Test patches, blend edges, and keep contrast minimal for realism.
Creating Depth With Highlights
3 simple highlight tones can transform a flat concrete finish into a convincing, dimensional surface: a pale cool highlight, a neutral midtone, and a slightly warmer shadow wash.
You’ll use depth techniques and careful highlight placement to mimic light and texture.
Try these combos to guide your brushwork and glaze blending:
- Pale cool for raised grain and edges
- Neutral midtone for body
- Warm shadow wash for recesses
Finish Choices: Matte, Eggshell, Satin
Choosing the right finish—matte, eggshell, or satin—changes how your faux concrete will read in a room: matte hides imperfections and feels more authentic.
Eggshell gives a subtle depth with slight sheen, and satin adds durability and a soft glow that catches light.
Decide matte vs. eggshell for mood; consider satin benefits for high-traffic areas where washability matters.
Estimating Paint and Materials for One Wall
First measure your wall’s height and width so you know the exact square footage you’re covering.
Then use the paint can’s coverage rate to calculate how much paint a single coat will need, and multiply for any extra coats or texture layers.
Finally, account for primer, sealant, tape, rollers, and touch-up supplies so you don’t run short mid-project.
Measure Wall Dimensions
Before you buy paint or tools, measure the wall so you know exactly how much material you’ll need. Use simple measuring techniques and note wall measurements in feet or meters.
Measure height and width, include windows/doors, and record surface irregularities. This guarantees accurate estimates and less waste.
- Measure height and width
- Subtract openings
- Note bumps or trims
Calculate Paint Coverage
Now that you’ve got the wall measurements down, you can figure out how much paint and supplies you’ll need for a concrete-look finish.
Use online paint calculators to convert square footage into gallons, then check coverage estimates on your chosen paint can (usually sq ft per gallon).
Add 10–15% for texture seeding and touchups. Record totals before shopping.
Account For Materials
Start by listing every material you’ll need for a single wall and assign quantities: base and topcoat paint (gallons), primer, texture additive or joint compound, seeding medium (if used), rollers/brushes, trays, painter’s tape, sandpaper, drop cloths, and any patches or caulk.
Estimate coverage, factor waste, and compare material selection and texture options for desired finish.
- Measure wall dimensions
- Note texture options
- Tally tools and extras
Surface Prep: Clean, Repair, and Prime
Preparation matters: you’ll clean away dust and grease, repair dents and holes, and apply the right primer so the faux-concrete finish adheres evenly and lasts.
Start with thorough surface cleaning using degreaser and a scrub pad. Use appropriate repair techniques—fill gouges, sand smooth, and feather edges.
Choose a bonding primer for porous or painted surfaces so subsequent layers grip uniformly.
Masking, Protecting Floors, and Workspace Safety
Before you start painting, cover floors with drop cloths, rosin paper, or plastic sheeting and tape seams to prevent paint seepage.
Mask trim, outlets, and adjacent surfaces with painter’s tape so you can work cleanly and quickly.
Keep the area well-ventilated, wear a mask and gloves, and clear tripping hazards to keep everyone safe.
Floor Protection Methods
Protecting floors and keeping your workspace safe is essential when you’re painting a wall to look like concrete, so lay out a clear plan for masking and covering surfaces before you bring out the paint.
Use floor coverings and adhesive barriers to prevent paint spills and surface damage; plan furniture placement and floor mats for spill protection and easy cleanup techniques.
- Lay down adhesive barriers
- Use heavy-duty floor coverings
- Position floor mats for traffic
Safe Workspace Practices
When you mask off trim and cover floors, you cut cleanup time and reduce the chance of costly mistakes; use painter’s tape on baseboards, plastic or paper drop cloths on floors, and secure seams with tape so nothing slips while you work. Keep workspace organization tight, clear pathways, and use safety gear (masks, gloves, eye protection).
| Task | Tool | Benefit |
|---|---|---|
| Masking | Tape | Clean lines |
| Floors | Drop cloths | Protect surfaces |
| Safety | PPE | Prevent injury |
Base-Coating Technique for Faux Concrete Walls
Although the base coat is simple, it sets the whole concrete look, so take time to apply it evenly and smoothly.
You’ll use base coat techniques and careful layering methods to build depth: roll a uniform neutral base, feather edges with a damp sponge, and let each layer dry before the next.
- Use a dense nap roller
- Work in sections
- Keep tools clean
Glazes and Washes for Concrete Veining
Because veining gives faux concrete its natural, irregular character, you’ll build those subtle lines with thin glazes and washes that you can control and soften as you go. Use glaze techniques and gentle wash applications to draw faint, branching veins, then feather and tone them until believable.
| Mood | Line | Depth |
|---|---|---|
| Calm | Soft | Subtle |
| Raw | Thin | Layered |
| Urban | Veined | Muted |
Texture Methods: Sponges, Rags, and Stippling Brushes
After you’ve laid in veins with thin glazes and washes, it’s time to add the tactile irregularities that make concrete believable: sponges, rags, and stippling brushes.
You’ll dab, lift, and press to build subtle depth using sponge techniques and rag application; vary pressure and paint load for realism.
- Use natural sponge dabs
- Wipe with folded rag
- Stipple with stiff brush
Skim-Coat and Joint Compound Tricks for Pitting
Layering joint compound gives you the quickest way to create authentic-looking pits and voids in a faux-concrete wall.
Use thin skim-coats, let each tack-up, then press and drag a rounded tool to pull shallow hollows.
Vary pressure and timing to practice pitting techniques.
Sand selectively, patch small edges, and seal with a thin primer before glazing for depth without overworking the surface.
Faux Aging: Stains, Rust, and Efflorescence
To make concrete look lived-in, you’ll want to plan where stains sit and how they fade into the surface.
Use thin washes and feathered brushes to place discoloration naturally along seams and low spots, then add vertical rust runs by dragging diluted burnt sienna or iron-oxide mixes downward with a damp brush.
Finish by softening edges and lifting small areas with a damp sponge to suggest efflorescence and mineral bloom.
Stain Placement Techniques
1 simple principle will make your stain placement look convincing: mimic how water and corrosion actually move across concrete.
You’ll plan stain application and use layering techniques to build depth, focusing stains near joints, drip paths, and low areas. Work thin washes, blot and lift, then glaze subtly to unify.
- Concentrate near seams
- Vary opacity
- Blend edges gently
Simulating Rust Runs
Now that you’ve placed stains where water would naturally collect and flow, you’ll use targeted rust runs to sell age and metal contact.
Lightly dilute burnt sienna and iron oxide, drag vertical streaks from faux fixtures, and blot with a crumpled cloth.
Build rust effects with subtle color layering—start thin, deepen selectively, and soften edges so runs read authentic, not painted-on.
Blending Edges and Seamless Transitions
When you blend edges and create seamless changes, you’re making the concrete effect read as one continuous surface instead of a patchwork of brushstrokes.
Use edge blending techniques and seamless shift methods: feather with a dry brush, glaze thin layers, and cross-hatch subtly so tones marry.
Keep tools clean, vary pressure, and step back often to spot unevenness.
- Feather with a dry brush
- Glaze thin layers
- Cross-hatch subtly
Polished vs. Raw: Finishing Choices for Faux Concrete
Although both looks share the same gray palette, choosing polished or raw finishes changes how the room feels and how durable the surface will be; you’ll pick polished for a sleek, reflective sheen and easier cleaning, or raw for a matte, industrial texture that hides imperfections. Choose sealers for polished finishes or matte varnish for raw textures to match aesthetic and maintenance needs.
| Look | Feel | Maintenance |
|---|---|---|
| Polished | Sleek | Wipeable |
| Raw | Textured | Touch-up friendly |
Drying Times, Recoat Windows, and Humidity Tips
Because paint and sealers cure in stages, you’ll need to plan for tack-free times, recoat windows, and full cure before heavy use.
Because paint and sealers cure in stages, plan for tack-free intervals, recoat windows, and full cure before heavy use
You’ll use proper drying techniques and monitor humidity effects to avoid tackiness or poor adhesion. Check product labels and ambient conditions, and wait recommended intervals.
- Allow tack-free times before light handling
- Respect recoat windows for adhesion
- Reduce humidity for consistent drying
Sealing Options: Breathable Sealers, Water-Based Poly, and Wax
After the paint’s tack-free and you’ve respected recoat windows, pick a sealer that matches the look and performance you want.
You can choose breathable sealers to preserve texture, water based poly for clear, durable protection, or wax options for a softer sheen.
Follow precise application techniques: thin coats, proper drying intervals, and light sanding between layers for an even, realistic concrete finish.
Making the Finish Durable for Bathrooms and Hallways
When you’re finishing a concrete-look wall in a bathroom or hallway, prioritize moisture resistance, impact protection, and cleanability. These spaces demand a tougher topcoat and careful edge treatment to prevent peeling, staining, and abrasion.
Use durable sealers, high-quality water-based poly, and reinforced corner guards to extend life.
Durability tips include:
- Choose moisture-resistant clear coats
- Apply two thin topcoats
- Protect edges and high-traffic zones
Fixing Common Mistakes Without Full Repainting
If you spot a patch that doesn’t match, you’ll want to blend the edges seamlessly so it fades into the surrounding texture.
For small chips or pits, patch the surface imperfections with a thin skim of joint compound or filler and retexture to match.
If the shade is off, adjust the tone gradually with translucent glazes rather than repainting the whole wall.
Blend Edges Seamlessly
1 simple trick will save you from repainting an entire wall: feathering the wet edges so they dissolve into the surrounding finish.
You’ll practice edge blending for seamless shifts, using light strokes and a slightly damp brush or sponge to merge tones. Work quickly, match texture, and step back often to check continuity.
- Light strokes
- Damp sponge
- Check distance
Patch Surface Imperfections
Blending wet edges helps hide minor mismatches, but you’ll still run into nicks, drips, or small gouges that don’t require repainting the whole surface.
You’ll clean the spot, apply suitable patch materials (lightweight filler or spackle), sand flush with careful smoothing techniques, and feather edges so texture matches.
Prime the repair, then touch up with matching concrete glaze—no full repaint needed.
Adjust Tone Gradually
When small areas read too light or too dark compared to the rest of your faux concrete, work in thin, gradual layers rather than trying to hit the perfect tone all at once.
You’ll blend tone variations with glaze or diluted paint, feather edges, and step back often to guarantee a smooth gradual shift.
- Feather edges with a damp sponge
- Use translucent glazes
- Check from different angles
Design Pairings: Furniture, Lighting, and Color Schemes
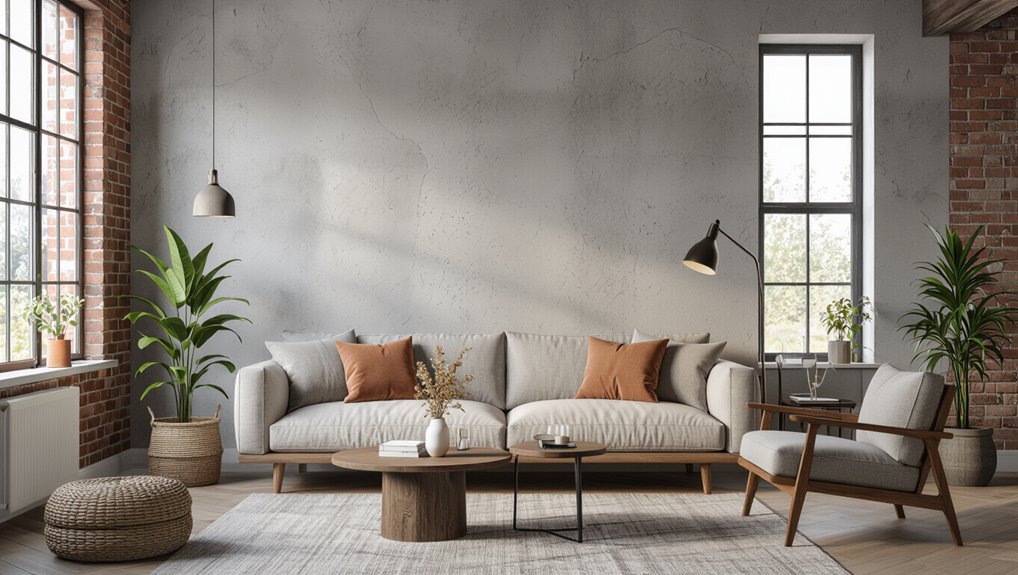
Although a concrete-look wall brings industrial texture, you’ll want furniture, lighting, and colors that soften and balance its cool, raw feel; choose warm woods, tactile fabrics, and layered lighting to create contrast and comfort while keeping a minimalist, cohesive palette so the wall remains a focal point rather than a clash.
Pair mid-century and rustic furniture styles with matte lighting fixtures, deliberate color contrasts, and varied material textures.
Quick Variations: Mottled Accents, Panels, and Faux Blocks
Now that you’ve considered how furniture, lighting, and colors soften a concrete-look wall, you can play with faster, smaller-scale techniques to add interest without redoing the whole surface.
Try mottled techniques for texture, panel variations for structure, or block patterns for graphic impact.
Experiment with mottled texture, varied panels, or bold block patterns to add subtle, crisp interest to concrete-look walls.
Use subtle accent methods to tie each area to the room’s palette and keep edges crisp.
- Mottled techniques
- Panel variations
- Block patterns
When to Hire a Pro: Cost, Complexity, Expected Results
If you’re tackling a full-room concrete finish or want seamless, realistic texture, hire a pro — they’ll save you time and prevent costly mistakes by matching materials, tools, and techniques that amateurs often misjudge.
You should consider cost considerations and complexity factors: pros handle substrate prep, layering, sealing, and realistic aging.
Hire one when deadlines, durability, or flawless results matter.
Frequently Asked Questions
Can I Achieve the Look Using Spray Paint or Aerosol Texture Cans?
Yes — you can achieve it with spray paint techniques and aerosol application, but you’ll need practice, layering, controlled distance, varied nozzles, masking, texture additives, and sealing; you’ll get a convincing industrial concrete look if you’re careful.
Will Faux Concrete Interfere With Electrical Outlets or Switch Plates?
Measure twice, cut once: you won’t have problems if you plan. You’ll protect outlet accessibility, guarantee faux concrete durability by masking or removing plates, avoid thick buildup, and reconnect fixtures only after paint and texture fully cure.
How Does Faux Concrete Affect Indoor Air Quality Long-Term?
Faux concrete can mildly impact indoor air quality if paints or sealers off-gas; you should choose low-VOC products, guarantee ventilation during and after application, and let finishes cure fully to minimize long-term emissions and odors.
Can Wallpaper Be Faux-Concreted Over, or Must It Be Removed?
Yes — you can often paint over wallpaper, but 60% of failures stem from poor adhesion. You’ll need thorough wall preparation and must assess wallpaper types; removable or loose paper should be removed for reliable faux-concrete results.
Is Faux Concrete Suitable for Rental Units With Landlord Restrictions?
Yes — you can use faux concrete in rentals if you choose temporary solutions like removable wallpaper or peel-and-stick panels; you’ll preserve landlord rules while adding strong aesthetic appeal without permanent changes, so get approval and proceed carefully.
Conclusion
You’re about to summon an industrial masterpiece without wrecking a wall — and honestly, you’ll look like a magician. With the right paints, tools, and a few texture tricks, you can fake concrete so convincingly neighbors will accuse you of tearing down drywall. Start small, experiment with tones and glaze, fix slip-ups easily, and pair the finish with raw metals and warm wood. If it gets too weirdly perfect, call a pro — or bask in your handiwork.