How to Clean Popcorn Ceiling With Paint Roller Safely
Before you touch the ceiling, assume it might contain asbestos if your home was built before the 1980s and stop to get a professional test if you’re unsure. Wear gloves, goggles and an appropriate respirator, turn off nearby power, move furniture and cover floors. Use a thick‑nap, lint‑free roller on a telescoping pole, keep it dry, work in light overlapping passes and blot stains with a damp microfiber. Follow disposal and pro‑call guidance for any damage — continue for full step‑by‑step precautions.
Who This Popcorn‑Ceiling Guide Is For
If you own or maintain a home built before the 1980s, manage rental properties, or just want to refresh a textured ceiling without a full remodel, this guide is for you.
You’ll learn practical popcorn ceiling maintenance tips, safe cleaning frequency recommendations, and simple roller techniques.
It’s aimed at DIYers, landlords, and caretakers who want efficient, low-risk upkeep without costly renovations.
When Homes Need Special Caution for Popcorn Ceilings
If your home was built before the 1980s, you should assume the popcorn texture could contain asbestos and take extra care.
Don’t scrape or sand it yourself without testing, because disturbing the material can release hazardous fibers.
Contact a licensed professional for inspection and safe removal if tests are positive.
Older Homes Risk
Because popcorn ceilings installed before the mid-1980s may contain asbestos, you should treat them with extra caution when renovating or cleaning.
In older homes you’ll face historic preservation issues and renovation challenges: fragile plaster, layered paints, and hidden wiring.
Inspect carefully, limit disturbance, use protective coverings, and consult specialists if uncertain so you don’t damage character or create hazards.
Asbestos Concerns
When might a popcorn ceiling pose a serious health risk? If your home predates the 1980s, presume risk until proven otherwise.
You should order asbestos testing before scraping, painting, or wet-cleaning. Don’t disturb suspect texture yourself; hire licensed professionals for safe removal or encapsulation.
Taking prompt, cautious steps protects occupants and avoids spreading hazardous fibers during DIY attempts.
How to Tell if Your Popcorn Ceiling May Contain Asbestos?
How can you tell whether your popcorn ceiling might contain asbestos? You can’t confirm by eye.
Check age—homes built before the 1980s are higher risk—and look for manufacturer labels or renovation records.
Hire a professional for a ceiling inspection and asbestos testing rather than sampling yourself.
If results show asbestos, follow licensed-removal guidance and avoid disturbing the surface.
When You Must Avoid Scraping or Sanding Popcorn Ceilings
If your ceiling might contain asbestos, you shouldn’t scrape or sand it yourself because disturbing the material can release dangerous fibers.
Also avoid scraping if the texture is water-damaged or moldy, since the surface can crumble and spread spores.
And never try to sand fragile or already damaged popcorn—leave it to professionals who can assess and safely handle the repair.
Potential Asbestos Presence
Because many popcorn ceilings installed before the mid-1980s can contain asbestos, you should treat any suspect textured ceiling as potentially hazardous and avoid scraping or sanding it yourself.
Hire a certified pro, follow asbestos regulations, and use approved testing procedures.
Consider these steps before any disturbance:
- Stop work immediately
- Isolate the area
- Contact licensed testers
- Use professional abatement services
Water Damage And Mold
Inspect your popcorn ceiling carefully for stains, sagging, soft spots, or a musty smell—these are signs of water damage and possible mold growth.
You shouldn’t scrape or sand the texture until the source is fixed and the area is fully assessed.
Call a pro to repair leaks, dry the space, and test for mold.
Only resume cleaning after remediation and mold prevention measures are documented.
Fragile Or Damaged Texture
When your popcorn ceiling shows crumbling, large flakes, or pieces that fall away at the slightest touch, don’t try to scrape or sand it yourself—those weak areas can disintegrate further, create a huge mess, and damage the underlying drywall.
You should stop and consider professional repair to protect texture preservation and safe cleaning techniques.
- Avoid scraping
- Limit handling
- Seal loose edges
- Call a pro
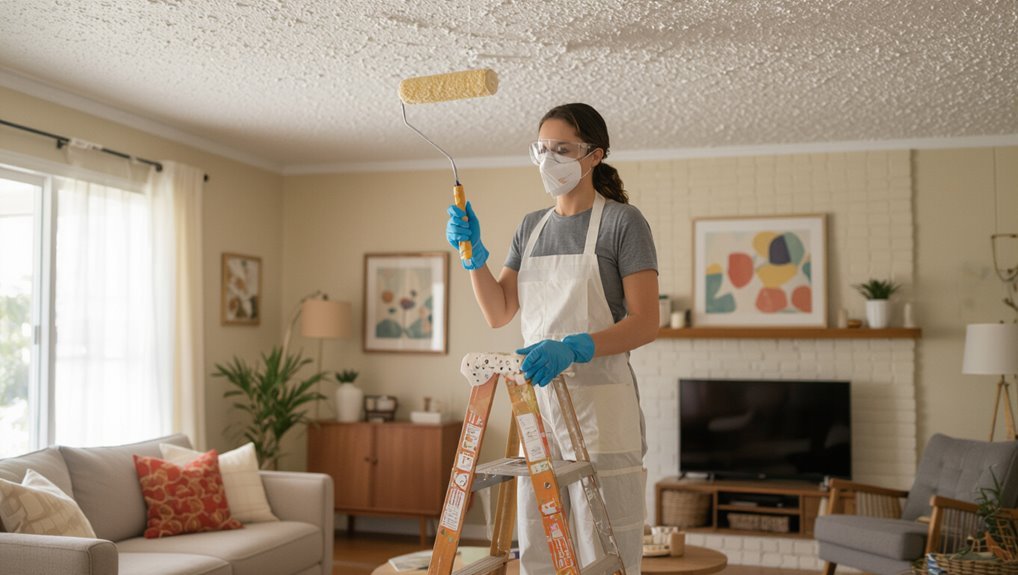
Protective Gear for Cleaning Popcorn Ceilings
Before you start scraping or spraying, suit up with the right protective gear to keep dust, debris, and possible asbestos fibers out of your lungs and off your skin.
Wear protective gloves, safety goggles, and a respirator mask or dust mask.
Lay drop cloths, use cleaning cloths, position a stable step ladder, and run a ventilation fan to reduce airborne particles and protect your workspace.
Which Roller Cover to Use on Popcorn Ceilings
With your protective gear on and the area prepped, choose a roller cover that won’t mash the texture: a thick-nap cover—typically ¾ inch to 1¼ inch—works best for popcorn ceilings because it reaches into the nooks without flattening the bumps.
With protective gear on and prep done, use a thick ¾”–1¼” nap roller to coat popcorn ceilings without flattening texture.
Pick based on roller cover types and texture compatibility:
- ¾” nap for moderate texture
- 1″ nap for deeper texture
- Synthetic covers resist moisture
- Replace worn covers promptly
Best Roller Frame and Extension Pole Setup
Choose a sturdy roller frame that won’t flex under pressure so your cover stays flat against the textured ceiling.
Pair it with a telescoping extension pole that’ll lock securely and reach the whole room without a ladder.
That combo keeps your hands steady and your cleaning more efficient.
Sturdy Roller Frame
A sturdy roller frame makes the whole popcorn ceiling cleanup faster and less tiring, so pick one that locks rollers firmly and won’t wobble on an extension pole.
You’ll want roller durability and low frame weight for balance and control.
Consider these features:
- solid locking mechanism
- corrosion-resistant materials
- ergonomic handle
- compatible roller sizes
Telescoping Extension Pole
Once you’ve secured a sturdy roller frame, pair it with a telescoping extension pole to reach the ceiling without straining a ladder.
Choose a lightweight, locking pole for telescoping pole benefits like stability and easy storage. Adjust to the ideal height adjustment for comfortable reach and control, testing locks and balance before starting.
Wear eye protection and keep movements slow and steady.
Safe Cleaning Solutions for Textured Ceilings
Because textured ceilings can be delicate, you’ll want cleaning solutions that remove dirt and stains without damaging the finish; choose gentle, natural cleaning and eco friendly solutions that won’t saturate the texture.
Use low-moisture methods and spot-test first.
Consider these safe options:
- Dry microfiber dusting
- Mild vinegar spray
- Gentle enzyme cleaner
- Rinseless foam wipe
Mix a Gentle Cleaning Solution (Simple Steps)
Pick a mild detergent and mix just a few drops into a bucket of warm water so the solution’s gentle.
Measure the water carefully to keep the ratio consistent and avoid soaking the texture.
Test the mix on a small, hidden patch of ceiling first to make sure it won’t damage or discolor the popcorn finish.
Choose Mild Detergent
Start with a mild, pH-neutral detergent so you don’t damage the texture or paint; mix one tablespoon of liquid dish soap or a gentle laundry detergent with a gallon of warm water.
Choose detergent options suited for delicate surfaces, and adjust cleaning frequency based on dust and stains.
Consider:
- pH-neutral dish soap
- Gentle laundry detergent
- Fragrance-free formulas
- Test a small patch first
Measure Water Carefully
Measure the water precisely to keep your cleaning solution gentle and predictable: mix one tablespoon of mild, pH-neutral detergent into a gallon (about 3.8 liters) of warm water, stirring until it’s evenly distributed. You’ll use accurate water measurement for consistent cleaning preparation and avoid oversaturation when rolling.
| Purpose | Ratio | Note |
|---|---|---|
| Gentle clean | 1 tbsp/gal | pH-neutral |
| Coverage | ~1 gal/room | adjust |
| Safety | low moisture | protects texture |
Test On Small Area
Before you clean the whole ceiling, test the solution on a small, inconspicuous patch to make sure it won’t damage the texture or cause discoloration.
You’ll confirm the mix, assess test methods, and verify surface preparation. Try one spot, wait to dry, inspect, then proceed only if safe.
- Mix gentle detergent
- Use soft roller
- Wait full drying
- Inspect closely
Test a Small Area Before You Clean the Whole Ceiling
Although it might seem needless, you should test a small, inconspicuous patch first to make sure your cleaning method won’t damage the texture or finish. Check texture sensitivity and note cleaning frequency needed. If the patch holds, proceed; if not, adjust solution or pressure. Use the table to record results:
| Patch Area | Result |
|---|---|
| Corner | |
| Center | |
| Near Vent | |
| Near Light | |
| Edge |
Prepare the Room and Protect Furniture and Floors
Start by clearing the room of small items and moving larger pieces to the center or out of the space.
Cover the floors with overlapping plastic or drop cloths taped at the edges to catch every scrap.
Wrap or tape plastic sheeting over furniture so dust and moisture can’t get in.
Clear The Room
To clear the room, move furniture away from walls and place smaller items in another area so you have open space to work and fewer things to cover.
For room preparation and safety measures, remove fragile items, unplug electronics, and roll up rugs.
Use these steps:
- Clear walkways
- Stack nonfragile items centrally
- Cover large items with drop cloths
- Keep an exit path open
Protect Floors Thoroughly
Now that you’ve cleared the room and covered larger items, protect the floors and remaining furniture before you wet or scrape the ceiling.
Lay heavy-duty floor coverings—drop cloths or plastic sheeting—tightly taped at edges to prevent slips and dust migration.
Create pathways, keep cleaning tools on trays, and position buckets and rollers where they won’t spill.
Check seals before starting.
Shield Furniture Completely
Before you wet or scrape a single inch of ceiling, cover every piece of furniture that’s staying in the room—drape plastic sheeting or painter’s cloths over sofas, tables, and lamps, and secure edges with low-residue tape so dust and moisture can’t creep underneath.
You’ll want solid furniture protection and an organized spot for cleaning supplies:
- Wrap fragile items
- Tape seams tightly
- Create a tool zone
- Keep supplies dry and accessible
Position Lights for Cleaning Popcorn Ceilings
Position your lights so they skim the ceiling at a low angle, because raking light makes dust, stains, and damaged spots stand out much more clearly.
Use adjustable work lights and move them slowly to reveal trouble spots.
Balance lighting techniques with safety measures: secure fixtures, avoid cords across walkways, and keep bulbs cool to prevent heat damage while you inspect and plan cleaning steps.
Gentle Rolling Technique to Remove Surface Dust
Start by gently rolling a lint-free, low-pile paint roller over the popcorn ceiling to lift loose dust without crushing the texture.
Use gentle pressure and a consistent rolling technique as you work in small sections. Maintain light, overlapping passes and avoid scrubbing.
- Work slowly
- Keep roller dry
- Replace roller if clogged
- Check for loose bits
Remove Stains, Cobwebs, and Spots Without Damage
Stains, cobwebs, and small spots can usually be removed without harming the popcorn texture if you treat them carefully and use the right tools.
You’ll blot stains with a damp microfiber cloth, use a soft-bristled brush for cobwebs, and try a mild detergent spot-clean.
These cleaning techniques and maintenance tips prevent abrasion—work gently, test a hidden area first, and avoid excess moisture.
Working Around Fixtures, Vents, and Ceiling Fans
After you’ve gently removed stains and cobwebs, you’ll need to take extra care when cleaning around light fixtures, vents, and ceiling fans to avoid damage or electrical hazards.
Turn power off, use a ladder, and protect fixtures before rolling. Consider fixture adjustments and careful vent cleaning.
Follow these steps:
- Switch off breakers
- Shield bulbs and shades
- Clean fan blades gently
- Remove vent covers for washing
How Often to Clean Popcorn Ceilings (Maintenance Tips)
Regularly inspect your popcorn ceiling and give it a light cleaning every 6–12 months to prevent dust buildup and spotting from becoming harder to remove.
Adjust cleaning frequency based on factors like cooking, smoking, or pets. Note high-traffic rooms may need quarterly attention.
Keep a simple maintenance schedule: note dates, methods used, and any damage so you can act before stains set or texture degrades.
Common Mistakes That Damage Popcorn Texture
Anyone can unintentionally ruin popcorn texture by using the wrong tools or techniques, so be careful what you reach for when cleaning or repairing it.
You should prioritize texture preservation and safe cleaning techniques. Avoid these common mistakes:
- Scrubbing with harsh brushes
- Over-wetting the surface
- Using roller pressure too high
- Applying incompatible cleaners
Don’t rush; work gently to protect the finish.
Signs You Should Stop and Call a Pro or Test for Asbestos
If your popcorn ceiling is old, crumbling, discolored, or you know it was installed before the mid-1980s, stop work and get it tested or call a professional—these are common signs asbestos may be present and disturbing the material could release hazardous fibers.
Don’t touch suspect areas. Arrange asbestos testing and a professional inspection before proceeding.
They’ll advise safe removal or containment.
Post‑Cleaning Disposal, Cleanup, and Inspection Checklist
- After cleaning, follow post cleaning tips: seal debris in heavy bags, wipe surfaces, and ventilate. Check for damage and residue, documenting any issues.
- Seal and label waste
- Use approved disposal methods
- Vacuum with HEPA
- Inspect for loose texture
Dispose bags per local rules, wear gloves, and recheck the ceiling after 24–48 hours for settling or missed spots.
Alternatives if Painting or Removal Becomes Necessary
When painting won’t hide stains or the texture’s failing, you’ve got a few practical alternatives to contemplate: consider DIY popcorn alternatives like skim coating or applying a smooth ceiling plank system, which you can tackle if you’re handy.
For larger projects or asbestos concerns, hire professional removal options to guarantee safety, proper testing, and clean disposal so you avoid fines and health risks.
Frequently Asked Questions
Can I Use a Steam Cleaner on Popcorn Ceilings?
You can, but you shouldn’t unless you’re careful: steam cleaner effectiveness varies and can loosen popcorn texture. You’ll need low heat, gentle passes, protective gear, and spot testing to avoid damage from ceiling texture concerns.
Will a Paint Roller Flatten Popcorn Texture Permanently?
No, a paint roller won’t permanently flatten popcorn texture; you’ll likely cause texture damage if you press hard. You’ll want gentler cleaning techniques and repairs or skim-coating to remove or permanently alter the texture.
How Long Should Cleaning Solution Sit Before Blotting Stains?
You should let the cleaning solution sit for about 5–10 minutes before blotting stains; you’ll use gentle cleaning techniques, then repeat as needed for stain removal, taking care not to oversaturate or scrub harshly.
Are Microfiber Rollers Safe for Popcorn Ceilings?
Yes — you can use microfiber rollers, but choose low-nap options: microfiber benefits include gentle cleaning and texture preservation, yet you’ll work slowly and lightly to avoid tearing delicate popcorn texture or dislodging loose bits.
Can Pets Be in the Room During Cleaning?
No, you shouldn’t keep pets in the room during cleaning; you’ll protect pet safety by relocating them. They’ll also avoid dust and noise sensitivity issues from rollers and activity, so plan a quiet, secure alternative space.
Conclusion
You’ve learned how to clean a popcorn ceiling with a paint roller safely — but pause before you act. If your home’s older or you spot telltale signs, don’t scrape or sand; a wrong move could release asbestos. Suit up, test if needed, and start gently. If anything looks off or fibers appear, stop immediately and call a pro. One careless swipe can change everything—so trust caution over haste.