How to Remove Dried Paint From Plastic Surfaces
You can remove dried paint from plastic by first identifying the paint type and testing a solvent on a hidden spot; wear gloves and ventilate the area. Soak or soften water-based paint with warm soapy water, vinegar, or isopropyl alcohol, then gently scrape with a plastic card. For oil/enamel, try acetone cautiously and test first. Use a soft brush, Magic Eraser, or WD-40 for stubborn spots, rinse and polish afterward, and keep following steps for more tips.
Quick Step-by-Step: Remove Dried Paint From Plastic
Start by evaluating the paint type and how long it’s been dry. Then gather supplies: a plastic scraper, rubbing alcohol or acetone (for tough spots), warm soapy water, microfiber cloths, and a soft-bristled brush.
Work gently: scrape loosened flakes, test solvent on a hidden area, dab and rub, rinse, and dry.
Use gentle paint removal techniques to preserve plastic surface care.
When to Remove Paint vs Replace the Part
Once you’ve tried gentle removal and tested solvents on a hidden spot, decide whether to keep working on the piece or replace it: weigh the paint’s penetration, the plastic’s condition, and the part’s value.
If paint durability suggests deep bonding or the plastic’s warped, cracked, or weakened, replace it.
If surface film predominates and part longevity is intact, invest time in careful removal.
Identify Paint Type: Latex, Acrylic, Oil, Enamel
Before you pick a removal method, identify the paint type—latex, acrylic, oil, or enamel—because each reacts differently to solvents and tools.
You’ll assess paint characteristics like sheen, flexibility, and smell to choose safe removal techniques.
- Latex: water-based, softens with water.
- Acrylic: similar to latex, UV-resistant.
- Oil: hard, needs solvent.
- Enamel: glossy, may require stronger chemicals.
Test a Hidden Spot First
Want to be sure your chosen remover won’t damage the plastic? Do a hidden test: apply a bit, wait, inspect for softening or discoloration to confirm surface compatibility before proceeding.
| Step | Action |
|---|---|
| 1 | Choose remover |
| 2 | Pick hidden spot |
| 3 | Apply small amount |
| 4 | Wait and inspect |
If issues appear, stop and try a gentler option.
Safety Gear and Ventilation Basics
Wear gloves, eye protection, and a respirator or mask rated for organic vapors when you’re working with paint removers, and keep windows and doors open or run a fan to pull fumes outside; strong solvents can irritate skin, eyes, and lungs and can build up quickly in enclosed spaces.
- Follow safety protocols every time.
- Check ventilation importance before starting.
- Limit exposure time.
- Keep a clear escape route.
Tools and Supplies to Have on Hand
Before you start, gather a few essential cleaning tools—soft-bristle brushes, plastic scrapers, microfiber cloths, and a bucket of warm soapy water.
Pick safe solvent options like isopropyl alcohol, rubbing alcohol wipes, or a citrus-based remover, and test them on a hidden spot first.
Don’t forget protective gear: gloves, eye protection, and good ventilation to keep the job safe and straightforward.
Essential Cleaning Tools
You’ll want a small kit of reliable tools and supplies to tackle dried paint on plastic quickly and safely:
- Soft microfiber cloths for gentle wiping and maintenance tips.
- Plastic scraper and nylon brush to lift flakes without scratching.
- Old toothbrush for crevices and precision cleaning.
- Mild cleaning solutions (dish soap mix) for residue removal and rinsing.
Safe Solvent Options
1 practical rule: pick solvents that dissolve the paint but won’t damage the plastic or your health.
You’ll prefer mild, tested products—isopropyl alcohol for small spots, citrus-based removers for tougher residue.
Look for eco friendly solvents and biodegradable options to reduce impact.
Test on an inconspicuous area, work gently with soft cloths, and avoid harsh chemicals that craze or discolor plastic.
Protective Gear Needed
Gather a small kit of protective gear and basic tools so you can remove dried paint from plastic safely and efficiently.
Wear protective gloves, safety goggles, a dust mask or respirator mask, and a chemical resistant apron for skin barrier and protective clothing.
Keep a ventilation fan running, eye wash nearby, and prioritize workspace cleanliness.
- Gloves/goggles
- Mask/apron
- Ventilation/eye wash
- Clean workspace
Protect Adjacent Areas Before Treatment
Before you start, cover nearby surfaces with drop cloths or plastic sheeting to catch drips and debris.
Use painter’s tape to protect seams and edges you don’t want touched.
Move valuables and electronics out of the area so they won’t get damaged.
Cover Nearby Surfaces
While you work on removing dried paint from a plastic item, protect the surrounding surfaces to avoid creating more cleanup.
Lay down drop cloths or old newspapers and tape edges with painter’s tape.
Use simple covering techniques for surface protection and position tools to limit drips.
- Mask edges
- Shield nearby furniture
- Elevate the item
- Contain runoff
Use Drop Cloths Or Tape
After you’ve masked edges and elevated the piece, lay down drop cloths or secure kraft paper with painter’s tape to protect floors and nearby surfaces from drips and solvent splashes.
Use drop cloths benefits by choosing absorbent, non-slip material; overlap seams.
For tape application, press firmly along edges, remove slowly after drying, and replace any soiled covering to keep the workspace clean.
Remove Valuables And Electronics
Make a quick sweep of the area and take any valuables, electronics, and irreplaceable items out of the work zone so they won’t get splattered or damaged by solvents and scraping.
Protect surfaces and prioritize Electronics safety; bag or box Valuable items.
- Unplug and remove devices
- Store small valuables in a sealed container
- Cover larger items with plastic
- Keep a safe distance for wet work
Soften Paint With Warm Soapy Water
Start by filling a basin with warm (not hot) water and a few drops of mild dish soap.
Then submerge the painted area or soak a cloth to lay over the paint for 10–20 minutes; the heat and soap will soften many types of dried latex and acrylic paint without damaging most plastics.
After soaking, check paint consistency, then gently rub with a soft cloth or plastic scraper, repeating as needed.
Loosen Water-Based Paint With Isopropyl Alcohol
If warm soapy water didn’t do the trick, dab isopropyl alcohol onto the dried water-based paint to help break its bond with the plastic. The alcohol penetrates and softens acrylic and latex paints so you can wipe them away with a cloth or soft scrubber.
Isopropyl effectiveness reduces paint adhesion; work in small sections, test first.
- Apply alcohol
- Wait minutes
- Scrub gently
- Wipe clean
Use Vinegar for Light Paint Splatters
When isopropyl alcohol feels like overkill for tiny splatters, reach for plain white vinegar instead.
You’ll warm a small amount, dampen a cloth, and blot gently to lift softened paint.
Vinegar effectiveness varies by paint age and type, so test a hidden spot first.
As one of several natural alternatives, it’s safe, inexpensive, and usually won’t damage most plastics.
Apply Rubbing Alcohol for Stubborn Acrylic Paint
Reach for rubbing alcohol (isopropyl, 70% or higher) when acrylic paint on plastic won’t budge—its solvent properties break down the paint without melting most plastics.
For stubborn acrylic on plastic, try 70%+ isopropyl rubbing alcohol — it breaks down paint without melting most plastics.
You’ll see rubbing alcohol effectiveness for acrylic paint removal if you:
- Dampen a cloth, test an inconspicuous spot.
- Rub gently in circles to lift flakes.
- Reapply as needed, blotting debris.
- Rinse and dry the surface.
Use Acetone Safely on Plastic
Before using acetone, test it on a hidden spot to make sure the plastic won’t soften or discolor.
Wear gloves and safety glasses, and work in a well-ventilated area to avoid fumes and skin contact.
If you see any damage during the test, stop and try a gentler method.
Test On Hidden Area
Because acetone can soften or cloud certain plastics, always test it on a hidden spot first: you’ll confirm surface compatibility before using aggressive paint removal techniques.
Apply a dab, wait five minutes, then inspect for softening, discoloration, or clouding.
- Choose an inconspicuous area
- Use a cotton swab
- Wait and observe
- Proceed only if unchanged
Protect Skin And Eyes
Now that you’ve checked a hidden spot for acetone compatibility, protect your skin and eyes before applying it to visible areas.
Wear chemical-resistant gloves and long sleeves for skin care, and adjust ventilation to avoid fumes.
Put on safety goggles for eye protection and keep a bowl of water nearby.
If contact occurs, rinse immediately and seek medical advice if irritation persists.
When to Use Mineral Spirits for Oil-Based Paint
If the paint on your plastic is oil-based and has hardened, reach for mineral spirits to dissolve it — they’re one of the few solvents that effectively break down oil paint without melting most common plastics when used properly.
You should follow mineral spirits safety and proven paint removal techniques, testing a hidden spot first.
- Ventilate well
- Wear gloves and goggles
- Blot, don’t scrub
- Rinse residue promptly
Choose Commercial Plastic-Safe Paint Removers
When you don’t want to risk solvents or elbow grease, choose a commercial paint remover formulated specifically for plastics. These products balance effectiveness with low solvent strength to strip paint without warping or clouding common plastics like ABS, acrylic, or PVC.
You’ll follow label directions, test a small area, wear gloves, and consider eco friendly options among paint removal techniques to protect surfaces and yourself.
Use a Heat Gun or Hair Dryer Without Warping Plastic
Aim the heat carefully and keep the tool moving so you soften the dried paint without melting the plastic underneath.
Use gentle heat application, watch paint consistency, and prioritize plastic safety by testing a hidden spot.
Maintain strict temperature control and stand back to avoid hotspots.
- Low setting
- Constant motion
- Test patch
- Cool between passes
Scrape Paint Safely Without Scratching
When you’re ready to scrape, pick soft-edged tools like plastic scrapers or old credit cards to lift paint without gouging the surface.
Always protect the plastic with a thin cloth or masking tape around the work area to prevent accidental scratches.
Work slowly at a low angle and rerun heat if needed to loosen stubborn spots.
Use Soft-Edged Tools
Start with a soft-edged tool—like a plastic putty knife, old credit card, or silicone scraper—and work the paint off gently so you don’t nick or scratch the plastic.
Use soft edge scrapers and plastic safe tools for controlled pressure.
Try these techniques:
- Angle gently under flakes.
- Push, don’t pry.
- Repeat soft passes.
- Wipe residue with a damp cloth.
Protect The Plastic
Before you scrape, protect the plastic with a barrier and the right technique so you don’t trade paint for scratches.
Use plastic protection like painter’s tape or soft films during surface preparation, choose tools by plastic types, and apply paint resistant coatings or protective finishes afterward.
Follow preventive measures, maintenance tips, and note treatment duration for long term care to preserve appearance.
Dislodge Flakes With a Soft-Bristled Brush
Grab a soft-bristled brush and gently sweep the dried paint flakes away—this lets you remove loose pieces without scratching the plastic.
Use short strokes, hold the brush at a low angle, and work outward from the center. Combine with other paint removal techniques if needed.
- Light pressure
- Short, controlled strokes
- Work outward
- Use alongside gentle cleaners
Use a Magic Eraser on Plastic Surfaces
If the paint is flaky or slightly raised, a Magic Eraser can lift it without harsh chemicals; dampen the sponge, squeeze out excess water, and gently rub the area with light pressure.
You’ll notice Magic Eraser effectiveness on many plastics, but test an inconspicuous spot first to confirm surface compatibility.
Rinse residue, repeat gently if needed, and avoid aggressive scrubbing that could dull or abrade.
Use WD-40 and Lubricants to Lift Paint on Plastic
When a Magic Eraser isn’t lifting stubborn spots, try a lubricant like WD‑40 to loosen dried paint on plastic.
Spray lightly, let sit, then wipe with a soft cloth. Test a hidden area first to check finish.
- WD‑40 effectiveness: quick loosening
- Gentle agitation with cloth
- Rinse with mild soap
- Lubricants comparison: pick low‑residue options
How Paint Thinner Affects Plastic vs Safer Solvents
Although strong paint thinners can dissolve stubborn enamel and oil‑based paints, they often soften or craze many plastics.
So you should choose solvents that remove paint without damaging the surface.
You’ll weigh paint thinner effects and plastic degradation, assess chemical interactions and material compatibility, and prefer safer solvent alternatives to protect surface integrity.
Consider environmental impact and cost analysis when selecting a method.
Remove Spray Paint From Outdoor Plastic Furniture
Start by identifying whether the spray paint is water-based or oil-based so you know which removers are safe to try.
You can begin with gentle cleaning—soap, warm water, and a soft brush or a plastic scraper—to lift fresh or thin spots.
For stubborn, cured paint, try a plastic-safe solvent or gentle abrasive pad, testing a hidden area first to avoid damage.
Assess Paint Type
Wondering what kind of spray paint you’re dealing with? You need to identify solvent- or water-based types to choose safe removal techniques and protect plastic by checking paint compatibility.
Test a hidden spot with a solvent, note texture, and cure time.
- Solvent-based: tougher, needs stronger removers
- Water-based: softer, milder options work
- Lacquer: fast-drying, aggressive solvents
- Unknown: spot-test before full treatment
Gentle Cleaning Methods
Now that you know which type of paint you’re facing, you can move on to gentle cleaning methods for outdoor plastic furniture that remove spray paint without harming the surface.
Use mild dish soap, warm water, and a soft cloth or sponge, testing a small area first.
Try gentle solutions like baking soda paste or vinegar; choose eco-friendly options and rinse thoroughly, repeating as needed.
Stubborn Paint Removal
When gentle cleaners won’t budge the spray paint, move on to tougher, targeted methods that remove stubborn paint without damaging the plastic—think isopropyl alcohol, acetone-free nail polish remover, or a commercial plastic-safe paint stripper applied sparingly and tested on an inconspicuous spot first.
- Scrape gently with a plastic scraper.
- Dab solvent, let sit briefly.
- Agitate with nylon brush.
- Rinse and assess paint adhesion.
Remove Paint From Textured Plastic Finishes
Textured plastic holds paint in grooves and dimples, so you’ll need a gentler, more methodical approach than you’d use on smooth surfaces.
Test a mild solvent for paint compatibility on an inconspicuous spot.
Use a soft-bristled brush, cotton swabs, and gentle scraping with a plastic pick to work paint from textured surfaces.
Rinse, repeat, and dry thoroughly to avoid residue.
Remove Paint From Flexible Plastic and Vinyl
If you’ve worked on textured plastics, you’ll notice flexible plastics and vinyl behave differently: they flex, stretch, and can tear if treated too roughly.
Flexible plastics and vinyl act differently— they flex, stretch, and can tear if handled too roughly.
For flexible plastic and vinyl surfaces, soften paint with warm soapy water, use a plastic scraper, try isopropyl alcohol on a hidden spot, and finish with vinyl conditioner to restore suppleness.
- Warm soapy water
- Plastic scraper
- Isopropyl alcohol
- Vinyl conditioner
Remove Paint From Automotive Plastic Trim
Tackle paint on automotive plastic trim carefully—these pieces are often faded, brittle, or chemically sensitive, so you’ll want to avoid harsh solvents and aggressive scraping that can gouge or discolor them.
Use mild soap, warm water, and a soft cloth; try isopropyl alcohol or a dedicated automotive paint remover on a hidden spot.
Finish with UV-protectant plastic care to restore appearance.
Remove Paint From Clear Plastics and Acrylic Sheets
Clear plastics and acrylic sheets scratch and cloud easily, so you’ll want to remove dried paint gently and deliberately to avoid permanent damage.
- Test solvent on a hidden spot; alcohol or mild acrylic care solutions work.
- Soak soft cloth, blot gently; don’t rub hard.
- Use plastic-safe scraper at low angle to lift flakes.
- Rinse, dry, and polish for long-term plastic maintenance.
Remove Paint From Toys and Baby-Safe Plastics
First check what kind of paint and plastic you’re dealing with so you don’t use a cleaner that will damage the toy.
Use gentle, non-toxic methods like warm soapy water, rubbing alcohol on a cotton swab, or a baking soda paste, testing a hidden spot first.
After the paint comes off, rinse thoroughly and inspect for rough edges or residue to make sure the toy is safe for handling.
Assess Paint And Plastic
Before you try any cleaning method, identify what kind of paint and plastic you’re dealing with so you don’t damage the toy or create a safety hazard.
Check paint durability, age, and whether it’s water- or oil-based. Note plastic types (PVC, ABS, polyethylene).
Use this checklist:
- Surface hardness
- Paint adhesion
- Labels or recycling codes
- Areas near mouth/skin contact
Gentle Non-Toxic Methods
When removing dried paint from toys and baby-safe plastics, stick to mild, non-toxic options that won’t weaken the material or leave harmful residues.
Use eco-friendly alternatives and biodegradable solutions: mild soap, baking soda paste, or white vinegar as natural solvents.
Apply gentle abrasives with a soft cloth, try tested home remedies, and focus on safe cleaning, paint prevention, and surface protection.
Finish And Safety Checks
After you’ve removed as much paint as possible with mild cleaners and gentle abrasives, finish the job by checking surfaces and securing the toy for safe use.
You’ll assess finish quality, sand rough spots gently, and follow safety precautions before returning toys to children.
- Inspect for residue
- Test smoothness
- Rinse and dry thoroughly
- Verify non-toxic condition
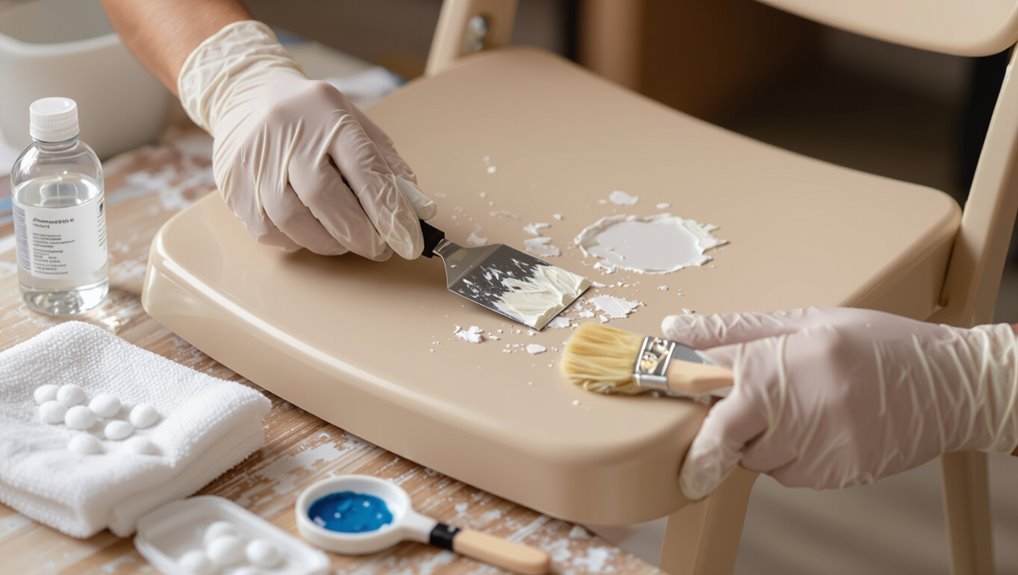
Clean Dried Paint From Plastic Chairs and Furniture
Scrape off loose flakes gently with a plastic putty knife or an old credit card.
Then test a small hidden spot with your chosen solvent—rubbing alcohol, acetone (nail polish remover), or a commercial paint remover—to make sure it won’t damage the plastic’s finish.
Work in sections, apply solvent briefly, blot and scrape, rinse with mild soap and water, and dry.
These paint removal techniques support proper plastic surface care.
Handle Large Paint Spills on Plastic Step-by-Step
If you’re faced with a large paint spill on plastic, act quickly to contain the mess and protect surrounding areas: block off the space, put down absorbent materials like towels or kitty litter around the edges, and wear gloves to avoid spreading paint with your hands.
- Remove excess with plastic scraper.
- Blot stains, don’t rub.
- Apply solvent safe for plastic surface care.
- Rinse, dry, repeat paint removal techniques.
Deal With Multiple Layers and Old Paint
First, identify the paint types on the plastic so you know whether it’s water-based, oil-based, or enamel.
Then work layer by layer, softening each coat and peeling or scraping it off instead of forcing all layers at once.
For stubborn or old paint, use a suitable solvent softener and test it on an inconspicuous spot before treating the whole area.
Identify Paint Types
When you’re dealing with dried paint on plastic, the first step is to identify what kind of paint you’re facing — latex, acrylic, enamel, oil-based, or spray — because each reacts differently to solvents and remover methods.
Assess paint characteristics and surface compatibility:
- Water-based (latex/acrylic) – softens with soap/water.
- Oil/enamel – needs solvent.
- Spray – thin, flaky.
- Old layers – brittle, may need gentle scraping.
Layer-by-Layer Removal
Start by evaluating each layer’s condition and composition so you can remove them safely and efficiently.
Work from the topmost layer down, testing small areas to see adhesion and flexibility.
Use gentle scrapers, nylon brushes, and heat cautiously between layers.
Alternate mechanical layer techniques with mild cleaning to lift residue, and rinse frequently to monitor paint removal without damaging the plastic.
Use Solvent Softeners
If mechanical methods and mild cleaning haven’t stripped away stubborn, multi-layered or aged paint, you’ll need solvent softeners to break down the binders so the paint lifts without gouging the plastic.
- Identify solvent types suited to the plastic.
- Test on an inconspicuous area.
- Use controlled application techniques with cotton or brush.
- Rinse, neutralize, and repeat until layers soften and lift.
When Sanding Plastic Is Appropriate and How to Do It
Although sanding isn’t the first move for every paint job, you’ll want to use it when paint is thick, bubbled, or uneven and solvent or scraping won’t remove it cleanly.
Choose fine-grit sandpaper and work gently with even pressure, testing on a hidden area first.
Use progressive sanding techniques, keep dust minimal, and respect plastic durability to avoid warping or thinning the material.
Prevent Surface Haze During Paint Removal
Protect the surrounding plastic with tape or a removable film so you don’t spread abrasives or solvents.
Work in small sections and test your method on an inconspicuous spot to catch haze before it affects the whole piece.
If haze appears, stop and switch to a gentler technique or a protective barrier to avoid worsening the finish.
Use Protective Barriers
One simple step that prevents cloudy haze when you remove dried paint is to lay down protective barriers between the polish or solvent and the plastic surface.
You’ll shield finishes and control contact based on paint types. Use thin films, masking tape edge, soft cloth layers, or disposable sheets to limit solvent spread and protect surrounding areas.
- Thin film
- Masking tape edge
- Soft cloth layers
- Disposable sheets
Work In Small Areas
Start by tackling only a few square inches at a time so you can control pressure, solvent use, and dwell time—this keeps the plastic from getting overworked and reduces the risk of a cloudy haze. Use small area techniques and precise application: work slowly, test solvent, wipe gently, and stop when clear.
| Action | Benefit |
|---|---|
| Slow work | Less abrasion |
| Test solvent | Prevents damage |
| Gentle wipe | Preserves finish |
Restore Color and Finish After Paint Removal
After you’ve removed the dried paint, you’ll likely find the plastic’s color looks dull or slightly discolored; restoring it means addressing both pigment loss and surface texture.
- Test color restoration techniques on an inconspicuous spot.
- Use plastic-safe dye or tinted restorers sparingly.
- Apply finish enhancement tips like UV protectant sprays.
- Recoat small areas with matching plastic paint if needed.
How to Buff and Polish Plastic After Cleaning
Polish the plastic with gentle, controlled motions to remove fine scratches and restore shine; you’ll want to choose the right pad and polish for the plastic type and work in small, overlapping passes so heat and pressure don’t warp the surface.
Use appropriate polishing techniques, starting with a soft foam pad and mild polish, then progress to finer compounds.
Adopt steady buffing methods and inspect frequently.
Avoid Discoloration and Chemical Reactions
Because many plastics react unpredictably to solvents and heat, you should test any cleaner or polish on a hidden spot first to avoid discoloration or chemical damage.
Check labels, use mild agents, and pause if you see changes. Prevent paint discoloration and other chemical reactions by proceeding slowly and rinsing thoroughly.
- Spot test
- Use mild solvent
- Rinse immediately
- Observe before proceeding
Temperature, Humidity, and Removal Success
While you’re testing cleaners and watching for reactions, also consider the environment: temperature and humidity directly affect how paint and solvents behave on plastic.
You’ll notice temperature effects: warmth softens paint and speeds solvent action, cold slows it.
Monitor humidity impact: high moisture can delay drying and dilute solvents.
High humidity slows drying and can dilute solvents, so account for moisture when timing and choosing cleaners.
Adjust technique and timing for best removal success without forcing chemicals or damage.
Troubleshoot Paint That Won’t Come Off
If paint won’t come off, first identify whether it’s water- or oil-based so you pick the right approach.
Try small spots with different solvents—soapy water, rubbing alcohol, acetone, or a commercial remover—until one softens the paint.
To stop this happening again, clean and prime plastic surfaces or use plastic-safe paints to prevent strong adhesion.
Assess Paint Type
Start by identifying what kind of paint you’re dealing with — latex, acrylic, oil-based, or enamel — because that determines which removers and techniques will work and which will damage the plastic.
Check age, sheen, and smell to assess paint adhesion and surface compatibility.
Then consider these steps:
- Probe edges gently.
- Test a hidden spot.
- Note flexibility.
- Photograph condition.
Try Solvent Alternatives
When paint won’t budge with scraping or soap and water, try solvent alternatives designed for the paint type and the plastic’s durability. Test small areas, note solvent properties and choose eco friendly options when possible. Work with gloves, ventilation, and soft cloths; rinse and repeat cautiously.
| Solvent | Best for | Notes |
|---|---|---|
| Isopropyl | Water-based | Gentle |
| Acetone | Nail polish | Harsh |
| Citrus | Latex | Eco friendly |
| Alcohol | Acrylic | Moderate |
| Commercial remover | Oil-based | Read label |
Prevent Future Adhesion
Because you want paint to stay removable, take steps that keep it from bonding too strongly to plastic in the first place.
Use paint adhesion prevention strategies and simple surface preparation techniques so cleanup’s easier later.
Follow these steps:
- Clean with mild detergent and dry thoroughly.
- Lightly scuff glossy plastic with fine sandpaper.
- Use a breathable primer designed for plastic.
- Test paint on a hidden area first.
Test for Residual Chemicals After Cleaning
After you’ve removed the paint, check the surface for any leftover cleaning agents by rinsing it with clear water and wiping it dry; this quick test will reveal residues that could react with new coatings or irritate skin. Use simple chemical testing for residue assessment and note smell, tackiness, or discoloration.
| Indicator | Action |
|---|---|
| Smell | Re-rinse |
| Sticky | Solvent wipe |
Eco-Friendly and Low-Toxicity Removal Options
You can often remove dried paint from plastic using simple, low-toxicity options like white vinegar mixed with baking soda to soften and lift residue.
For tougher spots, try a citrus-based solvent containing d-limonene, which cuts through paint without harsh fumes.
Always test a small, hidden area first and rinse thoroughly after treatment.
Vinegar And Baking Soda
Reach for common pantry staples—white vinegar and baking soda—when you want an eco-friendly, low-toxicity way to soften and lift dried paint from plastic.
You’ll use vinegar benefits to dissolve film and baking soda effectiveness as a gentle abrasive.
Apply, wait, scrub, rinse.
- Soak vinegar
- Sprinkle soda
- Scrub gently
- Rinse and repeat
Citrus-Based Solvents
If you’re looking for a low-toxicity alternative that still packs a punch, citrus-based solvents dissolve and loosen dried paint on plastic without harsh fumes.
You can apply a small amount, let it sit, then gently scrape or wipe. Enjoy citrus benefits like pleasant scent and biodegradability.
Test first for colorfastness. These eco friendly options work best on light, flexible plastics and fresh residue.
Choose the Fastest Method Without Damaging Plastic
Pick a method that balances speed with the plastic’s heat and solvent tolerance to avoid warping or discoloration.
You’ll choose paint removal techniques that prioritize plastic surface preservation, test a small area, and use the gentlest effective option.
Follow safety steps and monitor progress to stop before damage occurs.
- Solvent-test
- Gentle scraping
- Heat-controlled
- Soft abrading
Cost Comparison of Common Removal Methods
Now that you’ve weighed speed against the plastic’s tolerance, compare how much each removal method will cost you in materials, tools, and potential repairs. You’ll favor cost effective options that balance removal efficiency and low risk. Choose DIY solvents, rubbing alcohol, or heat tools based on price, time, and possible scarring.
| Method | Typical Cost |
|---|---|
| Solvent | Low |
| Alcohol | Low |
| Heat tool | Medium |
| Scraper | Low |
| Professional | High |
When to Call a Professional for Paint Removal
If the plastic is badly warped, cracked, or scratched, you should call a pro to avoid making the damage worse.
You should also hire an expert if the job requires strong chemicals or if you’re worried about fumes and safety.
And if you don’t have the time, tools, or experience to get the job done right, it’s worth paying for professional help.
When Damage Is Extensive
When paint has soaked into deep scratches, warped the plastic, or covers delicate electronics, you should call a professional for removal. They’ll assess adhesion, choose solvents that won’t melt the surface, and prevent further damage.
You’ll get clear advice on extensive damage and viable repair options.
- Evaluate structural harm
- Preserve electronics
- Select safe solvents
- Discuss cost vs. replace
Chemical Risks Present
Because some paint removers contain harsh solvents and reactive chemicals, you should call a professional whenever you’re unsure about fumes, flammability, or toxic byproducts—especially in confined spaces or near vents.
If you face heavy chemical exposure, don’t guess; professionals assess ventilation, PPE, and disposal.
They’ll advise health precautions, emergency steps, and safe products, reducing risk to you and your home.
Time Or Skill Constraints
Although tackling a small paint smear can be a quick DIY fix, call a professional if the job demands specialized tools, intricate disassembly, or skills you don’t have—like restoring textured or molded plastic, working on painted electronics, or removing paint from load-bearing components—because attempting those can cause permanent damage or safety hazards.
- Evaluate risk vs time saving hacks.
- Check required tools.
- Consider skill building techniques.
- Prioritize safety and warranty.
Care and Maintenance to Prevent Future Adhesion
To keep paint from sticking to plastic in the future, establish simple routines like wiping surfaces after use, storing items away from paint zones, and covering them with drop cloths or plastic sheeting.
For paint adhesion prevention, inspect surfaces regularly, clean with mild detergent, apply a suitable barrier or wax where appropriate, and follow future maintenance tips so paint won’t bond and cleanup stays easy.
Checklist: Step-by-Step Quick Plan to Remove Dried Paint
Start by gathering the right supplies—plastic scraper or old credit card, soft cloths, warm soapy water, rubbing alcohol or acetone (test first), a gentle adhesive remover, and fine-grit sandpaper for stubborn spots—so you can move quickly and safely through each step.
Gather the right supplies—scraper, soft cloths, soapy water, alcohol or acetone, adhesive remover, fine sandpaper.
- Test solvent in hidden area and choose paint removal techniques.
- Soak, soften, and gently scrape.
- Clean with soapy water, then alcohol.
- Lightly sand, rinse, dry; follow plastic surface care.
Final Tips: Preventing Future Paint Mishaps
If you want to avoid scraping paint off plastic again, adopt a few simple habits: cover nearby plastic with drop cloths, mask edges, and work slowly.
Use low-mist sprayers and proper brushes. Clean spills immediately, store paints sealed and upright, and label containers.
These paint prevention techniques and future mishap strategies cut cleanup time and protect your plastic surfaces.
Frequently Asked Questions
Can Dried Paint on Plastic Release Harmful Fumes Over Time?
Yes, you can be affected: dried paint on plastic can off‑gas and contribute to paint toxicity, so you shouldn’t ignore it. Long term exposure can increase risk, especially in poorly ventilated or occupied spaces.
Can Paint Removal Damage Embedded Labels or Serial Numbers?
About 70% of restoration attempts risk surface abrasion, and yes, paint removal can damage embedded labels or serial numbers. You should use label preservation techniques and serial number protection like masking, gentle solvents, and soft scraping.
Will Cleaning Products Void Warranties on Plastic Items?
Yes — if cleaning methods conflict with warranty details, you can void coverage; you should check the manufacturer’s instructions, avoid prohibited chemicals, and document your actions so you can prove you followed recommended care.
How to Dispose of Paint-Soaked Rags and Used Solvents Safely?
You should bag paint-soaked rags in a sealed metal can or solvent-proof container for proper disposal, use hazardous-waste drop-offs, and choose eco friendly options like biodegradable solvents or recycling programs to avoid fires and pollution.
Can Pets or Children Be Harmed by Residues After Cleaning?
Yes—you can harm them: if residues contain solvents or toxins, pet safety and child safety are at risk, so you should clean thoroughly, ventilate, and keep curious kids and pets away until surfaces are fully nonhazardous.
Conclusion
You’ve got this — removing dried paint from plastic is doable with patience, the right test spot, and gentle tools. Start small, work methodically, and don’t hesitate to stop if the plastic shows stress; sometimes replacing the part is smarter than rescuing it. Wear gloves and ventilate, try acetone-free removers first, and call a pro for delicate or valuable items. Like gardening, careful pruning keeps things healthy and looking new.