How to Check for Mold in House: Step-By-Step Inspection Guide
Start by scanning for dampness, water stains, musty odors, and visible discoloration, then document where you find issues. Put on gloves, an N95 or better mask, and eye protection before inspecting bathrooms, kitchens, basements, attics, crawlspaces, and behind appliances. Use a flashlight, moisture meter or hygrometer, camera, and small mirror for tight spots. For small areas under 10 sq ft you can clean safely; larger or hidden growth needs pros. Keep going to learn practical next steps.
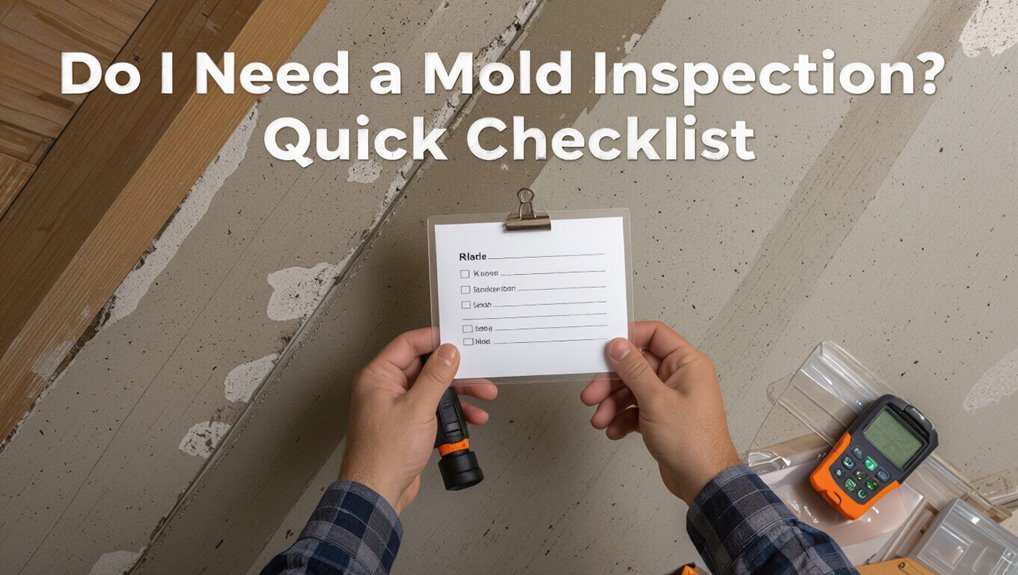
Do I Need a Mold Inspection? Quick Checklist
Wondering whether you need a mold inspection? You’ll spot triggers: persistent damp, musty odors, visible staining, allergy symptoms, or recent water damage.
A mold inspection benefits you by identifying hidden growth and common mold types, guiding remediation and preventing recurrence.
If multiple signs appear or health issues persist, schedule a professional to assess extent, causes, and next steps promptly.
Quick Safety Checklist Before You Start
Before you start, put on gloves, an N95 or better mask, and eye protection to keep spores off your skin and out of your lungs.
Open windows and use fans to ventilate the area while you work.
Turn off the HVAC system so you don’t spread mold through the vents.
Wear Protective Gear
1 simple rule: gear up before you inspect—wear an N95 or higher respirator, gloves, eye protection, and long sleeves to keep spores off your skin and out of your lungs.
Use protective masks and safety goggles.
Follow this checklist:
- N95 or P100 respirator
- Chemical-resistant gloves
- Safety goggles
- Long sleeves and pants
Ventilate Work Area
Open windows and doors and run a fan to pull fresh air through the work area so spores and dust don’t settle where you’re working.
Maintain steady air circulation while you inspect to reduce mold growth risk and keep particles moving away.
Position fans toward exits, avoid blowing directly across affected surfaces, and check that neighboring rooms get some airflow to protect occupants and your work zone.
Turn Off HVAC System
If your home has central heating or cooling, shut off the HVAC system before you begin inspecting for mold to prevent spreading spores through the ducts. You’ll protect occupants and limit contamination.
Follow these HVAC maintenance tips for mold growth prevention:
- Turn off system at thermostat.
- Switch off breaker for whole unit.
- Close return vents.
- Cover supply grilles.
Tools and Supplies for a Home Mold Inspection
Before you begin, gather a few essential tools and supplies so you can inspect safely and efficiently: a flashlight, moisture meter or hygrometer, disposable gloves and N95 respirator, magnifying glass, tape measure, camera or smartphone, a small mirror or inspection camera for tight spaces, and paper towels or cleaning wipes for minor sampling.
Use mold inspection tools, essential cleaning supplies, a notebook, and labelled bags for samples.
Where Mold Usually Hides in Homes
Check the usual trouble spots where moisture builds up, like bathroom corners, grout lines, and around showers.
Don’t forget hidden basement nooks that stay damp and out-of-sight.
Also inspect behind and under kitchen appliances where leaks and condensation can feed mold.
Bathroom Moisture Zones
Bathrooms are prime spots for mold because they combine warmth, humidity, and lots of hidden nooks where moisture lingers.
You should check areas tied to bathroom ventilation and moisture control, focusing on spots that trap dampness:
- Shower corners and grout
- Under sinks and cabinets
- Behind toilets and baseboards
- Around exhaust fans and vents
Hidden Basement Corners
When basements stay cool and damp, mold often takes refuge in hidden corners where you least expect it.
Check behind stored boxes, under staircases, and along foundation joints for musty smells, discoloration, or peeling paint.
Use a flashlight and moisture meter to locate hidden moisture.
Improve basement ventilation, clear clutter, and fix leaks promptly to prevent regrowth and spread to living spaces.
Behind Kitchen Appliances
Basements aren’t the only places mold hides; your kitchen can harbor just as much trouble, especially behind appliances.
You should pull each unit, inspect for mold, and address moisture accumulation quickly.
Check these kitchen appliance types and areas:
- Refrigerator coils and drip pans
- Dishwasher seals and under-sink gaps
- Oven and range backs
- Washer/dryer hookups and floors
Inspect Basements and Crawlspaces for Mold
1 clear sign of hidden moisture is a musty smell—start there when you inspect basements and crawlspaces for mold.
Look for discoloration on walls, flooring, insulation, and wooden beams. Check for leaks, standing water, and condensation.
Improve mold growth prevention by fixing leaks, improving ventilation, and using humidity control methods like dehumidifiers.
Prevent mold by repairing leaks, boosting ventilation, and controlling humidity with dehumidifiers.
Wear PPE and document affected areas for remediation.
Inspect Bathrooms and Showers for Mold
Check shower corners, grout lines, caulking, and ceiling areas for visible mold spots or staining.
Don’t forget to look for hidden moisture sources like leaking faucets, clogged drains, or poor ventilation that keep surfaces damp.
If you find signs or persistent dampness, address the leak and clean or test the area promptly.
Visible Mold Signs
Bathrooms and showers are prime spots for mold because they stay damp, so inspect grout lines, caulking, shower curtains, and vents for dark spots, fuzzy growth, or a musty smell.
You should note mold types and possible health effects, then act quickly.
- Black or green patches
- Fuzzy or slimy texture
- Discolored grout or paint
- Persistent mildew odor
Hidden Moisture Sources
After spotting visible mold, look for hidden moisture sources that keep it fed—especially around showers and sinks where leaks, trapped water, or poor ventilation can go unnoticed. Check grout, caulks, under sinks, behind cabinets, and fan operation. Fix hidden leaks quickly, dry surfaces, and improve ventilation to stop regrowth.
| Area | What to check | Action |
|---|---|---|
| Shower | Grout/caulk | Reseat |
| Sink | P-trap | Tighten |
| Fan | Operation | Repair |
| Cabinet | Back panel | Dry |
| Tile | Cracks | Seal |
Inspect Kitchens and Laundry Areas for Mold
Because kitchens and laundry rooms get warm and wet, they’re prime spots for mold to start — so you should inspect them regularly for signs of growth and moisture.
Check these areas and actions:
- Inspect under sinks for leaks and water stains.
- Monitor kitchen humidity near cooking areas.
- Check behind and under appliances for appliance leaks.
- Dry damp towels, mats, and washer seals promptly.
Check Attics, Rooflines, and Vents for Mold
When you inspect attics, rooflines, and vents, look for dark patches, musty odors, and any signs of water intrusion—these spots trap moisture and let mold grow unseen.
During attic inspections, flashlights and a mask help you scan insulation, rafters, and duct joints.
For roofline checks, examine eaves, fascia, and vent caps for staining or rot, and note any persistent dampness needing repair.
Detect Mold Behind Walls and Under Floors
You can spot mold behind walls by watching for musty odors, staining or bubbling paint, and unexplained allergy symptoms.
Pull a baseboard or check crawlspaces under floors to look for visible growth, damp insulation, or warped subflooring.
If the mold is extensive, hidden, or you smell strong odors, call a professional for testing and safe removal.
Signs Behind Walls
Hidden mold often shows itself in subtle ways, so watch for musty odors, unexplained allergy symptoms, water stains, or peeling paint that suggest growth behind walls or under floors.
When you do a wall inspection, look for hidden moisture and these signs:
- Faint discoloration or shadowing
- Warped drywall or bubbling paint
- Persistent damp smell
- Recurrent allergic reactions
Inspecting Under Floors
Start by lifting a floorboard or peeling back a corner of flooring to look for dark staining, musty odor, or soft, spongy subflooring that indicate mold growth beneath.
Check different flooring materials and seams, inspect crawlspaces and gaps, and verify moisture barriers aren’t compromised.
Note discoloration, fuzzy growth, or damp insulation.
Wear gloves and a mask, document findings, and dry affected areas promptly.
When To Call Professionals
If mold shows up in multiple rooms, keeps coming back after cleaning, or you suspect it’s behind walls or under floors, call a professional promptly; they’ve got the tools and training to locate and safely remove concealed infestations and diagnose underlying moisture sources.
- Hire experts for professional assessments.
- Ask about mold removal techniques.
- Get moisture source fixes.
- Request clearance testing.
Smell, Touch, and Visual Signs of Mold
Smell is often the first clue you’ll notice: a musty, damp odor can signal mold even when you can’t see it, and you should pay attention to areas where that scent is strongest. Use touch lightly for texture, look for stains, spots, and discoloration, and learn mold prevention tips and identifying mold types.
| Sight | Texture |
|---|---|
| Black spots | Slimy |
| White powdery | Fuzzy |
| Green patches | Dry |
| Water stains | Raised |
DIY Mold Test Kits: When to Use Them
Wondering whether a DIY mold test kit will give you useful answers? Use DIY testing when you need quick screening, low cost, visible suspicious spots, or to decide if professional testing is warranted.
Consider these mold test methods options:
- Surface swab
- Air sampling
- Bulk sample
- Petri dish settle plate
Follow instructions carefully and document locations.
Interpreting DIY and Lab Test Results : Next Steps
Now that you’ve used a DIY kit or sent samples to a lab, you’ll need to interpret the results and decide what to do next.
Compare findings against mold testing methods expectations: detect species, spore counts, and indoor vs outdoor baselines.
If results show elevated levels or toxic species, document locations, limit access, and consult a certified remediator or industrial hygienist for assessment and action plans.
When You Can Safely Clean Mold Yourself
If the affected area is small (roughly less than 10 square feet), the mold is on non-porous or easily replaceable materials, and no one in the household has severe allergies, asthma, or a weakened immune system, you can usually clean it yourself using proper precautions and supplies.
Follow these steps:
- Ventilate area and wear PPE.
- Use safe cleaning products.
- Apply mold cleaning techniques.
- Dry and monitor for regrowth.
Signs You Should Hire a Professional Remediator
When mold covers more than about 10 square feet, shows up inside HVAC systems, or keeps returning despite your cleaning efforts, call a professional remediator—these situations usually need specialized equipment and training. You should also hire help if you have mold health risks, extensive water damage, or need mold testing versus DIY removal; weigh professional costs against safety.
| Sign | Reason | Action |
|---|---|---|
| Large area | Spread risk | Hire pros |
| HVAC | Airborne spores | Inspect ducts |
| Recurring | Hidden source | Remediate |
| Health issues | Symptoms worsen | Seek help |
Preventing Mold After Remediation : Practical Steps
Because remediation removes visible mold but doesn’t stop the conditions that let it return, you should take practical steps to reduce moisture and keep your home dry.
Remediation clears visible mold but won’t stop recurrence—reduce moisture and keep your home consistently dry.
Use these mold prevention techniques and humidity control methods:
- Fix leaks promptly.
- Run exhaust fans.
- Use dehumidifiers.
- Improve ventilation and insulation to prevent condensation.
Frequently Asked Questions
Can Mold Cause Long-Term Damage to My Belongings or Furniture?
Yes — mold can permanently damage fabrics, wood, papers and upholstery if untreated. You should follow mold prevention tips, dry and clean items promptly, and use furniture protection like sealed storage or antimicrobial treatments to limit loss.
Are Certain Houseplants More Likely to Promote Indoor Mold?
Yes — some plants with dense foliage or constant damp soil can boost mold; you should choose mold resistant plants like snake plants or succulents, monitor soil moisture, and use humidity control to prevent fungal growth indoors.
Will My Homeowner’s Insurance Cover Mold Remediation Costs?
Break the ice: you’ll sometimes get mold coverage, but it’s spotty—standard policies often exclude gradual damage; file insurance claims quickly for sudden events, document losses thoroughly, and expect denials unless you’ve got specific riders.
How Soon Can I Move Back Into a Home After Professional Remediation?
You can usually move back in within 24–48 hours after remediation completion if clearance testing passes, but don’t rush — follow the remediation timeline, heed health considerations, and wait for your contractor’s and inspector’s confirmation.
Do Air Purifiers Completely Eliminate Indoor Mold Spores?
No — air purifiers don’t completely eliminate mold spores; you’ll improve air purifier effectiveness and indoor air quality by using HEPA filters, maintaining humidity, and addressing mold sources directly to prevent ongoing spore release and growth.
Conclusion
So you’ve learned how to spot mold, test, and even fix a few spots yourself — congratulations, you now know more about fungi than you probably wanted. Don’t celebrate just yet: mold loves humidity, hidden leaks, and your forgetfulness. If it’s small, wear protection and clean it; if it’s big or smells like a science lab, call a pro. Preventing it is mostly boring upkeep, which means you’re winning the fight by doing the unexciting stuff.