How to Hang a Painting on a Wall: Safe and Stylish Methods
You’ll hang your painting safely and stylishly by first choosing the right spot at eye level (about 57–60 in.), identifying your wall type, and weighing the piece so you pick anchors that exceed the load. Use studs or heavy anchors for big frames, adhesive strips for light prints, and D‑rings, wire, or a French cleat for secure support. Level and adjust until it looks balanced, touch up any small holes, and keep going to learn tips for spacing, hardware, and repairs.
How to Hang a Painting : Quick 3‑Step Guide
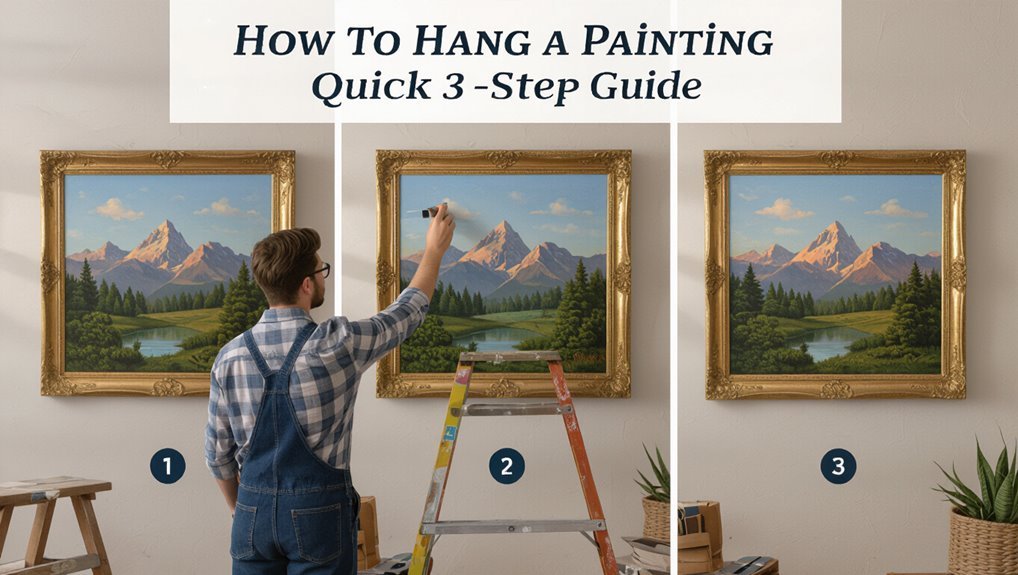
Start by choosing the spot and measuring for eye-level placement; you’ll usually hang the center of the painting about 57–60 inches from the floor.
Place the painting so its center sits at eye level—typically about 57–60 inches from the floor.
Step 1: mark the center and locate studs or anchors.
Step 2: choose appropriate hardware and level the frame.
Step 3: hang, adjust for art placement and maintain aesthetic balance, then step back to confirm alignment.
Identify Your Wall Type: Drywall, Plaster, Brick, Concrete
When you’re ready to hang a painting, the first thing to do is identify what kind of wall you’re working with—drywall, plaster, brick, or concrete—because each needs different anchors and tools.
You’ll note wall characteristics to choose proper hanging techniques. Assess texture, thickness, and studs.
- Drywall
- Plaster
- Brick/concrete
How Much Does Your Painting Weigh: and Why It Matters
Before you pick hardware, you need to know how much your painting weighs so you can choose anchors and hooks that can actually hold it.
Weigh the piece or check the frame and backing for weight info, and add a safety margin.
Match hardware capacity to that weight to avoid falls and wall damage.
Determine Artwork Weight
A quick weight check tells you which hanging hardware will hold your painting safely, so grab a bathroom scale or use a postal scale for smaller works and weigh the frame with its backing and glass attached.
Consider artwork materials and weight distribution as you measure.
- Record total weight.
- Note heavy spots.
- Reweigh after adding wire or backing.
Match Hardware Capacity
Because the right hardware keeps your painting secure, match the hanging hardware’s rated capacity to the weight you recorded and give yourself a safety margin—usually 25–50% extra.
Check hardware compatibility with your wall type and frame fittings.
Consider weight distribution: use two hangers or a French cleat for wider pieces.
Test the setup gently before full display to verify stability.
Tools & Materials Checklist Before You Start
Before you start, grab the essential tools—tape measure, level, drill or screwdriver, and a hammer—so you won’t be hunting mid-job.
Match the hanging hardware (picture hooks, wall anchors, or toggle bolts) to your painting’s weight and wall type.
Also have surface prep supplies ready, like a stud finder, spackle, sandpaper, and a damp cloth to clean and repair the wall.
Tools You’ll Need
You’ll want a short, specific toolkit ready so you won’t stop halfway through the job. Gather essentials that support safe hanging techniques and enhance wall aesthetics:
- Tape measure, level, pencil.
- Stud finder, drill/driver (or screwdriver), anchors.
- Hanging wire, D-rings, picture hooks.
Keep tools organized and within reach so you can work confidently and tidy up quickly.
Hanging Hardware Types
Pick hardware that matches your frame’s weight, wall type, and aesthetic so the picture hangs secure and straight.
Choose hooks, screws, anchors, D-rings, wire, or French cleats based on load and drywall or masonry.
Inspect load ratings, use paired hangers for wide pieces, and follow installation tips for spacing and level.
Keep fasteners corrosion-resistant for longevity.
Surface Preparation Supplies
A small kit of tools and materials will make surface prep quick and reliable, so gather everything you need before you start measuring and drilling.
You’ll want supplies for surface cleaning and wall preparation to guarantee secure mounting.
- Damp cloth, mild detergent, sandpaper
- Level, tape measure, pencil
- Anchors, screws, drill bits
Choose Hardware for Lightweight Prints (≤5 Lb)
For lightweight prints up to about 5 lb, choose simple, low-profile hardware that’s easy to install and won’t damage your wall or artwork.
Use adhesive hooks, picture hanging strips, or small D-rings paired with finishing nails. These lightweight options preserve paint and frames while offering secure support.
Consider aesthetic choices—invisible mounts or brass hooks—to match your décor without overpowering the print.
Choose Hardware for Medium Frames (5–25 Lb)
When you’re hanging medium frames that weigh between 5 and 25 lb, opt for sturdier hardware like wall anchors, toggle bolts, or medium-duty picture hooks that match your wall type and frame backing.
Choose by frame styles and consider weight distribution.
Match your hardware to the frame style and how its weight is distributed for secure hanging.
- Use anchors for drywall.
- Toggle bolts for hollow walls.
- Screws into studs for best security.
Choose Hardware for Heavy Canvases & Mirrors (>25 Lb)
Three steps will keep heavy canvases and mirrors secure: locate studs, use high-capacity hardware, and distribute weight across multiple points.
Choose rated heavy canvas hardware—D-rings, French cleats, or bolted brackets—and pair with lag screws into studs.
For mirror mounting options, use mirror clips plus a French cleat or specialty mirror anchors.
Always double-check weight ratings and tighten fasteners before hanging.
How to Find Studs Quickly and Accurately
Need to find studs fast? Use reliable stud finder techniques and wall scanning tools to pinpoint framing quickly.
Try these steps:
- Scan horizontally across the wall slowly with a calibrated stud finder.
- Confirm edges by measuring 16″ or 24″ from the first locate.
- Tap to verify density before marking.
You’ll save time and hang heavier pieces with confidence.
When to Use Wall Anchors vs. Studs
Although studs give the strongest hold, you’ll want wall anchors for light-to-medium items or when studs aren’t available where you need them.
Use anchors for drywall, plaster, or brick when stud spacing prevents placement. Choose appropriate wall anchor types—plastic expansion, molly, or toggle—based on weight.
For heavy pieces always hit a stud or use multiple heavy-duty anchors to distribute load.
Marking the Wall Without Damaging Paint or Plaster
Once you’ve chosen anchors or located studs, mark where the hardware will go without scuffing the finish: use a soft-lead pencil held lightly at the edge of a template, a piece of painter’s tape to note drill points, or a plastic scribe that won’t tear paint.
Use these paint safe options and wall marking techniques:
- Pencil + template
- Tape markers
- Plastic scribe and level
Measure for Perfect Height: Eye‑Level Rule & Alternatives
How high should your painting hang for the most pleasing view? Aim for the center at eye level—about 57–60 inches off the floor—so your work achieves immediate visual balance.
If ceilings are low or furniture sits beneath, adjust using artistic perspective: lower for cozy intimacy, higher for drama.
Always test with tape or a cardboard mockup before drilling to confirm the effect.
Find the Center and Align Multiple Pieces
Start by measuring the wall to find its center so your arrangement feels balanced.
Mark the determined eye‑level height and use templates to position each piece without guesswork.
Use spacers to keep consistent gaps and step back to confirm alignment.
Measure Wall Center
Want your artwork to look intentional and balanced? Use precise measuring techniques to find the wall center and improve wall aesthetics.
Follow steps:
- Measure total wall width and mark midpoint.
- Measure each frame’s width; halve to find its center.
- Align frame centers to the wall midpoint, marking hanging points.
Double-check spacing before drilling.
Determine Eye-Level Height
Now that you’ve marked the wall and aligned the frame centers, decide on the eye-level height so your artwork reads naturally.
Choose an average viewing height (about 57–60 inches) or adjust for taller seating. For multiple pieces, align their centers to this artistic height to create visual balance.
Step back, tweak spacing, and verify each piece sits comfortably within sightlines.
Use Templates And Spacers
Once you’ve settled on eye-level placement, use paper templates and thin spacers to find each frame’s center and keep consistent gaps between pieces. You’ll save time and avoid remeasuring.
Focus on template usage and spacer benefits as you work.
- Trace frames
- Mark centers
- Adjust gaps with spacers
Hang confidently, level, and evenly spaced.
Use a Level & Measuring Tape Like a Pro
Because a crooked painting ruins a room faster than anything else, grab a level and measuring tape before you pick your spot.
You’ll mark center height, check frame edges, and make level adjustments until the bubble sits steady.
Use precise measuring techniques—measure twice, mark once—to align with furniture and sightlines.
Hold the frame while a helper verifies marks so your hanging’s straight and secure.
How to Hang a Painting on Drywall (With Anchors)
After you’ve got your marks level and centered, it’s time to pick the right anchors for drywall so your painting stays secure.
Choose anchor types based on weight and wall material. For painting placement, follow manufacturer weight limits and hang at eye level.
- Plastic expansion for light pieces
- Threaded drywall anchors for medium loads
- Toggle or molly for heavy frames
Hang a Painting on Plaster (No Cracks)
Hanging a painting on intact plaster requires a slightly different approach than drywall: plaster is brittle and won’t hold standard drywall anchors as well, so you’ll use anchors and screws designed for solid walls or fasten directly into the wooden studs when possible.
Do plaster preparation by locating studs, drilling pilot holes, and using molly or masonry-style anchors; consider compatible adhesive options for lightweight frames only.
How to Hang a Painting on Brick or Concrete
When you’re hanging a painting on brick or concrete, pick anchors rated for masonry so the weight’s secure.
Drill the holes carefully, clean out the dust, and tap in the anchors to guarantee a snug fit.
Protect the painting surface with felt pads or a spacer so it won’t scratch or sit unevenly against the wall.
Choose Appropriate Anchors
If your wall is brick or concrete, you’ll need anchors that bite into masonry instead of drywall—masonry screws, sleeve anchors, or plastic anchors designed for brick will hold far better than a standard picture hook.
Choose anchor types by weight considerations and wall compatibility; consider anchor materials and aesthetic choices. Installation tips matter.
- Match load.
- Pick material.
- Conceal heads.
Drill And Clean Holes
Start by marking your anchor points with a pencil. Then drill straight into the brick or concrete using a hammer drill and a carbide-tipped masonry bit sized to your anchors. Keep the drill level and apply steady pressure without forcing it.
After drilling, clear dust with a vacuum and brush. Inspect hole depth and edges, and follow drilling techniques for clean, consistent holes. Regular hole maintenance prevents loose anchors.
Protect The Painting Surface
Before you mount the hardware, protect the painting’s back and frame with felt pads or a strip of foam to prevent abrasions and to keep it slightly off the brick or concrete surface.
You’ll guarantee proper painting care and surface protection by following these steps:
- Apply felt or foam to corners.
- Use a continuous foam strip along the frame.
- Check spacing and adjust for level.
Install a French Cleat for Heavy Pieces
Mount a French cleat when you’re hanging a heavy painting to distribute weight securely and make removal easy.
You’ll cut matching 45° boards, attach one to the wall into studs and the mating piece to the frame.
French cleat benefits include stability, level adjustment, and safer handling.
French cleats provide stability, easy leveling, and safer handling for heavy artwork—secure, adjustable, and reliable.
For reliable results, follow a precise French cleat installation and check fasteners and studs before lifting.
Use Wire, D‑Rings & Sawtooth Hangers Correctly
Choose hardware that matches your frame weight and wall type so the hanger won’t fail.
Measure and attach wires or D‑rings at equal heights and near the frame’s strongest points to keep the painting level and secure.
Use sawtooth hangers for lightweight pieces, positioning them centered and firmly nailed for reliable support.
Choosing The Right Hardware
Pick hardware that matches your frame size, weight, and the wall material so the hanging stays secure and level; choose mounting techniques and hardware materials for safety.
Follow these steps:
- Match anchors to wall type and painting weight.
- Select D‑rings, sawtooth, or wire per frame construction.
- Use corrosion‑resistant hardware and test stability before final placement.
Proper Wire And D‑Ring Placement
After you’ve matched anchors and hardware to the wall and frame, it’s time to get the hangers and wire placed correctly so the painting sits level and stays secure. Use proper wire placement—attach D‑rings about one-third down from the top edge for balanced d ring positioning. Tighten knots, leave slight slack, and test weight.
| Item | Location | Tip |
|---|---|---|
| D‑ring | 1/3 from top | Align both |
| Wire | Above rings | Slight slack |
| Knot | Behind ring | Double secure |
| Test | Hang briefly | Adjust |
Installing Sawtooth Hangers
Install sawtooth hangers on a frame back that’s clean and flat so they bite evenly into the wood; align centered for balance and use small screws or nails.
You’ll appreciate sawtooth hanger benefits for lightweight frames.
installation tips:
- Measure center height precisely.
- Pre-drill tiny pilot holes.
- Test level before final fastening.
Rental‑Friendly Options: No‑Nail & Damage‑Free Methods
If you’re renting and want to avoid holes, several no‑nail methods let you hang art securely without risking your deposit: adhesive strips and hooks, tension rods, removable picture rails, and leaning large frames against the wall are all effective depending on weight and wall type.
Use adhesive hooks, wall strips, removable tape, art putty or Command strips for damage free solutions; match method to frame weight.
Create a Gallery Wall: Layout, Spacing & Templates
When you plan a gallery wall, start by arranging the pieces on the floor or using paper templates on the wall so you can see how different sizes, frames, and colors interact. This helps you balance focal points, maintain consistent spacing, and avoid unnecessary holes.
Use gallery wall arrangement tips and spacing guidelines:
- Center at eye level.
- Keep 2–4 inches between frames.
- Group by color or theme.
How to Hang Odd‑Shaped or Frameless Canvases
Gallery arrangements often include uniquely shaped or frameless canvases, so you’ll want methods that keep those pieces secure and looking intentional. Use wire, French cleats, or D-rings suited to canvas types and weight; place anchors where needed and test stability.
| Method | Best for |
|---|---|
| Wire + D-rings | Lightweight, odd-shaped |
| French cleat | Heavy, frameless canvases |
| Adhesive hooks | Temporary, low-weight pieces |
Protect Surfaces: Bumpers, Felt Pads & Anti‑Tip Hardware
To keep your walls and frames scratch‑free, use protective bumpers or felt pads at contact points.
Choose surface‑friendly hanging options like rubberized hooks or adhesive strips for delicate finishes.
For taller or heavy pieces, secure anti‑tip anchors or straps so the artwork stays put and nothing gets damaged.
Protective Bumpers And Pads
Because your walls and frames deserve extra care, add protective bumpers, felt pads, and anti‑tip hardware before you hang anything.
You’ll protect finishes and stabilize frames—learn bumpers benefits and choose pad types that suit weight and wall texture.
- Soft rubber bumpers for spacing
- Felt pads to prevent scratches
- Anti‑tip straps for tall or heavy pieces
Surface-Friendly Hanging Options
You’ve already reduced risk by adding bumpers, felt pads, and anti‑tip hardware; now choose the specific surface‑friendly hanging options that match your walls and artwork.
Use adhesive hooks and removable strips for damage free options on rental walls, select wall safe materials like felt or rubber pads, hang heavier pieces on picture rails or decorative brackets, and test placement to guarantee secure, scratch‑free display.
Anti‑Tip Anchors And Straps
One simple step that prevents toppled frames and protects walls is installing anti‑tip anchors and straps; they secure the bottom of a painting to the wall or furniture so a bump or vibration won’t let it swing free.
You’ll appreciate anti tip benefits like safety and surface protection.
Follow clear installation techniques:
- Choose anchor type.
- Measure and mark.
- Secure strap and test.
How to Fine‑Tune Leveling & Position After Hanging
Once the hook’s set, step back and check the painting from a few feet away and at eye level to judge its overall alignment; small shifts often make the biggest visual difference.
Use small level adjustments with a bubble or digital level, nudge the frame for subtle positioning tweaks, tighten or loosen hanging hardware slightly, and recheck from different angles until the composition feels balanced and stable.
Common Mistakes That Make Paintings Fall
Don’t underestimate how much the right hardware matters — wrong hooks or thin wire can slip or bend under weight.
If you don’t anchor into studs or use proper wall anchors for drywall, the fastener can pull out and the painting will fall.
Check weight ratings and match anchors and hooks to the frame before you hang.
Improper Hanging Hardware
If you rely on the wrong hardware, your painting won’t stay put and can cause damage or injury. You need hanging safety and smart hardware selection.
Check common errors:
- Using weak picture hooks for heavy frames.
- Relying on single nails instead of proper wire or D-rings.
- Ignoring weight ratings and loose screws.
Replace mismatched hardware promptly to prevent falls.
Poor Wall Anchoring
When you skip proper anchors or pick the wrong type for your wall, the hardware can pull out and your painting will come crashing down.
You should assess wall stability, choose anchor types suited to drywall, plaster, or masonry, and match anchors to the painting’s weight.
Test the anchor before hanging, follow manufacturer limits, and use multiple anchors for large or heavy pieces to prevent failures.
Repair Small Wall Damage After Hanging or Removing Art
After you take down a painting or remove its hardware, small dings, nail holes, and scuffed paint can make the wall look unfinished—but you can fix most of these blemishes quickly with a few basic tools and the right touch.
Use simple touch up techniques for fast wall repair:
Use quick touch-up techniques—fill, sand, prime, and blend—for fast, seamless wall repairs.
- Fill holes with spackle, sand smooth.
- Prime tiny spots.
- Match paint and blend gently.
When to DIY vs. Hire a Pro (Budget vs. Professional)
Fixing small holes and scuffs yourself saves time and money, but there are moments where calling a pro makes more sense.
You’ll weigh DIY considerations like skill level, tools, and repair complexity. Hiring professionals suits structural issues or valuable art.
Factor budget constraints and time management: if deadlines or risks are high, pay for expertise; otherwise, tackle it yourself to save cash.
Frequently Asked Questions
Can I Hang a Painting Outdoors or in a Humid Bathroom?
You can, but choose outdoor materials and sealed frames; humidity effects can warp canvases, peel finishes, and corrode hardware. Use marine-grade or acrylic prints, ventilate bathrooms, and avoid direct spray or prolonged damp exposure to protect artwork.
How Do I Hang Multiple Heavy Pieces on a Single Mounting Point?
Think of your wall as a bridge; you’ll use heavy duty anchors and a spreader bar to balance wall weight distribution. You’ll attach a mounting plate, secure anchors, then hang and level each piece together.
What Lighting Best Showcases My Painting Without Damaging It?
You should choose LED options with UV protection, combine soft ambient lighting to avoid hotspots, position fixtures to minimize glare, and use dimmers or adjustable color temperature so you can highlight the painting without causing damage.
How Do I Transport a Large Painting Safely Before Hanging?
Need a safe move? You’ll wrap with acid-free paper, bubble wrap, secure corners, and use sturdy crates or padded carriers; label fragile, transport techniques include transporting upright, strapping down, and checking artwork protection throughout the trip.
Are There Insurance Considerations for Valuable Artwork at Home?
Yes — you should get an artwork appraisal and check your insurance coverage; you’ll want documented value, appropriate policy limits, and rider or fine art coverage, and you’ll need photographs, receipts, and secure storage or display conditions.
Conclusion
You’ve got this—picture your wall proudly showing off a perfectly hung painting, level as a heartbeat and secure like a fortress. With the right hardware, a quick weight check, and a steady hand, your art won’t become a rogue frisbee. Fix small dings, pick the right anchors, and tweak the level until it sings. If it’s heavy or priceless, call a pro—less sweat, more bragging rights. Enjoy the view.