Can You Use a Paint Sprayer for Stain? Tips and Techniques
Yes — you can use a paint sprayer for stain, and it’ll speed the job while giving thinner, more even coats than brushing. Prep carefully: sand, clean, mask, and test on scrap wood. Thin the stain as needed, adjust tip size and pressure, hold 8–12 inches away and overlap passes 50%. Use HVLP or LVLP for detail, airless for large areas, and always wear protection and flush the gun afterward. Keep going to pick up tips, settings, and troubleshooting.
Can You Use a Paint Sprayer for Stain? Quick Verdict & Decision Checklist
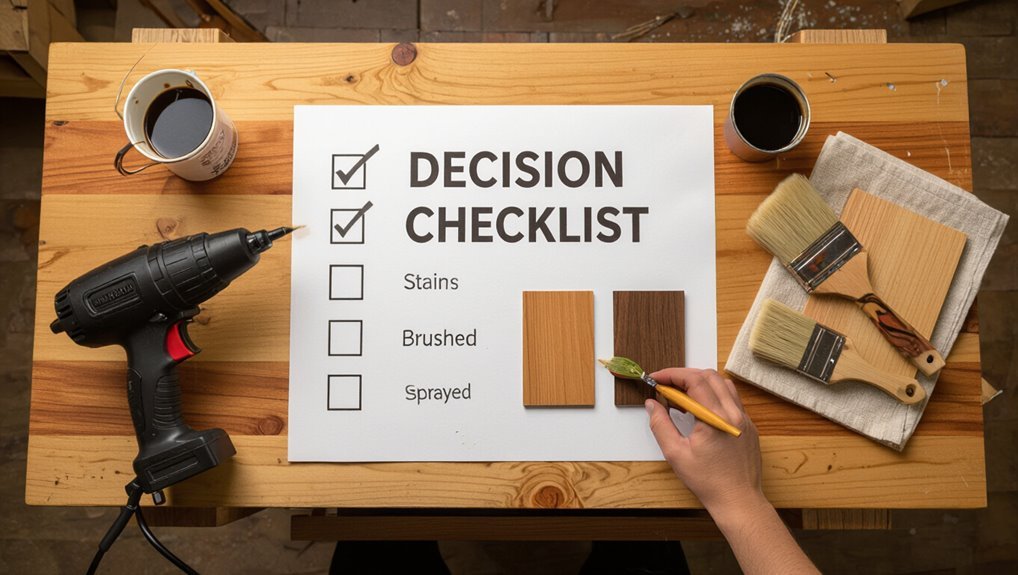
Wondering if you can use a paint sprayer for stain? Yes—you can, but weigh factors: wood type, stain viscosity, and prep.
Follow spraying safety: mask, goggles, and ventilation.
Thin and strain stain for even stain application, test on scrap, and adjust pressure and tip.
If you prep properly and control overspray, a sprayer speeds work and yields consistent results.
Who Should Consider Spraying Stain?
Who should reach for a paint sprayer when staining? You should if you’re a DIY enthusiast tackling decks, fences, or large furniture and want speed and even coverage.
You’ll also benefit if you’re a professional painter needing consistent results on jobs with tight timelines.
If you value efficiency, uniformity, and you’ll prep and mask carefully, spraying makes sense.
Sprayer Types: HVLP, LVLP, and Airless – Which Is Best for Stain?
When you’re choosing a sprayer for stain, match the tool to the job: HVLP gives you fine control for trim and detail.
LVLP cuts overspray so you’ll waste less product on small projects.
For big surfaces or fast work, airless delivers the highest output.
HVLP: Fine Control
Control matters most when you want an even, professional-looking stain, and HVLP sprayers give you that precision.
You’ll appreciate HVLP advantages: low pressure, consistent atomization, and adjustable fan patterns that deliver fine control over flow and coverage.
They reduce runs and pooling on furniture or trim, letting you build thin, even coats and achieve a smooth, professional finish with less touch-up.
LVLP: Lower Overspray
If you’re working in tight spaces or indoors, LVLP sprayers give you lower overspray and better transfer efficiency than traditional high-pressure guns, so more stain ends up on your project instead of the surrounding air.
You’ll appreciate LVLP advantages for indoor LVLP projects: simple LVLP setup, routine LVLP maintenance, right LVLP accessories, and targeted LVLP applications.
Compare LVLP vs. HVLP for LVLP performance, efficiency and LVLP tips.
Airless: High Output
Although airless sprayers sacrifice some finesse, they deliver the highest output and fastest coverage. You’ll finish large staining jobs in a fraction of the time compared with HVLP or LVLP units.
You’ll appreciate their high output for decks and siding, but you must control pressure and thinning to maintain spray efficiency and avoid runs, overspray, and wasted stain.
How to Choose the Right Sprayer by Project Size
Picking the right sprayer comes down to the size and scope of your job: small touch-ups and furniture need a handheld HVLP or airbrush.
For small touch-ups and furniture, choose a handheld HVLP or airbrush for precise control.
Mid-sized projects like fences and decks are best served by a medium-capacity HVLP or electric turbine.
Large jobs—siding, whole-house staining—call for a high-volume airless sprayer.
Match project scale to sprayer compatibility, consider material volume, portability, and cleanup.
Which Stains Atomize Well in Sprayers?
You’ll find that water-based stains atomize easily and clean up quick, making them a great choice for sprayers.
Solvent-based stains spray smoothly too but need proper ventilation and a sprayer rated for stronger solvents.
Gel and varnish stains are thicker and often require thinning or an HVLP/airless setup to atomize evenly.
Water-Based Stains
When you plan to spray water-based stains, pick products labeled specifically for sprayers or marked “pre-thinned”—they atomize cleanly and reduce clogging.
You’ll get even stain application, quicker dry times, and easy cleanup with water.
Test on scrap, thin per manufacturer, and follow sprayer maintenance: flush between colors, clean filters, and store parts dry to prevent buildup and performance issues.
Solvent-Based Stains
If you moved from water-based stains to solvent-based options, expect different handling and cleanup—these stains atomize differently and often need thinning or specific spray tips.
You’ll find oil, lacquer and polyurethane-based solvent types atomize well with HVLP or airless systems when properly reduced.
Monitor drying times closely; ventilation, temperature and coat thickness affect cure and recoat intervals to avoid runs or tacky finishes.
Gel And Varnish Stains
Although gel and varnish stains are thicker and cling more than traditional liquid stains, you can still spray them effectively with the right preparation and equipment. You’ll thin appropriately, test nozzle sizes, and practice gel stain application and varnish stain techniques for even coverage.
| Stain Type | Thinning Needed | Tip Size |
|---|---|---|
| Gel | Moderate | .015 |
| Varnish | Light | .011 |
| Hybrid | Variable | .013 |
| Oil | Minimal | .009 |
Which Stains Are Poor Candidates for Spraying?
Which stains should you skip spraying? You’ll avoid certain stain types that clog nozzles, create uneven finish, or require brushing for control.
Choose application methods wisely; some stains demand handwork for proper penetration and texture.
- Heavy-bodied gel stains
- Thick lacquer-based stains
- Abrasive pigment-heavy mixes
- Fast-drying solvent stains
- Stains needing multiple brushed coats
Oil-Based vs. Water-Based Stain: Which Is Better for Spraying?
Wondering whether oil- or water-based stain will give you better results with a sprayer?
You’ll weigh oil based benefits like deeper penetration and longer open time against water based advantages such as easier cleanup and lower VOCs.
Consider application differences, drying times, environmental considerations, and required safety measures.
Think about how application, drying time, environmental impact, and safety precautions will affect your project.
Choose based on substrate, ventilation, and how fast you need to finish.
Using Gel Stains: Can You Spray Them?
Curious if you can spray gel stain? You can, but prep and thinning matter for proper gel stain application and benefits of spraying like speed and even coverage.
Use appropriate tip, lower pressure, and test on scrap. Clean thoroughly to avoid clogs.
- Thin slightly if needed
- Use low-pressure settings
- Test spray on scrap
- Wipe excess between coats
- Clean gun immediately
Solvent-Based Penetrating Stains: Spraying Tips for Deep Color
When you’re working with solvent-based penetrating stains, prep and thinning are critical — you’ll sand, clean, and thin to the manufacturer’s specs so the sprayer atomizes evenly.
Use steady, overlapping passes at the right distance and pressure to build color without runs, and keep humidity and temperature in mind so the stain soaks and levels properly.
Let each coat penetrate and tack off before adding more so you get rich, uniform depth without blotching.
Prep And Thinning
Before you spray solvent-based penetrating stain, get the surface and the product ready: sand and clean the wood thoroughly, mask off surrounding areas, and reduce the stain’s viscosity as needed so it flows into the grain rather than sitting on the surface.
- Check surface compatibility and sand grit
- Adjust pressure adjustments and spray patterns
- Choose tool selection and monitor sprayer maintenance
- Balance application techniques for stain durability
- Plan cleanup process and consider environmental impact
Spray Technique And Drying
Although solvent-based penetrating stains soak in quickly, you’ll still want a controlled, steady spray stroke to build deep, even color without blotches; use overlapping passes, maintain consistent distance, and monitor drying times to avoid lap marks.
| Tip | Benefit |
|---|---|
| Overlap 50% | Even coverage |
| Consistent distance | Prevents pooling |
| Light coats | Better penetration |
| Watch drying times | Smooth finish |
| Test piece | Calibrates spray techniques |
Semi-Transparent and Transparent Stains: Spraying Techniques
Because semi-transparent and transparent stains show the wood grain more than they hide it, you’ll need a gentle, consistent spraying technique to avoid blotches and uneven color.
You’ll focus on even spraying techniques and careful stain application, thin coats, and overlapping passes to build color gradually.
- Thin coats
- Steady speed
- Consistent distance
- Overlap passes
- Light back-brushing
Solid-Color Stains and Spray Application Strategies
When you’re switching to a solid-color stain, start with thorough surface prep—clean, sand, and seal any bare wood so the stain adheres evenly.
Adjust your sprayer for higher viscosity stains by thinning slightly, opening the nozzle, and slowing your pass speed to avoid build-up.
Practice on a scrap piece to fine-tune overlap and spray distance before you work on the actual project.
Surface Preparation Essentials
A clean, smooth surface is the foundation of a successful solid-color stain job with a sprayer, so you’ll want to remove dirt, old finishes, and loose fibers before you load the gun.
Use surface cleaning, proper sanding techniques, moisture management, and wood conditioning to address absorption differences, plan pre-stain application, guarantee surface protection, and verify finish compatibility.
- Clean and degrease
- Sand progressively
- Control moisture
- Condition porous wood
- Protect adjacent areas
Spray Technique Adjustments
If you want even, durable coverage with a solid-color stain, adjust your sprayer’s settings and your technique to control flow, overlap, and finish texture.
You’ll practice spray technique adjustments: maintain consistent distance, use steady, overlapping passes, and vary speed for edges.
Choose correct nozzle selection for atomization and pattern size, thin as needed, and test on scrap before staining the project.
Which Nozzles and Tips Work Best for Common Stains?
Wondering which nozzle will give you the cleanest, most even coat? For stain application, nozzle selection matters: pick tips based on stain viscosity and surface.
Match fan width to piece size and choose fine or medium orifices for control. Avoid over-atomizing on thin stains.
- Fine tip (0.009–0.013″)
- Medium tip (0.013–0.015″)
- Wide fan tip
- HVLP-specific tip
- Round nozzle for details
How Spray Pressure Affects Stain Atomization and Penetration
Set your sprayer to the right pressure and you’ll get finer atomization for an even finish without wasting stain.
Keep in mind that higher pressure breaks droplets more but can drive stain too deep or increase overspray, while lower pressure may not penetrate grain adequately.
I’ll explain ideal pressure ranges for different stains and how to balance atomization with penetration.
Optimal Pressure Settings
Although adjusting pressure might seem minor, it controls droplet size and spray velocity, which directly determine how well stain atomizes and how deeply it penetrates the wood.
You’ll dial pressure with pressure regulation and watch ideal airflow to balance atomization and penetration. Aim for test sprays, adjust in small increments, and note drying behavior.
- Start low
- Increase gradually
- Test on scrap
- Check coverage
- Monitor drying
Pressure Versus Penetration
Adjusting pressure doesn’t just change spray pattern — it changes how the stain breaks into droplets and how far those droplets drive into the wood.
You’ll balance pressure settings: higher pressure atomizes finer droplets for even coverage but can reduce penetration depth on dense grain; lower pressure yields larger droplets that soak deeper.
Test on scrap wood to dial in ideal spray and penetration.
Thinning Stain: When and How Much to Thin
When you’re preparing a stain for a sprayer, thinning is often necessary to achieve an even mist and prevent clogging. How much you thin depends on the stain type, the sprayer’s specs, and the look you want.
Thinning stains for spraying ensures a smooth mist and prevents clogging; adjust by stain type, sprayer, and desired finish.
You’ll test and adjust to match stain consistency and application techniques.
- Start with manufacturer recommendations
- Test spray on scrap
- Adjust in small increments
- Check nozzle flow
- Note drying behavior
What Solvents and Thinners Are Safe for Different Stain Types?
When you’re spraying stain, you need to match the thinner to the stain base: use mineral spirits or paint thinner for oil-based stains and stick to water or manufacturer-recommended solvents for water-based stains.
Using the wrong solvent can ruin finish quality or clog your sprayer, so test a small batch first.
I’ll cover compatible products and safe thinning ratios next.
Oil-Based Stain Thinners
Because oil-based stains rely on solvents to flow and penetrate, choosing the right thinner matters for spray application and final appearance.
You’ll appreciate oil based benefits like better penetration and richer color; follow recommended thinning ratios and test spray patterns first.
- Mineral spirits for general thinning
- Odorless mineral spirits for indoor work
- Paint thinner for faster drying
- Turpentine for traditional finishes
- Mix small batches and test
Water-Based Stain Solvents
Although water-based stains don’t rely on strong solvents like oil-based products, you still need compatible thinners and additives to achieve proper flow and atomization for spraying. You’ll favor water, retarders, and mild surfactants for water based advantages and cleaner application techniques.
| Solvent | Use |
|---|---|
| Water | Primary thinner |
| Retarder | Slows drying |
| Surfactant | Improves wetting |
| Isopropyl (low %) | Degreasing pre-cleaning |
How to Strain Stain to Prevent Clogs and Spitting
Strain your stain before loading the sprayer to cut down on clogs and spitting. You’ll check stain viscosity, choose strainer types, and follow thinner recommendations for stain compatibility.
Adjust spray pressure and perform sprayer flushing to avoid blockages. Keep maintenance routines consistent for clog prevention.
- Use 100µm mesh
- Double strain for solids
- Thin only as needed
- Flush between colors
- Inspect filters often
Testing Stain Viscosity and Spray Pattern Before You Start
Before you load the sprayer, test the stain’s viscosity and spray pattern on a scrap board so you can catch issues early. Do viscosity testing with a cup or flow cup, adjust thinning, and spray varying distances to check spray pattern. Record settings and results.
| Test | Setting | Result |
|---|---|---|
| Viscosity | Thinned/Full | Smooth/Thick |
| Distance | 6″/12″ | Fan/Narrow |
| Nozzle | Size A/B | Even/Splotchy |
Preparing Wood for Sprayed Stain: Cleaning, Sanding, and Removing Old Finish
Before you spray, make sure you clean the wood thoroughly to remove dirt, grease, and mildew so the stain bonds evenly.
If the piece has an old finish, strip or sand it back to bare wood or a consistently roughened surface to avoid blotches.
Take time here—proper cleaning and finish removal make the difference between a professional-looking result and a streaky mess.
Clean Surface Thoroughly
If you want your sprayed stain to soak in evenly and last, clean the wood until it’s free of dirt, grease, and old finish residue; contaminants will block penetration and cause blotchy color.
You should remove surface contaminants with appropriate cleaning methods, let proper drying time, and test for stain adhesion before spraying.
- Degrease surfaces
- Use mild detergent
- Rinse thoroughly
- Dry completely
- Test adhesion
Strip Or Sand Finish
1) Decide whether to strip or sand based on the finish and wood condition: you’ll strip backed-on varnish or paint, but sand smooth old stain and light finish remnants.
Choose chemical strip techniques for heavy finishes, following safety.
For sanding, progress through sandpaper grades—start 80–120, finish 180–220—keeping grain direction.
Clean dust thoroughly before you spray stain for even absorption.
How Moisture Content in Wood Affects Sprayed Stain Results
Because wood soaks up stain differently depending on its moisture, you’ll see big changes in color, absorption, and drying time when you spray.
You should check moisture measurement before spraying to predict wood absorption and avoid blotches. Use a meter, wait for stable readings, and adjust technique for damp or dry boards.
- Check moisture with a meter
- Test a small area first
- Allow extra drying time
- Thin or adjust spray pressure
- Watch for uneven sheen
How to Manage Stain Absorption Differences Across Wood Species
When you work with different species, expect wide variations in how they take stain—open-grain woods like oak and ash absorb quickly and deeply, while tight-grain species such as maple and cherry resist penetration and can blotch.
Test each wood species on scrap, adjust spray settings and stroke speed, wipe excess promptly, and sand between coats to control stain absorption and achieve even, predictable results.
When to Use Pre-Stain Conditioners With a Sprayer
Wondering whether to reach for a pre-stain conditioner before you spray? You should use one on blotchy woods, softwoods, or highly porous pieces to get even absorption and pre-stain benefits; check sprayer compatibility first so the conditioner atomizes correctly.
- Softwoods (pine, fir)
- Burl or knotty grain
- Previously patched areas
- Open-grain hardwoods
- Indoor furniture projects
Spray Distance, Overlap, and Sweep Speed for Even Coverage
Distance, overlap, and sweep speed control how evenly your stain lays down, so keep your sprayer at the recommended 8–12 inches from the surface.
Overlap each pass about 50 percent, and move at a steady, consistent pace to avoid drips and lap marks.
You’ll maintain spray distance, practice the overlap technique, and set a uniform sweep speed for reliable coverage consistency across panels and trim.
Spraying Stain on Horizontal Surfaces Like Decks and Floors
Now that you’ve got spray distance, overlap, and sweep speed dialed in for vertical panels and trim, applying stain to horizontal surfaces like decks and floors requires a slightly different approach.
With distance, overlap, and sweep mastered for verticals, horizontal decks and floors demand adjusted prep, spraying, and drying.
You’ll focus on surface preparation, sprayer efficiency, and drying techniques to guarantee color consistency and outdoor durability while balancing deck maintenance and floor protection.
- clean and sand
- test spray pattern
- apply thin even coats
- manage drying time
- inspect for runs
Spraying Stain on Vertical Surfaces Like Siding and Fences
When you’re prepping siding or a fence, clean, dry, and patch any damage so the stain sticks evenly.
Use a consistent vertical spray pattern, keep the nozzle 8–12 inches from the surface, and overlap each pass about 50% to avoid streaks.
Work from top to bottom and adjust pressure or thinning as needed to control runs.
Preparing Vertical Surfaces
Spraying stain on vertical surfaces like siding and fences calls for a few preparatory steps to guarantee even coverage and avoid drips: clean, dry, and mask areas, and plan spray techniques to minimize runs.
Follow these quick prep steps:
- Perform thorough surface cleaning and rinse.
- Remove loose paint or rot.
- Sand rough spots.
- Mask trim and plants.
- Test flow and viscosity.
Spraying Technique Tips
Start with a steady rhythm and keep the nozzle moving to prevent drips and uneven build-up on vertical surfaces. You’ll maintain spraying consistency by overlapping passes, adjusting pressure, and choosing proper nozzle selection for grain and stain viscosity.
| Action | Tip | Result |
|---|---|---|
| Overlap | 50% | Even coat |
| Speed | Slow steady | No drips |
| Pressure | Test first | Controlled spray |
| Nozzle | Match stain | Better penetration |
Spraying Furniture and Small Woodworking Projects
If you’re tackling furniture or small woodworking pieces, using a paint sprayer gives you fast, even coverage and helps preserve delicate details like molding and joinery.
You’ll control spray distance, thin stains appropriately, and mask hardware for furniture restoration. Combine sprayer use with basic woodworking techniques for clean results.
- Sand progressively
- Thin stain correctly
- Maintain consistent passes
- Mask and hang parts
- Dry between coats
Preparing Non-Wood Surfaces for Stain-Look Finishes
After you’ve mastered small wood pieces, you can use many of the same spraying principles on non-wood substrates to achieve a convincing stained-wood look. Clean, sand, and prime for proper stain adhesion; test sprays on scraps. Use thin coats and glazing for grain effects.
| Substrate | Prep |
|---|---|
| MDF | Seal, sand |
| Metal | Clean, prime |
| Plastic | Scuff, prime |
| Concrete | Etch, prime |
Masking and Protecting Non-Target Areas Effectively
When you’re spraying stain-look finishes on mixed materials, masking and protecting adjacent areas keeps overspray, drips, and stray glaze from ruining trim, hardware, or flooring.
Use precise masking techniques and tape application to mark boundaries, employ drop cloths for protecting surfaces, and plan spray coverage to limit overspray.
Focus on clear boundary marking around non-target areas.
- Clean edges
- Tight tape application
- Overlap drop cloths
- Test spray coverage
- Remove tape promptly
Ventilation, Respirators, and PPE for Sprayed Stain Jobs
Because sprayed stains put fine particulates and solvent vapors into the air, you should prioritize ventilation and proper PPE before you pull the trigger: follow ventilation requirements, arrange workspace setup for cross air circulation, choose respirator types rated for organic vapors and particulates, and use PPE essentials—eye protection, gloves, coveralls.
Observe safety precautions: monitor airflow, keep exits clear, and avoid confined spaces.
Tackling Blotching and Lap Marks With Spraying Techniques
If you want smooth, even coverage with a sprayer, control your overlap and spray speed to prevent lap marks and blotching.
You’ll manage surface absorption, spray consistency, and drying techniques during stain application to guarantee color uniformity.
Address common issues with effective practices and maintenance tips to get reliable blotching solutions and lap mark prevention.
- Even passes
- Test absorption
- Adjust flow
- Time coats
- Clean tips
Preventing Runs, Sags, and Drips When Spraying Stain
To prevent runs, sags, and drips you need to control your spray pattern so the stain lays down evenly.
Keep your overlap consistent and avoid stopping in one spot, and adjust your speed to match the pattern width.
If you notice build-up, back off or lighten your pass to keep the finish smooth.
Control Your Spray Pattern
When you’re spraying stain, controlling the spray pattern is what keeps runs, sags, and drips from ruining your finish; adjust distance, speed, and overlap so each pass lays down a thin, even coat.
Keep spray distance steady for coverage consistency and watch buildup on edges.
- Test pattern on scrap
- Hold sprayer perpendicular
- Keep nozzle clean
- Use thin passes
- Pause to inspect
Manage Overlap And Speed
Controlling your spray pattern sets the stage, but managing overlap and speed is what actually prevents runs, sags, and drips as you work.
Use consistent overlap management—50% overlap—moving the gun steadily. Keep speed control steady; don’t linger.
If you see buildup, back off and feather edges with quick passes. Adjust stroke length for corners and test on scrap before staining the project.
How to Achieve Consistent Color Across Multiple Boards or Panels
If you want uniform color across multiple boards or panels, start by sorting pieces by grain, porosity, and sapwood content so similar pieces get grouped together; this makes matching easier and reduces the number of test passes.
Focus on color consistency and board preparation, test stains on sample pieces, and keep application, dry time, and finish coats consistent.
- Group similar boards
- Sand uniformly
- Precondition porous wood
- Test on scraps
- Spray same settings
Blending Between Sprayed and Brushed Areas Seamlessly
Although sprayed stain gives an even laydown, you’ll need deliberate overlap and feathering to make brushed sections disappear; match spray technique, wet edge, and direction, then blend the edges with light, smooth brush strokes or a soft foam pad so there’s no visible ridge between methods.
Use consistent blending techniques, test color matching on scrap, work quickly while edges are wet, and keep strokes minimal.
How Many Coats to Spray and Ideal Dry Times Between Coats
Decide how many coats your project needs by testing opacity and wood absorption—most stains take one to three thin coats.
Let each coat dry according to the stain label and conditions (usually 30 minutes to several hours), and don’t rush recoat if the surface still feels tacky.
Remember factors like temperature, humidity, wood species, and product type will change recoat times and how many coats you’ll actually need.
Number Of Coats
Most projects need two thin coats of stain applied with a sprayer to get even coverage and full color depth; a light first coat soaks in, and a second builds tone and evens out any streaks.
Consider stain absorption and coat thickness when deciding extra coats.
- Start with one light coat
- Assess color depth
- Add a second thin coat
- Spot-treat uneven areas
- Avoid heavy builds
Dry Time Guidelines
When you plan coats with a sprayer, factor both the stain type and drying conditions so each thin layer cures enough to accept the next without lifting or blotching. You’ll usually spray 1–3 thin coats, wait 30–90 minutes between coats for water-based, 2–4 hours for oil-based. Use proper drying techniques and monitor humidity effects.
| Coats | Interval | Note |
|---|---|---|
| 1 | 30–90 min | water-based |
| 2 | 2–4 hrs | oil-based |
| 3 | 24 hrs | full cure |
| 4 | variable | test first |
Factors Affecting Recoat
Although stain type and surface conditions drive your recoat decisions, you’ll also weigh temperature, humidity, application thickness, and wood species to determine how many coats to spray and how long to wait between them.
Balance Recoat timing with Stain absorption and Surface compatibility to guarantee Color consistency and fit your Project duration.
- Weather conditions
- Application environment
- Equipment maintenance
- Stain absorption
- Recoat timing
Feathering, Back-Brushing, and Glazing After Spray: Upgrading Your Technique
Start by refining the finish with three simple techniques that turn a sprayed stain from acceptable to professional: feathering to soften overlap lines, back-brushing to work stain into grain and pores, and glazing to even tone and correct streaks.
You’ll use feathering techniques and back brushing methods alongside glazing finishes, make spray adjustments for pattern control, and check color consistency as you finish.
Troubleshooting Spitting, Orange Peel, and Uneven Atomization
If your sprayer spits, produces orange peel, or atomizes unevenly, you’ll want to diagnose three likely causes—fluid issues, air-pressure or nozzle problems, and technique—to get a smooth, consistent finish.
- Check stain viscosity and thin appropriately to prevent spitting issues.
- Verify spray adjustments and pressure.
- Reevaluate nozzle selection.
- Adjust technique and distance for uneven atomization.
- Use proper cleaning techniques to clear partial blockages.
Cleaning and Flushing Your Sprayer After Staining
Once you’ve eliminated spitting, orange peel, and uneven atomization, don’t leave stain sitting in the sprayer—residual pigment and oils will clog passages and wreck future performance.
Flush immediately with the manufacturer-recommended solvent, then run clean water until clear.
Disassemble and wipe fluid passages, filters, and needle.
Dry parts before reassembly.
Regular sprayer maintenance and thorough stain cleanup extend life and guarantee consistent results.
Maintenance Tips to Keep a Sprayer Reliable for Stain Jobs
Because consistent performance hinges on routine care, you should schedule a few simple maintenance tasks after every stain job and on a regular service cadence: flush and dry the system, inspect and clean filters and nozzles, check seals and hoses for wear, and lubricate moving parts per the manual.
- Clean nozzle and tip
- Replace or clean filters
- Inspect seals and O-rings
- Tighten fittings and hoses
- Lubricate pump and trigger
Prioritize sprayer maintenance for reliable performance.
Environmental and Disposal Rules for Stain and Solvents
You’ll need to handle leftover stain and solvent carefully to avoid spills and air pollution.
Check your local hazardous waste rules before you toss containers or wash out equipment, since disposal requirements vary by area.
When in doubt, use designated drop-off sites or approved disposal services to stay compliant.
Proper Solvent Disposal
When you finish staining, don’t just pour leftover solvents or solvent-soaked rags down a drain or into the trash; they’re hazardous and can contaminate water, soil, and air.
You should use solvent recycling, label containers, and seek eco friendly disposal options at collection sites. Securely store rags in metal cans and transport sealed containers to approved drop-offs.
- Segregate solvents
- Use metal cans
- Label clearly
- Seek recycling
- Seal containers
Local Hazardous Waste Rules
Local hazardous waste rules vary by city and county, so check your municipality’s regulations before disposing of stain, thinners, or solvent-soaked rags.
You’ll need to follow hazardous waste collection, drop-off schedules, or special packaging requirements. Contact your local waste agency or website for disposal locations and permitted quantities.
Don’t dump solvents or rags in drains, trash, or soil—follow local regulations to avoid fines and contamination.
Cost Comparison: Spraying vs. Brushing or Wiping Stains
Although spraying often looks faster, it can cost more up front because you’ll need a quality sprayer, filters, and extra stain for overspray and masking.
Brushing or wiping usually takes longer but uses less product and minimal equipment.
Do a cost analysis and efficiency comparison to choose.
Consider:
- Equipment purchase/rental
- Stain quantity and waste
- Prep and masking supplies
- Cleanup time and solvents
- Long-term maintenance
Time Savings and Productivity Gains From Spraying Stain
When you use a paint sprayer for stain, you’ll cover large surfaces much faster than with a brush or rag.
That speed cuts labor time considerably, letting you finish jobs with fewer hands or hours.
Faster application and thinner, more even coats also mean quicker drying turnaround so you can move to the next step sooner.
Faster Coverage Rates
Spraying stain can cut application time dramatically, often letting you cover the same surface in a fraction of the time it takes with brushes or pads.
You’ll gain speed efficiency by mastering spray patterns and application techniques, reducing passes and overlap while maintaining even coverage.
- Larger area coverage
- Faster drying coordination
- Consistent film build
- Less touch-up
- Quicker setup/cleanup
Reduced Labor Time
Cutting stain application time by switching to a sprayer lets you get more done in less time: you’ll spend fewer hours per job thanks to faster coverage, reduced need for hand-tool finishing, and quicker turnaround between coats.
You’ll boost labor efficiency, streamline prep and touchups, and improve time management on projects so you can take more jobs, finish faster, and reduce crew fatigue.
Quicker Drying Turnaround
Because spray application lays down thinner, more even coats, your stain will reach tack-free and full cure faster than with brushed or wiped methods.
You’ll get quicker drying and enhanced absorption, so jobs finish sooner and recoat windows tighten schedules.
- Faster tack-free times
- Shorter wait between coats
- Improved production flow
- Less downtime for crews
- Quicker client turnover
Common Mistakes DIYers Make When Spraying Stain
When you rush setup or skip prep, you’ll almost always regret it once blotches or runs appear; you must clean the nozzle, check filters, and follow sprayer maintenance routines.
Don’t overload tips, apply uneven coats, or ignore grain direction during stain application.
Test on scrap wood, maintain consistent distance and speed, and thin stains only as recommended to avoid dripping, blotching, or pump damage.
When to Hire a Pro for Sprayed Stain Work
If your project involves large surfaces, intricate trim, or high-value wood, hire a pro—DIY sprayers can save time, but pros bring consistent coverage, proper equipment, and experience that prevents costly mistakes.
For large surfaces, delicate trim, or valuable wood, hire a pro for consistent coverage and to avoid costly mistakes
You should call a pro when project complexity, tight schedules, or warranty needs outweigh DIY savings; enjoy professional benefits like quality finish and proper prep.
- Time constraints
- Fine trim work
- High-value wood
- Warranty/insurance
- Consistent finish
Example Workflow: Spraying a Deck
Start by prepping the deck surface and surrounding area so spraying goes quickly and cleanly: clear furniture, sweep and wash the wood, repair loose boards, and mask nearby plants and siding.
Choose nozzle selection for even spray pattern, test color consistency, manage airflow management and watch environmental conditions.
Apply thin coats for uniform stain absorption, use proper drying techniques, and perform sprayer maintenance after use.
Example Workflow: Spraying a Fence
Prep the fence area thoroughly so spraying goes fast and clean: move gates and decorations, trim back vegetation, sweep and wash the boards, and fix any loose or rotten planks.
You’ll apply stain with even passes, keep overlap consistent, and follow spray maintenance routines to avoid clogs.
- Choose proper stain viscosity
- Mask nearby plants
- Test spray pattern
- Maintain consistent distance
- Clean sprayer after use
Example Workflow: Spraying a Dining Table
Lay your dining table out for spraying by moving it to a well-ventilated, dust-free area, removing hardware and any detachable parts, and sanding and cleaning the surface so the stain will adhere evenly. Start with test sprays, use even passes, let coats dry, and prioritize sprayer maintenance between coats to guarantee consistent stain application.
| Calm | Pride |
|---|---|
| Tension | Relief |
| Anticipation | Joy |
| Focus | Satisfaction |
| Care | Admiration |
Materials Checklist for a Successful Spray Stain Project
Now that your table’s ready and you’ve practiced your spray technique, gather the right supplies so the job goes smoothly.
Focus on materials sourcing and spray safety: choose compatible stain, reducer, and strainers; PPE; tack cloths; proper masking; and a cleaning kit.
Check quantities, test compatibility, and keep ventilation tools ready to protect finish and health.
- Compatible stain and reducer
- Respirator and gloves
- Masking materials and tape
- Tack cloths and stir sticks
- Sprayer cleaning kit
Quick-Reference Settings for Popular Sprayer Models and Stains
A few simple settings will get you close to a flawless finish: match the sprayer’s nozzle size, pressure, and fluid flow to the stain type and viscosity, then fine‑tune with test passes on scrap.
For popular models, start mid-range pressure, medium tip, and thin coats; adjust for heavier pigments.
Keep records, perform regular sprayer maintenance, and always check coverage during stain application.
How to Test, Measure, and Record Your Spray Stain Recipes for Future Jobs
Start by mixing small, measured batches of the stain recipe you’ll use. Then spray test passes onto scrap wood to evaluate color, penetration, and atomization.
You’ll note spray stain benefits and record ratios, thinning, pressure, tip, and drying times for recipe documentation.
- ratio and volume
- thinner type and amount
- sprayer pressure and tip
- test wood and lighting
- dry times and notes
Final Decision Guide: Is Spraying the Right Choice for Your Stain Project?
After you’ve tested and recorded your stain recipes, weigh those results against the specifics of your project to decide whether spraying is the best method.
Consider project planning, surface compatibility, color matching, and finish consistency.
Evaluate equipment setup, technique mastery, and spray maintenance needs.
Factor environmental considerations and time efficiency—choose spraying when benefits outweigh prep, cleanup, and skill demands for reliable stain application.
Frequently Asked Questions
Can You Mix Different Brands of Stain in One Sprayer Without Reactions?
You shouldn’t assume brands mix safely; you’ll risk poor brand compatibility and unpredictable reactions because stain formulation varies. Test a small batch first, check labels for solvent and resin types, and strain before spraying.
How Long Should I Wait Before Applying a Topcoat After Spraying Stain?
About 90% of stains feel dry within 24 hours, so you should typically wait 24–48 hours before applying a topcoat; check stain drying by touch, and adjust topcoat timing for humidity, temperature, and product directions.
Can I Spray Stain Over Previously Painted or Sealed Surfaces?
You can, but you’ll need careful surface preparation and proper spraying techniques; strip or scuff glossy paint, remove sealers, clean thoroughly, test adhesion, and use a compatible stain and tip to guarantee even coverage and lasting bond.
What Are Safe Storage Practices for Leftover Thinned Stain in a Sprayer Cup?
You should transfer leftover thinned stain to a sealed, labeled container, refrigerate if recommended, clean the sprayer cup and seals immediately, and follow sprayer maintenance routines to maximize stain longevity and prevent clogs or contamination.
Does Humidity or Temperature During Spraying Change Final Stain Color?
Yes — humidity effects and temperature impacts change final stain color; you’ll see lighter or darker tones, slower or faster penetration, and altered drying sheens, so you should adjust thinning, spray speed, and drying conditions accordingly.
Conclusion
You can absolutely spray stain — and when you do it right, your project’ll transform faster than a pumpkin into a parade float. With the right sprayer, thinned stain, good masking and test passes, you’ll get factory-smooth, even color without brush marks. Skip the prep and you’ll make a mess; do it properly and you’ll finish like a pro. Decide by project size, stain type and your patience for setup and cleanup.