How Do You Stop Mold Growing on Walls Permanently?
You can stop mold on walls permanently by removing moisture, improving airflow, and repairing damaged materials. Find and fix leaks, seal penetrations, and control indoor humidity with ventilation or dehumidifiers so conditions aren’t hospitable. Clean or replace moldy drywall and use mold‑resistant paint or materials where needed. Keep vents, gutters, and plumbing maintained, and train household members to limit steam and wet clutter. Follow these steps and you’ll see how to make the fix last.
Why Permanent Mold Fixes Matter
Because mold keeps coming back when you only treat the surface, you should focus on permanent fixes that remove the cause, not just the stain.
You’ll prioritize mold prevention strategies that address moisture, ventilation, and leaks.
Combine effective cleaning techniques with repairs so spores won’t return.
Quick Answer: Stop Wall Mold Permanently
If you want to stop wall mold permanently, fix the moisture source, clean the affected area properly, and improve ventilation so spores can’t return.
You should adopt clear mold prevention strategies: dry leaks, use dehumidifiers, and clean with approved cleaners.
Monitor wall moisture management regularly, repaint with mold-resistant products, and maintain airflow.
Stay proactive to keep mold from reestablishing.
How Recurring Wall Mold Develops: Core Causes
When recurring mold shows up on your walls, it’s usually a sign that moisture, food (organic material), and spores are repeatedly coming together in the same spot. You should track the mold lifecycle, fix leaks, improve ventilation, and use moisture management to stop repeats.
| Cause | Evidence | Action |
|---|---|---|
| Leak | Stains | Repair |
| Condensation | Damp | Ventilate |
| Organic dirt | Spots | Clean |
How Moisture Dynamics Drive Mold Growth in Walls
To stop mold on walls you need to follow how water gets into and stays in your walls, from leaks and rising damp to humid indoor air.
Pay attention to airflow and ventilation because stagnant, moist air feeds mold growth.
Also control temperature swings and condensation on cold surfaces, since those wet spots are prime breeding grounds.
Sources Of Water
Because moisture finds tiny weaknesses, walls often become mold’s first foothold if you don’t control the sources feeding it. You must track water intrusion from leaks, condensation and rising damp, and identify indoor humidity sources like cooking or drying clothes to stop mold before it roots.
| Source | Feeling | Action |
|---|---|---|
| Leak | Alarm | Repair |
| Condensation | Frustration | Insulate |
| Rising damp | Resignation | Seal |
| Indoor humidity | Urgency | Ventilate |
Airflow And Ventilation
Leaks, condensation, rising damp and humid activities all feed moisture into wall cavities, but airflow and ventilation determine whether that moisture stays or gets carried away.
You should adopt targeted airflow strategies: use exhaust fans, trickle vents, and cross-ventilation to flush damp air.
Maintain ventilation systems, guarantee balanced intake and extraction, and avoid stagnant pockets so mold spores can’t settle and grow.
Temperature And Condensation
When warm, moisture-laden air hits a cool wall surface, it condenses into liquid water that feeds mold growth, so you need to control both temperature and humidity to keep surfaces dry. You’ll monitor temperature fluctuations, improve insulation, and use dehumidification for condensation prevention.
| Action | Benefit |
|---|---|
| Insulate | Reduces cold spots |
| Ventilate | Lowers humidity |
| Dehumidify | Removes moisture |
How Poor Ventilation Creates Mold‑Prone Pockets
If air can’t move freely through a room, you’ll get cool, still pockets where moisture clings to walls and gives mold a place to start.
You should check ventilation systems, open vents, and use fans to circulate air.
Maintain humidity control with dehumidifiers and exhaust fans in wet areas so spores can’t settle and grow in neglected corners and behind furniture.
How Thermal Bridging and Cold Surfaces Invite Mold
Because cold surfaces draw moisture from warm indoor air, thermal bridges — places where heat escapes through studs, window frames, or uninsulated walls — create spots where condensation forms and mold can take hold.
You should seal bridges with continuous thermal insulation, add moisture barriers, and improve interior surface temperatures.
How Building Leaks and Capillary Rise Spread Moisture
Although leaks often start small, they let water travel where you can’t see it and feed persistent dampness through capillary action.
You need prompt leak detection and to address hidden moisture sources before mold takes hold.
- Trace wet stains and rising damp.
- Repair flashing, pipes, and mortar.
- Dry and waterproof affected masonry to break capillary paths.
How Contents and Occupant Habits Affect Indoor Humidity
Your furniture and soft furnishings trap and release moisture, so where you place sofas, mattresses, and curtains can raise local humidity and encourage mold.
You should also watch habits like drying clothes indoors, long hot showers, or keeping windows closed for days, because those behaviors steadily add moisture to the air.
Changing layout and routines can cut humidity spikes and help stop mold on walls.
Furniture And Soft Furnishings
Moisture behavior in your home is shaped not just by walls and vents but by the things you bring into rooms—furniture, rugs, curtains, and how you use them.
You’ll reduce wall mold risk by choosing breathable materials and practicing furniture care and fabric protection.
Try simple steps:
- elevate furniture for airflow
- rotate cushions and air rugs
- use moisture-resistant covers and hang curtains to dry
Occupant Behavior Patterns
Because the way you live and what you bring into a room directly change indoor humidity, small daily choices can either cut or raise mold risk on walls.
You’ll boost occupant awareness by tracking drying times, venting when cooking or showering, and avoiding indoor clothes-drying.
Simple behavior modification—keeping vents clear, using lids on pots, and reducing houseplants—lowers humidity spikes and prevents mold.
Confirm Mold Versus Dirt, Stains, or Efflorescence
Wondering whether that dark patch is mold or something else? You’ll use simple mold identification techniques and focus on distinguishing stains from biological growth.
Check texture, smell, and location. Look for dampness history.
- Scrape gently: powdery = efflorescence, fuzzy = mold.
- Smell: musty indicates mold.
- Context: recent leaks favor biological growth.
When to Test Mold: DIY Checks You Can Do Now
Watch for telltale visual signs like fuzzy spots, water stains, or paint discoloration and trust your nose if you notice a musty smell.
If household members start sneezing, getting headaches, or having worse allergy symptoms, that’s a cue to act.
Use a home test kit when signs are unclear or you need to confirm the presence and approximate type of mold before taking remedial steps.
Visual Signs To Watch
If you spot dark specks, fuzzy patches, or discoloration on walls, act quickly—these visual cues often mean mold growth and signal it’s time for a closer look.
Use simple mold detection methods and wall inspection techniques to confirm. Check corners, behind furniture, and near vents.
- look for color changes or texture
- probe soft paint or plaster
- inspect seams and baseboards
Smell And Allergy Signals
Notice a musty, damp odor or sudden allergy-like symptoms? You should act fast: use basic mold identification techniques like sniff tests, visual inspection, and checking for water sources.
Track allergy symptom recognition—sneezing, itchy eyes, or worsening asthma—when you’re home versus away. These signs tell you to investigate further and prioritize cleaning, ventilation, and moisture control before mold spreads.
When To Use Kits
When you suspect mold but aren’t sure how extensive the problem is, DIY test kits can give quick, useful clues without waiting for a pro.
Use mold removal kits for small spots; get professional help for widespread growth.
Practice effective application: follow instructions, wear protection, and document results.
- test visible patches
- check hidden areas
- repeat after remediation
When Should You Get a Professional Mold Inspection?
How do you know it’s time to call a pro for a mold inspection? You should consider professional help when mold inspection frequency becomes irregular due to recurring dampness, or if signs needing inspection appear: persistent musty odors, visible widespread growth, health symptoms, or after major water damage.
A pro confirms extent, guarantees safe removal, and prevents costly recurrence.
Locate Concealed Mold Inside Walls: Signs and Methods
If you notice a musty smell that won’t go away, you might’ve hidden mold inside the walls and should follow the odor to likely hotspots.
You can do simple wall surface tests like tape lifts or surface swabs to confirm visible growth on drywall or baseboards.
If tests indicate mold, consider cutting a small inspection hole or hiring a pro for moisture meters and further sampling.
Hidden Odor Indicators
Wondering why a musty smell won’t go away? You might’ve hidden mold behind drywall; follow odor detection cues and act fast.
- Persistent, localized mustiness even when rooms are dry
- Sudden scent spikes after heating or rain, indicating trapped moisture
- Faint sweet or chemical notes suggesting decay inside walls
Trust your nose, document smells, and inspect cavities where odor points.
Wall Surface Testing
When you suspect mold hiding behind paint or wallpaper, start with simple surface tests that reveal hidden growth without tearing into the wall: tap and smell for musty pockets, use a moisture meter to map damp zones, and perform targeted mold testing swabs on suspicious spots.
Combine results with a visual wall assessment to decide if remediation or cavity inspection is needed.
How to Measure Humidity and Wall Moisture Correctly
Measuring humidity and wall moisture correctly starts with the right tools and a simple routine: use a reliable hygrometer to track room humidity and a moisture meter to check walls at multiple spots, including near windows, corners, and the floor line.
You’ll use basic measuring techniques and humidity tools; then:
- Check daily at different times
- Record readings and locations
- Compare against safe thresholds to act promptly
How to Use Infrared Cameras and Moisture Meters Effectively
Pick an infrared camera and moisture meter that match your budget and the depth of inspection you need, and make sure they’re rated for building diagnostics.
You’ll learn to spot thermal anomalies with the camera and confirm moisture levels with the meter, interpreting patterns rather than single readings.
Keep calibration, probe type, and surface conditions in mind so your results are accurate and actionable.
Choosing The Right Tools
Although invisible to the naked eye, hidden moisture and thermal anomalies become obvious once you use the right tools; an infrared camera pinpoints temperature differences that often indicate leaks or trapped damp.
Meanwhile, a moisture meter gives you concrete readings to confirm the problem. You’ll pick tools that match your needs and budget, aiding mold prevention techniques and guiding wall cleaning tools choice.
- Choose reliable brands
- Prioritize portability
- Calibrate regularly
Interpreting Readings Correctly
When you scan walls with an infrared camera and then check suspect spots with a moisture meter, focus on patterns rather than single pixels.
Thermal images show temperature contrasts that hint at leaks or insulation gaps, while moisture readings confirm whether those cold or hot areas actually contain damp.
Use trends to prioritize repairs, integrate readings into mold prevention strategies, and guide effective cleaning techniques without guessing.
Decide Between Spot Cleaning and Full Remediation
Decide whether you’ll spot-clean small patches or hire a full remediation team based on how extensive the mold is, what’s behind it, and any health or structural risks.
You’ll weigh spot cleaning benefits against full remediation drawbacks, then choose action.
- Small, isolated stains: consider spot cleaning.
- Widespread growth: hire pros.
- Hidden damage: prioritize remediation.
Make a Safety Plan Before Cleaning Mold
Before you start cleaning, assess who in your household might be at risk from mold exposure—kids, seniors, pregnant people, and anyone with respiratory issues should probably stay away.
Make sure you’ve mapped clear emergency exits and kept them unobstructed in case you need to leave quickly.
Have a plan for who’ll call for help and where affected people will go if symptoms appear.
Assess Health Risks
How at-risk are you and the people in your home? Assess mold exposure and likely health effects before cleaning.
Note allergic reactions, respiratory issues, immune response concerns, long term impacts, and vulnerable populations. Use preventive measures, PPE, and ventilation.
- Identify symptoms and sensitive residents
- Estimate contamination and duration
- Plan medical consults and cleanup limits
Prepare Emergency Exits
Having assessed health risks and who’s most vulnerable, map safe exits and meeting points you’ll use if cleaning stirs up heavy spores or causes a collapse.
In your emergency planning, mark primary and secondary exit routes, keep paths clear, equip helpers with masks and radios, and set a timed check-in.
Practice the plan so everyone knows where to go and what to do.
How to Clean Small Mold Patches Safely Yourself
If you spot a small mold patch (about 10 square feet or less), you can usually clean it yourself safely with the right precautions and supplies.
Wear PPE, ventilate, and use safe cleaning techniques that tie to broader mold prevention strategies.
Follow steps:
- wear gloves, mask, goggles
- ventilate and isolate the area
- scrub gently, dry thoroughly and monitor
Which Cleaners Actually Kill Mold on Painted Walls
Now that you know how to clean small patches, you’ll want to choose a cleaner that actually kills mold without damaging paint.
You can use commercial mold-killing products formulated for painted surfaces or simple DIY mixes like diluted bleach or vinegar for small spots.
I’ll explain which options work best, how to use them safely, and when to avoid DIY.
Commercial Mold Killers
When you’re choosing a commercial cleaner for mold on painted walls, focus on products with proven fungicidal claims and the right active ingredients — like bleach (sodium hypochlorite) for non-porous painted surfaces, hydrogen peroxide, or quaternary ammonium compounds — because not every “mold remover” actually kills spores or prevents regrowth.
Use cleaners as part of mold prevention strategies and effective cleaning techniques.
- Read label claims
- Follow dwell times
- Test small area
DIY Household Solutions
Tackle small mold patches on painted walls with common household cleaners that actually kill spores—like diluted bleach (for nonporous painted surfaces), 3% hydrogen peroxide, or a properly labeled quaternary ammonium product—because plain soap and water or vinegar alone won’t reliably eliminate or prevent regrowth.
You can also try targeted natural remedies: baking soda, safe vinegar solutions, citrus cleaners, a mild soap mixture, or essential oils like tea tree, but prioritize hydrogen peroxide for effectiveness.
What Not to Do: Ineffective Mold‑Cleaning Mistakes
Although it might be tempting to spray bleach or scrub hard and call it done, those quick fixes often make mold worse or leave behind hidden spores.
Spraying bleach or aggressive scrubbing can worsen mold and leave hidden spores — avoid quick fixes.
You should avoid common mold myths and poor cleaning techniques.
Don’t:
- Rely solely on bleach for porous surfaces.
- Scrub without containment; you’ll spread spores.
- Ignore ventilation and moisture control; mold returns.
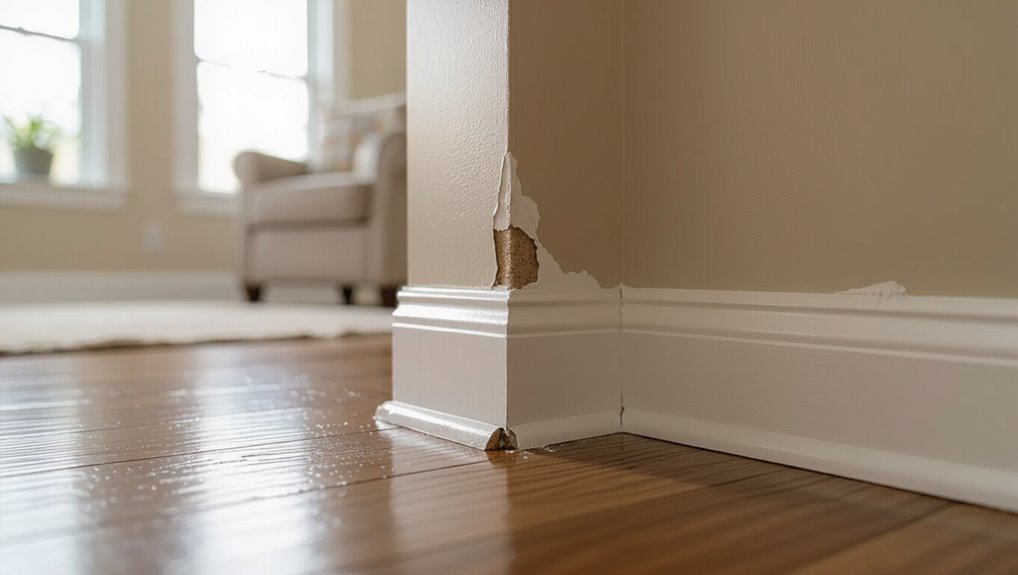
How to Remove Mold From Drywall Without Replacing It
1 clear plan can keep you from tearing out drywall: you’ll isolate the area, protect yourself, remove surface mold, and address moisture so it doesn’t return.
Wear PPE, ventilate, and test for extensive penetration. Use approved mold removal techniques and gentle drywall cleaning solutions—scrub, rinse, dry, and apply mold inhibitor.
Fix leaks, dehumidify, and monitor to prevent recurrence.
When You Must Replace Drywall or Plaster Due to Mold
If mold has penetrated more than about a square meter, soaked the drywall or plaster for days, or left soft, crumbling material, you’ll need to remove and replace the affected sections to protect your home and health.
Use mold assessment techniques to confirm extent, then choose drywall replacement options and proceed safely.
- Inspect framing and insulation
- Remove contaminated material
- Replace and dry thoroughly
Repair and Seal Wall Penetrations That Leak
Start by finding every spot where pipes, cables, vents, or fasteners penetrate the wall so you can pinpoint leak sources.
Pick sealants and flashing rated for the material and exposure — silicone, polyurethane, or metal flashing are common choices.
After repairs, test for leaks and monitor the area for several weeks to confirm the fix.
Find All Leak Sources
Track down every place water can enter your walls—because even small penetrations can feed mold growth fast.
Use mold prevention strategies and leak detection techniques to inspect seams, fixtures, and flashing. Check ceilings, plumbing, and exterior cladding. Mark and document leaks, then prioritize fixes.
- Inspect plumbing joints
- Scan roof and flashing
- Probe around windows and vents
Choose Proper Sealants
Sealing is your next critical step: pick a sealant rated for the material and movement you’re fixing, and apply it to gaps around pipes, windows, vents, and flashing so water can’t re-enter and feed mold.
Choose among sealant types—silicone, polyurethane, or hybrid—based on substrate and flex needs.
Use proper application techniques: clean, backer‑rod where needed, tool joints smooth, and allow full cure before exposure.
Test And Monitor Repairs
Verify your fixes by deliberately provoking the conditions that caused the leak and watching for any return of moisture or mold; you’ll want to run a water test (carefully apply water around the repaired penetration) and inspect both sides of the wall over the next few days and weeks.
- Do scheduled moisture monitoring and note readings.
- Use mold testing when unsure or after visible staining.
- Reseal and retest promptly if moisture rises.
Fix Roof and Window Leaks That Feed Wall Mold
If water’s getting into your walls from a damaged roof or leaky window, you need to stop those entry points fast—otherwise any mold remediation you do will be temporary. Use mold prevention strategies and leak detection techniques: inspect flashing, seals, and roof vents; replace damaged shingles; reseal windows; and dry framing promptly.
| Action | Tool | Timing |
|---|---|---|
| Inspect | Flashlight | Weekly |
| Repair | Caulk | ASAP |
| Replace | Shingles | Seasonal |
| Dry | Dehumidifier | Immediately |
Address Plumbing and Foundation Moisture Sources
Check your plumbing for slow drips and hidden leaks and fix them promptly to keep walls dry.
You’ll also want to improve foundation drainage by cleaning gutters, extending downspouts, and grading soil away from the house.
Tackling both plumbing and foundation moisture stops the steady water supply that lets mold grow.
Fix Leaks Promptly
Act quickly on any leaks you spot—small drips from pipes, a slow toilet fill, or dampness near the foundation can turn into mold-friendly conditions within days.
You should fix leaks, schedule building inspections, and use moisture barriers and mold resistant materials where repairs occur to aid mold growth prevention.
- Repair pipes and fixtures promptly
- Seal wall penetrations
- Track repairs and recheck affected areas
Improve Foundation Drainage
Leaks inside are only part of the story—groundwater and poor exterior drainage can soak your foundation and send moisture into walls and basements.
You should inspect and repair guttering, extend downspouts, and install proper drainage solutions like French drains or a perimeter system.
Regrade soil with correct landscape grading so water flows away from the foundation, reducing persistent damp and mold risk.
Improve Ventilation in Single Rooms to Prevent Mold
If a single room stays damp, mold will find a place to grow, so improving ventilation is one of the quickest ways you can prevent it.
You’ll boost air circulation and pair it with mold resistant materials where possible.
Try these steps:
- Open windows and use window fans regularly.
- Run exhaust fans during showers and cooking.
- Place a portable dehumidifier near problem walls.
Whole‑House Ventilation to Protect Walls From Mold
When you ventilate the entire house, you reduce moisture build-up that feeds mold on walls and hidden surfaces. Whole-house systems move stale, humid air out and bring fresh air in so you don’t have to rely on open windows or room-by-room fixes.
Adopt a whole house design mindset and apply balanced ventilation strategies—HRVs or ERVs, timed or continuous airflow—to keep wall assemblies dry and mold-resistant.
Choose and Place Dehumidifiers for Permanent Control
To stop mold long-term, you’ll need a dehumidifier sized for the square footage and typical humidity levels of the room.
Place it where air circulates freely — not tucked in a corner, and near the most moisture-prone area when possible.
Check capacity and runtime so it runs efficiently without constant emptying.
Sizing Your Dehumidifier
Pick a dehumidifier sized to match the room’s square footage and moisture load so it can actually maintain safe humidity levels without running constantly.
Match dehumidifier capacity to room size for reliable moisture control. Consider:
- Choose capacity (pints/day) based on square footage.
- Account for dampness level: low, moderate, high.
- Oversize slightly for continuous control and energy efficiency.
Optimal Placement Strategies
Even if you’ve chosen the right capacity, where you place the dehumidifier will determine how well it controls moisture—so position it where airflow and access to damp sources are maximized.
Put units near basements, closets, or behind furniture causing condensation, keep vents clear, and elevate on a stable platform.
Pair placement with mold resistant materials and regular maintenance to guarantee long-term moisture control and prevention.
Control Indoor Humidity With HVAC Adjustments
One simple, effective step is to set your HVAC to maintain indoor humidity between 30–50% so moist conditions that feed mold don’t develop.
Set your HVAC to keep indoor humidity 30–50% to prevent the moist conditions that promote mold.
You should check HVAC maintenance regularly and adjust dehumidifier settings to match seasonal needs.
- Monitor humidity with a reliable hygrometer.
- Service HVAC filters and coils.
- Program setbacks to avoid overnight humidity spikes.
Insulate to Eliminate Cold Spots and Thermal Bridges
Look for thermal bridges where framing, windows, or balconies make walls colder and attract moisture.
Add continuous insulation over studs and around openings to keep surfaces warm.
Then seal gaps and junctions so air and moisture can’t bypass the insulation.
Identify Thermal Bridges
Because heat follows the path of least resistance, thermal bridges create cold spots where condensation and mold can start.
You should locate them with thermal imaging and address gaps with appropriate insulation materials.
Check common bridge points:
- Junctions of walls and floors
- Around windows and doors
- Structural beams and penetrations
Fixing bridges reduces moisture risk and prevents recurring mold.
Add Continuous Insulation
After you’ve identified thermal bridges, add continuous insulation to keep surfaces warm and stop condensation before it forms. You’ll gain continuous insulation benefits: fewer cold spots, lower humidity, and reduced mold risk. Use proven insulation installation techniques—layering panels, taped seams, and proper fastening—to create an unbroken thermal barrier.
| Panel | Tape | Fastener |
|---|---|---|
| Foam | Seam | Screw |
| Rigid | Vapor | Clip |
| Mineral | Seal | Washer |
Seal Gaps And Junctions
If you want to stop cold spots and the moisture they invite, seal gaps and junctions where walls, windows, pipes, and frames meet—those cracks are thermal bridges that let warm air escape and cold surfaces form.
You should perform junction inspections, use proven gap sealing techniques, and finish with insulation to keep surfaces above dew point.
- Inspect seams regularly
- Choose compatible sealants
- Test after weather changes
Upgrade Windows and Doors to Reduce Condensation
When you upgrade windows and doors, you’ll cut down cold spots and air leaks that cause condensation on interior walls and sills. Improve window insulation and door sealing to reduce moisture, prevent mold, and save energy. Choose double-glazed units, weatherstripping, and proper thresholds.
| Upgrade | Benefit |
|---|---|
| Double glazing | Less cold transfer |
| Weatherstripping | Fewer drafts |
| Thresholds | Better seal |
| Low-E glass | Lower condensation |
Build an Air Barrier That Keeps Walls Dry
To keep walls dry and mold-free, start by sealing gaps and cracks where moist air can sneak in.
Install a continuous vapor barrier in walls and ceilings so moisture can’t pass through building assemblies.
Then control indoor humidity with ventilation and dehumidification to stop moisture buildup before it causes problems.
Seal Gaps And Cracks
Small gaps and cracks around windows, pipes, and baseboards let moist air sneak into wall cavities and feed mold growth, so seal them tightly to keep walls dry.
You’ll use caulk, foam, and weatherstripping as part of mold prevention strategies and wall maintenance tips:
- Caulk around frames and trim
- Spray foam larger voids
- Add door sweeps and trim seals
Install Continuous Vapor Barrier
Because moist air finds its way through tiny gaps and porous materials, you should install a continuous vapor barrier that blocks moisture migration and keeps wall cavities dry.
You’ll choose appropriate materials, overlap seams, seal edges and penetrations, and integrate with flashing.
Proper vapor barrier installation provides reliable moisture control, prevents condensation inside assemblies, and reduces mold risk when combined with correct detailing and durable finishes.
Manage Indoor Humidity
A continuous vapor barrier helps stop moisture from moving into wall cavities, but you also need an effective air barrier to control indoor humidity at its source.
You should seal gaps, ventilate wet rooms, and monitor levels so mold can’t take hold.
- Seal gaps and penetrations for humidity control
- Use exhaust fans and balanced ventilation
- Install and maintain moisture barriers around windows and doors
Select Mold‑Resistant Building Materials
Choosing mold-resistant building materials gives you a practical head start on preventing mold growth before it ever begins.
Select drywall, insulation, and trim labeled mold resistant, and use moisture barriers in crawlspaces and behind walls to block dampness.
Finish surfaces with mold resistant paints where needed.
These choices reduce fungal food and moisture access, cutting long-term mold risk and simplifying maintenance.
How Coatings and Primers Add Long‑Term Mold Resistance
Once you’ve picked mold-resistant materials, seal and protect them with the right coatings and primers to keep moisture and spores from taking hold.
You’ll choose coating types based on surface and exposure; primer benefits include adhesion and mildew inhibitors. Apply properly and maintain seals.
- Use water‑resistant paints
- Select mold‑inhibiting primers
- Recoat after damage or wear
Treat Exterior Walls and Siding to Prevent Moisture Intrusion
If you want to keep mold out, treat exterior walls and siding to stop water before it reaches your structure: inspect flashings, seal gaps around windows and doors, and repair damaged siding or loose trim so rain can’t penetrate joints or wrap behind cladding.
Use moisture barriers, weatherproof coatings, proper siding materials and sealant applications.
Combine surface treatments, correct insulation types, vapor control, drainage solutions and exterior maintenance; avoid poor landscaping strategies.
How Landscaping and Grading Affect Wall Moisture
Sealing gaps and repairing siding only goes so far if the ground around your house keeps directing water toward the walls. Landscaping and grading determine whether rain and irrigation run away from or toward your foundation.
You should adjust slopes, choose plants, and amend soil composition to limit moisture. Consider these drainage solutions:
- Grade soil to slope away from walls
- Install swales or French drains
- Use drought-tolerant plantings
Manage Crawlspaces and Basements to Protect Interior Walls
Because crawlspaces and basements are the lowest points in your home, they’re where water and humidity collect first.
You should inspect and manage them proactively to keep interior walls dry.
Maintain crawlspace management by sealing vents, repairing foundation cracks, adding vapor barriers, and insulating rim joists.
Ascertain basement ventilation and use dehumidifiers or mechanical vents to control moisture and prevent mold migration.
Create a Quarterly Mold‑Inspection and Maintenance Schedule
Now that you’ve addressed crawlspaces and basements, set up a simple quarterly mold‑inspection and maintenance schedule to keep small issues from becoming big ones.
Use a Quarterly checklist and Seasonal maintenance plan so you’ll inspect, clean, and fix promptly.
Use a Quarterly checklist and Seasonal maintenance plan to inspect, clean, and repair promptly—keep small mold issues from growing.
Include:
- Check humidity, vents, and visible walls.
- Clean gutters and inspect seals.
- Replace filters and address leaks immediately.
Document Moisture and Remediation for Future Issues
How will you keep a clear record of where moisture showed up and what you did about it? You’ll use moisture documentation to log dates, locations, causes, actions, and outcomes so future remediation’s faster and clearer. Keep photos, receipts, and notes organized.
| Date | Location | Action |
|---|---|---|
| 2026-04-22 | Basement wall | Sealed leak |
How to Estimate Costs for Permanent Mold Fixes
Estimating the cost of permanent mold fixes starts with a clear scope: identify affected areas, the source of moisture, and the repairs needed (drywall replacement, insulation removal, structural work, waterproofing, or HVAC fixes).
Then get itemized quotes so you can compare labor, materials, and contingency for hidden damage.
Get itemized quotes to compare labor, materials, and built-in contingency for potential hidden damage.
- Get multiple quotes for accurate cost assessment.
- Include materials, labor, permits.
- Use budgeting strategies and a contingency.
How to Prioritize Repairs When Budget Is Limited
With itemized quotes and a clear scope in hand, you can set priorities that stretch your budget without leaving health risks or major damage unaddressed.
Under budget constraints, list repairs by health impact, moisture source elimination, and structural urgency. Tackle moisture control and contaminated materials first, defer cosmetic fixes, and track repair priorities so limited funds go to actions that stop mold recurrence and protect occupants.
Find and Vet a Mold‑Remediation Professional
Because mold can hide behind drywall and HVAC ducts, you’ll want a remediation pro who combines thorough inspection skills with verified credentials.
Vet candidates by asking about mold inspection methods, experience addressing environmental factors, insurance and certifications.
Check references and written estimates. Choose someone who documents scope, containment and air testing.
- Ask certifications and insurance
- Request written scope and testing
- Verify references
Verify the Job Was Done Right After Remediation
After the crew finishes remediation, don’t assume the job’s complete—inspect their work and confirm conditions match the written scope.
You should review photos, compare cleared areas to the mold assessment report, and ask for lab results or clearance testing.
Do remediation verification yourself or hire an independent inspector, document findings, and require corrective action if remaining contamination or moisture issues persist.
Protect Occupants During Remediation Work
When remediation starts, protect people in the home by isolating work areas, controlling dust and airflow, and keeping vulnerable occupants—children, elderly, pregnant people, and those with respiratory issues—out of harm’s way; set clear barriers, use negative air machines or HEPA filtration, and establish safe entry routes and schedules so everyone knows when rooms are off-limits.
- Guarantee personal protective equipment and safety protocols.
- Use work zone containment and remediation training.
- Maintain occupant communication, mold awareness education, risk assessment, and emergency contacts.
Prevent Mold When Renovating or Remodeling
Keeping people safe during remediation also means preventing future mold problems as you renovate.
Use mold resistant materials like treated drywall, paints and insulation, and select renovation techniques that improve ventilation and drainage.
Choose mold-resistant drywall, paints, and insulation, and renovate to boost ventilation and proper drainage.
Seal gaps, slope exterior grading away from the foundation, and install proper flashing.
Coordinate with contractors to document moisture barriers and HVAC adjustments so new work won’t invite recurrence.
Educate Household Members to Avoid Mold‑Friendly Habits
Because everyone in your home affects moisture levels, teach family members simple habits that cut mold risk—dry wet clothes and spills promptly, run exhaust fans during showers and cooking, and avoid leaving damp items in closets or on floors.
Reinforce mold prevention education and practical household habits:
- Check vents and wipe condensation regularly.
- Launder damp towels immediately.
- Store items dry and off the floor.
Use Sensors and Smart Home Tools for Ongoing Monitoring
You can reinforce good habits with sensors and smart-home tools that monitor humidity, temperature, and leaks around the clock. Use smart sensors for real-time alerts, automated ventilation, and simple mold monitoring dashboards so you act before growth starts. Check placements near bathrooms, basements, and windows; review logs weekly and set thresholds for alerts.
| Location | Recommendation |
|---|---|
| Bathroom | High humidity alert |
| Basement | Leak sensor |
| Window | Condensation alert |
| Living area | Routine log review |
Troubleshoot Recurring Mold Despite Fixes
If mold keeps coming back despite your repairs, it usually means an underlying moisture source or missed hotspot wasn’t fully addressed — so start by narrowing down where and why moisture’s still showing up.
Check structural leaks, ventilation, and hidden condensation. Use mold prevention techniques and humidity control strategies.
Check for structural leaks, improve ventilation, and address hidden condensation—combine prevention methods with humidity control to stop mold recurrence.
- Inspect behind walls and trim
- Test plumbing and roof connections
- Reassess fan and vent performance
Create a Long‑Term Plan to Keep Walls Mold‑Free Permanently
When you build a long-term plan to keep walls mold-free, focus on identifying persistent moisture risks, scheduling preventive maintenance, and adopting everyday habits that stop spores from taking hold.
You’ll map trouble spots, apply preventive measures like improved ventilation and dehumidification, set inspection intervals, and train occupants in moisture management.
Review results annually and adjust tactics to keep mold from returning.
Frequently Asked Questions
Can Mold Return From Neighboring Units in Multi-Family Buildings?
Yes — mold can return from neighboring units; you’ll need mold prevention strategies and a neighboring unit inspection to identify sources, fix leaks, improve ventilation, and coordinate remediation with management to stop cross-unit contamination effectively.
Are HVAC Ducts Spreading Mold Spores Through the House?
Yes — if your HVAC ducts are contaminated, they can spread mold spores through the house. You should schedule HVAC maintenance, clean or replace ducts and filters, and monitor humidity to protect air quality and prevent recurrence.
Can Indoor Plants Significantly Contribute to Wall Mold?
Yes—you can unwittingly boost wall mold when plants raise indoor humidity; monitor air quality and use moisture control like proper ventilation, dehumidifiers, and careful watering so plants enrich your space without feeding mold growth.
Do Certain Pet Habits Increase Wall Moisture and Mold Risk?
Yes — certain pet habits can. If you don’t maintain pet hygiene and dry wet fur, they’ll raise indoor humidity and deposit moisture on walls. Control moisture with ventilation, dehumidifiers, and regular grooming to reduce mold risk.
Will Cosmetic Repainting Hide Active Mold Problems?
No — repainting hides stains, hides spores; it doesn’t fix mold. You should get a mold assessment, remove growth, and use prevention strategies like drying, ventilation, and barriers so paint covers only clean, stable surfaces.
Conclusion
You can stop mold on walls permanently by tackling moisture, ventilation, and habits together; remember, “an ounce of prevention is worth a pound of cure.” Stay vigilant: fix leaks fast, keep humidity below 50%, vent bathrooms and kitchens, and train everyone not to block airflow or dry clothes indoors. Use sensors, inspect annually, and address hidden damp spots immediately. Do that consistently, and you’ll keep walls mold-free for the long haul.