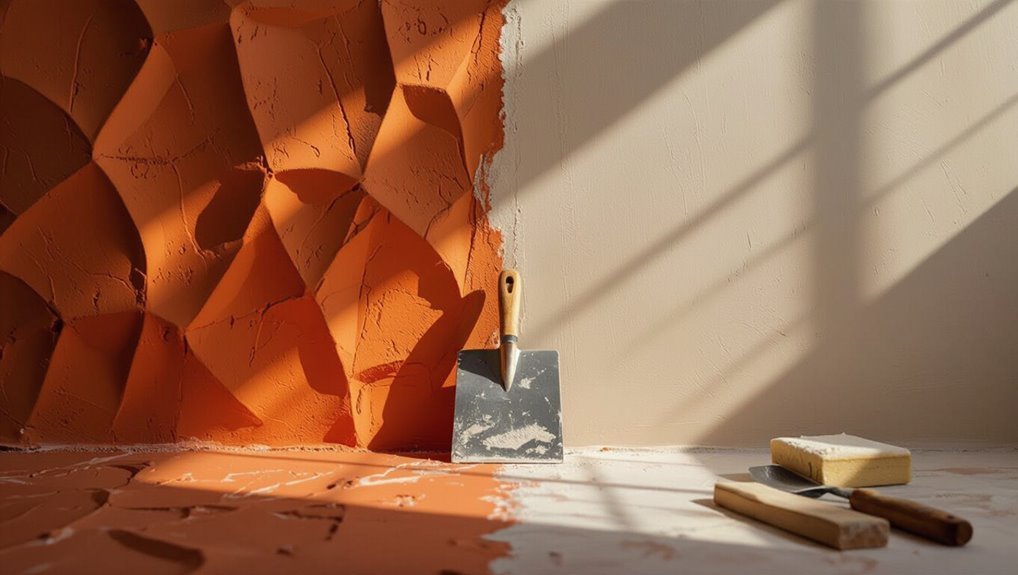
How to Skim Coat a Textured Wall for a Smooth Surface
You can turn a textured wall smooth by cleaning, sanding, and priming first, then applying thin skim coats of joint compound with a hawk and trowel, feathering edges and letting each coat dry 24–48 hours; sand lightly with fine grit between coats, inspect under oblique light for low spots or pinholes, touch up as needed, prime with a high-build primer, then paint. Follow proper safety, use the right compound for drywall or plaster, and keep going to learn tips for tackling common problems.
Why Skim Coat a Textured Wall?
Because textured walls can make a room look dated and are harder to clean, skim coating gives you a smooth, modern surface that’s easier to paint and maintain.
You’ll enjoy textured wall benefits like improved light reflection and a cleaner look.
Skim coating delivers smooth surface advantages: fewer paint coats, simpler upkeep, and a neutral backdrop that lets your decor stand out without visual noise.
When to Skim Coat vs Other Fixes?
When should you skim coat rather than try another fix?
When textured walls are widespread or uneven, choose skim coating for a smooth, durable, paint-ready finish.
Choose skim coating when textured wall challenges—deep or widespread texture, multiple repairs, or uneven surfaces—outweigh patching or sanding.
You’ll gain skim coat benefits: a uniform, paint-ready surface and long-term durability.
Opt for simpler fixes only for small, isolated imperfections; otherwise, skim coat saves time and improves final appearance.
Skim-Coating: Step-by-Step at a Glance
Gather your tools and plan the sequence before you start: skim-coating is a straightforward series of steps—prep, mix, apply, level, sand, and finish—that you’ll repeat room by room until the wall’s smooth and paint-ready.
You’ll remove loose texture, clean and prime, apply thin coats of compound, feather edges, sand between passes, inspect for uniformity, and finish for improved textured finishes and refreshed wall aesthetics.
Tools and Materials for Skim Coating
Tools are the backbone of a successful skim-coating job, and you’ll want the right mix of hand tools and materials before you begin. Use proper sanders, knives, hawks and primers for surface preparation and to practice skim coat techniques.
| Tool | Purpose | Tip |
|---|---|---|
| Trowel | Apply compound | Maintain angle |
| Hawk | Hold mix | Keep clean |
| Sander | Smooth | Use fine grit |
Choosing Joint Compound and Additives
Picking the right joint compound and additives makes the difference between a durable, smooth finish and a job that keeps cracking or sanding poorly.
You’ll choose between all-purpose, lightweight, and setting compound — understand joint compound types for strength and sanding.
Additive benefits include improved adhesion, extended open time, or faster cure.
Match compound and additives to substrate and drying needs.
Mixing Joint Compound for a Smooth Skim
Start by measuring a clean bucket of compound and adding only enough water to reach a thick, creamy yogurt consistency—too thin and it won’t cover ridges, too stiff and you’ll create drag marks.
You’ll use simple mixing techniques, paddle slowly, and check consistency importance as you go.
- Paddle slowly
- Scrape sides
- Tap out air
- Test thickness
- Rest before use
Protecting Floors, Trim, and Fixtures
Before you apply any compound, cover floors, trim, and fixtures thoroughly so dust and drips won’t create extra cleanup or damage; use heavy-duty drop cloths for floors, painter’s tape and plastic sheeting for trim, and removable covers or taped bags for light fixtures and outlets.
For area preparation, secure floor protection, guarantee trim safeguarding with tight tape, and maintain fixture safety so cleanup’s minimal.
Patch Holes and Remove Loose Texture
Before you skim coat, patch any small holes with spackle or joint compound so the surface is even.
Scrape or brush away any loose texture until only firmly-adhered material remains. You’ll get a smoother finish and better adhesion if you start with a clean, stable surface.
Patch Small Holes
Patch small holes by scraping away loose texture, cleaning the area, and filling the void with a lightweight spackling compound.
You’ll select patching techniques based on hole size, apply thin layers, and sand smooth between coats so the skim coat bonds properly.
- Clean edges
- Use appropriate spackle
- Apply in thin layers
- Sand progressively
- Prime patched spots
Remove Loose Texture
Now that small holes are filled and smoothed, check the rest of the wall for any loose or flaking texture that could lift the skim coat.
Use a scraper and stiff brush to remove weak sections, vacuum debris, and sand rough edges.
These texture removal techniques are essential wall preparation tips—don’t skip them, or the skim coat won’t adhere properly.
Sanding and De-Glossing Textured Surfaces
Start by scuffing the textured surface to remove gloss and create a key for the skim coat to adhere to.
Scuff the textured surface to dull the gloss and create a proper key for the skim coat.
You’ll sand high points, focus on texture removal, and handle surface preparation carefully to avoid damage. Use dust control and wear protection.
- Medium-grit sanding block
- Detail sanding sponge
- Vacuum with brush attachment
- Respirator and goggles
- Damp cloth wipe-down
Applying Primer or Bonding Agents
Before you skim coat, pick a primer formulated for high-adhesion and stain-blocking so your skim coat will bond and finish evenly.
If the texture is especially rough or flaky, use a bonding adhesive designed for plaster or drywall to guarantee the new skim layer sticks.
Apply products per manufacturer instructions and let them fully dry before you start skim coating.
Choosing The Right Primer
When you’re prepping a textured wall, picking the right primer makes the whole job easier and keeps your finish looking professional. A bonding primer or stain-blocking latex can bridge rough surfaces and help paint adhere evenly.
You’ll consider primer types and surface preparation to guarantee adhesion and uniform sheen.
- Acrylic bonding primer
- Stain-blocking latex
- High-build primers
- Oil-based primers
- Shellac primers
Using Bonding Adhesives
If your textured wall has loose or chalky areas, you’ll want to apply a bonding adhesive or a specialty primer to anchor the surface and improve paint adhesion; these products penetrate and bind friable texture so your skim coat and finish coat won’t peel or crack.
Choose bonding agents rated for your substrate, follow manufacturer directions, and test adhesive types on a small area before full application.
First Thin Skim Coat: Step-by-Step
Start by mixing a thin batch of joint compound to a pancake-syrup consistency so it spreads easily without dripping; you’ll want just enough to cover a small section of wall at a time.
You apply a thin skim coat using skimming techniques learned during wall preparation, smoothing with a wide knife and maintaining even pressure.
- load knife evenly
- spread top to bottom
- overlap passes slightly
- check for voids
- maintain thinness
Feathering Edges and Blending Seams
Once you’ve applied your thin skim, pull the knife outward in long, even strokes and feather the edges so the compound tapers into the existing wall surface.
Keep the blade flat, wipe excess off between passes, and overlap slightly to avoid ridges.
Keep the blade flat, wipe off excess between passes, and slightly overlap to prevent ridges.
Use light pressure and varied angles for feathering techniques.
Work seams toward the center for seamless blending, checking visually as you go.
Drying Times: Wait Between Coats
Let the skim coat dry fully between applications so each layer bonds and sands cleanly; you’ll usually wait 24 hours under normal indoor conditions, but thinner coats, higher humidity, or lower temperatures can extend that to 48 hours.
You’ll check surface dryness and adjust based on coat thickness and room conditions.
- monitor humidity
- test tackiness
- prefer longer drying
- note coat thickness
- ventilate area
Adding Second and Final Skim Coats
Apply the second skim coat with the same clean, consistent strokes you used on the first, aiming to feather the edges smoothly into the surrounding wall so the changeover disappears. This coat should be thinner than the first, fill remaining low spots, and be smoothed and checked as you go so the final pass only needs light sanding.
For the final coat, maintain texture consistency, work in manageable sections, and blend carefully.
Sanding Skim-Coated Walls Safely
Before you sand, put on proper protective gear—an N95 mask, safety glasses, and a drop cloth to catch dust.
Use gentle, even strokes with fine-grit sandpaper or a sanding block to smooth the skim coat without gouging.
Work methodically from top to bottom and wipe away dust frequently to keep the surface clean for priming.
Proper Protective Gear
Sanding skim-coated walls stirs up fine dust that you don’t want in your lungs, eyes, or on your skin, so wear the right protective gear every time.
Use protective goggles or safety goggles, a respiratory mask or dust mask, durable gloves, long sleeves and work boots, plus knee pads for low work.
Don’t skip proper fit and inspection.
- Protective goggles / safety goggles
- Respiratory mask / dust mask
- Durable gloves
- Work boots / knee pads
- Long sleeves
Safe Sanding Technique
Now that you’ve got the right gear on, protect your work and lungs by using a careful, controlled sanding technique.
Start with a fine-grit pole sander, keep even pressure, and sand in long, light strokes.
Vacuum frequently, wipe dust with a damp cloth, and change filters.
Follow sanding techniques and safety precautions: work slowly, ventilate, and stop to inspect surface for smoothness.
Inspecting and Touching Up Imperfections
Once the skim coat has dried, walk the wall at eye level and scan for low spots, ridges, and pinholes you might’ve missed; you’ll catch defects better with oblique lighting or a flashlight held nearly parallel to the surface.
After the skim coat dries, inspect at eye level with oblique lighting to spot low spots, ridges, and pinholes.
Use imperfection detection and surface assessment to mark areas, then repair, sand, and recheck.
- Mark defects
- Feather edges
- Fill pinholes
- Light sanding
- Final inspection
Priming and Painting After Skim Coating
Once your skim coat is fully dry and sanded, you’ll pick a primer that matches the surface and paint type to guarantee even adhesion and coverage.
Use a high-build or stain-blocking primer on porous or repaired areas, and go with a quality latex primer for smooth, ready walls.
When painting, use consistent strokes, maintain a wet edge, and apply thin even coats to avoid lap marks and texture pickup.
Proper Primer Selection
Primer choice matters: pick a product that seals the skim coat, evens out porosity, and promotes adhesion for topcoats.
You’ll match primer types to substrate and finish, perform surface preparation, and guarantee uniform absorption before painting.
- Bonding primer for glossy areas
- PVA for new drywall
- Latex for general use
- Oil for problem stains
- Specialty primer for repairs
Painting Technique Tips
Start by inspecting your skim coat for uniform texture and complete drying—tackiness or visible damp spots mean you should wait longer.
Choose a high-quality primer, roll evenly with appropriate roller methods to avoid lap marks, and cut in with steady brush techniques.
Sand lightly if needed, remove dust, then apply two thin paint coats, letting proper dry times guarantee a smooth, durable finish.
Skim Coating Ceilings and Inside Corners
Skim coating ceilings and inside corners takes a steadier hand and a few technique tweaks compared with walls, because gravity and tight angles amplify imperfections.
You’ll focus on texture removal and precise corner techniques to get smooth shifts without sagging.
- Work small sections
- Use thin passes
- Feather edges into corners
- Control compound consistency
- Sand lightly between coats
Drywall vs Plaster: Technique Differences
Moving from ceilings and inside corners to the substrate itself, you’ll find drywall and plaster demand different handling even when using the same joint compound.
Switching from corners to substrate reveals drywall and plaster need distinct handling, even with the same joint compound.
For drywall installation, you’ll focus on tape, paper edges, and feathered thin coats.
For plaster repair, you’ll prep hairline cracks, key in compound for adhesion, and apply slightly thicker passes.
Adjust drying times and sanding between coats.
Common Mistakes to Avoid
Don’t rush the prep—poor sanding, missed loose texture, and inadequate cleaning will come back to haunt you once the compound dries.
You’ll avoid common errors by following prevention tips: prepare, mix, and apply carefully, and sand lightly between coats.
- Skipping primer
- Overthinning compound
- Uneven application
- Ignoring dry times
- Using wrong tools
Troubleshooting Cracks, Bubbles, and Adhesion
When you see cracks, bubbles, or poor adhesion after applying skim coat, act quickly to identify the cause so you can fix it before the problem spreads. Check substrate moisture, clean loose material, and sand edges. Use proper primer for crack prevention and technique for bubble removal.
| Issue | Likely Cause | Quick Fix |
|---|---|---|
| Crack | Movement | Reinforce tape |
| Bubble | Moisture | Pierce, press |
When to Hire a Pro
If you’ve tried patching cracks and popping bubbles but the problems keep coming back, it’s time to contemplate hiring a pro.
If patch repairs keep failing, it’s time to call a pro who’ll fix it right.
You should call one when damage is extensive, adhesion fails, or you need accurate cost considerations and a reliable project timeline.
Pros save time and guarantee durability.
- structural issues
- widespread adhesion failure
- tight deadline
- budget limits
- finish quality
Frequently Asked Questions
Can Skim Coating Reduce Wall Noise or Improve Acoustics?
Yes — skim coating offers limited acoustic benefits; you’ll slightly improve sound absorption by smoothing irregular surfaces, but it won’t noticeably reduce noise. For real acoustic improvement, add insulation, mass, or dedicated absorption panels.
Will Skim Coating Increase Room Insulation or Thermal Performance?
No, skim coating won’t miraculously warm your house—it’s cosmetic, not a thermal fix. You won’t get meaningful insulation benefits or improved thermal efficiency from skim coat alone; you’d need dedicated insulation upgrades for that.
Can I Skim Coat Over Wallpaper Without Removing It?
You can, but you shouldn’t: skipping wallpaper removal risks poor adhesion and peeling later. Use proper skim coat techniques only over well-bonded, sealed paper; test adhesion, prime with bonding primer, then apply thin coats for best results.
Is Skim Coating Safe Around Mold-Prone or Damp Areas?
You shouldn’t gamble: you’ll avoid skim coating in mold-prone or damp conditions. It can hide problems, so focus on mold prevention, fix moisture sources first, then proceed with treated surfaces and proper ventilation to stay safe.
How Long Before Furniture Can Be Moved Back Against Skim-Coated Walls?
You can move furniture back after full drying time, typically 24–48 hours for light contact; wait 72 hours for heavy items. For furniture placement, use pads or spacers to avoid sticking while paint fully cures.
Conclusion
Skim coating a textured wall can feel like wiping the slate clean—think of it as turning a weathered map into a new chart for your home’s story. When you follow the right steps and tools, you reclaim smoothness and calm in a room. If cracks or stubborn textures persist, call a pro before you weary of patchwork. Trust the process: patience, care, and the right mix will reveal a fresh canvas worth living on.