How to Use a Wood Moisture Meter for Painting and Construction
You’ll want to check moisture before painting or installing to avoid finish failure, warping, or rot. Use a pin meter for localized readings, a pinless meter to scan beneath surfaces, or a dual meter for both. Prep the wood—clear dust and finishes—then test 3–5 spots, avoid edges and knots, and calibrate for species. Hold readings against target ranges (interior 6–9%, exterior 9–14%, structural 12–19%) and log results; more practical tips follow.
Quick Answer: When Wood Is Dry Enough to Paint or Build
How do you know when wood is dry enough to paint or build? You check moisture indicators and use proper drying techniques: let lumber acclimate indoors, stack with spacers for airflow, and avoid surface-only dryness.
Aim for manufacturer or project-specific moisture percentages. If indicators show target values consistently over a few days, you’re safe to proceed with finishing or assembly.
How Wood Moisture Meters Work (Pin, Pinless, Dual)
Although they all measure moisture, pin, pinless, and dual meters do it in different ways, and knowing those differences helps you pick the right tool for your project.
Although all measure moisture, pin, pinless, and dual meters work differently—know those differences to choose the right tool.
You’ll use pin technology to measure electrical resistance via probes; pinless uses electromagnetic sensing; dual combines both for versatility.
Understand moisture principles to interpret readings and target depth.
| Pin | Probe |
|---|---|
| Pinless | Sensor pad |
| Depth | Shallow/deep |
| Use | Finish/structure |
| Readout | %/scale |
Which Moisture Meter Should You Buy: Quick Decision Guide
Now that you know how pin, pinless, and dual meters work, it’s time to pick the right one for your needs.
Think about whether you need the pinpoint accuracy of pins or the non‑destructive speed of pinless models, and weigh that against how much you’re willing to spend.
I’ll help you balance pin vs. pinless choices and budget vs. features so you can make a quick, practical decision.
Pin-Type Vs. Pinless
Choosing between pin-type and pinless moisture meters comes down to what you need to measure and how you’ll use the tool.
You’ll favor pin type advantages when you need precise internal readings or spot checks; expect surface damage from pins.
Choose pinless benefits for quick, noninvasive surveys across finished surfaces.
Match meter choice to job scope, wood species, and access for reliable readings.
Budget Vs. Features
If you’re buying a moisture meter on a budget, focus first on the specific features you actually need so you don’t overpay for extras you’ll never use.
Prioritize accuracy, range, and durability within your budget considerations. Use feature comparisons to weigh pin versus pinless, display clarity, and warranty.
Choose the simplest model that reliably meets your project requirements and avoid costly bells and whistles.
Pin vs. Pinless vs. Dual: Pros, Cons, and Use Cases
You’ll want to compare pin, pinless, and dual meters to match the tool to your project.
Pin meters give spot readings by piercing the wood. Pinless meters scan surface moisture noninvasively, and dual meters let you use both methods.
Knowing the pros and cons helps you pick the best meter for flooring, framing, or lumber inspection.
Pin Moisture Meter
When deciding between pin, pinless, and dual wood moisture meters, consider how each type measures moisture and where you’ll use it. You’ll like pin meters for precise depth readings and simple measuring techniques; they show moisture meter benefits for treatment and repair decisions. Use pins for framing, joists, and thin lumber; they penetrate finishes for accurate core readings.
| Feature | Strength | Typical Use |
|---|---|---|
| Accuracy | High | Structural wood |
| Depth | Direct | Framing/joists |
| Finish | Penetrates | Renovation |
| Cost | Low–Medium | Site checks |
Pinless And Dual
Although pin meters give you precise, localized readings, pinless and dual meters offer speed and noninvasive testing that’s better for finished surfaces and large areas.
You’ll prefer pinless technology when scanning broad floors or finished trim, avoiding surface damage.
Choose dual functionality if you want both deep, pinpoint probes and rapid scans.
Use each based on surface, accuracy needs, and workflow.
Prepare Wood Surface for Accurate Moisture Readings
Before taking readings, clear the wood’s surface of dust, paint flakes, or finish so the meter contacts the actual wood; otherwise readings can be skewed.
For reliable surface preparation, wipe, sand lightly, or scrape away contaminants. Check for loose coatings and guarantee a flat contact area.
Use the meter per manufacturer guidance to achieve accurate testing and repeatable, trustworthy moisture readings.
Where and How Many Spots to Test for Reliable Results
Test moisture at multiple locations across the piece — at least three to five spots — including ends, center, and any areas that look different (stains, knots, or near fasteners), because wetness often concentrates in specific zones.
Choose varied testing locations across grain direction and thickness. Record each value, ignore outliers unless repeated, and average results for reliable sampling before proceeding with painting or construction.
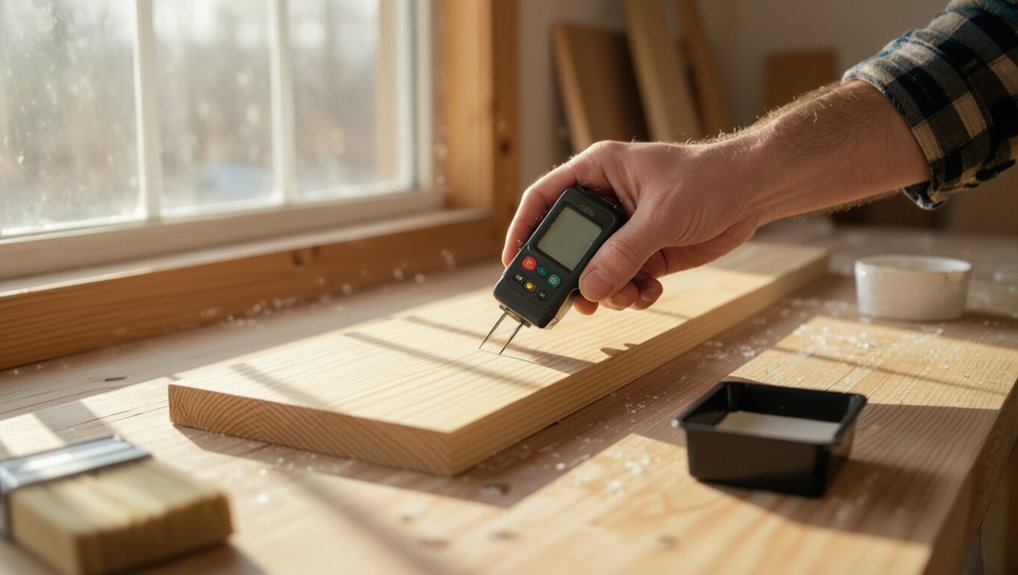
How to Take Readings With a Pin Moisture Meter
Place the pins firmly into the wood grain at consistent spacing so you get a true contact reading.
Calibrate or set the meter for the wood species you’re testing, since density affects the result.
Then read the percent moisture and compare it to species-specific acceptable ranges to interpret whether the wood is dry, borderline, or too wet.
Proper Pin Placement
When you take readings with a pin moisture meter, insert the pins so they penetrate the wood fibers at consistent depths and across the grain where possible; this guarantees the meter senses the moisture in the wood itself rather than surface dampness.
You should mind pin depth, vary locations, and apply reliable testing techniques.
- Use uniform pin spacing.
- Test multiple spots.
- Avoid knots and edges.
Calibrating For Species
Different wood species conduct electricity differently, so you’ll need to calibrate your pin meter to the species you’re testing before taking readings.
Set the meter’s species calibration to match the wood or consult its correction chart. Drive pins properly, take multiple spots, and apply any moisture adjustments the chart recommends.
Record settings and conditions so future readings stay consistent and reliable.
Interpreting Moisture Readings
Once you’ve calibrated for species and driven the pins correctly, read the meter display and compare the value to the acceptable moisture range for that wood and application.
You’ll note moisture impact on finish adhesion and structural safety; trust consistent reading accuracy by testing multiple spots and depths.
- Take at least three readings spaced across the piece
- Record moisture and location
- Recheck after environmental changes
How to Take Readings With a Pinless Moisture Meter
Although it doesn’t pierce the wood, a pinless moisture meter reads moisture through a sensor pad you press firmly against the surface, so you’ll get quick, noninvasive measurements across a wider area. Use pinless advantages and proper reading techniques: hold flat, move slowly, average multiple spots, avoid edges, note temperature.
| Step | Action |
|---|---|
| 1 | Press firmly |
| 2 | Hold flat |
| 3 | Sweep slowly |
| 4 | Avoid edges |
| 5 | Average spots |
Compare Pin and Pinless Readings: Reconcile Differences
When comparing pin and pinless readings, you should first understand that they use different measurement principles—pins read electrical resistance through depth, while pinless uses a sensor field near the surface.
Account for surface conditions like coatings, dirt, or uneven grain that can skew one method more than the other.
Cross-check suspicious results, calibrate your meter if needed, and use both methods together to get a reliable moisture profile.
Understand Measurement Principles
You’ll often see different readings from pin and pinless meters because they measure moisture in different ways: pins read electrical resistance between two points and give a localized, contact-based value, while pinless devices use electromagnetic signals to scan a broader area below the surface.
Understand how measurement accuracy and wood types affect results, then:
- Note depth and area differences
- Calibrate for species
- Cross-check readings
Account For Surface Conditions
Having compared pin and pinless meters and adjusted for species and depth, next focus on how surface conditions can skew readings and how to reconcile those differences.
You’ll inspect surface preparation—clean, dry, and flat surfaces reduce false highs.
Compare readings: pins probe core, pinless senses near-surface; note moisture effects from coatings or contaminants.
Adjust interpretation accordingly and document discrepancies.
Cross-Check And Calibrate
Several quick cross-checks between pin and pinless meters will help you spot inconsistencies and calibrate expectations. You should compare readings on the same spot, adjust for depth differences, and apply basic calibration techniques to reconcile results.
Regular checks preserve meter accuracy and confidence before painting or construction.
- Test identical locations
- Account for sensing depth
- Use known-moisture references
How to Calibrate and Verify Your Moisture Meter
Before you take measurements for a project, calibrate and verify your meter so you can trust its readings and avoid costly mistakes. Use simple calibration techniques and verification methods: check with known-moisture blocks, adjust per manufacturer, and log results. Quick table:
| Step | Action |
|---|---|
| 1 | Set zero/reference |
| 2 | Test known sample |
| 3 | Record and adjust |
Common Measurement Errors and How to Avoid Them
When you use a moisture meter, watch for common mistakes that can skew readings: wrong probe placement, extreme surface temperatures, and misreading the display.
Place pins or the sensor over representative grain and avoid edges or knots.
Also account for temperature and read the meter according to the manufacturer’s guidance so you interpret values correctly.
Incorrect Probe Placement
If you stick the probes in the wrong place, your meter can give you readings that don’t reflect the wood’s true moisture content.
You should focus on proper probe positioning to guarantee testing accuracy: insert probes fully into heartwood, avoid knots and end grain, and take multiple readings across the board for consistency.
- Heartwood vs sapwood
- Avoid knots
- Multiple spots
Surface Temperature Effects
Because a meter senses electrical or dielectric properties at the surface, the temperature of the wood can skew readings, so you need to account for surface temperature to get accurate moisture measurements.
Measure and note wood temperature, avoid extreme cold or heat, and let acclimation occur.
Remember temperature impact can mimic moisture changes; remove surface insulation like tapes or coatings before testing.
Reading Interpretation Errors
Although the meter gives a quick number, you still need to interpret that reading carefully to avoid mistakes: you should check meter calibration, confirm reading accuracy with multiple spots, and account for wood species and temperature.
- Re-test different areas to spot inconsistencies.
- Compare to a calibrated reference or hygrometer.
- Note surface conditions and temperature before trusting a single reading.
How Environmental Conditions Affect Moisture Readings
When you take readings, remember that temperature, humidity, and airflow all change how a wood moisture meter behaves, so you’ll need to account for the environment to get accurate results.
You should let wood acclimate, note moisture impact from recent weather, and avoid direct drafts or sun.
Track seasonal variations and record conditions so you can interpret spikes or drops correctly.
Ideal Moisture Ranges for Interior, Exterior, and Structural Wood
Now that you’ve considered how temperature, humidity, and airflow influence readings, you’ll want to compare those measurements to target moisture ranges so you can judge whether wood is safe to use.
Now compare your readings to target moisture ranges to determine whether the wood is safe to use.
You should aim for ideal moisture levels aligned with regional moisture content standards. Check specific targets before installation:
- Interior trim: 6–9% typical
- Exterior siding: 9–14%
- Structural lumber: 12–19%
What Moisture Readings Mean for Painting, Staining, and Sealing
If you’re planning to paint, stain, or seal wood, the moisture reading tells you whether coatings will adhere and cure properly; too much moisture leads to blistering, peeling, or a tacky finish, while too little can cause cracking and poor penetration.
Use readings to adjust painting techniques, choose staining tips and sealing methods suited to wood types, and prevent moisture impact on finish longevity.
When to Delay Painting or Installation Based on Readings
Because moisture affects adhesion and curing, you should delay painting or installing trim whenever readings exceed recommended levels for your coating or the surrounding materials.
If moisture readings exceed manufacturer recommendations, wait—moisture can compromise adhesion and curing, so retest first.
Check the moisture threshold for your product, account for environmental factors like humidity and temperature, and recheck before proceeding.
- Verify product-specific moisture threshold
- Monitor environmental factors (humidity, temp)
- Re-test until readings fall within range
How Long to Acclimate New Lumber Before Installation
When you bring new lumber into a conditioned space, let it sit until its moisture content matches the room and the materials it’ll meet, typically 48–72 hours for kiln-dried boards and up to several weeks for green or pallet lumber.
Check various lumber types with your meter, stagger stacks for airflow, and confirm stability before fastening. That acclimation period prevents warping and gaps.
Troubleshooting Unexpected High or Low Moisture Readings
Although a surprising reading can be frustrating, you can usually pinpoint why your meter shows unusually high or low moisture by checking a few common causes: probe contact, calibration, wood species and density, surface moisture vs. internal moisture, and environmental factors like temperature or recent weather.
Check moisture fluctuations with proper testing techniques and try:
- Re-seat probes firmly and retest.
- Calibrate per manual.
- Compare multiple sites and times.
Using Moisture Meters on Engineered and Laminated Wood
If your work involves engineered or laminated wood, remember these products behave differently than solid lumber and need tailored testing methods. Their layered construction, adhesives, and veneer thickness can all affect readings, so adjust probe placement and meter type accordingly.
You should test multiple spots, target core layers when possible, interpret surface readings cautiously, and account for glue lines. Calibrate for species and board thickness.
Best Moisture Meters and Buying Tips for Tradespeople
Because you rely on quick, accurate readings on job sites, pick a meter that matches the materials and conditions you work with most often.
Pick a meter that fits the materials and conditions you work with for fast, accurate jobsite readings.
Compare moisture meter brands, check essential features, and prioritize durability, battery life, and accuracy.
Choose pin or pinless based on surfaces. Consider warranty and calibration options.
- Durable casing
- Clear display
- Reliable calibration
Add Moisture Checks to Your Pre-Paint Checklist and Records
When you add moisture checks to your pre-paint checklist and records, you’ll catch damp wood before it ruins a finish and avoid costly rework.
Include a pre-paint inspection step with meter readings, acceptable moisture ranges, locations tested, and date/time.
Keep moisture documentation with photos and signatures.
Review records before starting work so you won’t paint over hidden dampness.
Frequently Asked Questions
Can Moisture Meters Detect Decay or Rot Inside Wood?
Yes — you can use a moisture meter to aid wood decay and rot detection, but it won’t spot internal rot reliably; you’ll detect elevated moisture that suggests decay, then you’ll inspect further or use probes/imaging for confirmation.
Do Finishes (Varnish/Paint) Interfere With Pinless Readings?
Yes — wood finish impact can slightly reduce pinless accuracy, but you’ll still get usable readings. You’ll want to calibrate, test on an uncoated area when possible, and account for thin coatings versus heavy varnish layers.
Can Moisture Meters Be Used on Non-Wood Building Materials?
Yes — you can use moisture meters on non wood materials, though accuracy varies. You’ll find alternative applications for concrete, drywall, masonry and composites; check meter type, calibration, and manufacturer guidelines for reliable readings.
How Do Wood Moisture Meters Perform in Very Cold Climates?
Like frost on glass, you’ll see readings shift in very cold climates: thermal conductivity effects and moisture content variations can skew results, so you’ll need temperature compensation, allow wood to acclimate, and use meters rated for cold.
Are There Safety Risks Using Pins Near Electrical Wiring?
Yes — you’ll face pin safety concerns and electrical hazards if pins contact wiring; don’t probe blindly, turn power off, use insulated pins or non‑contact meters, and wear proper PPE to avoid shocks and short circuits.
Conclusion
You’re right to check moisture — painting or building on wet wood risks peeling, swelling, and structural failure. Test with the right meter for the job, and don’t assume kiln-dried means ready; pockets of retained moisture can hide under surfaces. Try both pin and pinless readings when in doubt: if they disagree, investigate further (surface finish, laminated layers, or trapped moisture). Make moisture checks routine, record readings, and trust patterns over single tests.