Can You Use Wall Paint on Canvas? Artist Guide Explained
You can use wall paint on canvas for practice, murals, or large textured pieces, but expect trade-offs: less pigment refinement, weaker archival binders, potential fading or cracking, and questioned resale value. Prime and gesso the canvas, apply thin layers, test adhesion and colorfastness, and seal with an appropriate varnish to help durability. For commissioned or museum-quality work, stick with artist-grade paints, and keep going to see preparation, techniques, and sale-ready tips.
Can Wall Paint Replace Artist Paint on Canvas?
Can wall paint replace artist paint on canvas? You can, but expect trade-offs: wall paint often lacks fine pigments and binder formulation, so canvas texture may not accept layers or detail the same way.
Paint longevity can be shorter without archival binders and UV stability. If you choose wall paint, test adhesion, seal properly, and avoid relying on it for museum-quality permanence.
Quick Workflow: Wall Paint on Canvas, Step-by-Step
Start by prepping your canvas—clean, prime, and sand lightly so the wall paint adheres evenly.
Thin the paint as needed and build color with multiple thin layers rather than one thick coat.
You’ll save drying time and get more control over texture and opacity.
Prep Canvas Surface
Before you apply wall paint, make sure your canvas is clean, taut, and primed so the paint adheres evenly and colors stay true.
For canvas preparation, wipe dust, tighten or restretch if loose, and sand any rough spots lightly.
Apply a quality gesso or primer for proper surface priming, let it dry fully, and inspect for uniform texture before painting.
Thin And Layer
With your primed canvas ready, thin your wall paint slightly to improve flow and avoid heavy buildup that can crack or obscure texture.
You’ll apply thin layers using layering techniques to control paint consistency and drying times.
Vary application styles for texture variation and surface effects, use blending methods to manage color saturation, and refine finish quality as layers cure.
Wall Paint vs. Artist Acrylics: Basic Chemistry
When you compare wall paint and artist acrylics, focus first on their binders and pigments: wall paints often use different polymer emulsions and tinting systems than artist-grade acrylics, which affects flexibility and lightfastness.
Also consider solvents and additives — wall paints may contain coalescing agents, thickeners, or mildew inhibitors that acrylic artists don’t typically want on canvas.
Understanding these basic chemistry differences helps you decide how each will behave and age on your support.
Binder And Pigment Differences
Although both wall paints and artist acrylics look similar on the surface, their binders and pigments behave very differently, and that changes how they perform on canvas.
You’ll notice different binder types affect flexibility and adhesion, while pigment sources influence lightfastness and tinting strength.
- flexible vs rigid binders
- synthetic vs artist-grade pigments
- opacity differences
- long-term durability
- archival concerns
Solvent And Additive Chemistry
Because wall paints and artist acrylics rely on different solvents and additives, you’ll notice distinct handling and drying behaviors when you use them on canvas.
You’ll encounter varied solvent types—water, co-solvents, or glycol ethers—that affect open time and penetration.
Additive functions in wall paint aim at flow, mildew resistance, and leveling, while artist acrylics use conservation-friendly additives to preserve flexibility and archival stability.
Oil-Based Wall Paint vs. Oil Artist Paint
If you’re considering oil-based wall paint as a shortcut to traditional oil artists’ paint, know they’re formulated for different jobs: wall paints prioritize coverage, durability, and ease of application on large surfaces, while artist oils are engineered for pigment load, buttery handling, and archival stability on canvas.
Oil-based wall paint isn’t a substitute for artists’ oils—formulated for coverage and durability, not pigment load or archival quality
- oil paint characteristics: pigment concentration, binder quality
- wall paint limitations for fine art
- drying and yellowing differences
- flexibility and adhesion concerns
- longevity and conservation implications
How Sheen and Finish Change Results
Pay attention to sheen levels because matte, eggshell, satin, and gloss will reflect light differently and change how colors read on your canvas.
The finish also affects texture—higher gloss can smooth and amplify brushwork while matte can hide surface irregularities.
Before you commit, test the paint and finish together so you know how they’ll interact with your technique.
Sheen Levels Explained
Sheen levels—matte, satin, eggshell, semi-gloss, and gloss—affect how wall paint looks and behaves on canvas, so choosing the right finish changes both appearance and durability.
You’ll weigh sheen types and sheen effects: matte hides flaws, satin adds depth, eggshell balances, semi-gloss highlights color, gloss intensifies shine.
- Matte: low reflectance
- Satin: subtle sheen
- Eggshell: soft glow
- Semi-gloss: bright
- Gloss: high shine
Finish Effects On Texture
The finish you pick changes not just shine but how texture reads and photographs on canvas.
So consider how each sheen will emphasize or soften brushstrokes, canvas tooth, and layering. You’ll use gloss to heighten texture contrast and satin to moderate highlights.
Matte flattens depth but unifies color.
Plan finish layering—seal areas selectively to control reflections and preserve desired tactile effects.
Which Canvases Best Accept Wall Paint
Canvas choice matters when you’re using wall paint, because not all fabrics and preparations will hold color, texture, or bonding the same way.
Canvas choice matters with wall paint — different fabrics and preparations affect color, texture, and adhesion.
You’ll want sturdy, tightly woven fabrics for consistent canvas texture and reliable paint adhesion. Consider weight, weave, and backing to prevent sagging or bleeding.
- Cotton duck, heavy
- Linen, finely woven
- Stretched prepped canvas
- Sturdy synthetic blends
- Linen-cotton hybrids
Primed vs. Unprimed Canvas: Prep Steps
Decide whether to prime or work raw before you paint, because that choice determines prep steps, adhesion, and final appearance.
If you prime, sand lightly, clean dust, and apply chosen priming options for even absorbency.
If you work unprimed, stretch taut, size with a clear barrier if desired, and use appropriate canvas preparation techniques to test adhesion and color shift before committing.
Why Gesso Matters for Wall Paint
You’ll want to prime your canvas with gesso because it protects the surface from the oils and binders in wall paint that can degrade fibers over time.
Gesso also creates a slightly toothy ground so the paint grips better and won’t flake or slide.
Skipping it risks poor adhesion and a shorter-lived artwork.
Protects Canvas Surface
Prime the surface: gesso creates a barrier that stops wall paint from soaking into the canvas fibers, so your colors stay vibrant and the fabric won’t become stiff or brittle over time.
You’ll use canvas protection methods and surface sealing techniques to preserve texture and longevity.
- Prevents paint bleed
- Reduces fabric wear
- Maintains color depth
- Controls absorption
- Eases varnishing
Improves Paint Adhesion
1 key reason to gesso a canvas before using wall paint is that it creates a toothy, uniform surface that helps the paint grab and stay put; without it, wall paints—formulated for smooth drywall—can slide, pool, or flake off fibrous canvas.
You’ll improve paint adhesion techniques and rely on proven surface preparation methods, ensuring layers bond, dry evenly, and resist peeling over time.
How to Thin Wall Paint for Better Brushwork
When your wall paint feels too thick for smooth brushstrokes, thin it carefully to improve flow and control without weakening coverage.
If your wall paint drags, thin it gently to restore smooth brushstrokes while preserving solid coverage.
You’ll adjust paint viscosity with small water or acrylic medium additions, test brush consistency on scrap canvas, and stir thoroughly between coats to keep color and opacity consistent.
- Add water sparingly
- Use acrylic flow medium
- Mix thoroughly
- Test on scrap
- Maintain opacity
Best Brushes and Tools for Wall Paint
You’ll want to know which brush shapes and bristle types work best with wall paint on canvas so your strokes stay predictable.
I’ll also cover essential auxiliary tools — rollers, palette knives, and mixing containers — that make application and cleanup easier.
With the right kit, you’ll get smoother coverage and cleaner edges.
Brush Types Overview
Someone who switches from house walls to canvas often finds the right brush makes all the difference.
You’ll learn basic brush techniques and simple brush maintenance to adapt. Pick shapes and sizes that match scale and finish; polyester/nylon handle acrylics well.
Choose bristle stiffness for texture control and softer filaments for glazing. Consider balance and durability.
- Flat
- Round
- Filbert
- Angled
- Mop
Auxiliary Tools Needed
A few well-chosen tools beyond brushes will make switching from walls to canvas far smoother, and you’ll want ones that control paint flow, protect the surface, and speed cleanup.
Use a roller for base coats, foam brushes for edges, a palette knife for texture, masking tape for clean lines, sanding block for canvas preparation, and a spray bottle to thin and mist during paint application.
Layering and Drying Behavior to Expect
When you layer wall paint on canvas, expect faster surface drying but slower full cure times compared with traditional artist acrylics.
So plan work in stages and don’t rush varnishing. Use thin coats and controlled layering techniques to manage drying times and adhesion.
- Apply thin layers
- Wait longer between coats
- Test tack before next layer
- Use low humidity workspace
- Avoid heavy impasto
Will Wall Paint Crack or Peel Over Time?
Whether wall paint will crack or peel on canvas depends largely on the paint’s flexibility and how well you prepare the surface.
If the paint is rigid and the canvas moves or flexes, cracks can form, so choosing a flexible acrylic-based option helps.
Proper priming and cleaning of the canvas reduce adhesion problems and cut the risk of peeling over time.
Paint Flexibility Matters
Because canvas flexes and moves every time you handle or store it, paint that isn’t flexible can crack or peel as the fibers bend.
You should choose wall paints with good paint flexibility so your artistic expression stays intact, allowing reliable color blending and preserving surface texture without brittleness.
- Test bend resistance
- Use flexible formulas
- Layer thoughtfully
- Monitor drying times
- Store flat when possible
Surface Preparation Importance
Preparation matters: if you skip proper surface prep, wall paint on canvas is far more likely to crack, peel, or flake as the fibers move.
You should clean, tighten, and prime to control surface texture and seal raw fibers.
Test paint compatibility with your chosen primer and a small swatch.
Proper prep reduces movement-related failure and extends the painting’s lifespan.
Lightfastness and Fading Risks
Although wall paints can look fine at first, they often don’t offer the same lightfastness as artist-grade pigments, so your colors can fade or shift over months and years.
Wall paints may appear fine initially but often lack artist-grade lightfastness, causing colors to fade or shift over time.
You should check lightfastness standards, use UV-protective varnish, and practice fading prevention to preserve work.
- Verify pigment ratings
- Limit UV exposure
- Use archival varnish
- Store properly
- Monitor color changes
Quick Adhesion Tests to Try First
Before you commit to a full piece, try a small patch test on a corner of the canvas to see how the wall paint behaves.
Use an adhesion tape check to lift a strip and confirm the paint sticks without flaking.
Also note drying time observation—record how long it takes to cure so you can adjust layers and handling.
Small Patch Test
Start with a tiny patch test on a hidden corner of your primed canvas to see how the wall paint adheres and behaves—this quick trial will save you from larger problems later.
Try small swatches to evaluate color vibrancy, texture variation, drying speed, application technique, surface compatibility, finish durability, artistic intent, environmental impact, cost efficiency, and creative experimentation.
- Compare tones
- Feel texture
- Time drying
- Test tools
- Note cleanup
Adhesion Tape Check
After your small patch tests give you a basic sense of how the wall paint behaves, try an adhesion tape check to verify how well the paint sticks to the canvas.
Press a strong tape strip, smooth it, then pull sharply. Record failures and successes to compare adhesion techniques.
Test several tape options (masking, gaffer, packing) to find the most reliable choice for your surface.
Drying Time Observation
While the paint may look dry to the touch, you’ll want to time short adhesion checks at several intervals to see when it truly bonds to canvas—try a gentle tape peel at 15, 30, and 60 minutes, then at a few hours, and note when adhesive resistance stops lifting pigment.
- Record tape peel results
- Compare drying techniques
- Note temperature/humidity
- Repeat on primed vs unprimed
- Adjust for environmental factors
Safely Mixing Wall Paint With Artist Acrylics
Because wall paint and artist acrylics have different formulations, you should approach mixing them cautiously to avoid adhesion, drying, and longevity issues.
Because wall paint and artist acrylics differ, mix them cautiously to prevent adhesion, drying, and longevity problems.
Follow safety precautions: work in ventilation, wear gloves, and test small batches.
Use controlled mixing techniques and viscosity adjustments with proper mediums.
Check paint compatibility on scrap canvas, and choose brush selection that matches mixed consistency to maintain application control and finish.
Fixing Brush Marks, Orange Peel, and Texture
Once you’ve confirmed compatibility and mixed carefully, you’ll want to address surface appearance—brush marks, orange peel, and unwanted texture can ruin a painting’s look even if the paint bonds well.
- Test sanding to flatten orange peel and refine texture enhancement.
- Use a softer brush for fewer brush mark solutions.
- Thin coats reduce ridges.
- Light scumble or glaze can unify surface.
- Finish with matte or satin varnish to hide flaws.
Achieving Fine Details and Glazing Techniques
Before you start adding fine lines, make sure the canvas is primed smooth and any texture is minimized so brushes can lay down controlled strokes.
Use very thin, diluted glazes to build color without obscuring underlayers, testing opacity as you go.
Work in successive transparent layers, allowing each to dry fully so edges stay crisp and colors remain clear.
Preparing Surface For Detail
To get crisp fine lines and smooth glazing with wall paint on canvas, you’ll want a surface that’s tight, toothy, and uniformly primed so the paint behaves predictably; sand any rough patches, apply a couple of thin gesso layers (sanding lightly between coats), and use a final very fine sand or brush finish where you’ll need the most detail.
- Test surface texture
- Level imperfections
- Build consistent tooth
- Target detail enhancement zones
- Seal edges and corners
Thin Glaze Application
Now that your surface is prepped—tight, toothy, and evenly primed—you can start glazing with thin, controlled layers that build color and fine detail without obscuring texture.
Use diluted wall paint and a soft brush for subtle glaze techniques, working wet-on-dry to maintain edges.
Focus on precise strokes, minimal pigment, and gradual color layering to refine highlights, shadows, and delicate shifts.
Layering And Dry Times
When you build thin layers of diluted wall paint, timing matters as much as brush control: let each glaze reach a tacky-dry state so it accepts the next translucent wash without lifting, and wait longer—fully dry—before scumbling or adding opaque detail.
You’ll use drying techniques and layering strategies to control translucency, edge sharpness, and pigment depth.
- Thin glazes
- Tacky-dry checks
- Full cure waits
- Scumble last
- Local details
Sealing and Varnishing Wall-Painted Canvases
Although wall paint can look great on canvas straight away, sealing and varnishing it protects the surface, evens out the finish, and lets you control sheen and longevity. You should use proper sealing techniques and compare varnish options: spray for even coats, brush-on for control. Choose removable or permanent varnish based on use.
| Type | Finish | Use |
|---|---|---|
| Spray | Matte | Large areas |
| Brush | Gloss | Detail work |
| Removable | Satin | Exhibits |
Conservation Concerns When Selling Works
When you sell canvases painted with wall paint, be upfront about potential long-term durability risks like fading, cracking, or adhesion problems.
Understand that some buyers and galleries may hesitate because wall paint isn’t a traditional fine-art medium, so you’ll need to provide documentation or testing to build confidence.
Clear labeling and a recommended care plan can help mitigate market acceptance issues and protect both you and the buyer.
Long-Term Durability Risks
Because wall paints aren’t formulated for flexible, absorbent supports like stretched canvas, you’ll face distinct long-term durability risks that affect resale and conservation.
Consider durability factors and likely long-term effects on structure, appearance, and treatment options.
- Cracking from poor flexibility
- Delamination from weak adhesion
- Yellowing or fading pigments
- Increased dirt attraction
- Limited conservation treatments
Market Acceptance Issues
If you plan to sell pieces painted with wall paint, expect knowledgeable buyers and galleries to question their longevity and resale value, since conservators often advise against non-artist-grade materials.
You’ll face market perception issues: consumer preferences lean toward archival works, and quality concerns may lower bids.
Be prepared to defend artistic integrity, document materials, and offer restoration options to reassure collectors.
Cost Comparison: Wall Paint vs. Artist Paint
Budget matters a lot when you’re choosing between wall paint and artist paint. Wall paint usually costs less per gallon and covers more surface area, while artist-grade paints charge for higher pigment concentration, lightfastness, and archival quality.
You’ll weigh cost efficiency against longevity in a straightforward quality comparison.
- Lower upfront cost
- Pigment strength
- Coverage per container
- Longevity/archival value
- Replacement frequency
When Wall Paint Is Fine for Practice Pieces
When you’re learning composition, color mixing, or brushing technique, wall paint can be a perfectly acceptable choice for practice pieces.
You’ll save money using budget friendly alternatives while testing ideas rapidly. Use larger brushes, thin layers, and quick studies to focus on form and color.
Treat these works as sketches for creative experimentation; don’t worry about archival permanence or fine finishing.
When to Avoid Wall Paint for Commissions?
You can keep using wall paint for rough sketches, but steer clear of it for client commissions that need longevity, fine detail, or professional presentation.
Use wall paint for rough sketches, but avoid it for client commissions needing longevity, detail, or professional finish.
When following commission guidelines and managing client expectations, choose archival materials. Avoid wall paint if the piece must resist yellowing, varnishing, or gallery standards.
- durability concerns
- limited color fidelity
- varnish incompatibility
- archival requirements
- resale/value issues
Using Wall Paint for Large Canvases and Murals
If you’re tackling a large canvas or mural, wall paint can be a practical choice because it covers fast, comes in big formats, and stays affordable for big surfaces.
You’ll work quicker on large murals, block in color broadly, and experiment with creative techniques like gradients, stenciling, or textured rollers.
Seal your work and test adhesion on a small primed panel first.
VOCs and Safety: Environmental Considerations
Because many wall paints release volatile organic compounds (VOCs), you should consider their impact on indoor air and long-term health before using them on canvas.
Because many wall paints emit VOCs, consider their indoor air and long-term health impacts before using on canvas.
You should follow VOC regulations, reduce paint emissions, and pick eco friendly options.
Observe safety precautions and disposal guidelines to limit environmental impact and health risks.
- indoor air quality
- paint emissions
- VOC regulations
- disposal guidelines
- eco friendly options
Color Matching Limits and Pigment Gaps
Many wall paints can’t reproduce the full range of artist-grade pigments, so you’ll hit limits when matching certain hues or subtle shifts in chroma and saturation.
You’ll need practical color matching techniques—layering, glazing, or tinting with artist pigments—to approach desired tones.
Expect pigment selection challenges: wall paint formulas lack some single-pigment purity, so plan compromises and test mixes before committing to a final composition.
How to Test Colorfastness at Home
Want to be sure your wall-paint-on-canvas work will hold up over time?
Use simple colorfastness methods for quick home testing: apply small swatches, let cure, rub with damp cloth, expose to sunlight, and record results.
This practical routine helps you spot fading, staining, or bleeding before committing to a full piece, saving time and avoiding surprises.
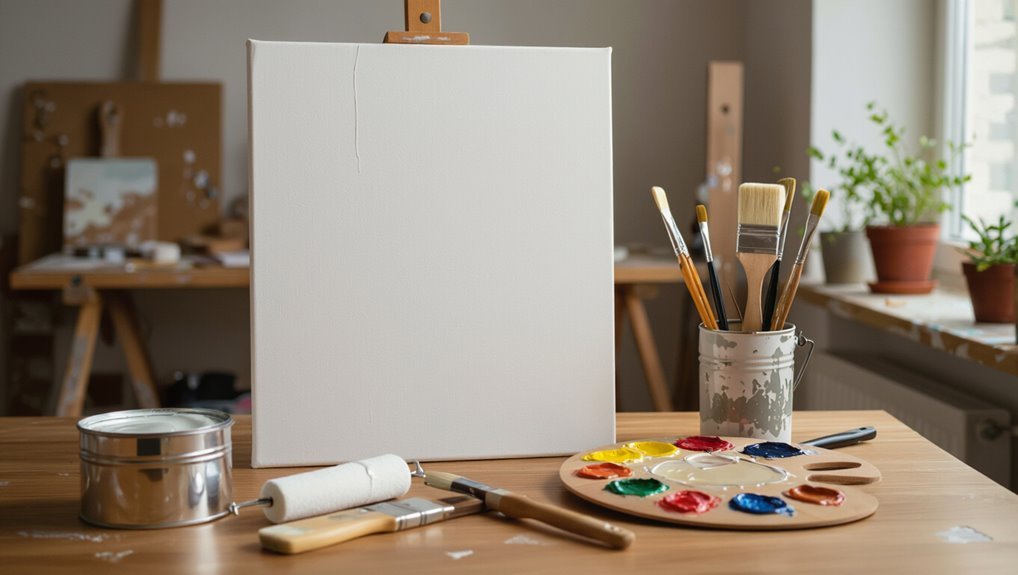
Supplies Checklist for Wall Painting on Canvas
Now that you’ve checked colorfastness, gather the right tools so your wall paint behaves on canvas.
You’ll need assorted brushes, rollers, trays, and a palette knife.
Prep supplies: gesso or primer to control paint absorption, sandpaper for smoothing canvas textures, masking tape, rags, and a spray sealer.
Include water, a mixing medium, and gloves for clean, controlled results.
Case Studies: Artists Who Used Wall Paint
Case studies show how wall paint can shift from a DIY material to a deliberate artistic choice, and you’ll see how different practitioners solved its technical and aesthetic challenges.
You learn practical wall paint techniques and witness varied artistic expression across projects.
- Large-scale murals adapted to canvas
- Layering and glazing hacks
- Texture manipulation with additives
- Color-matching for exhibitions
- Preservation and framing strategies
Common Mistakes to Avoid With Wall Paint
Seeing how artists adapted wall paint for canvas helps highlight pitfalls you’ll want to avoid when working with it yourself.
Don’t assume wall paint durability equals archival quality; it can yellow or flake over time.
Avoid applying thick coats that obscure canvas texture or cause cracking.
Prime properly, test adhesion, and use compatible varnishes so your pieces last without unexpected issues.
Alternatives: Choose Student-Grade Acrylics Instead
While wall paint can work in a pinch, you’ll get more reliable results and fewer long-term surprises by choosing student-grade acrylics instead. You’ll enjoy better color permanence, flexibility, and compatibility with canvases.
Look for student grade options as budget friendly alternatives that still perform.
- consistent pigments
- faster drying
- easier layering
- non-toxic formulas
- wide color ranges
How to Switch Your Studio to Artist Paints
Now that you’ve seen the benefits of student-grade acrylics over wall paint, it’s a good time to upgrade your studio kit to artist-grade supplies.
Purge low-quality cans, label new tubes, and plan studio organization around workflow. Invest in proper paint storage—opaque, sealed containers and racks to prevent drying.
Test colors, adjust palette choices, and commit to consistent mediums and brushes for professional results.
Questions to Ask Before Selling Wall-Paint Art
Before you list a piece painted with wall paint, ask who’ll buy it and why: consider reputation, pricing, and purpose. Balance artistic integrity with commercial appeal and watch market trends.
- Who values the technique?
- Is preservation acceptable?
- What’s fair pricing?
- Does it fit current trends?
- How will you disclose materials?
Quick Decision Checklist: Use Wall Paint or Not?
You’ve weighed buyer expectations and disclosure needs, so next ask quick practical questions to decide if wall paint suits a piece:
Is the canvas texture compatible with the paint’s finish?
Is the canvas texture compatible with your chosen paint finish—smooth enough for detail or textured for expressive effects?
Will paint adhesion hold over time or need priming?
Do you want flexibility, colorfastness, or low VOCs?
Can you meet buyer expectations and label materials clearly before sale?
Final Verdict: Should You Use Wall Paint on Canvas?
Ultimately, should you use wall paint on canvas? You can for practice or bold textures, but weigh canvas texture and long-term paint durability.
Use proper primers and varnish if you proceed.
- Test adhesion first
- Prime to protect canvas texture
- Expect lower paint durability than artist acrylics
- Varnish to seal
- Reserve wall paint for experiments, not archival work
Frequently Asked Questions
Can Wall Paint Be Used for Mixed-Media Collage Elements on Canvas?
Yes — you can use wall paint for mixed-media collage elements on canvas, but you’ll prep surfaces, seal porous bits, and test adhesion; you’ll balance collage techniques with paint durability to guarantee layers stick and endure over time.
Will Insurance Cover Damage to Wall-Painted Canvases in Transit?
Yes—you can file insurance claims if damage occurs, but coverage varies; think of transit protection as a safety net catching fragile wings. You’ll need documentation, proof of value, and proper packaging to improve success.
Do Tax Rules Differ When Selling Wall-Paint Artworks Versus Artist-Paint Works?
Yes — tax rules generally don’t change based on paint type; you’ll face the same reporting, VAT/sales tax, and income obligations, though tax implications and pricing differences can affect deductions, cost basis, and how you set retail prices.
Can Wall Paint Layers Be Safely Cold-Pressed or Flattened After Drying?
Yes — you can sometimes cold-press layers after drying, but you’ll need to respect drying times and test cold press techniques on scraps first, since flexibility, adhesion, and potential cracking vary with wall paint formulations.
Are There Gallery Display Restrictions for Wall-Painted Canvas Pieces?
Yes — you’ll face few strict limits, though some venues demand gallery quality standards; museums or juried shows may restrict finishes, framing, or materials. You’ll choose display options smartly to meet conservators’ and curators’ expectations.
Conclusion
You can—sometimes. You’ll mix a nostalgic can of wall paint with canvases, and by coincidence the first brushstroke will remind you of the sunlit hallway you once painted; practical, cheap, forgiving. But you’ll also notice cracking, odd sheen, and archival doubt over time, so unless you’re experimenting or selling casually, you’ll likely switch to artist paints. Trust your intent: for practice and bold décor it’s fine; for longevity and galleries, choose proper artist-grade mediums.