How to Get Rid of Mold on Painted Drywall (And Keep It From Coming Back)
You can remove mold from painted drywall yourself by isolating the area, wearing an N95, gloves and goggles, and cleaning with detergent then a biocide or hydrogen peroxide; rinse, dry thoroughly with fans/dehumidifiers, and replace badly stained or soft drywall. Find and fix the moisture source—leaks, condensation or poor ventilation—then monitor humidity under 50% to keep spores from returning. Follow containment and replacement rules, and keep going for step-by-step tips and prevention tricks.
How to Get Rid of Mold on Painted Drywall (Quick Answer)
If the paint is intact and the mold is small, you can scrub the area with a detergent solution, dry it thoroughly, and repaint with mold-resistant primer and paint to prevent recurrence.
Wear gloves and a mask, and call a professional if the mold covers more than about 10 square feet, has penetrated the drywall, or if you have health concerns.
For minor spots you can DIY, but get expert help for widespread, recurring, or toxic-looking mold.
Fast summary of steps to remove mold and prevent recurrence
Start by containing the area and protecting yourself: open windows, run a fan toward an exterior vent, wear an N95 respirator, gloves, and goggles, and tape plastic sheeting around the work zone to limit spores.
Follow these steps for how to get rid of mold on painted drywall:
- Clean with detergent, scrub gently.
- Disinfect with diluted bleach or commercial cleaner.
- Dry thoroughly; fix the moisture source.
- Prime and repaint with mold-resistant products.
When to call a professional vs. DIY
Those DIY steps will handle small, surface mold on painted drywall, but you’ll want to call a professional when the problem is bigger, hazardous, or recurring.
- Extensive growth over 10 sq ft.
- Hidden mold after leaks or floods.
- Health symptoms or toxic mold concerns.
- Repeated regrowth despite fixes.
If any apply, get a pro for testing, safe removal, and fixing underlying moisture.
Understanding Mold on Painted Drywall
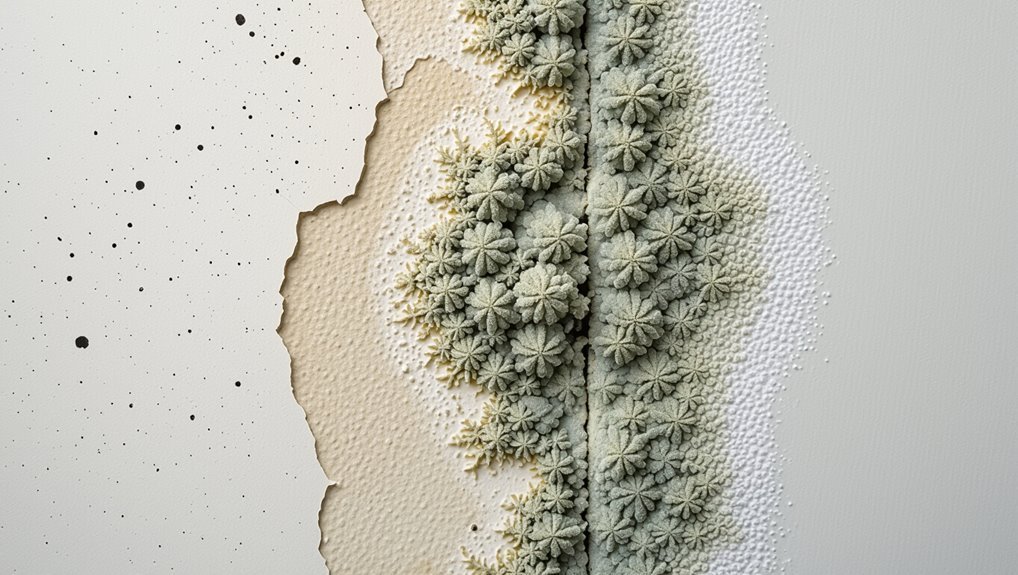
You’ll usually spot mold on painted drywall as discolored spots or fuzzy patches that range from black and green to white or pink.
Common household culprits include Aspergillus, Penicillium, Cladosporium, and Stachybotrys, each with slightly different looks and health risks.
Mold forms when moisture from leaks, high humidity, condensation, or poor ventilation soaks into the paint and drywall, creating the right environment for growth.
What mold on painted drywall looks like
Paint on drywall can hide mold until it becomes obvious, so knowing what to look for helps you spot problems early.
You’ll see small dark specks, fuzzy patches, or discolored blotches that won’t wipe off. Mold may cause bubbling or peeling paint, musty odors, and occasional water stains nearby.
Check corners, ceilings, and behind furniture for subtle growth.
Common types of household mold that affect drywall
Mold comes in several common varieties that regularly show up on painted drywall, and knowing their differences helps you identify and treat infestations correctly.
You’ll commonly see black (Stachybotrys or Aspergillus), green (Cladosporium), white (Penicillium or yeast-like species), and rusty/orange (Aureobasidium).
Each has distinct color, texture, and growth patterns, so match appearance to safe removal methods and monitoring.
Why mold grows on painted drywall (causes and moisture sources)
Knowing the type of mold on your drywall helps you spot where it’s likely coming from and how it behaves, but understanding why it grows is what lets you stop it.
You’ll want to check moisture sources and conditions that favor spores:
- Leaks from pipes or roofs
- High indoor humidity
- Condensation on cold walls
- Poor ventilation in bathrooms/kitchens
Health and Safety Considerations
Mold can cause respiratory issues, allergies, and other health problems, so you should treat any infestation seriously.
Wear proper PPE—N95 or better respirator, gloves, and eye protection—and keep the area well ventilated while you work.
For large or suspected toxic mold problems, contain the area and call a professional to avoid spreading spores or risking your health.
Health risks from mold exposure
Exposure to mold on drywall can trigger a range of health problems, from mild allergic reactions like sneezing and itchy eyes to more serious respiratory issues such as asthma attacks or chronic sinusitis, especially if you’re sensitive or have a weakened immune system.
You may also experience headaches, skin irritation, persistent cough, or worsening of existing lung conditions; prolonged exposure can increase infection risk.
Personal protective equipment (PPE) and ventilation requirements
Because disturbed drywall can release a lot of spores and dust, you should wear appropriate PPE and set up good ventilation before you start remediation.
Use PPE, limit exposure, and vent outward. Follow these essentials:
- N95 or P100 respirator
- Disposable gloves and eye protection
- Long sleeves and disposable coveralls
- Exhaust fan with window venting or inline blower
Containment and safety for large or toxic infestations
If you’re facing a large or potentially toxic drywall infestation, you’ll need stricter containment and safety measures than for small patches.
Seal the room with plastic sheeting, create negative pressure with a HEPA-filtered fan, and post warning signs.
Don’t reuse contaminated HVAC; isolate and filter air.
Wear full PPE, bag waste securely, and call a certified remediation pro if spores spread beyond containment.
Tools, Materials, and Products You’ll Need
Before you start, make sure you’ve got the right tools and PPE—gloves, N95 or P100 respirator, eye protection, disposable coveralls, plastic sheeting, and a HEPA vacuum.
I’ll explain which cleaning solutions work best for light surface mold versus porous drywall remediation and when to reach for a fungicide or mold‑killing primer.
You’ll also learn when a HEPA vacuum is needed for cleanup and when it’s better to remove and replace the drywall.
Essential tools and PPE
You’ll need a concise set of tools, materials, and personal protective equipment to tackle mold on drywall safely and effectively—don’t try to improvise with household items alone.
- N95 or P100 respirator, safety goggles, nitrile gloves
- Disposable coveralls or old clothing and shoe covers
- Soft nylon brush, sponge, and bucket
- HEPA vacuum and heavy-duty garbage bags for disposal
Recommended cleaning solutions and when to use each
1 clear choice isn’t always best—pick the cleaning solution that matches the type and extent of the mold and the drywall’s condition. Use mild detergent for light surface growth, diluted bleach for non-porous paint, and specialized cleaners for stubborn stains. Wear PPE and test a small area first.
| Solution | Best for | Notes |
|---|---|---|
| Mild detergent | Light growth | Gentle |
| Bleach (diluted) | Painted non-porous | Test first |
| Enzyme cleaner | Stains/organic | Biodegradable |
| Commercial mold cleaner | Heavy staining | Follow label instructions |
When to use a HEPA vacuum, fungicide, or mold-killing primer
Because removing mold isn’t just about scrubbing, you’ll need the right tools at the right stage: use a HEPA vacuum first to capture dry spores after containment and before wet cleaning.
Apply a labeled fungicide for active, extensive, or porous infestations.
After repairs and drying, roll on a mold-killing primer to seal stains and inhibit regrowth.
Follow product instructions and safety precautions.
Step-by-Step Mold Removal from Painted Drywall (DIY)
Before you start, isolate the area, cover floors and furniture, and assess how deep the mold has penetrated.
For small, non-porous painted spots you can clean the surface; for porous or textured drywall you’ll follow a different treatment and may need to remove damaged sections.
After cleaning or repair, dry and monitor the wall, then use proper materials and techniques to prime and repaint.
Preparation: isolate area, protect surfaces, and assess damage
When you’re ready to remove mold from painted drywall, start by isolating the work area, protecting nearby surfaces, and evaluating how extensive the damage is so you can pick the right tools and safety gear.
- Seal doors and vents with plastic.
- Lay drop cloths and tape edges.
- Move furniture and cover belongings.
- Inspect mold size, texture, and paint condition to decide repair versus replacement.
Surface cleaning procedure for small, non-porous painted areas
Start by assembling your supplies—gloves, goggles, an N95 mask, a spray bottle with a mild detergent or a commercial mold cleaner, soft scrub brush or sponge, and clean towels—so you can work methodically and avoid cross-contamination.
Ventilate the room, test a hidden spot, spray lightly, wait a few minutes, scrub gently, blot with towels, rinse with clean water, and dry thoroughly to prevent recurrence.
Treatment for porous or textured painted drywall
If your painted drywall has a porous or textured finish, you’ll need a more thorough approach than surface cleaning because mold can sink into the paint and substrate.
Wear PPE, isolate the area, and gently remove loose texture.
Use a detergent scrub, then apply a biocide or hydrogen peroxide solution. Test a small area first.
If staining or deep growth remains, cut out and replace affected drywall.
Drying, monitoring, and verifying mold removal
After cleaning or replacing the damaged area, focus on fully drying and monitoring the space to prevent regrowth and confirm you’ve removed the mold.
- Run dehumidifiers and fans until surfaces are bone dry.
- Check moisture with a meter and document readings.
- Inspect weekly for discoloration, musty odor, or visible spots.
- Re-test with bleach swab or DIY mold test if signs return; act fast.
Repairing and repainting after mold removal (materials and techniques)
Once the area’s dry and you’ve confirmed the mold’s gone, you’ll need the right materials and a careful technique to restore the drywall surface so the repair blends and won’t invite regrowth.
Remove damaged paper, apply mold-resistant primer, patch with joint compound, sand smooth, re-prime exposed areas, and repaint with mildew-resistant paint.
Maintain humidity control and ventilation to prevent recurrence.
When to Replace Drywall Instead of Cleaning
If the drywall is crumbling, has extensive black or fuzzy growth, or the mold has soaked through more than a few square feet, you’ll need to replace it rather than clean it.
When that’s the case, you should seal off the area, wear proper PPE, and cut out the affected studs and panels to prevent spores spreading.
Dispose of contaminated drywall in heavy-duty bags, label them, and follow local regulations for moldy construction waste.
Signs replacement is necessary
When mold has deeply stained, crumbled, or softened the drywall, you should replace it rather than try to clean it; these signs mean the material’s structural integrity and safety are compromised.
Replace if mold covers more than a 10-square-foot area, if drywall smells persistently musty, if fasteners loosen or paper backing peels, or if water damage left sagging, bulging, or soft spots.
How to remove and dispose of mold-damaged drywall safely
Start by sealing off the work area and turning off HVAC to prevent mold spores from spreading; you’ll want to wear an N95 or higher respirator, gloves, and eye protection before you touch the damaged drywall.
- Cut out wet or mold‑stained sections 12 inches past visible growth.
- Double‑bag debris in heavy duty bags.
- Seal and label bags for disposal.
- Dry and sanitize framing; replace insulation.
Preventing Mold From Coming Back (Best Practices)
To keep mold from returning, you’ll want to control indoor humidity, fix moisture sources, and improve ventilation and insulation.
Schedule routine checks and seasonal maintenance, and monitor problem areas so small issues don’t become big ones.
Use mold-resistant paints, primers, and sealants on repaired drywall to add a long-term layer of protection.
Controlling indoor humidity and moisture sources
Because mold thrives in damp air, keeping indoor humidity and moisture sources in check is your best defense against recurrence.
- Use dehumidifiers to maintain 30–50% RH.
- Fix leaks promptly—pipes, roofs, and windows.
- Dry wet areas within 24–48 hours after spills or floods.
- Direct water away from foundation with proper grading and gutter maintenance.
Improving ventilation, insulation, and building envelope measures
When you improve ventilation, insulation, and the building envelope, you cut off the pathways that let moisture reach drywall and feed mold.
Seal gaps, add continuous insulation, and install proper vapor barriers.
Use exhaust fans in wet rooms vented outdoors, size vents correctly, and guarantee attic and crawlspace ventilation.
These measures lower condensation risk and keep drywall drier, reducing mold recurrence.
Routine maintenance, monitoring, and seasonal checks
Although mold often shows up after wet weather or leaks, you can keep it from returning with a simple program of routine maintenance, regular monitoring, and seasonal checks.
Follow these steps and stay proactive:
- Inspect basements, attics, and behind appliances monthly.
- Fix leaks and dripping fixtures immediately.
- Run dehumidifiers in humid months.
- Clean vents, gutters, and condensation-prone areas seasonally.
Product choices to resist mold: paints, primers, and sealants
If you want drywall to stay mold-free, choose products formulated to resist mold growth: use a mildew-resistant primer, a paint labeled for bathrooms or high-humidity areas, and a waterproofing sealant in vulnerable spots. Pick low-VOC, antimicrobial formulas, follow manufacturer curing times, and reseal joints. Use proper ventilation to maximize effectiveness.
| Product | Use |
|---|---|
| Primer | Seal and block mold |
| Paint | Moisture-resistant finish |
| Sealant | Waterproof joints |
| Additive | Boosts antimicrobial protection |
Common Mistakes and What to Avoid
Don’t spread mold by scrubbing dry spores into the air or using a broom that just kicks them around.
Don’t rely on trendy DIY products or bleach on porous drywall—they often don’t work and can damage the material or create toxic fumes.
If the job seems beyond basic cleaning, don’t risk it; call a pro with proper containment and protective gear.
Mistakes that spread mold or make it worse
When you try to remove mold the wrong way, you can actually spread spores around the room and make the problem worse.
Don’t do these things:
- Scrub dry mold without dampening — it throws spores into the air.
- Skip containment — spores travel to other rooms.
- Use a vacuum without HEPA — it disperses particles.
- Ignore ventilation — trapped humidity fuels regrowth.
Ineffective DIY products and unsafe practices to avoid
Although it’s tempting to try every home remedy, some DIY products and methods won’t remove mold and can put you at risk instead.
Don’t rely on vinegar, essential oils, or paint covers for serious infestations. Avoid bleach on porous drywall, dry brushing, or sanding without protection—they spread spores and damage surfaces.
Hire pros for extensive growth and use proper PPE for small cleanups.
Cost and Time Estimates
You’ll want to know what a mold job will cost and how long it’ll take before you start.
Small DIY cleanups can be done in a few hours to a day for minimal expense, while larger infestations often require days, higher material costs, or a pro.
Professional remediation costs vary with scope, containment needs, and hidden damage, so get estimates before committing.
Typical DIY costs and time for small vs. large jobs
Small mold patches on a single drywall panel can often be tackled in an afternoon for under $100, while larger infestations that require removal of multiple sheets, specialized cleaners, or rental equipment can run into several hundred dollars and take a day or more.
| Job size | Cost range | Time |
|---|---|---|
| Small | <$100 | Hours |
| Large | $200–$800+ | 1+ days |
Cost factors for professional remediation
Several key factors will determine what pros charge for mold remediation, and knowing them helps you budget accurately.
You’ll pay for inspection, testing, containment, removal, and disposal. Costs rise with affected square footage, mold severity, access difficulty, and required structural repairs.
Expect higher rates for HVAC contamination, emergency services, and labor in high-cost regions; get written estimates and scope details before hiring.
Case Examples and Quick Scenarios
You’ll get three practical scenarios to compare: treating a small patch in a bathroom corner you can handle yourself, evaluating a basement flood where you’ll likely need pros, and troubleshooting recurrent mold after repairs with a quick diagnostic checklist.
Use the bathroom example for simple DIY steps and safety reminders.
For the basement and recurring cases, focus on when to call specialists and which tests or inspections to prioritize.
Scenario: Small bathroom corner mold DIY approach
If you spot mold in a bathroom corner, you can usually handle it yourself without calling a pro—as long as it’s a small patch and hasn’t soaked into the drywall.
Wear gloves, goggles, and a mask. Ventilate, scrub with detergent or a diluted bleach solution, rinse, and dry thoroughly.
Prime with mold-resistant primer and repaint. Fix ventilation to prevent return.
Scenario: Basement flood mold when to hire pros
Small bathroom mold can often be fixed with a scrub and some paint, but a flooded basement is a different beast that usually calls for professional help when damage is widespread or water’s been sitting for more than 24–48 hours.
You should hire pros if insulation, framing, or drywall is saturated, if mold covers large areas, or if you smell persistent mildew or have health risks.
Scenario: Recurrent mold after repairs diagnostic checklist
When mold keeps coming back after repairs, start by treating it like a detective case: document what you see, note where and when it reappears, and check nearby building systems that could be feeding moisture.
- Inspect for hidden leaks (pipes, roofs, windows).
- Check humidity and ventilation.
- Assess past repair quality and materials.
- Consider mold testing or a pro if patterns persist.
Frequently Asked Questions (FAQ)
You probably have specific questions about using bleach, safety after cleaning, repainting, identifying toxic mold, and how fast mold comes back if moisture isn’t fixed.
Here are four quick FAQs to get you started:
- Can I use bleach on painted drywall?
- How long after cleaning is it safe to occupy the area?
- Will repainting cover mold stains?
- How can I tell if mold is toxic, and how quickly will it return without fixing moisture?
Can I use bleach to remove mold on painted drywall?
Wondering if bleach will get mold off painted drywall? You can use diluted bleach on nonporous paint to kill surface mold, but it won’t penetrate paint or address roots in porous or textured finishes.
Bleach can discolor paint and emit harsh fumes, so ventilate, wear protection, and test a small area.
For porous paint or recurring mold, consider specialized cleaners or professional remediation.
How long after cleaning is an area safe to occupy?
After you finish removing mold—whether with diluted bleach on nonporous paint or a specialized cleaner—you’ll want to know how long to wait before re-entering the room.
Wait until surfaces are dry and any fumes have dissipated—usually 1–3 hours with good ventilation, longer for porous areas.
Use a mask while cleaning; ventilate thoroughly and only resume normal use when you can no longer smell cleaners.
Will repainting cover mold stains?
Will repainting hide mold stains permanently? No — simply painting over mold only masks stains and lets underlying growth continue.
You should fully remove mold, dry the drywall, and treat surfaces with an appropriate mold-killing product before priming.
Use a stain-blocking primer designed for mold remediation, then repaint.
Otherwise stains and odors often return, and mold can damage drywall beneath the paint.
How can I tell if mold is toxic (black mold)?
How can you tell if mold is the toxic “black mold”? You can’t reliably ID toxicity by color alone.
Only lab tests can confirm Stachybotrys or other toxigenic species. If you see extensive dark growth, smell musty odors, or household members have unexplained respiratory symptoms, treat it as hazardous: avoid disturbance, ventilate, and hire a qualified tester or remediation pro for assessment and safe removal.
How quickly will mold return if moisture isn’t fixed?
If you suspect toxic mold or notice persistent musty smells, you should also consider how quickly mold will come back if the underlying moisture problem isn’t fixed.
Mold can regrow within 24–48 hours on damp drywall. Without repairing leaks, improving ventilation, and lowering humidity, you’ll face continual recurrence.
Fix moisture sources first; otherwise cleanup is temporary and costly.
Conclusion and Next Steps
Wrap up with a quick action checklist you can follow now to remove visible mold and stop it from coming back.
If the problem is large, recurring, or affects HVAC, call a certified mold remediation pro and ask for references, insurance proof, and a written plan.
Keep records of repairs and moisture fixes so you can show the pro what you’ve already tried.
Quick action checklist to remove current mold and prevent recurrence
1 clear checklist will keep you from getting overwhelmed: act now to dry and clean the area, remove porous materials that are moldy (like soaked drywall or insulation), disinfect remaining surfaces with an appropriate cleaner, improve ventilation and fix the moisture source, and monitor the spot for recurrence over the next few weeks.
- Wear protection and isolate the area.
- Remove contaminated porous materials.
- Clean and disinfect hard surfaces.
- Fix leaks, dry, and ventilate; recheck weekly.
When to contact a professional and how to choose one
Because small stains can often be handled yourself, call a pro when mold covers more than about 10 square feet, returns after cleaning, smells strongly of mildew, or comes with health symptoms for anyone in your home.
Choose someone who:
- Is certified in mold remediation
- Provides written estimates and scope
- Uses containment and HEPA filtration
- Offers references and a warranty