
Can You Paint Drywall Without Texture and Still Get Great Results?
Yes, you can paint drywall without texture and still get great results, but only if the surface is truly smooth before you ever open the paint can. You need clean, even joint compound work: feather seams and screw heads, spot-prime repaired areas, and sand gently until it feels uniform. Then use the right primer in full coats to prevent flashing or telegraphing. Finally, apply thin paint coats with steady overlapping strokes. Keep going—you’ll learn the key steps.
Can You Paint Drywall Without Texture?
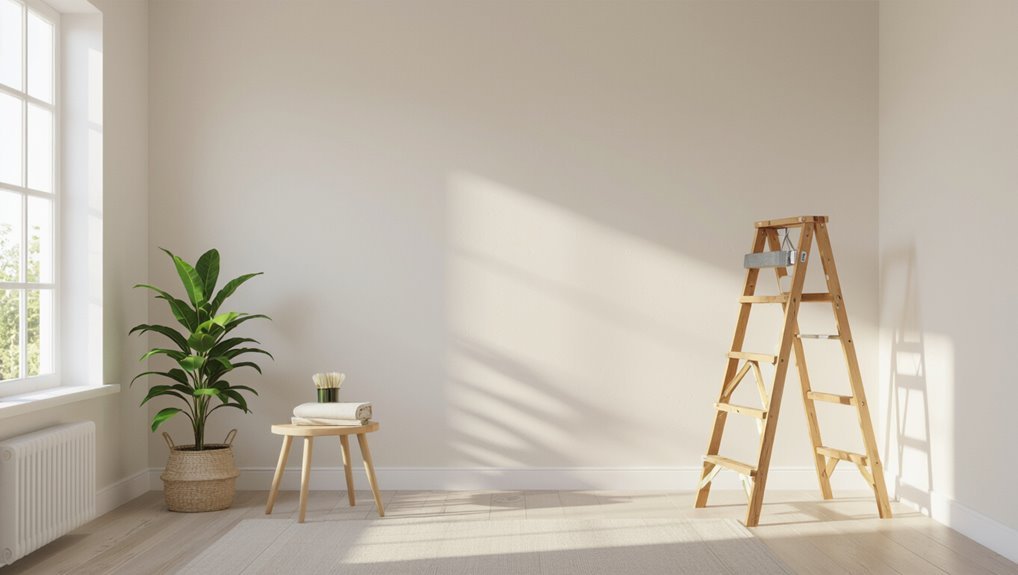
Yes, you can paint drywall without texture, and you usually don’t need to add any extra surface treatment first.
If your drywall is properly finished, primed, and sanded smooth, you can get a clean, uniform wall with regular paint. You’ll enjoy drywall benefits like quick installation and an easy canvas for color.
Focus on smart painting techniques: wipe dust, apply a quality primer to seal paper, then use a roller for broad areas and a brush for edges.
Allow proper drying time, and spot-check for bubbles or ridges before the final coat.
What “Smooth Drywall” Really Means
When you say “smooth drywall,” you’re aiming for a level, uniform surface—not a flawless mirror finish.
You focus on achieving drywall level by feathering joint compound and making the seam and screw areas blend in, even if minor imperfections remain after curing and sanding.
You’ll remove joint ridges, overfilled spots, and screw defects so the paint can lay evenly.
Understanding “Smooth” Drywall Finish
“Smooth” drywall doesn’t mean the gypsum board looks factory-new in every spot; it means you’ve sanded and filled the joints and fastener holes until the surface reads flat to the touch and the eye.
When you pursue smooth drywall finishes, you’re prioritizing even absorption and minimal ridges, so light doesn’t catch transitions.
Use paint techniques that match that goal: prime after repairs, then apply paint in steady, overlapping strokes to avoid flashing or showing skim gaps.
If you can feel seams when running your hand lightly, you’re not smooth yet. Sand, recheck, and only then paint.
Achieving Level, Not Perfect
“Smooth drywall” isn’t about perfection in every microscopic spot—it’s about leveling the wall so it looks even under normal viewing. You aim for level surfaces, not mirror-sheen.
After surface preparation, you use finishing techniques that support smooth application and consistent thickness, then check lighting from multiple angles. Remember: small ridges may vanish after sanding and primer, but shadows from uneven spots won’t.
Use aesthetic choices to guide how far you go, and test paint compatibility on scraps.
- Skim strategically, keeping feathered edges.
- Verify flatness with a straightedge.
- Consider texture alternatives for forgiving results.
Removing Joint And Screw Defects
Start by removing joint and screw defects, because those are what create the bumps and shadows you can’t “paint away.”
As you scrape and sand, focus on ridges at seams, raised nail or screw heads, and any flaky compound that hasn’t bonded.
Don’t skip joint preparation techniques: pull loose edges, feather compound wider than the seam, and re-skim low spots thinly.
Use a light over the surface at an angle to spot waves before priming.
When you correct each spot, you’ll create seamless shifts that disappear under paint.
Why Paint Looks Bad on Unprepared Drywall
If you skip proper prep, rough joint tape and spackle can leave bumps and ridges that won’t vanish under paint.
Uneven absorption makes certain spots flash or look brighter and darker under light, even when the wall seems smooth by eye.
Those raised imperfections show through as shadowy texture, so your finish ends up looking patchy instead of clean.
Rough Joint Tape And Spackle
Rough joint tape and spackle create a bumpy surface that paint can’t hide—so those ridges and pinholes show up as dull patches, shadows, and uneven sheen.
When you skip solid prep, your joint tape techniques leave edges proud, and your spackle application leaves ridges that catch light. You need a smooth finish before paint so every section reflects evenly.
- Feather each coat wide, sanding between layers for a flat changeover.
- Fill pinholes and scrape off excess; don’t let ridges harden.
- Prime before final coats if repairs are still thirsty.
Uneven Absorption Causes Flashing
After you’ve skimmed and sanded past the bumpy tape-and-spackle stage, you still have one more problem that makes the wall look “off”: uneven absorption.
In some spots, drywall paper, compound edges, and patches drink primer differently, so paint flashes—dulls, lightens, or creates shiny bands—especially under raking light.
You fix it with proper surface preparation: wipe dust, then prime the whole wall, not just repairs, using consistent coats.
Maintain flash control by following dry times and recoat limits; don’t let patches dry longer than the surrounding areas.
Raised Spots Show Through Paint
Raised spots show through paint because your finish coat can’t hide tiny bumps in the surface. When you skip proper surface preparation, loose joint compound ridges and nicked paper telegraph upward, ruining paint adhesion.
Even good primer won’t level what you left behind. To fix it, you need to find every high spot before you roll or spray:
- Scrape and sand ridges until they’re truly flush.
- Apply a skim coat, then let it cure fully before sanding again.
- Spot-prime, recheck with raking light, and repaint only after it’s smooth.
When Skipping Texture Works Best
If you have a perfectly smooth, well-finished drywall base, skipping texture can work great. You’ll enjoy benefits simplicity, since you skip extra materials and steps, and you get clean lines with better aesthetic appeal.
Do it when lighting is even and your room doesn’t have strong raking shadows. Choose this approach right after you skim, sand, and prime until the surface feels glassy.
If your drywall has no dents, joint ridges, or waviness, paint glides on and hides nothing. For best results, use quality primer and a smooth roller, then apply two even coats.
When a Light Texture Helps More
Even when your drywall looks fine, a light texture helps when your finish isn’t perfectly “glassy” or when lighting creates raking shadows.
You can boost texture benefits by adding subtle pattern that disguises tiny waves, joint telegraphing, or sanding inconsistencies before paint. You also gain flexibility for aesthetic choices: matte or eggshell sheen will hide more when the surface isn’t mirror-smooth.
Use texture as a practical middle ground—especially on ceilings and hallways where angles highlight flaws.
Consider:
- Soft stipple to break up shadow lines
- Light orange-peel for forgiving coverage
- Consistent application for even appearance
Check Drywall Joints Before You Prime
Before you prime, inspect every drywall joint for cracks, gaps, or loose tape.
Sand any rough spots until the surface feels smooth and even.
If you skip this step, those defects will show through your paint.
Inspect Joints For Cracks
Start by running a hand along every seam and corner, because drywall joints often hide tiny hairline cracks that show up after you prime and paint.
Do your joint inspection in bright, angled light so you can catch uneven seams early. Press lightly, then look closely: any lifting tape edge, pinhole, or shadow line signals a problem.
Practice crack identification by checking along each butt joint, inside corner, and around outlet boxes.
Add these focus points:
- Spot hairline splits at tape seams.
- Check for loose or bubbling joint compound.
- Mark every defect for quick repair.
Sand Smooth Before Priming
After you’ve inspected every seam for hairline splits and loose tape, sand the joint compound until it feels completely level.
Use steady, light pressure and feather the edges so the patch blends with the surrounding drywall. Switch directions as you go to spot ridges and low spots early.
Start with a medium-grit sanding block, then finish with a finer grit for a uniform surface.
Vacuum dust often, then wipe with a damp cloth and let it dry.
Good drywall preparation means the primer can grip evenly and hide nothing—especially if you plan to paint smooth without texture.
Use the Right Joint Compound for Seams
Picking the right joint compound for seams makes your drywall look smooth and helps prevent cracking. You’ll get better results when you choose the right joint compound types for your project, based on how thickly you’ll fill and how fast you need to move on.
Choosing the right joint compound for seams makes drywall smoother, reduces cracking, and delivers better results tailored to your project needs.
Start with solid seam preparation: clean dust, remove loose paper, and tape firmly so compound bonds well. Then:
- Use a setting-type compound for faster repairs and strong filled seams.
- Pick a lightweight all-purpose compound for easier sanding and smoother final coats.
- Match skim-coat compound to your paint sheen for consistent, crack-resistant finish.
Feather Edges to Avoid Raised Lines
When you feather your joint compound properly, you spread each coat beyond the seam so edges don’t build up.
Blend the tape edges seamlessly, then sand lightly in stages so you smooth *gradations* without flattening the drywall paper.
Always stop short of cutting through—too much sanding leaves ridges and makes raised lines show through your paint.
Feather Joint Compound Properly
Before you spread any joint compound, you need to feather the edges so the shift stays flat and won’t telegraph as raised lines.
Use your feather technique: thin the compound at the perimeter, leaving the center slightly thicker so it sands evenly.
Mix joint compound until smooth, then apply with a clean taping knife and stagger passes.
Let each coat dry fully, because rushing causes ridges.
After drying, sand lightly with a block, then run your hand across to confirm no humps remain.
Add these checks:
- Keep knife angle shallow.
- Feather wider than the seam.
- Wipe dust before priming.
Blend Tape Edges Seamlessly
To keep tape seams from showing after you paint, you need to blend the tape edges smoothly as the compound dries and sands.
Start your tape application by embedding the mesh or paper tape in a thin, even coat, then add compound only where seams feel raised. As you feather, keep each pass wider than the last, pulling compound outward so the center stays slightly thicker.
Let it fully dry, then sand lightly with a pole sander, checking with side light.
Repeat seamless blending with thin coats until you can run your hand over the joint and feel nothing.
Sand Without Cutting Through
Once your compound has fully set, you can sand without digging in by letting the edge do the work: use light pressure and short, controlled strokes, and feather the changes so the seam fades into the surrounding drywall.
You’ll avoid raised lines when your sanding techniques stay gentle and consistent. Focus on the feathered blend, not the center ridge. Use edge protection by keeping your paper flat and clearing dust often, so grit doesn’t groove the surface.
- Switch to a finer grit after initial leveling.
- Stop sanding as soon as texture disappears.
- Check with raking light before priming.
Fix Bubbles and Flat Spots Before Primer
Scrape out any bubbles and flatten any flat spots so your primer bonds evenly. Press the blade firmly, and remove loose paper or joint compound until the surface feels solid.
Scrape bubbles and flatten low spots so primer bonds evenly; press firmly and remove loose paper or joint compound.
If you find bubble repair areas, cut back to stable drywall, then fill with a thin layer of setting-type compound.
For a flat spot, re-skim only the low area, keeping feathered edges wide so you don’t create ridges.
Let patches dry fully, then check with your hand across the wall for dips or bumps. Wipe away dust before priming.
Sand for a True Smooth Wall Finish
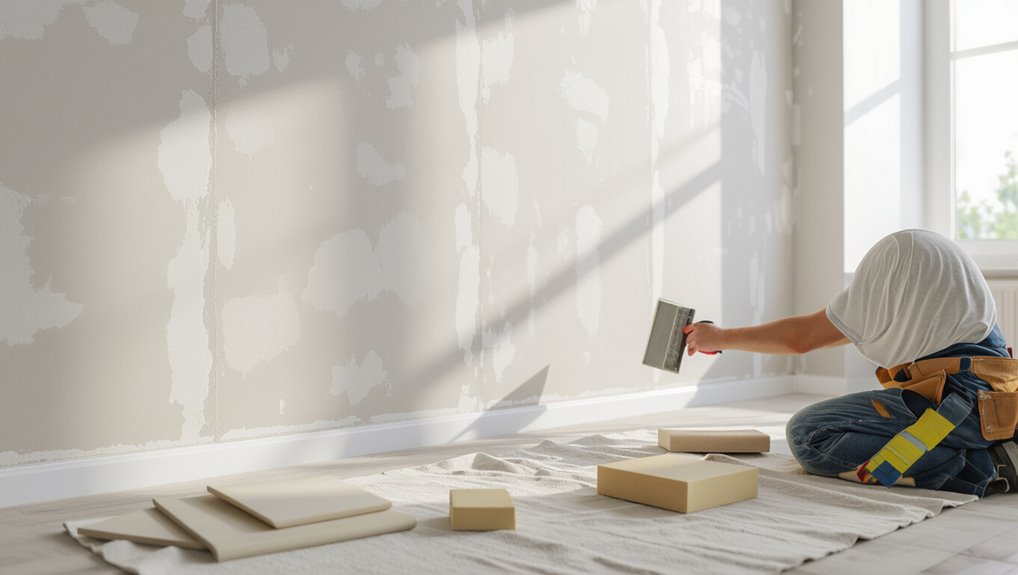
After you’ve fixed bubbles and re-skimmed low areas, you need to sand the wall so the primer has a truly even surface to grab.
Use clean drywall preparation methods: dull, uneven patches telegraph through paint. Start with medium grit, then switch to fine grit for sanding techniques that blend seams invisibly.
Keep a light hand, use long passes, and check with raking light to spot ridges. Vacuum constantly to control dust.
Add depth by focusing on:
- Feathering edges into surrounding compound
- Creating a consistent scratch pattern for primer
- Rechecking flatness between grit changes
How Not to Sand Through on Edges
When you tape edges, don’t overfill—use just enough compound so it stays thin.
As you feather, keep your passes wide and light so you don’t abrade the paper and cause burn-through spots.
If you notice a shiny edge while sanding, stop and adjust your pressure before it keeps happening.
Taping Edges Without Excess
Taping the edges of drywall is where most sanding disasters start, so you need to keep the joint thin and consistent from the first pass.
Use solid taping techniques and clean edge preparation: press tape fully into compound, then scrape off excess until it looks even. Don’t chase thickness; you’ll create ridges that tempt you to oversand later.
- Cut tape straight and align it before you set it.
- Apply a light, continuous skim coat under and over the tape.
- Use a wide knife to remove squeeze-out immediately.
Feathering To Avoid Burn-Through
Feather your compound aggressively enough that the edge of the patch has a smooth taper, not a step, because that’s what protects you from burn-through when sanding.
Use feathering techniques: press lightly as you spread, then extend your last pass farther each time. Let each coat dry fully before sanding; soft compound grabs and tears.
When you sand, keep the pad flat and use long strokes, blending edges gradually into the surrounding drywall paper. Check often by touch and sight.
If you see shiny spots, stop and recoat instead of chasing low areas with more sanding.
Blend Patches So Walls Paint Evenly
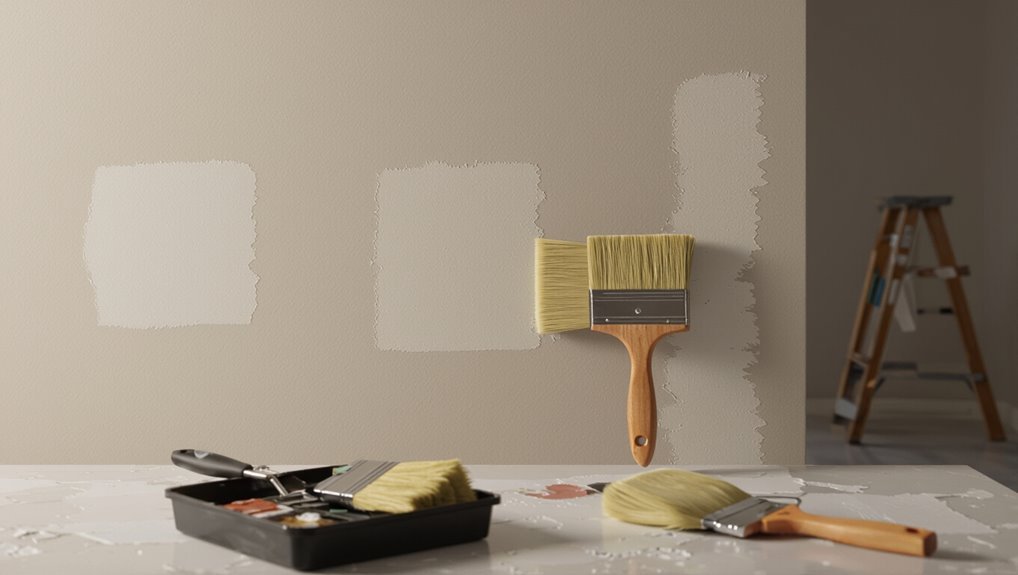
Blend patched areas carefully so your finish coat looks uniform. After feathering, you’ll complete drywall maintenance by smoothing any ridges until your wall feels consistent under your hand.
Use light, overlapping paint application strokes across seams, not just within the patch, so the sheen stays even. If you see flashes or darker streaks, don’t panic—blend them while the paint stays workable, then let it dry fully before evaluating again.
- Hold a bright raking light to catch high spots.
- Keep a wet edge for seamless blend lines.
- Apply one thin full-coverage coat, then touch up sparingly.
Spot Prime Only the Trouble Areas First
Spot prime cracks and seams as soon as you see them, so they don’t telegraph through your finish.
Feather the edges of your patch with light passes until the changeover feels smooth to the touch.
Then you’ll blend easier when you paint the wall.
Spot Prime Cracks And Seams
Once you’ve filled and sanded, you should spot-prime only the cracks and seams that still show up under raking light. You do this to lock down your crack repair and keep the filled areas from flashing through once paint goes on.
Stir the primer well, then brush or roll thin coats just over trouble spots. Let it dry fully before painting.
Use these checks to stay accurate:
- Mark visible lines under raking light.
- Spot-seal any joint edges for better adhesion.
- Re-sand only if the primer raises the surface.
Feather Edges For Smooth Blending
After you spot-prime the seams and cracks that still show under raking light, you’ll get the best finish by feathering the repaired edges.
Use feathering techniques: wrap a 6–10 inch taping knife with light pressure, then skim outward from the patch so the joint compound thins gradually. Let each pass dry, then sand with a fine sponge, knocking down ridges without digging into paper.
For blending methods, feather the edges in widening arcs, alternating direction to avoid a “track” line.
When you’re smooth to the touch, do a final spot prime only if sanding exposes dull areas.
Choose Primer for Paint-Ready Smooth Drywall
Choosing the right primer sets you up for a truly paint-ready, smooth finish on drywall. You want primer types that seal joint compound, minimize absorbency differences, and protect your work. Match it to your paint for paint compatibility so the topcoat won’t flash, stain, or peel.
- Use a quality drywall primer to lock down paper and leveled spots.
- Select a stain-blocking or bonding primer if you patched repairs or had marks.
- Confirm sheen and compatibility with your chosen paint finish.
Apply evenly, let it dry fully, then sand lightly to keep the surface smooth.
Roll Primer for Even Coverage and Hide
With the right primer already selected for a smooth, paint-ready surface, you can roll it on to get even coverage and strong hide.
Use a quality roller cover and a steady roller technique: load evenly, then roll in consistent W patterns, lightening pressure at the edges.
Work in small sections so the primer doesn’t tack up mid-pass. Keep a wet edge and overlap each roll line to prevent flashing or streaks.
Prioritize high-spot areas like seams, patched drywall, and corners. When you do, the primer benefits kick in—better adhesion, uniform sheen, and fewer topcoat coats.
Spray vs Roll Primer for Smoother Results
If you want even coverage fast, a spray primer can lay down a uniform coat that helps you smooth out drywall more quickly.
If you prefer tighter control and consistent thickness, roll primer lets you manage how much product goes on each pass.
Which approach fits your workspace and your finish goals?
Spray Primer For Even Coverage
For the smoothest base layer on bare drywall, you need primer that lays down evenly and seals consistently—spray primer often delivers that better than rolling.
Use the right spray technique: keep your nozzle the same distance, overlap passes slightly, and move steadily to prevent stripes. You’ll get primer benefits like better stain blocking and fewer bubbles because the coating levels as it dries.
Before you switch to topcoat, let the surface fully cure and inspect for missed spots, then spot-prime if needed.
- Choose a smooth, bonding drywall primer
- Apply thin, even coats with controlled overlap
- Allow full dry time before sanding or paint
Roll Primer For Controlled Thickness
Rolling primer gives you more control over thickness when you’re aiming for a super smooth drywall finish, especially on edges, small patched areas, and ceilings.
When you roll, you can use controlled application by loading the roller lightly, then spreading in consistent W strokes. You should keep a wet edge and avoid overworking the same section, which helps prevent ridges.
For best primer techniques, use a short-nap roller for smooth walls and an angled brush to feather connections at seams.
Compare: spray moves fast but can overshoot thickness; rolling stays even and predictable.
Seal Water Stains to Stop Bleed-Through
Once you spot a water stain, seal it before you paint or you’ll keep fighting bleed-through. Start by drying the area completely, then clean off any chalky residue and repair damaged drywall.
Use a stain-blocking primer to lock down the cause and support water stain prevention. You can test a small patch first to confirm the color won’t ghost.
- Apply a thin, even coat only where the stain shows.
- Let the sealer cure per label before topcoating.
- If color returns, repeat for stronger bleed through solutions.
Prevent Flashing by Controlling Dry Time
To prevent flashing, you need to control the dry time between coats.
Wait until the surface is fully dry to the touch before you paint again, because rushing leaves a slick underlayer that shows through.
If you manage the drying window, you’ll reduce flashing and keep the finish even.
Control Dry Time Carefully
If you control dry time, you prevent flashing and keep your paint looking even. Use dry time techniques that match your drying environment, because temperature and airflow change how fast the coating sets.
Watch the surface, not the clock: when it feels uniformly dry and tack-free, you’re ready to move on. Don’t rush; partial set lets sheen differences show later.
- Keep room conditions stable; avoid drafts and direct heat.
- Stagger coats evenly, maintaining consistent thickness.
- Use touch tests to confirm tack-free readiness.
Reduce Flashing Between Coats
Prevent flashing by nailing the dry time between coats, because rushing through partial set makes sheen differences show up later.
You should build consistent flashing control by waiting until the first coat feels uniformly dry to the touch and looks matte, not damp or slightly glossy.
Follow your paint’s label and conditions like humidity and temperature, since these change dry speed.
Use your coat technique to apply even pressure and consistent spacing, avoiding heavy edges.
After priming, sand only high spots, then remove dust.
When you recoat, keep a wet edge to prevent streaks.
Pick the Right Paint Finish for No-Texture Walls
For smooth, no-texture drywall, choosing the right paint finish matters because it affects how light reflects and how well the surface hides imperfections.
You’ll get better paint durability when you pick a finish that resists scuffs and scrubbing.
Prioritize wall maintenance by selecting the level of sheen that matches your room lighting and traffic.
Use these to choose fast:
- Matte/flat: hides tiny flaws, but needs gentler cleaning.
- Eggshell: balances smooth look with easier wipe-downs.
- Satin: offers top durability, but shows unevenness more in glare.
Use Sheen Carefully to Avoid Highlighting Flaws
Even when you choose the right finish, sheen can make a perfectly smooth, no-texture wall look uneven once light hits it. You need smart sheen selection to avoid spotlighting every mistake.
Start by inspecting the drywall under bright, angled light; you’ll see surface imperfections that flat paint hides. If you pick satin, keep it consistent and avoid overworking spots, since pressure and buildup create shiny patches.
Inspect drywall under bright, angled light to reveal imperfections flat paint hides. Choose satin carefully and avoid overworking to prevent shiny patches.
Prime fully, then apply thin coats with smooth, even passes. Let each coat dry fully before judging.
When in doubt, choose lower sheen and test on a spare section.
How Many Coats for Clean, Consistent Color
Start by prepping your drywall for a smooth, clean base so the paint won’t look uneven.
Apply primer for uniform coverage, then plan your coats so each layer builds the same color across every patch.
If you rush the count, you’ll end up with lighter spots and streaks that show up fast.
Prep For Smooth, Clean Base
To get a smooth, consistent finish on new drywall, you’ll usually need two coats of primer before paint—one to seal the surface and bond the joint compound, and a second to even out color and sheen.
For smooth, clean base prep, do your smoothing techniques first: scrape ridges, feather edges, and sand until dustless.
Then focus on base preparation by wiping with a dry tack cloth, filling pinholes, and checking light reflections for dull or shiny spots. Use a clean roller nap and avoid overworking.
- Prime every repaired seam
- Remove sanding dust thoroughly
- Spot-check sheen before topcoat
Apply Primer For Uniform Coverage
Apply primer in two coats on smooth, freshly repaired drywall to lock down patchwork and keep the final color consistent.
First, choose the right primer types for your surface—stain-blocking for repairs, bonding for tricky patches, and drywall sealer when needed.
Then, focus on uniform application: use a roller for broad areas and a brush to feather edges.
Let each coat dry fully per the label, and don’t rush recoat time.
You’ll reduce flashing, prevent soak-in differences, and create a stable base so your topcoat won’t look uneven.
Plan Coats For Consistent Color
Once your primer has cured for long enough to feel fully dry and stable, you can plan your finish coats so the paint color stays even across seams, patches, and repaired areas.
Plan on two coats for clean, consistent color, and don’t stretch the first coat too thin, especially on skim-floated spots. Let each coat dry fully, then inspect under angled light to spot flashing.
Use your painting techniques to cut edges first, then roll wall sections in consistent passes.
Add:
- Mark patch zones before you paint.
- Mix enough paint for the whole room.
- Thin only per label guidance.
Cut In Neatly Without Lap Marks
Cutting in cleanly without lap marks starts with your edge control: keep a wet, even line of paint on your brush or roller pad, then stop the stroke right at the area you’re shifting to.
You need clean edges, so avoid dragging through already-painted sections. Load your brush lightly; too much paint causes drips and thick overlaps that show as a lap mark.
Angle your brush, press gently, and feather at the border—one steady pass, no backtracking. When you blend into your next panel, overlap only slightly while the paint stays wet.
Wipe drips immediately, and rotate tools to maintain consistent coverage.
Choose the Right Roller Nap for Drywall
Choosing the right roller nap helps you keep drywall looking smooth, not stippled or blotchy. Start by matching roller types to your finish goals: use a short nap for level texture finishes and better paint adhesion.
Choosing the right roller nap keeps drywall smooth, helping you avoid stipples and blotchy patches while improving finish quality.
Measure your nap length by how it affects paint absorption and roller coverage; too long traps sheen and creates bumps. Before rolling, focus on surface preparation so the wall stays clean and evenly dry, then apply with steady application techniques.
- Pick microfiber for fine results
- Use 3/8–1/2″ nap for most drywall
- Maintain consistent pressure for even roller coverage
Maintain a Wet Edge to Avoid Marks
To keep drywall paint smooth and free of lap marks, you need to maintain a wet edge as you roll—especially when working across large sections.
Work in tight, overlapping passes so the freshly painted area stays workable. Keep your roller moving steadily, and don’t stop mid-wall; if you must pause, feather the edge with light strokes before it dries.
Use wet edge techniques by tracking where your last roll ends, then roll into that boundary immediately. This mark prevention mindset keeps sheen even and eliminates visible ridges.
Reload the roller often to maintain consistent coverage and speed.
Roll and Brush to Keep a Flat Look
As you work, roll the broad drywall areas first, then brush only where the roller can’t fully smooth the surface—corners, tight seams, and around outlets.
Use steady roller techniques, keeping even pressure so the nap lays paint down without ripples. After rolling, switch to brush strokes that stay light and controlled; feather edges where you stopped so sheen stays uniform.
Reload the roller and maintain overlapping passes to prevent dry lines. Finish with a quick visual check from multiple angles.
- Keep a consistent paint load.
- Maintain wet contact between sections.
- Feather brush strokes into rolled areas.
Thin Paint Only If the Manufacturer Says So
Only thin your paint if the label or manufacturer instructions explicitly allow it, because drywall paint usually needs its specified viscosity to hide evenly and resist streaking.
You should follow manufacturer guidelines and use the exact thinning product and ratio they state. If you want better thin paint techniques, adjust application instead: load your roller consistently, keep a steady pace, and back-roll lightly.
Don’t guess with water; over-thinning can weaken sheen control, increase flashing, and leave patchy coverage.
When the label says no, skip thinning and focus on clean sanding, proper priming, and smooth rolling for a uniform finish.
Control Temperature and Humidity for Smooth Flow
Temperature and humidity strongly affect how paint flows and levels on drywall. If you want smooth results, you must focus on temperature control and humidity management before you roll.
Aim for steady conditions so the paint doesn’t skin, drag, or dry too fast at seams. Check the room, then keep airflow gentle—no blasting fans. When conditions stay consistent, you get even leveling and fewer lap marks.
- Keep temperature between 65–75°F (18–24°C).
- Maintain 40–60% relative humidity.
- Let fresh coats cure fully before you add thickness.
Use Lighting to Spot Imperfections Early
With your room conditions steady, switch your focus to what the eye can’t catch in flat, shadow-free light.
First, run lighting techniques that create raking angles: move a bright task light across the wall from low to high. As shadows slide, you’ll reveal hairline ridges, pinholes, and uneven skim coats before paint hides the defects.
Move a bright task light low to high for raking shadows—revealing hairlines, pinholes, and uneven skim coats before you paint.
Next, check at night with a single overhead fixture, then again with a side lamp to exaggerate shadow effects.
Mark every spot with painter’s tape, feather patching materials, then let them dry fully before you roll on final paint.
What If Seams Still Show After Painting?
Even if you prepped carefully, seams can still telegraph after the first coat—especially when you use flat paint or paint too thick. If your seam visibility remains, don’t panic: you can fix it fast.
First, let everything cure, then sand lightly with a fine-grit block to knock down ridges and feather edges. Next, recoat with a thinner finish and a roller that lays off evenly, not a brush that drags.
Finally, watch how the light hits—sheens and shadows expose weak spots. Addressing these issues improves paint durability and keeps drywall looking smooth.
- Dry fully before sanding
- Feather compound edges
- Apply thinner coats evenly
How to Stop Blotchy Drywall After Paint
Stop blotches from showing up by treating the cause right after you notice them. Blotchy drywall usually comes from uneven paint absorption, often where patches, spackle, or primer dried differently.
First, let the area dry fully, then lightly scuff with a fine sanding sponge to level any roughness. Wipe dust, and apply a thin coat of stain-blocking primer or drywall primer only to the blotched spots.
Let it dry, then topcoat with the same paint using even pressure and a dry brush or roller. If blotches return, repeat priming once—don’t keep adding topcoat.
Eliminate Ghosting on Patched Areas
After you’ve corrected blotchy absorption, focus on ghosting—those faint outlines that show where patches and tape sit under the paint. You prevent ghosting issues by evening the surface thickness and smoothing every ridge before you prime and paint.
Use these steps with smart patching techniques:
- Feather compound edges with wide passes until the shift disappears under raking light.
- Sand between coats, then wipe dust so primer bonds evenly.
- Spot-prime only scuffed areas; let it dry fully, then apply final coats thin and consistent.
Check for outlines after each coat.
Get Durability Without Texture in High-Traffic Rooms
Reinforce your drywall so it stays smooth and resists scuffs in hallways, kitchens, and other high-traffic rooms without relying on texture. Use joint compound properly, then sand flat and feather edges so there’s nothing to catch shoes or chairs. Seal the surface with a bonding primer to lock it down and prevent dirt from grinding in. Choose durable finishes: a washable eggshell or satin with good scrub ratings, and apply two full coats. Follow these high traffic tips:
| Step | Goal |
|---|---|
| Prime | Seal smoothness |
| Coat twice | Build durability |
| Allow cure | Prevent early wear |
Tools and Materials for Smooth, No-Texture Walls
To keep your drywall smooth and no-texture from the start, gather the right tools and materials before you roll a single coat. Start with a low-nap roller, angled cutting brush, and a bright work light for lighting considerations.
For surface preparation, choose quality sandpaper or sanding sponge plus a vacuum to control dust; use sanding techniques that feather seams.
Next, buy primer for primer selection and plan your paint application with a durable roller cover. Use joint compound for repairs and skim coats, then decide finish options like satin for easy wall maintenance.
- Drywall knife sets
- Putty/feathering tools
- High-quality primer + roller system
When Hiring a Pro Helps You Save Time
Hiring a pro can save you serious time because they already know how to prep drywall, apply primer, and paint for a truly smooth, no-texture finish.
You avoid trial-and-error patching, rerolling, and sanding that drags projects for weeks. When you hire someone, you benefit from time management: they schedule steps, control drying windows, and keep coverage consistent.
Their professional expertise means fewer mistakes with joint compound, feathering, and coating thickness. You get straighter results sooner, and you can focus on decisions instead of cleanup and rework.
Final Inspection Checklist for No-Texture Walls
A proper final inspection locks in that smooth, no-texture look. Before you call it done, run your final inspection and treat it like checklist essentials.
Get low-angle light across the surface, then look for missed tape edges, pinholes, and flashing. Press a clean hand against the wall to feel roughness you can’t see. Finally, wipe a microfiber cloth over areas you’ll paint again and confirm dust is gone.
- Check seams under raking light
- Inspect caulked corners for gaps
- Verify cleanup, tack cloth, and primer hold-up
Frequently Asked Questions
Can I Skip Texture on Older Drywall With Cracks or Repairs?
Yes, you can skip texture on older drywall with cracks or repairs, but you’ll need solid crack repair and smooth drywall finishes. Scrape loose edges, feather patch, prime with bonding primer, then apply thin coats. Check for defects before final paint.
What Primer Sheen Works Best for Truly Smooth, No-Texture Drywall?
Semi-gloss? You don’t need it—choose a bonding primer type or a drywall primer labeled “sanding” for smooth finishes; sand between coats to level. Why settle for roughness when you can get a silky wall?
How Long Should I Wait After Joint Compound Before Painting?
Wait until the joint compound fully cures—typically 24 hours per coat, longer in thick layers or humid rooms—before painting. Confirm it’s dry, sanded smooth, and dust-free to support paint adhesion and smooth, even drying time.
Will Flat Paint Hide Minor Imperfections, or Make Them More Obvious?
Flat paint can hide minor imperfections at first, but it often makes flaws more obvious once light hits. You’ll get the best results with proper drywall preparation: sand smooth, feather joints, and prime before painting.
How Do I Avoid Roller Streaks on Drywall That’s Already Smooth?
You’ll avoid roller streaks by loading the roller evenly, then using light pressure and steady roller techniques. Keep a “wet edge” while you work, and use consistent paint application. Finish with one clean pass, like a 1920s barber.
Conclusion
Yes, you can paint drywall without texture and still get a jaw-dropping, smooth finish—*but only if you prep like you mean it*. Skip the sanding, patching, primer, and careful spot-filling, and your wall will “reveal every mistake” under the light. If you chase perfection, control moisture, and apply the right primer and paint, you’ll get clean, durable walls—even in high-traffic rooms—without that annoying bumpy look.
