
Can You Put Oil Primer Over Latex Paint Without Problems?
Yes, you can put oil primer over latex paint without major problems, but only if you prep well. Inspect for peeling and stains, then clean with TSP/degreaser, rinse, and let it dry fully. Scuff-sand or degloss glossy spots so the oil primer has grip. Apply a thin, even coat and give it 24–48 hours (longer in cool damp weather) to cure hard before topcoating. If you skip prep or drying, it may peel, so keep going to learn the warning signs.
Can Oil Primer Bond to Latex Paint?
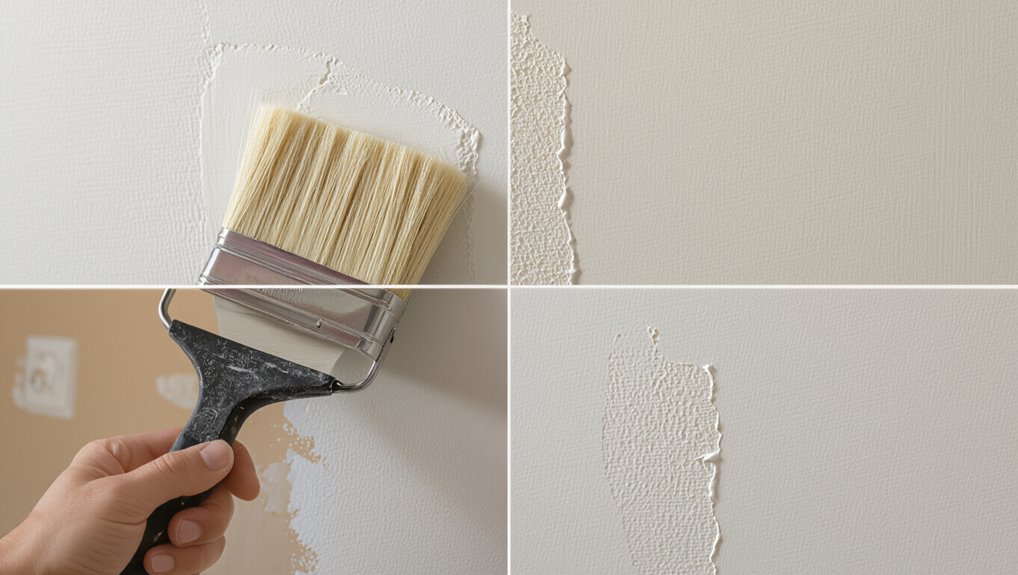
Yes, an oil primer can bond to latex paint, but only if you prep the surface correctly and the existing coating is still sound.
Yes, an oil primer can bond to latex paint—if the surface is properly prepped and the existing coating is still sound.
You need strong bonding mechanisms: roughening the latex creates mechanical grip, and cleaning removes grease so oils can wet the surface.
You also must check the old paint for peeling, chalking, or soft spots; if it’s unstable, paint interactions won’t hold.
Use detergent cleaning, let it dry fully, then sand to scuff, and wipe dust away.
A thin, even oil primer coat can then adhere reliably, rather than flaking off later.
When Oil Primer Over Latex Works Best
You’ll get the best results when oil primer improves adhesion on surfaces that are bare or lightly stained, since it has something solid to grip.
If the latex is clean, dulled, and free of peeling, the primer can lock in and help prevent future flaking.
Before you paint, scuff the area and wipe off dust so the bond actually holds.
When It Improves Adhesion
When you apply an oil primer over latex paint, adhesion improves most when the existing surface is sound, clean, and properly scuffed—think glossy or lightly worn latex that needs “tooth” rather than a full strip.
You get stronger adhesion benefits when you wipe away dust and grease, then dull the finish with sandpaper until it feels slightly rough.
Your results also depend on primer types: use an oil-based bonding primer suited for painting over earlier latex.
Apply a thin, even coat and let it cure fully before topcoating, so the layers lock in securely.
Best On Bare Or Stained Surfaces
How does an oil primer perform when you’re dealing with bare drywall, old plaster, or lightly stained spots? It often works best when you’ve got solid adhesion potential.
For bare drywall, you’ll benefit from smooth, consistent bonding that helps you build an even topcoat.
For old plaster or patched areas, you should still prep firmly—dust removal and skim repairs matter.
When staining shows through, oil primer tackles the stained surface challenges by sealing tannins, water marks, and mild bleed-through.
Use it only on clean, dry surfaces, and let it cure fully before latex paint.
When Oil Primer Over Latex Fails
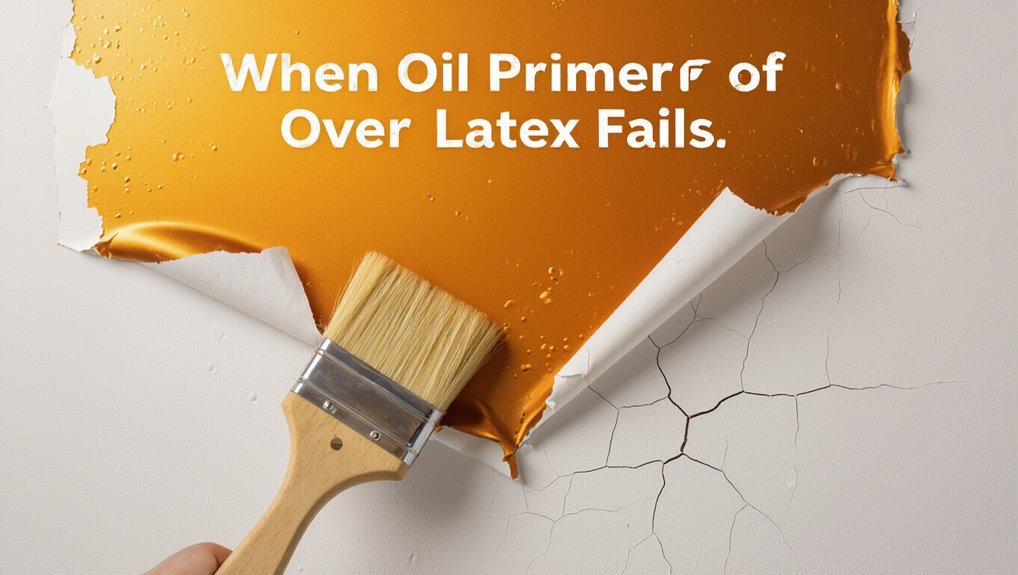
Even though oil primer can seem like a quick fix, it often fails over latex paint when the old surface stays glossy, dusty, or poorly bonded.
You get bad latex paint interactions because the slick topcoat resists adhesion, so the oil primer properties can’t grip. You may notice peeling, bubbles, or flaking within weeks.
If you rush prep—skipping cleaning, sanding, or spot-priming stains—the oil layer stays brittle and turns into a weak bridge.
When moisture or grease films remain, the primer lifts and the finish above follows. You must re-sand to solid adhesion.
What Causes Peeling After Priming
If you see peeling after priming, surface contamination—like grease, dust, or chalky residue—often stops the bond from forming.
You also might be using the wrong primer for latex, or you didn’t let the primer dry and cure fully before painting.
When either the compatibility or the curing fails, the topcoat can release and peel quickly.
Surface Contamination Issues
When your latex primer peels later, surface contamination usually lies at the root of the problem. You often skip thorough surface preparation, leaving dust, grease, or soap residue. Even a thin film breaks bond between primer and latex, so adhesion fails and edges lift. You may also trap moisture, causing rust or mildew that pries paint away. Pay attention to sanding debris and fingerprints; they act like release agents. Use contamination prevention by cleaning, degreasing, and letting surfaces fully dry before priming.
| Contaminant | Effect |
|---|---|
| Dust | Weak bonding |
| Grease | Primer fish-eyes |
| Moisture | Blister/peel |
Wrong Primer Compatibility
1 key reason latex primer peels after priming is wrong primer compatibility.
When you slap an oil primer onto latex paint, you can trigger poor primer adhesion. The top layer stays slightly flexible, while the oil primer forms a harder film that doesn’t bond well.
You might also use a primer meant for bare wood or drywall over a painted surface, and the chemistry can clash. As temperatures shift, that weak bond loosens and you’ll see bubbling, flaking, or peeling.
Always match primer type to the existing paint, and test a small area first.
Inadequate Drying And Curing
Even when your primer type matches, inadequate drying and curing can still cause peeling after priming. You rush the project, paint too soon, or expose wet primer to humidity and cool air. You also ignore label-specific drying times and assume “dry to the touch” equals fully cured. If curing factors like ventilation, temperature, film thickness, or oil primer age are off, the bond stays weak. Check what’s most likely:
| Problem | Result |
|---|---|
| Thick coat | Trapped solvents |
| High humidity | Soft primer |
| Low temperature | Incomplete cure |
Why Latex Can Resist Oil Primer Adhesion
Because latex paint forms a flexible, film-like surface and cures by trapping resins in the top layer, it can block an oil primer from bonding effectively.
With typical latex paint properties, you get a glossy, nonporous skin that resists wetting. When you roll on oil, you face primer adhesion challenges because the primer can’t penetrate or grip the slick surface.
A glossy, nonporous latex skin resists wetting, making oil primer adhesion difficult because it can’t penetrate or grip the surface.
- The cured film sheds oils and water
- Limited porosity prevents mechanical bite
- Resin-rich top layer reduces chemical bonding
- Surface tension makes oil bead up
- Any chalking or dust further weakens hold
Check Your Latex Paint Type First
Before you pick an oil primer, check what kind of latex paint you’re working over, since not all latex cures the same. You should identify latex paint types on the label or by asking the prior painter. Note whether it’s an acrylic latex, vinyl-based, or an elastomeric coating. These differences affect primer compatibility and bond strength. Use this quick guide before you prime:
| Latex paint type | Typical traits | Primer compatibility |
|---|---|---|
| Acrylic latex | Fast dry, durable | Usually yes |
| Vinyl latex | Softer, flexible | Use caution |
| Elastomeric | Thick, rubbery | Often problematic |
| Unknown | No label, prior coat | Test first |
Test Compatibility With a Sand Test
Once you’ve confirmed the latex type, run a simple sand test to check whether oil primer will bond to the existing finish. You’re doing a compatibility assessment to learn if the surface holds grit and stays stable, not if it looks good.
Lightly sand a small hidden area, wipe dust off, then evaluate the residue. If the latex turns gummy, flakes easily, or leaves powdery debris, oil primer may struggle. If it abrades firmly and feels cohesive, you can proceed.
- Sand a 2×2 ft spot lightly
- Wipe, don’t rinse
- Watch for peeling
- Check for chalky dust
- Re-prime after it dries
Do You Need to Strip Latex Paint First?
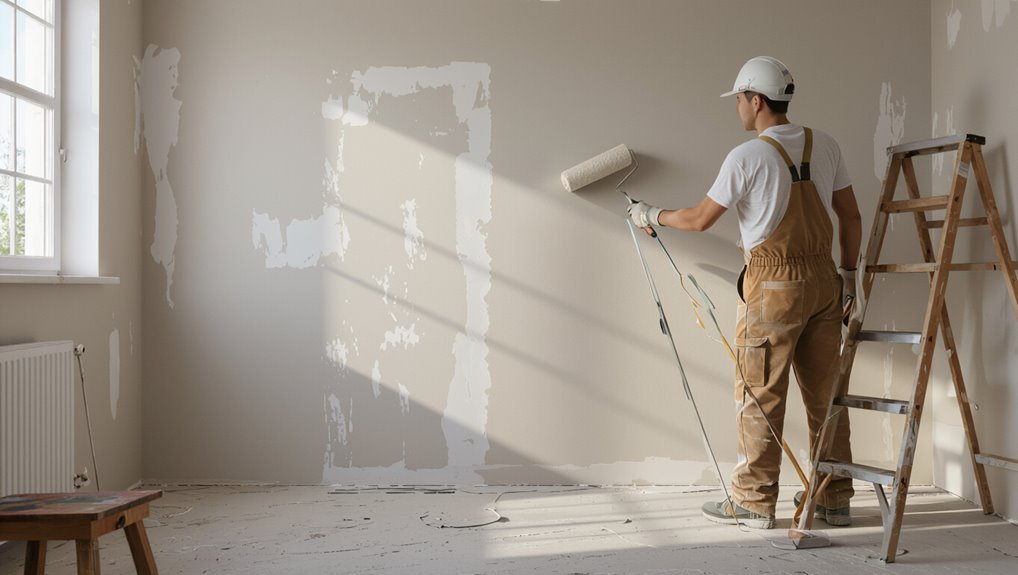
Before you prime over latex, you need to assess the existing paint’s condition—look for peeling, chalking, or moisture damage.
Then you check adhesion and bonding with tests, because loose or glossy areas won’t hold an oil primer well.
If the surface fails those checks, you strip only when necessary; if it stays solid, you can clean and prime without stripping.
Assess Existing Latex Condition
How solid is your existing latex paint, really? Before you plan any oil primer, you need to judge its condition. Strong latex paint durability usually means you won’t have to strip; weak spots demand prep.
Scrutinize the surface and think about your primer application techniques, since you’re relying on what’s already there.
- Look for peeling, bubbling, or flaking edges
- Check for chalky residue when you rub it
- Scan for cracks, stains, or mildew growth
- Feel for soft, damp, or uneven areas
- Confirm the sheen is consistent across walls
Check Adhesion And Bonding
To decide whether you need to strip latex paint first, you should test adhesion and bonding before you open a can of oil primer. Start by cleaning dust, then press painter’s tape firmly on the latex, pull it off quickly, and inspect tape residue. Also wet-sand a small patch to see how the surface texture behaves; flaking or chalking means poor bonding. Scrape an edge with a putty knife—solid paint stays put; loose paint lifts. Use this quick guide:
| Test | What you see |
|---|---|
| Tape pull | No residue / residue |
| Knife scrape | Sound / lifts |
| Sanding | Smooth / powdery |
Strip Only When Necessary
Once you’ve checked adhesion and bonding, you can decide whether stripping is really necessary.
Don’t strip automatically—only do it when you find failure points. If latex paint still grips firmly, you can benefit from latex paint advantages like smoother touch-ups and lower hassle.
However, if the surface is peeling, chalky, or contaminated, you must remove it first so your new system can lock in.
Watch for these signs:
- Peeling edges or lifting
- Cracking or blistering
- Chalk residue on a rag
- Grease, grime, or lead-safe concerns
- Uneven coats that trap gloss
Skipping cleanup can worsen oil primer disadvantages.
Best Surface Prep for Oil Primer Over Latex
Start by treating the latex surface like it’s less “bonded” than a bare substrate, because oil primer can fail when paint isn’t clean or tightly adhered. First, do surface cleaning: wash with TSP or degreaser, rinse, and let it dry fully. Then scuff-sand to dull gloss, remove dust, and spot-check for peeling. Confirm paint compatibility by testing adhesion on a small area—primer should grip, not flake.
| Prep step | Why it matters |
|---|---|
| Wash thoroughly | Removes oils, grime |
| Rinse & dry | Prevents primer failure |
| Sand to dull | Boosts mechanical bite |
| Clean dust | Avoids weak bonding |
| Test patch | Checks paint compatibility |
Degloss Latex Before Using Oil Primer
Before you apply oil primer, degloss the latex so the surface gives the primer something to grab onto.
Use proper latex preparation and deglossing techniques to avoid peeling or streaking later. Start by washing away dirt, then lightly scuff the sheen with fine-grit sandpaper or a deglosser. Wipe off dust so the primer bonds firmly.
- Choose 120–220 grit for scuffing
- Apply a chemical deglosser with care
- Keep walls dry between steps
- Wipe residue using tack cloth
- Let the surface fully cure before priming
Repair Chips and Cracks Before Priming
After you’ve deglossed the latex and removed dust, take a minute to fix any chips or cracks so the oil primer won’t lock in weak spots.
Scrape loose edges back to solid paint, then vacuum again.
Scrape loose edges back to solid paint, then vacuum again to remove debris before applying any primer or patching.
For crack filling, press a suitable patching compound into the gap, slightly overfilling so it settles flat.
Use repair techniques like feathering the surrounding area with a putty knife, keeping connections thin.
Let each patch cure fully, then sand until smooth and flush with the wall.
Wipe off residue, and check under bright light for pinholes.
Sand Latex for Mechanical Grip
You need sanding that creates a mechanical bond, so scuff the latex until it looks dull instead of glossy.
After that, wipe and remove all dust so primer and oil paint can adhere properly.
Don’t skip the cleaning step, or your topcoat won’t grip as well.
Sanding For Mechanical Bond
Sand the latex paint surface to create a mechanical grip for the oil primer. You want mechanical adhesion, so use sanding techniques that remove sheen, not the entire coating.
Lightly scuff until the surface feels rough and dull to the touch, then wipe away dust so oil primer can bite into the microtexture.
- Use 120–150 grit for most latex
- Blend edges and any glossy spots
- Keep pressure light; don’t gouge
- Vacuum, then tack-cloth the area
- Prime promptly to prevent new dust buildup
Scuff Latex Until Dull
Scuff the latex finish until it turns dull, not glossy, so the oil primer can lock into the surface. Use firm, even pressure with medium-grit sandpaper or a sanding sponge, working in small sections to avoid shiny patches.
You want a uniform, slightly rough feel—think “matte,” not “bare wood” or gouges. Wipe off any residue afterward with a clean, dry cloth, then inspect lighting to spot missed slick areas.
These scuff techniques improve mechanical grip, helping your chosen primer types bond more reliably to latex.
Remove Dust For Adhesion
Once the latex dries matte, remove every bit of sanding dust to protect adhesion. You need clean surfaces so the oil primer bonds tightly.
Use these dust removal techniques and adhesion improvement methods before priming:
- Vacuum sanding residue with a brush attachment
- Wipe with a tack cloth, changing when it loads up
- Use a microfiber rag lightly dampened with water/cleaner, then dry
- Blow off crevices with compressed air while wearing a mask
- Let the wall fully dry and inspect under side light
Skip dust and your primer may peel.
Clean Latex So Oil Primer Can Stick
Before you brush on oil primer, you need latex paint cleaned so the surface can actually grip; otherwise, the primer will skin over and fail to bond.
Use solid cleaning techniques: wash with a degreasing detergent, rinse well, and let it dry completely. If the latex is glossy or flaking, scuff-sand to dull the finish so the primer can bite.
Wipe away residue with a damp cloth, then dry again. Choose compatible primer types—oil-based primers usually need an oil-tolerant, clean surface; avoid skipping prep for best adhesion and long-term durability.
Remove Dust Correctly Before You Prime
Dust ruins adhesion, so you need to control it right after cleaning and scuffing.
Before you prime, remove every grit so oil primer won’t lift later. Use reliable dust collection methods and dust removal techniques, working from top to bottom.
- Vacuum with a brush attachment and edges
- Wipe with a tack cloth, lightly
- Blow off residue with clean, dry air
- Re-sand only where needed, then repeat removal
- Let surfaces dry fully before priming
Keep checking in strong light; any dull, dusty spots mean you missed debris.
Use the Right Primer for Oil Over Latex
Choose an oil-based primer specifically made for bonding to previously painted latex surfaces, because oil doesn’t always bite into cured acrylic the way it does into bare material.
Choose an oil-based primer made for painted latex so it bonds reliably, since it may not “bite” into cured acrylic like bare material.
You should check the label for “latex,” “oil over latex,” or “bonding primer” compatibility, then thin and apply it as directed.
This is where oil primer benefits show up: strong adhesion, better stain blocking, and smoother topcoat performance.
Don’t ignore latex paint concerns like peeling, chalking, or glossy areas—roughen them, patch defects, and remove residue first.
Use thin coats and let it cure fully before painting.
Shellac vs. Oil Primer vs. Bonding Primer
You can choose shellac when you need to block stubborn stains and seal surface issues before topcoating.
You’ll want to pick an oil primer only when compatibility checks out, since it works best under certain latex-to-oil shifts.
If your goal is maximum adhesion, go with a bonding primer to stick firmly to the existing surface and reduce peeling risk.
Shellac: When To Use It
Shellac works best when you need a fast, reliable barrier against stains and problem surfaces—especially for sealing knots, tannin bleed, smoke, and water marks before you apply latex paint.
You’ll see real shellac benefits when you must block trouble quickly, then move on without long waits.
- Seal interior knots in softwoods
- Lock in tannins to prevent yellowing
- Cover smoke and soot staining
- Stop water marks from bleeding through
- Use shellac types like dewaxed shellac for cleaner latex adhesion
Oil Primer: Compatibility Notes
After you’ve sealed stains and knots with shellac, your next step is making sure the next coat grips correctly—especially when you move to an oil primer or a bonding primer.
Choose compatible oil primer types for your substrate. For latex paint properties, check if the surface is glossy, chalky, or flaking; oil primers bond best to sound, scuffed paint, not to loose coatings.
Let the primer cure fully before topcoating. If you’re using an alkyd oil primer, scuff sand to improve adhesion.
Avoid mixing products midcoat; stick to one system for predictable bonding.
Bonding Primer: Best For Sticking
Bonding primer gives the “grab” you need when latex paint, stains, or patchy surfaces won’t bond reliably on their own. You’ll benefit most when you use proven bonding techniques and choose the right primer formulations for your substrate.
Unlike shellac, bonding primer stays flexible and resists lifting over marginal spots; unlike oil primer, it targets adhesion without heavy fumes. Apply it to clean, lightly scuffed walls, then topcoat with latex.
- Blocks tannin and stain bleed where needed
- Seals chalky, glossy, or porous areas
- Improves hold on repairs and patch seams
- Works faster with less curing time
- Accepts most topcoats after drying
When a Bonding Primer Beats Oil Primer
If you’re repainting over existing oil-based paint, a bonding primer can often save you time and headaches compared with an oil primer that only replicates the old problem.
You should choose bonding primer when your surface has slick gloss, stains, or uncertain adhesion. It grabs better, so you don’t fight peeling later.
Use scuffing plus cleaning as your bonding techniques, then apply a bonding primer as a primer alternative to oil.
Oil primers can work, but they may trap imperfections and prolong cure.
With bonding primer, you move on faster and get steadier topcoat performance.
Oil Primer Tools for a Smooth Finish
Pick the right oil primer for your surface, then prep your tools so the coat levels cleanly.
Use sanding blocks, a tack cloth, and quality brushes or rollers to remove dust and smooth out any ridges before you roll on primer.
Apply the first layer evenly, keep a wet edge, and finish with light passes for a smooth, ready-to-paint surface.
Choose Correct Oil Primer
Choosing the right oil primer determines whether your latex finish looks smooth or uneven, so you should match the primer to both the surface and the conditions.
When you pick oil primer types, consider how they interact with latex paint properties like adhesion and flexibility. Use the correct finish for your substrate and aim for even coverage.
- Spot-prime stains with a stain-blocking oil primer
- Use bonding primer on glossy or sealed latex
- Choose rust-inhibiting primer for metal surfaces
- Select fast-dry formula for tight timelines
- Match sheen level to reduce visible differences
Prep Tools For Leveling
After you match the right oil primer to the surface and conditions, you get better leveling by prepping the tools you’ll use. Gather clean brushes, a roller cover suited to smooth finishes, and a mixing stick.
Scrape dried paint from roller frames and trim bristles so they don’t clump. Wash tools thoroughly, then let them dry completely to prevent contamination. Lightly sand any tool marks or lint, and wipe away dust.
Use a strainer when pouring primer to remove chunks. Keep a damp rag nearby for quick cleanup between coats, improving surface leveling and supporting solid prep techniques.
Apply With Smooth Finishing
Once your tools are clean and prepped, apply the oil primer with steady, controlled strokes so the surface stays even. Use smooth application techniques: keep a wet edge, overlap lightly, and avoid pressing too hard.
For best results, watch finish quality considerations as you go. Work in manageable sections, then stop and check for runs, lap marks, or missed spots. Keep airflow moderate and let the primer level before recoating.
- Use a high-quality angled brush for corners
- Roll with a 3/8 in nap for walls
- Thin only if manufacturer allows
- Maintain consistent stroke direction
- Inspect under angled light immediately
How to Apply Oil Primer Over Latex Smoothly
To apply oil primer over latex smoothly, start by cleaning and deglossing the existing paint so the primer can grip. You should wipe away dust, then scuff with fine sandpaper until the surface feels uniform.
Next, choose the right primer selection: a quality oil-based bonding primer compatible with latex. Use steady application techniques—thin, even coats—and keep a wet edge while rolling or spraying.
Stir or mix thoroughly, and strain if needed for a smoother finish. After the coat sets, lightly sand any rough spots, then remove residue before topcoating.
How Many Coats of Oil Primer to Use
How many coats of oil primer do you actually need over latex paint? Usually, you only need one solid coat for good coverage, as long as you prep correctly and confirm latex paint compatibility.
For oil primer application, your goal is an even, sealed surface with no shiny spots, bleed-through, or rough texture. You’ll add a second coat when the latex is stained, repairs were deep, or adhesion feels questionable after sanding and cleaning.
Use these checks:
- Cover in thin, uniform passes
- Wait for complete hide, not streaks
- Spot-prime problem areas first
- Feather edges of patched spots
- Apply a second coat if color/tannins show
Dry Time for Oil Primer Over Latex: What to Expect
So, how long should you wait before you can paint over oil primer applied to latex? You should plan around manufacturer guidance, because dry time factors vary widely.
Temperature and humidity slow or speed curing, and good airflow helps. Apply thin, even layers; thick spots stay tacky longer.
Watch the surface, too: oil primer types differ, so check for a hard, dull finish before topcoating. In many cases, you can recoat after about 24 hours, but if it feels rubbery or looks glossy, wait longer.
When in doubt, give it an extra day.
Avoid Thick Coats and Solvent Traps
Even if your oil primer feels dry on the surface, avoid thick coats because they trap solvents underneath and keep the primer from curing evenly. You’ll fight bubbling, peeling, and weak adhesion if you keep piling on product.
Instead, apply thin, even layers and let each one flash before the next. Watch for these common mistakes:
- Apply multiple heavy passes in one go
- Ignore manufacturer recoat guidance
- Overwork the wet surface
- Seal fresh primer too soon
- Use thick, gloopy mix straight from the can
You prevent solvent traps and help the finish bond reliably.
Temperature and Ventilation for Proper Curing
Keep your workspace in the ideal temperature range so the oil primer cures evenly and doesn’t stay tacky.
Run enough ventilation throughout the process to clear fumes and help moisture escape.
If you notice slow curing, adjust temperature and airflow right away before recoating.
Maintain Ideal Temperature Range
Maintain an ideal temperature range before and during curing, because oil primer needs consistent warmth to dry and bond properly.
To protect your finish, focus on temperature control and stick to suitable conditions. Keep the room steady so the primer can flow out, oxidize, and lock onto the latex surface.
- Aim for roughly 50–85°F (10–29°C) throughout curing
- Avoid drafts or heaters blasting one spot
- Don’t prime over cold walls; let surfaces warm first
- Check temps morning and night for swings
- Plan around humid days that slow drying
Ensure Adequate Ventilation Throughout
After you’ve stabilized the temperature, you’ll need steady airflow to help the oil primer cure correctly. Keep windows open when possible, and run an exhaust fan to pull fumes out.
You should aim for consistent air circulation across walls and ceilings, not just near the door. Use ventilation tips like positioning fans to direct airflow along the surface while avoiding direct drafts that can skin the coating too fast.
Check local humidity too; damp air slows drying. Let the area stay ventilated during curing, and don’t close up the room immediately after coating.
How Long to Wait Before Topcoating With Latex
Let the latex paint cure fully before you topcoat—timing depends on temperature, humidity, and how thick your coats are.
Don’t rely on touch-dry; you need proper drying time for adhesion. Use these application tips to judge readiness and avoid soft layers under the next coat:
- Aim for 24–48 hours minimum before topcoating.
- Wait up to 72 hours in cool, damp conditions.
- Apply topcoat only when the surface feels hard, not tacky.
- Lightly scuff-sand if you see sheen or dust.
- Keep airflow steady to speed curing.
Can You Topcoat Oil Primer With Latex?
Yes—you can topcoat an oil primer with latex, but you should do it the right way to guarantee strong adhesion.
Start by letting the oil primer cure fully, then scuff-sand the surface until it feels slightly rough. Dust everything off, and use a primer sealer if the surface stains or chalks.
Let the oil primer cure, scuff-sand for adhesion, dust thoroughly, and use sealer if it stains or chalks.
This approach supports latex paint compatibility because the latex grabs into the keyed profile. You’ll also benefit from the oil primer advantages: better stain blocking and sealing.
Apply latex in thin, even coats, keeping a steady temperature, and let it dry before handling.
Can You Topcoat With Oil Paint Instead?
You can topcoat latex with oil paint, but you’ll need solid surface prep—clean, degrease, and sand until it’s dull and stable.
Make sure the oil primer is fully cured before you apply the oil topcoat, and let each layer dry hard between coats.
If you rush the curing or skip prep, you risk peeling, bubbling, or poor adhesion.
Oil Topcoat Over Latex
When you’ve already painted with latex, you might wonder whether an oil topcoat can go over it—especially if you’re thinking about switching to an oil paint instead of using an oil-based primer or specialized intercoat system.
You can’t assume oil paint compatibility works automatically across all latex paint types. Instead, focus on these checks:
- Confirm the latex finish is fully adhered and sound
- Use a compatible bonding primer if the sheen is slick
- Choose an oil topcoat formulated for adhesion over latex
- Match gloss level to reduce flash, streaks, and peeling
- Test a small patch before committing
With the right approach, you can make it work.
Surface Prep And Curing
Before you topcoat latex with oil paint, you need to prep the surface so the oil can actually grab and the film can cure without problems.
Start by sanding glossy spots and any peeling areas; you want solid, keyed texture.
Then remove dust, grease, and chalk with proper surface cleanliness—wipe with a degreaser or cleaner, and let it dry fully.
Fill cracks or holes, sand smooth again, and only then prime.
Give the primer and any patching enough curing time before you apply oil paint, since trapped solvents can cause soft spots, wrinkles, or poor adhesion.
Common Texture Problems After Oil Primer
Once oil primer dries, it can still leave your walls with texture issues that show up as soon as you roll on latex paint—especially under bright light or from certain angles.
You may notice bumps, rough streaks, or uneven sheen that create bonding challenges. To spot the cause, check for these common problems:
- Flaking or peeling edges where oil primer didn’t bite
- “Orange peel” bumps from thick rolling
- Pinholes that telegraph through topcoat
- Raised ridges from dried drips or runs
- Hairline texture waves where sanding missed spots
Prevent Brush Marks and Roller Spatter
To prevent brush mark lines, you need to keep a “wet edge” and lay the primer down in smooth, even strokes without overworking it.
For roller spatter, load your roller lightly, roll off excess, and use a steady pace so you don’t blast tiny droplets onto the surface.
If you notice streaks forming, stop and lightly smooth the area immediately before the primer starts to set.
Preventing Brush Mark Lines
Preventing brush mark lines starts with how you load and move your brush: keep a consistent amount of paint on the bristles and work in smooth, even strokes with light pressure.
Use a steady brush technique—don’t “scrub” or pause mid-stroke—so each pass blends. Plan application timing: coat one area, then feather lightly into the wet edge before it skins over. If you see ridges, stop, wipe excess, and lightly re-stroke only the line.
- Load less, then test on scrap
- Maintain wet-edge blending
- Brush with the grain
- Keep a uniform stroke length
- Correct immediately, not later
Reducing Roller Spatter Risks
When you roll latex over an oil primer, spatter usually comes from paint that’s too dry, too thick, or trapped on a poorly loaded roller.
To reduce roller spatter risks, start with correct roller application: use even pressure, work in small sections, and keep a “wet edge” so the coat doesn’t skin.
Don’t overload; load the roller lightly and roll off excess on the tray ramp. Thin the latex only as directed, and stir often.
Choose the right primer selection too—let the oil primer cure fully, then sand any glossy spots.
How to Avoid Wrinkling or Bubbling
Before you roll another coat, focus on the film conditions that cause wrinkling or bubbling—most often trapped moisture, air, or incompatible layers. You can prevent headaches by drying thoroughly, sanding edges, and applying primers at the right thickness.
Use these wrinkling prevention tips to keep your oil primer over latex paint smooth and your bubbling solutions effective:
- Let latex cure fully before priming.
- Remove dust, grease, and glossy patches.
- Stir primer well; avoid over-thinning.
- Roll with light pressure; tip off edges.
- Watch humidity and temperature; don’t rush coats.
Fix Fish-Eyes and Cratering After Priming
If you see fish-eyes or craters after priming, you’re usually dealing with contamination like grease, dust, or silicone, so start by identifying the cause on the surface.
To prevent cratering next time, clean thoroughly, lightly sand, and patch any glossy or uneven spots before you prime.
Finally, make sure you choose a compatible oil primer and apply it at the right film thickness so it actually bonds instead of pulling away.
Identify Fish-Eyes Causes
Fish-eyes and cratering usually happen because something on the surface rejects the primer, so the coating can’t wet out properly and forms round defects.
When you spot them after priming, you should identify the cause fast during surface preparation and improve fish eye prevention for the next coat.
Look for these common culprits:
- Grease, oils, or silicone contamination
- Dust, sanding residue, or loose debris
- Wax, polish, or release agents left behind
- Moisture or dew trapped in pores
- Waxed or glossy latex areas not scuffed enough
Once you find the contaminant, you can correct the substrate before repainting.
Prevent Cratering With Prep
After you identify the likely fish-eye causes, you can prevent cratering by correcting the substrate before you prime again.
Scrape off loose latex and any shiny, contaminated patches. Wash with a degreaser or TSP substitute, then rinse and let it fully dry.
Sand to dull the surface, and vacuum dust so primer can grip. Patch dips or pits with compatible filler, then sand smooth.
If you used cleaners, confirm no residue remains; residue drives cratering causes and poor adhesion.
Prime only after moisture checks pass. Use proper preparation techniques and apply primer evenly, avoiding overworking.
Choose Compatible Oil Primer
Selecting the right oil primer helps your coating system stop fish-eyes and cratering before they start again.
When you’re doing primer selection over latex, you must choose compatible products, not random oil formulas. Start by reading the label for “bonding” or “stain-blocking” and confirm it’s meant for latex-over-oil use. Then test a small patch and inspect after it dries.
- Use a bonding oil primer for slick or chalky surfaces
- Avoid silicone or wax contaminants before priming
- Match primer to topcoat chemistry when possible
- Apply the right thickness; don’t flood
- Sand cured primer lightly before painting
Troubleshoot Poor Coverage and Flash Rust
If your oil primer looks streaky or dries with mottled coverage, you’ll usually find the root cause in surface contamination, poor prep, or a mismatch between primer and substrate. Check for glossy latex, dust, and chalky spots; wash, scuff-sand, and wipe clean. For flash rust, remove all rust, then use rust prevention with a clean, dry surface before priming. Use this quick triage:
| Symptom | Likely cause |
|---|---|
| Streaks | Contamination |
| Mottled | Poor adhesion |
| Brown bloom | Flash rust |
Fix coverage issues immediately to avoid repeated failures.
Prevent Peeling With the Second Primer Coat
Once you’ve corrected streaks, mottling, and flash rust, your next job is to keep the primer bond strong through the finish coat.
After the first coat cures, apply a second coat to lock in adhesion tips and reduce peeling risk. Match primer types to the surface, then lightly scuff for tooth before priming again.
- Let the first coat fully dry and cure
- Sand smooth edges and drips
- Use compatible primer types for your substrate
- Keep coats even, thin, and well-brushed
- Remove dust before the second coat
Spot Bad Adhesion Early (Tape Test Signs)
Spotting bad adhesion early saves you from peeling later, and you can catch it fast with a simple tape test.
Press painter’s tape firmly onto the primed latex surface, then pull it back quickly at a 90-degree angle. If paint or primer lifts with the tape, you’ve got adhesion issues.
Watch for rough edges, powdery residue, or tiny blisters that appear after pressing—those are red flags too.
Do the test in a few spots, not just one, especially near corners, patched areas, or glossy spots.
Fix by cleaning, sanding, and re-priming before you proceed.
What If the Primer Feels Soft or Gummy?
When your primer feels soft or gummy to the touch, treat it as a bonding problem waiting to happen. Soft primer issues usually mean the surface didn’t cure or the wrong film is forming, so oil primer over latex may fail later.
Before you coat again, pause and check:
- Primer remains tacky after dry time
- You can dent or smear it with light pressure
- Odor feels strong or uneven across spots
- Dust doesn’t stick; it clumps into paste
- The gummy texture spreads when you rub
Let it fully cure, or remove and redo the compromised section.
How to Reprime After Failed Adhesion
If your latex paint didn’t bond and the surface lifts, flakes, or peels, you need to re-prime correctly before you repaint.
Scrape every loose edge until you hit solid substrate, then feather the borders with sandpaper. Vacuum dust, wash with a degreaser if needed, and let everything dry fully.
Use repriming techniques that match the damage: stain-blocking primer for discolored areas, then a bonding primer where adhesion challenges keep recurring.
Spot-prime bare spots, not just the failures, and apply two even coats. Lightly sand between coats to remove raised grain.
Can You Prime Glossy Latex With Oil Primer?
Yes—you can prime glossy latex with oil primer, but you need to prep the surface so the oil primer can actually grab.
Start by cleaning off grease and chalk, then scuff the glossy latex with sandpaper until it dulls. Wipe away dust, and check for any peeling areas you must scrape and spot-repair.
Clean off grease and chalk, scuff glossy latex until dull, wipe dust, and scrape any peeling areas for spot repair.
Apply the oil primer evenly, letting it dry fully before your topcoat.
- Degloss with sandpaper
- Clean with TSP or cleaner
- Dry thoroughly, remove dust
- Spot-fix peeling spots
- Prime in thin, even coats
What Not to Do When Priming Over Latex
Even after you’ve deglossed glossy latex for an oil primer, a few common mistakes can still ruin the bond.
Don’t skip cleaning; grease and dust cause latex paint problems like peeling.
Don’t prime over damp or oily stains; they create oil primer issues and bleed-through.
Don’t use thick, uneven coats—runs trap solvent and weaken adhesion.
Don’t sand too lightly; glossy residue remains and prevents bonding.
Don’t ignore dry times; recoating early can seal contaminants.
Don’t mix incompatible products, like thinning oil primer with water.
Always let surfaces cure, then verify adhesion before finishing.
When to Strip and Restart (Real Warning Signs)
Still hoping the oil primer will “cover it and move on”? If you see these warning signs, don’t gamble—strip and restart.
You need correct stripping techniques, not patchwork over failing latex.
- Primer won’t bond; it lifts when you run a fingernail
- Old paint wrinkles, blisters, or keeps bleeding stains
- Fresh coats stay tacky, even after drying time
- You notice rust, mold, or mildew at seams and edges
- Sheen changes or sandpaper loads instantly, showing poor adhesion
When that happens, stop and choose primer alternatives that match the surface, then re-prime clean, cured areas.
Fast Compatibility Check: Paint + Primer Scratch Test
Before you commit to oil primer over latex, run a quick paint-plus-primer scratch test on a small, hidden spot. You’re checking compatibility concerns before you waste time and money. Choose an inconspicuous area, apply oil primer over the latex, and let it cure per the label. After fully dry, scratch firmly with a coin or key. If paint stays tight, adhesion looks good; if it flakes, lifts, or turns tacky, stop and rethink.
| Scratch result | What it means |
|---|---|
| No lift | Good adhesion |
| Hairline scuff | Borderline |
| Flaking | Bad compatibility concerns |
| Tacky/soft | Chemical reaction risk |
Final Topcoat Choice After Oil Primer Over Latex
Once your scratch test checks out and the oil primer has fully cured, you can pick a topcoat that won’t undermine the bond you just established.
Your topcoat considerations should start with the chemistry: choose an alkyd or oil-based finish, or a compatible water-based topcoat labeled for primed oil surfaces. Match sheen levels and let each coat flash, then cure fully for finish durability.
Choose an alkyd/oil topcoat—or a compatible water-based one—match sheens, let coats flash, then fully cure for durability.
Consider:
- Verify label compatibility with oil primer
- Use proper brush/roller nap
- Apply thin, even coats
- Sand lightly between coats if needed
- Watch humidity and temperature
How to Maintain a Long-Lasting Finish
To keep an oil-primed, latex-finished surface looking new, you need consistent, gentle maintenance from day one—because dirt, moisture, and abrasion steadily weaken the coating.
Dust weekly with a soft microfiber cloth, and clean spills fast using mild soap and water. Avoid harsh chemicals, steam, and abrasive pads that can dull the topcoat.
Inspect monthly for chips, cracks, or peeling; touch up quickly with properly prepped paint to protect long lasting durability.
Keep humidity controlled, fix leaks, and use caulk at seams.
Finally, wash seasonally and don’t drag furniture across painted areas to improve finish maintenance.
Frequently Asked Questions
Can Oil Primer Be Used Over Latex Painted Outdoors in Cold Weather?
Yes, you can use oil primer over latex outdoors in cold weather, but cold weather effects matter. Wait until the latex cures, keep surfaces dry, and choose a primer rated for low temperatures to guarantee outdoor painting bonds properly.
Will Oil Primer Seal Odors From Smoky or Water-Damaged Latex Paint?
Yes, oil primer can help seal odors, including smoke damage and lingering smells from water-damaged latex. You’ll need clean, fully dried walls and proper ventilation; apply a quality odor-blocking primer coat, then topcoat after curing.
How Soon After Priming Can I Safely Clean the Surface?
Coincidentally, you can usually clean the surface soon after priming: wait about 24 hours, then use gentle cleaning techniques. If the primer still feels tacky, extend drying times 2–4 more hours before wiping with a damp cloth.
Does Humidity Affect Oil Primer Adhesion to Existing Latex Paint?
Yes, humidity levels can affect oil primer adhesion to existing latex paint. If surfaces stay damp or humid air condenses, you’ll risk adhesion issues and poor bonding. Let the area dry fully, and prime when conditions are consistently dry.
Can I Use a Tinted Oil Primer Over White Latex Without Color Bleeding?
Yes, you can use a tinted oil primer over white latex, and you’ll usually prevent color bleeding if you prep cleanly, scuff-sand, and choose primer compatibility. Do color matching carefully, apply a full bonding coat, then topcoat evenly for best coverage.
Conclusion
Yes, you *can* put an oil primer over latex paint, but only if the latex is firmly bonded, cleaned well, and lightly scuffed so the primer has something to grab. If the paint peels, chalks, or you see cracking after sanding, don’t “prime and hope”—strip and restart. You can test by scratching for adhesion before you commit. After priming, use the right topcoat and keep up with regular maintenance for a long-lasting finish.
