
How to Paint Polka Dots on Walls Without Ruining the Pattern
Plan your polka dot grid first by measuring wall dimensions and lightly sketching dot spacing. Prep the wall by patching, sanding, and cleaning, then prime stained spots to prevent bleed. Choose consistent dot size and a finish like satin for sharper edges. Use painter’s tape as row/column guides, and dab on paint with a small foam or liner brush using a light touch. Add a second thin coat, remove tape carefully, and fix smears fast so the pattern stays crisp—keep going for more tips.
Plan Your Polka Dot Grid Before You Paint
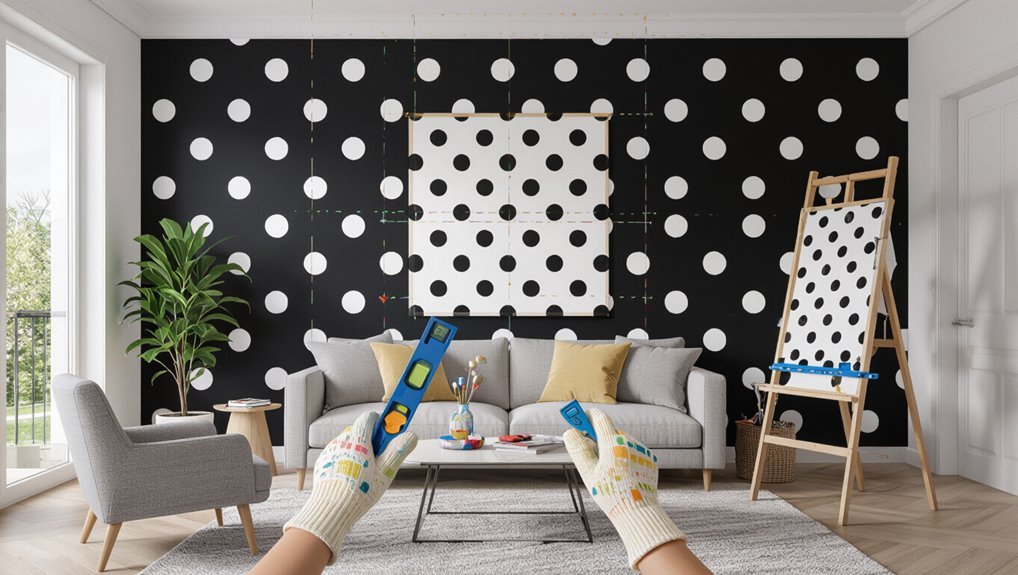
Before you open a single can of paint, map out your polka dot grid so the pattern stays even from corner to corner.
Decide on a color palette first, then measure your wall width and height. Mark starting points, calculate dot spacing, and sketch the layout lightly to guide your pattern planning.
Decide your color palette, measure wall dimensions, mark starting points, calculate spacing, and sketch lightly to plan an even dot grid.
Do careful wall preparation: patch holes, sand bumps, and clean dust so your lines don’t drift. Use painter’s tape or a chalk guide to lock the grid position.
When you’re ready for paint application, work systematically row by row, keeping spacing consistent and edges crisp.
Choose The Right Dot Size For Your Space
How big should your polka dots be to flatter your room instead of overwhelming it? Choose sizes based on sightlines and wall scale. If your room feels tight, go smaller—about 6–10 inches across for most accent walls—so the pattern softens, not crowds. For large living rooms or high ceilings, larger dots (10–18 inches) create confidence and balance. Match dot color selection to the room’s purpose: bold dots energize, muted ones calm. Also, do wall surface preparation carefully; uneven texture blurs edges, making even the right size look messy.
Pick Spacing That Looks Intentional
Before you paint, measure your dot size and the spacing so the pattern stays consistent.
Use painter’s tape alignment marks to plan both rows and columns, then step back to confirm the gaps look intentional.
Adjust the distance now—small changes in spacing can make the whole wall feel balanced.
Measure Dot Size And Spacing
Decide on your dot size first, then map spacing so the pattern reads intentional from across the room. Measure a test dot diameter, then set the center-to-center distance equal to that diameter plus your gap. Keep wall texture considerations in mind: rough walls widen dots, so slightly reduce spacing if texture blooms paint. For dot color choices, pick high-contrast shades that don’t visually merge. Use a quick grid to stay consistent:
| Row/Col | 1 | 2 | 3 |
|---|---|---|---|
| 1 | d | d+g | d |
| 2 | d+g | d | d+g |
| 3 | d | d+g | d |
Use Painter’s Tape Alignment Marks
Once you’ve set your dot diameter and spacing, use painter’s tape to lock in the pattern before you paint. For pattern precision, map the grid lightly with pencil, then place painter’s tape strips along the guide lines so every row aligns.
Use tape application to mark both the starting corners and repeat points, checking symmetry as you go. When you press tape down, smooth edges to prevent bleeding, and remove it only after the dots dry.
- Choose spacing that matches your wall scale.
- Stagger rows for a natural rhythm.
- Reposition tape before any mismatch spreads.
Straight Rows Or Staggered: Choose Your Look
When you plan your polka dots, pick either straight rows or a staggered pattern to control the whole vibe of the room. Your wall color sets the backdrop, so match it to the polka dot styles you want: classic, playful, or sleek.
For straight rows, you align every dot in columns and rows, creating crisp order and making the wall feel taller or more structured.
For staggered, you shift each row, so dots interlock visually. That look feels more energetic and hides slight spacing errors.
Choose based on your furniture layout and desired rhythm.
Place Dots Around Corners, Doors, And Molding
When you reach a corner, line up your dots on both walls so the pattern looks continuous.
Around doors and molding, measure the spacing carefully and keep the dot centers evenly spaced to match the rest of the layout.
Mark your guide points first, then paint the dots so edges and trim stay crisp.
Aligning Dots At Corners
To keep your polka dots crisp at corners, plan their positions before you paint and decide how the pattern will “wrap” around the bend. You align dot arrangements so the seam looks intentional, not broken.
On wall textures, lightly test placement so transfer lines don’t distort. Keep design balance by matching spacing across each side, then choose color combinations that support the corner’s visual impact. For accent walls, treat corners as the pattern’s anchor, maintaining pattern flow.
- Mark the corner guideline and transfer the first dot.
- Mirror dot centers or stagger for playful themes.
- Touch up edges with a small brush.
Spacing Around Doors And Molding
You’ll get the cleanest look by treating doors and molding like their own “mini corners,” with dots spaced evenly so the pattern doesn’t bunch or drift. Use your marks to preserve door frame alignment; start dots at the same measured distance from both trim edges. Keep molding considerations tight: shift the next dot to match the established grid, then continue past the casing. Test on a scrap wall if your wall texture blurs edges. For visual balance, reduce half-step deviations near wider trim.
| Location | Spacing tip |
|---|---|
| Door casing | Match grid distance |
| Top lintel | Keep dot centers level |
| Side trim | Mirror opposite side |
| Base molding | Use same rhythm |
Measure Using A Laser Level Or Chalk Line
Start by marking a reliable grid so your polka dots stay even across the wall. Use a laser level to project straight reference lines, or snap a chalk line for crisp guides.
Before you measure, do thorough wall preparation so bumps won’t distort your alignment techniques. Plan your paint selection and dot size, then map intersections where each dot will land.
- Verify levelness corner to corner with the laser level or repeated chalk lines.
- Mark grid widths for consistent dot application.
- Re-check design considerations before painting.
When done, use cleanup methods promptly to prevent chalk smears and paint buildup.
Mark A Start Point You Can Recheck
Pick a clear start point at a corner or along your reference line, then place a small, temporary mark you can confirm throughout the job. You’ll use this start point to orient every dot so spacing stays consistent.
Lightly mark the wall with a pencil or removable chalk, and label it so you don’t confuse it with other marks. Before painting, step back and verify the mark lines up with your layout.
If you’re using multiple rows, extend your reference line to the edges, then recheck the reference mark after each row. When the mark matches, keep going.
Dry-Fit The Pattern With Painter’s Tape
Before you paint, mark a grid on the wall with painter’s tape so you know exactly where each dot will land.
Then dry-fit the spacing—place small tape markers or the template pieces and step back to check alignment and symmetry.
When it looks right, you’re ready to start painting the dots in your planned pattern.
Mark Grid With Painter’s Tape
Mark off your wall with painter’s tape to dry-fit the polka-dot layout before you commit to paint. Use painter’s tape for clean edges, then tape a light grid layout so you control grid alignment.
As you work, double-check dot measurement against your chosen spacing, keeping pattern consistency across the whole wall. For tape application, press firmly along grid lines, but leave tabs for easy tape removal.
Then perform alignment verification—step back and confirm each intersection matches your layout.
- Plan a grid layout with measured intervals
- Mark key intersections for alignment verification
- Test taping, then prep for accurate tape removal
Dry-Fit Spacing Before Painting
Once you’ve laid down your painter’s-tape grid, dry-fit your dot spacing by arranging a few “test” dots directly on the wall—without painting yet.
Step back and check your pattern visualization: do the gaps look even, and does the rhythm feel right?
Next, use dot alignment techniques by pressing a temporary dot with painter’s tape or a removable marker at each planned center.
Compare top, middle, and bottom rows; adjust spacing before you commit.
If lines drift, tweak your tape grid, then re-test.
When it looks balanced, you’re ready to paint consistently across the whole wall.
Choose Supplies For Crisp, Non-Smudgy Dots
To get crisp, non-smudgy polka dots, start by choosing tools that control edges and drying time.
To get crisp, non-smudgy polka dots, start by choosing tools that control edges and drying time.
Make smart supplies selection so your dot application stays sharp instead of bleeding. Use painter’s tape for consistent spacing, then pair it with a foam roller or stipple brush to deposit paint without dragging.
Favor a small, dense foam brush for tight control, and keep a narrow liner brush for touch-ups. Select fast-dry, low-viscosity wall paint, and use a fresh dab pattern instead of swiping.
- Foam brush size matched to dot diameter
- Low-nap rollers for even pickup
- Thinner only if manufacturer allows
Pick A Paint Finish That Helps Dot Edges
Pick a matte or eggshell finish when you want soft-looking dots that won’t glare under light.
If you want sharper dot edges, go with satin, since it holds crisp lines better as you paint and dry.
Test your finish on a small patch first so you can confirm the edge definition you’re after.
Choose A Matte Or Eggshell Finish
A matte or eggshell wall paint makes polka dots look crisp because it dulls glare and hides tiny imperfections that can blur edges.
Choose this finish when your goal is clean, separated circles. With matte benefits, you minimize reflections that steal contrast from your painted dots. If your room needs frequent cleaning, go with eggshell durability so the dots stay looking fresh.
- Test both finishes on scrap board to compare edge visibility.
- Apply two even coats, letting each dry fully before dots.
- Lightly scuff between coats for consistent coverage.
Use Satin For Sharper Dot Edges
If you want your polka dots to look extra crisp, use satin wall paint instead of matte or eggshell. The paint finish helps boost edge sharpness, so each circle holds its shape and dot texture stays clean.
After wall preparation, tape guides firmly and use steady application technique with a small brush or foam roller. Satin reflects a bit of light, improving color contrast and overall aesthetic appeal.
Match drying times—let dots cure fully before removing tape—so paint types don’t smudge. With sharp edges, you can push pattern creativity by spacing dots confidently.
Choose A Foam Dabber Or Brush That Works
Choosing the right foam dabber or brush makes or breaks your polka-dot pattern. You should match tool pressure and texture to your wall finish. With the right foam choices, you keep dots crisp instead of smeared; with correct brush options, you control coverage and bounce-back.
Start by picking a dense foam dabber for tight circles, or a flat foam brush for softer edges. Then tune your technique so each press lifts cleanly without dragging.
- Use dense foam for sharp, consistent dots.
- Use short-nap brushes for even paint pickup.
- Avoid overly flexible heads that distort spacing.
Test Your Dot Size On A Scrap Board
Before you mark the wall, test your dot size on a scrap board so you can see how your paint and tool behave in real conditions.
Use the same foam dabber or brush you’ll use on the wall, and do real dot testing with scrap materials that match your wall’s texture.
Dip lightly, stamp straight down, and keep a steady pressure for a few dots.
Check the edges: are they crisp or smudged?
Let dots dry briefly, then evaluate coverage and opacity.
Adjust your dip depth, brush load, or dot size until results look perfect.
Prep The Wall Before You Start Painting Dots
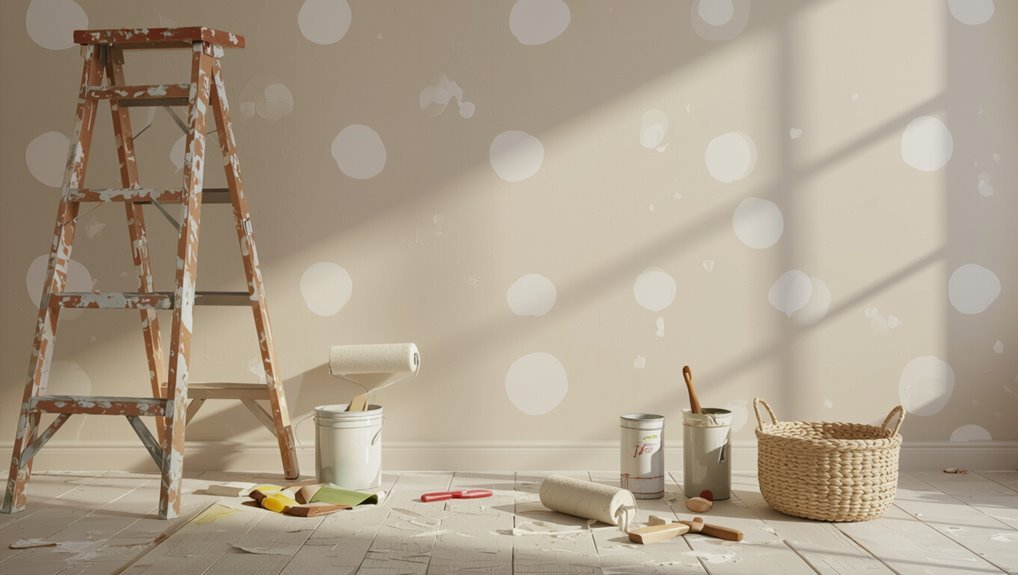
Prep your wall so the dots land cleanly and stay that way. Start with solid surface preparation: do a pre paint inspection, check wall condition under lights, and note cracks, bumps, and uneven wall texture.
You must address issues before dotting, or paint adhesion will fail.
- Use paint primer after wall cleaning to seal minor spots and boost adhesion.
- Perform surface smoothing; sand high ridges and handle dips with a patching technique.
- Treat wall stains by spotting them early, so they won’t bleed through your dots.
Clean And Dry The Wall Thoroughly
Thoroughly clean and fully dry your wall so dust, grease, and leftover residue don’t keep your dot paint from sticking.
Use solid wall preparation: start by vacuuming or wiping loose debris, then wash with warm water and a mild detergent.
Vacuum or wipe loose debris, then wash with warm water and mild detergent for a strong, clean dot-paint bond.
Employ cleaning techniques that remove oils—focus on near switches, trim, and high-traffic areas.
Rinse well so soap film doesn’t interfere.
After cleaning, let the wall dry completely; air-dry time matters, so don’t rush.
If you’re unsure, press painter’s tape briefly—no residue should transfer.
Patch Holes And Sand Rough Texture
Patch any holes with spackle, then let the patch dry fully before you touch it again.
Once it’s cured, sand the area until you get a smooth finish that blends with the wall.
After that, wipe away dust so your polka dots go on evenly.
Patch Holes With Spackle
Once you’ve removed loose drywall edges and cleaned the area, scoop spackle onto the hole with a putty knife, pressing firmly to fill the crater. You’ll want the right spackle types for the depth—lightweight for small pinholes, heavier for deeper gouges.
Smooth each layer with the knife edge so the surface blends with the surrounding wall, not raised.
- Apply in thin coats to reduce shrink.
- Check drying time and add another coat only if you see low spots.
- Feather edges outward for a seamless shift.
Let Patch Dry Fully
After you’ve filled the hole and smoothed the spackle, give it enough time to cure.
Don’t rush—patience required here prevents soft patches that later telegraph through paint and dots. Leave the wall undisturbed until the surface feels hard and dry to the touch, not cool or damp.
To support drying techniques, improve airflow with a fan and keep the room at a steady temperature. If you applied thick layers, allow extra time, since moisture needs to escape fully.
Only move to your next step when the patch looks uniform and firm.
Sand Until Smooth Finish
Sand the patched area until it blends seamlessly with the surrounding wall. You want a wall surface that’s ready for polka dots, not visible ridges.
Use sanding techniques that feather edges outward so the repair disappears under paint. Start with medium grit to flatten lumps, then switch to fine grit for smooth finishes. Wipe dust away with a damp cloth and let it dry before you prime or paint.
- Sand in light, even strokes, following the wall’s texture.
- Check under angled light for remaining high spots.
- Dust thoroughly between grits to prevent scratches.
Prime Stains So Coverage Stays Even
Before you paint polka dots, prime any stained areas so the color underneath can’t bleed through, and you won’t end up with uneven spots.
Use a stain-blocking primer on water marks, smoke, rust, and old patch jobs. Let it dry fully, then spot-sand lightly to smooth any raised texture.
Prime also if you see uneven sheen, because glossy patches can resist paint.
After priming, stir your dot paint well and apply in thin coats so you keep clean circles. This improves paint adhesion and helps the pattern stay crisp.
Protect Floors, Trim, And Edges With Tape
Tape off the floor and trim edges before you start so splatters don’t land where you don’t want them.
Press the tape down firmly and seal corners with extra care for crisp, clean polka-dot lines.
Pull the tape at the right time so you get sharp edges instead of smudges.
Tape Floors And Trim Edges
Once you prep the walls for polka dots, you should tape off the floors and protect the trim so your paint stays crisp.
Use proven taping techniques: lay painter’s tape along baseboards, doorframes, and window casing, then run a second strip over any gaps for edge protection. Press tape firmly with a plastic putty knife so paint won’t creep underneath.
- Cover floors with plastic sheeting, then tape edges down tightly.
- Align tape parallel to trim lines; remove quickly if you still see wet paint.
- Keep a clean boundary by re-taping worn sections before you continue.
Seal Corners For Clean Lines
Seal the corners carefully so your polka dots—and your paint lines—stay sharp and professional.
Before you paint, press tape tight along baseboards, window trim, and ceiling edges where walls meet. Use corner sealing techniques: run a thin bead of painter’s caulk or a sealing gel at inside corners, then tool it smooth with a damp finger. Let it dry completely.
Protect floors with drop cloths and keep a clean edge by overlapping tape seams.
When you start dotting, use precision painting tools—angled brushes and small rollers—to fill right up to the sealed lines.
Create Guidelines You Can Paint Without Smearing
Start by marking a light grid on the wall with a pencil or chalk, then go over each intersection with a painter’s guideline using a color that won’t show through your final paint. You’ll avoid smears if you do solid wall preparation first, then test your paint types on scrap.
1) Use guideline materials like masking tape strips or low-tack painter’s tape, not marker.
2) Apply alignment techniques with pattern tools, keeping dot positioning consistent before loading the brush.
3) Follow spacing methods and coverage tips: dab lightly, stop before paint runs.
Use design inspiration sparingly, and plan maintenance strategies to touch up edges.
Use A Dot Template For Faster Layout
After you’ve marked clean guidelines that won’t smear, you can speed up the dot layout by using a dot template. Place the template flush against the wall, and press lightly so you control dot placement.
Choose sturdy template materials, like plastic or thick cardboard, then test stencil techniques on scrap first. Use spacing tools—measuring blocks or guide spacers—to keep each dot aligned and maintain pattern consistency.
Choose sturdy template materials like plastic or thick cardboard, then test your stencil techniques on scrap to perfect alignment.
Work row by row, repeating your layout strategies for every square. Let design inspiration guide dot size variation, but keep the template orientation unchanged.
Follow solid application tips: reload the brush sparingly and wipe drips immediately.
Build A Reusable Grid For Large Walls
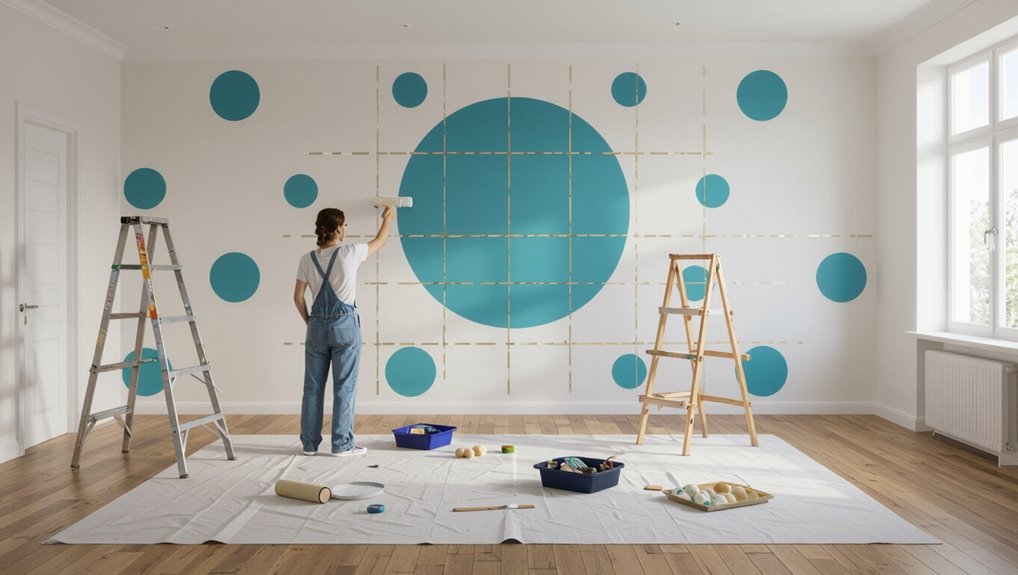
Pick a grid size that matches your dot spacing, then mark clear reference lines across the wall.
Use a reusable guide you can reposition section by section, and keep every row and column aligned as you move.
If you stay consistent with your grid, your polka dots will look straight and even over the whole large wall.
Choose Grid Size
To keep your polka dots even on a large wall, you need a grid that you can reuse without recalculating—so measure your wall width and height first.
Pick grid dimensions that divide cleanly into both measurements, and choose a dot spacing that matches your desired size. If you’ll use dot variations, select a grid that still lands larger and smaller dots at consistent points.
For reusable accuracy, tape a printed grid or lightly sketch it on painter’s paper, then transfer quickly.
Use these checks:
- Count columns/rows before painting.
- Test one corner with tape.
- Adjust spacing to fit multiples.
Mark Reference Lines
Start by marking reference lines that you can reuse across the entire wall. Measure the wall width and height, then decide your dot spacing from the grid size you chose.
Use reference tools like a chalk line, laser level, and tape measure to create a straight horizontal baseline and vertical midline. Lightly snap the lines, then step back to confirm they’re square.
For large walls, add a few parallel guide lines so you don’t recalculate. Keep your marks faint but visible, and use mark precision by double-checking corners and edges with a level before you start painting dots.
Maintain Alignment Over Walls
Once your reference lines are set, you can maintain alignment across the entire wall by building a reusable grid that guides every dot—especially on large spaces where tiny shifts add up.
Lightly mark your grid across the width, then tape a spacer jig to reuse the same spacing while you paint. Use dot alignment techniques: measure from the same corner each row, and keep your stencil or brush perpendicular.
Before starting, follow wall preparation tips so the surface stays smooth and paint doesn’t bleed under edges.
- Create a grid on paper and transfer key intersections.
- Use painter’s tape rulers between rows.
- Recheck every 4–5 dots.
Mark Vertical And Horizontal Reference Lines
Before you paint your dots, mark a light grid of vertical and horizontal reference lines so every circle lands where you want. Use reference materials like a measuring tape, level, and painter’s tape; these alignment techniques keep your spacing true across the whole wall. Start by finding the center height and width, then lightly draw vertical lines from that point and add matching horizontal lines.
| Position | Line guide |
|---|---|
| Top-left | vertical + horizontal |
| Top-right | vertical + horizontal |
| Bottom-left | vertical + horizontal |
| Bottom-right | vertical + horizontal |
Keep Dot Diameter Consistent Across The Wall
Pick one dot template and stick with it so every circle stays the same size.
Use your even spacing lines as a guide, then mark where each dot will sit.
Before you paint, verify the template diameter against a test dot on the wall and adjust if anything looks off.
Choose One Dot Template
Start by choosing a single polka dot template—either a stencil or a craft punch—so every dot matches in size. You’ll control size variations by committing to one template and sticking with it across the entire wall.
Pick dot template types that fit your look, then decide which template materials work best for you. Try creative templates with clean edges, but keep the same diameter every time.
Before you paint, confirm template positioning so alignment stays consistent as you repeat the pattern.
- Test your stencil/punch on scrap.
- Mark template starting points lightly.
- Recheck diameter before each session.
Mark Even Spacing Lines
Evenly spaced dots look professional because every row lines up cleanly.
Before you start, do wall preparation: clean surfaces and prime if needed.
Use spacing techniques to plan your grid design, then mark even lines with alignment tools like a level, ruler, or chalk guide.
Focus on dot placement by measuring accuracy—measure from a fixed edge, mark start points, and extend lines across the wall.
Keep pattern balance by alternating offsets only if your design requires it.
Choose paint types that suit your surface, and respect drying times so lines don’t smear, keeping visual consistency.
Verify Consistent Dot Diameter
Once your spacing lines are marked, focus on dot diameter so every circle looks like it belongs to the same grid.
Verify by doing quick dot measurement techniques: compare fresh test dots to the first one before you commit. Press your stencil or brush consistently, and let paint build evenly instead of flooding edges.
If dots start shrinking as paint thins, reload and repaint immediately to keep maintaining symmetry.
- Measure the first dry dot against your guide using a ruler or caliper.
- Use a single loading amount for the brush, then repeat across the wall.
- Step back every row to spot drift in maintaining symmetry.
Control Paint Amount To Prevent Bleeding
Use a light touch so you don’t flood the stencil or brush area—dip your applicator sparingly, then dab off any excess on a paper towel before you apply it to the wall.
Keep your paint consistency smooth, and match brush selection to your stencil size for controlled paint absorption. Press lightly to protect wall texture, and pause so you maintain dot alignment with each placement.
Do technique practice on scrap drywall first, using your chosen color choice and respecting drying time between rows.
For cleanup tips, wipe drips immediately with a damp rag, and improve surface preparation so paint won’t creep.
Load The Brush Lightly For Better Spots
Load your brush lightly so the paint stays on top of the wall instead of soaking through and spreading. You’ll get cleaner brush technique and rounder spots by using the right paint consistency.
Before you start, finish surface preparation and plan pattern alignment so each dot placement matches your guide. Use small, controlled strokes—painting methods matter more than force.
- Dip, tap, then wipe the excess to match your color selection.
- Test on scrap to confirm tool selection and paint consistency.
- Keep edges crisp, then follow cleanup tips immediately.
Use this design inspiration to repeat patterns evenly.
Dab Paint Instead Of Brushing For Control
When you dab instead of brushing, you keep the paint pooled where you want it and prevent smears.
Use a dabbed brush technique to press lightly, lift cleanly, and build each spot with control.
As you work, maintain consistent dot spacing by using the same dab pressure and spacing every time.
Use A Dabbed Brush Technique
Grab a flat or small round brush and dab—don’t brush—into the paint, so you control each dot’s size and spacing.
Start with solid wall prep; smooth, dry surfaces help your pattern consistency. This dabbed brush technique gives you crisp edges and lets you test color contrast before committing.
Use a light touch for small dots, firmer pressure for fuller ones, and keep a steady wrist angle for artistic flair.
- Try a scrap section first, then adjust density.
- Respect drying time between layers to prevent smears.
- Plan a cleanup strategy with water or solvent right away.
Maintain Consistent Dot Spacing
To keep your polka dots looking intentional, you need consistent spacing—so dab each mark instead of brushing across the wall. Work in small sections so you can measure as you go.
Use spacing tools like painter’s tape grids, a dot template, or a ruler with marks to guide your next dab. Keep your brush or sponge perpendicular to the wall, then lift straight up to avoid smears.
Apply dot alignment techniques by lining up every new dot with the previous row’s centers. Step back often, but adjust immediately while paint is still wet.
Use The Same Pressure On Every Dot
Maintain a steady hand and match your pressure dot-to-dot. You need pressure control so each circle fills to the same size; that’s how you keep dot uniformity across the room.
Dip your brush once, then rely on consistent wrist motion instead of squeezing harder mid-dot. If one dot looks lighter, pause and reset your grip before continuing, not after.
- Practice on scrap until each stroke lands identical.
- Use the same paint load for every dot.
- Count your timing: quick touch, lift cleanly.
Avoid Oversaturating Textured Walls
Even with steady pressure, textured walls can drink paint and cause dots to balloon, bleed into the texture, or look darker than the rest. You must control paint thickness control and avoid overloading. Use proper surface preparation methods first, then test paint absorption factors on a scrap area. Match wall texture compatibility with your dot application strategies and choose dot painting tools accordingly. Consider these cues:
| Tool | Risk | Fix |
|---|---|---|
| Roller | Heavy sheen | Light coat |
| Dabber | Pooled edges | Quick lift |
| Brush | Patchy coverage | Back-brush |
Use paint consistency tips, and decide roller versus dabber fast to prevent wall coverage issues.
Work In Sections To Lock In Alignment
Section off your wall with painter’s tape so each band stays consistent as you work.
Paint the dots in aligned rows within one taped section, then move to the next only after the first set dries enough not to smear.
This keeps your spacing straight and helps every row line up cleanly.
Section Off With Painter’s Tape
Use painter’s tape to divide the wall into tight grids so your dots line up across the whole room. Focus on tape placement first: mark the guides, then press down tape edges firmly for clean boundaries and consistent tape alignment.
Choose tape types that match your wall texture; this boosts tape durability and reduces paint bleed, improving tape precision. Keep tape visibility low by using matte tape and tight overlaps.
Work in sections so your tape technique stays consistent. When you finish a grid, let paint set slightly, then perform tape removal carefully at an angle.
- Dry test alignments
- Check tape edges
- Adjust section sizes
Paint Dots In Aligned Rows
Once your tape guides are down, paint dots in aligned rows by working one small grid at a time.
Before you start, finish wall preparation: remove dust, let primer cure, and check lighting so you can see edges.
Load a small sponge or dotting tool, then press firmly at each tape intersection, lifting straight up to keep crisp circles. Move across your row, placing each dot consistently for steady polka dot placement.
When you reach the grid end, step down one row and repeat. Keep wet paint covered from drips, and let each section set before removing tape.
Paint One Row, Then Verify Spacing
Start by painting one horizontal row of polka dots using your painter’s tape guides. Then step back and measure the spacing before you commit to the rest. You’re checking dot placement so your pattern stays even.
Use spacing techniques: compare several dot-to-dot distances with a ruler, and confirm each dot sits centered over the guide marks. If anything looks off, correct it now on this first row—don’t “fix” it later.
- Mark the measured center-to-center gap.
- Repaint any dot that smears or shifts.
- Take a quick photo for visual alignment.
Let Dots Set Before You Paint Adjacent Rows
Let each polka dot dry completely before you start the next row, so you don’t smear fresh paint.
Carefully tape along the edge of the finished row to protect it while you work.
When the spacing looks crisp, you can move on with confidence.
Let Dots Dry Completely
Give the first row of polka dots time to dry fully before you paint the next row. Don’t rush—your pattern will smear if you overlap paint that’s still wet.
Use dot drying techniques that let each circle set and skin over, then harden. Check ideal drying times by touch: lightly tap a dot’s center; it should feel dry and firm, not tacky. If humidity is high, add extra minutes and improve airflow with a fan.
Plan your schedule so you can step back and verify consistency before continuing.
- Use thin coats for faster curing.
- Keep dots level and untouched.
- Inspect edges for tackiness.
Tape Adjacent Rows Carefully
Once your first row feels dry and firm to the touch, you can protect it while you work on the next. Use smart tape techniques to shield fresh dots: press painter’s tape along the edge of the row, not over the dot faces.
Keep the tape line straight so your next row aligns, supporting pattern precision. When you’re ready to paint, apply color only within the open space, then peel the tape back slowly at a low angle before the paint fully cures.
If any bleed starts, stop and reposition tape.
Fix Minor Smears Immediately, Before Curing
Fix any minor smears as soon as they happen—before the paint starts to set. If a dot edge smudges, you don’t wait; you act.
For effective fixing smears and clean touch up techniques, keep a damp cloth and a small angled brush handy. Blot lightly, then reshape the dot with a quick, controlled tap. Work while the surface stays glossy.
- Dab the smear with a barely wet rag, not wiping.
- Feather outward with the brush tip to prevent hard edges.
- Re-dab the center so the polka dot regains its round shape.
Remove Tape At The Right Time
After you’ve corrected any smears while the paint is still glossy, you should remove the tape at the right moment to protect your crisp polka-dot edges.
Use timing techniques: wait until the paint skins over but doesn’t fully cure, typically after the recommended dry-to-touch period. Test on a hidden corner—if the tape pulls lightly without stretching, you’re ready.
Grab the tape backing, pull it back on itself at a 45-degree angle, and keep the motion steady. Don’t pause mid-strip. If it starts to tear, wait a few minutes and try tape removal again.
Thin Paint Properly To Stop Edge Bleeds
Thin your paint properly to prevent edge bleeds and keep those polka dots sharp. Adjust paint viscosity so your paint consistency feels like smooth cream, not watery runoff; this controls edge bleeding at dot borders.
Thin paint to a smooth-cream consistency to prevent edge bleeds and keep polka dots sharply defined at every border.
Before you start paint application, check surface texture—rough spots gulp thinner unevenly, so apply a uniform base.
Use these steps:
- Stir, then test on scrap to confirm paint thickness won’t sag.
- Roll with light, even pressure using a steady roller technique.
- Follow a tight layering technique, letting drying time fully finish between coats.
Pick your color choice wisely; deeper tones highlight any flaws.
Keep Dot Edges Sharp On Satin Or Gloss
On satin or gloss, use painter’s tape guides so your dot edges stay crisp and clean.
Let each coat set fully before you move or repaint, and keep your brush pressure gentle to avoid smearing the surface.
Work carefully, because even slight drag can blur those sharp lines.
Use Painter’s Tape Guides
To keep polka dots crisp on satin or gloss walls, use painter’s tape as guides before you paint. After marking dot centers, press short strips into ring outlines so edges stay sharp despite slick surfaces.
Plan your tape application: overlap lightly, keep tension even, and smooth every corner with a plastic card. Then prime or paint over the gaps using a small roller or brush, not broad strokes.
When coverage sets enough to handle, do quick tape removal at a 45° angle to prevent peeling. Finish by touching any tiny bleed with a damp brush.
- Align tape rings to your measurements
- Feather paint at the tape edge
- Remove immediately for clean dots
Let Paint Set Fully
Let the paint cure fully before you touch or re-tape anything—on satin or gloss, rushed handling can smear your dot edges even if they look dry. Give each coat time for paint drying; keep airflow steady with proper ventilation, and avoid leaning tools or rolling tape over fresh dots. Use this quick check:
| Time | Result | Action |
|---|---|---|
| 2 hrs | Touch-cool | Leave alone |
| 4 hrs | Firm skin | Don’t tape |
| 8 hrs | Dry to eye | Inspect gently |
| 12 hrs | Stable edge | Remove guides |
| Overnight | Fully set | You can clean nearby |
Control Brush Pressure Gently
Keeping sharp polka-dot edges starts with how you press your brush. On satin or gloss, you can’t rush: control brush pressure gently so the bristles don’t spread into a soft halo. Lightly touch at the center, then lift straight up without dragging.
Keep dot consistency by reloading paint and testing on scrap until each dot lands the same size.
- Press, don’t mash—use steady, minimal pressure.
- Hold the brush vertical for clean circles.
- Stop motion at lift-off to preserve crisp edges.
If edges blur, pause, wipe the tip, and try again.
Match Dot Spacing Across Corners Neatly
Consistent dot spacing across corners is what makes your polka dots look intentional instead of accidental.
Before you paint, mark a few dot centers on each wall, using the same spacing reference so your pattern continuity carries through the corner.
Use corner techniques: stop dots short of the edge, then place the next dot exactly where it would land if the walls were one flat surface.
Test with two test dots on scrap, then mirror the rhythm.
If your spacing shifts, pause and adjust before you continue, keeping the rows aligned across every corner.
Paint Polka Dots On Trim Without Getting On Trim
Paint the dots on trim by controlling your edges first, then filling in the color. Use solid wall preparation so paint won’t bleed into trim gaps; then apply edge protection with a careful tape technique.
For your trim painting, plan color coordination: match dot size and spacing to your wall pattern consistency. Choose a steady, flat-tipped brush for dot application, and keep a light hand to maintain clean circles with artistic flair.
- Press tape firmly along trim lines.
- Dot from the center outward for pattern consistency.
- Use quick cleanup methods: rinse brushes immediately, wipe tape before drying.
Handle Outlets And Switch Plates Carefully
When you’re ready to take your polka-dot pattern past the trim, handle outlets and switch plates with the same edge control you used on the molding.
Turn off power, remove covers if possible, and use outlet protection to keep paint out of openings. Mask the screw holes and surrounding wall tightly, then press tape firmly around the edges.
As you place dots, stop at the taped boundary and plan your spacing so dots meet cleanly.
Keep switch plate alignment consistent by using a level mark for each plate, then paint carefully around it.
Keep Polka Dots Neat Near Baseboards
As you move down to the baseboards, slow your pace and treat the bottom edge like a finish line. Use baseboard protection so your roller won’t smear dots onto the trim.
Keep edge precision tight: stop strokes early, then tap the dot’s edge with a small brush to prevent paint bleeding. Before you start, plan color contrast so dots still read clearly on accent walls at the lowest point.
Keep edge precision tight—stop early, then tap dot edges with a small brush to prevent bleeding and preserve clean contrast.
After drying, use careful cleaning techniques and a damp microfiber for stray marks. Maintain dot alignment and pattern consistency with light guide marks.
- Apply tape, then press seams firmly.
- Let each dot set before touching nearby ones.
- Touch up with mini daubs, not wide swipes.
Match Pattern Flow Above Doors And Windows
Keep your eyes moving upward once you reach the door and window zones, since that’s where dot flow can look off. Before you paint, mark a light vertical guideline at each frame edge and decide which row should cross the trim.
Step back every few dots to protect pattern continuity, nudging spacing so each dot lands in line with the last unbroken row. When you reach the lintel area, keep your stencil or guide level and rotate only your body, not the tool.
Aim for visual balance by mirroring dot height and spacing above both sides.
Spot And Correct “Almost Aligned” Dots Fast
You can fix “almost aligned” polka dots fast if you catch them immediately after each row dries. Stay close to the wall and check spacing while the paint still behaves.
Use dot alignment techniques: measure the offset from the last perfect dot, then nudge misaligned ones before the next row sets. For quick correction methods, keep a damp cloth and a small angled brush ready, and dab only the edges.
When a dot sits low or high, wipe it slightly and repaint a smaller spot centered correctly.
- Mark drift with painter’s tape.
- Use a template guide.
- Blend edges, let dry, then reassess.
Troubleshoot Patchy Coverage And Uneven Dots
Patchy coverage and uneven dots usually come from inconsistent paint thickness, poor wall prep, or uneven pressure from your applicator.
Before repainting, wipe dust and let the wall fully dry; any residue blocks adhesion and creates patchy coverage.
Next, thin your paint only to the manufacturer’s guidance, then stir thoroughly to keep pigment even.
Test on scrap board: if dots look faded, load the roller or sponge more, and press with steady, repeatable pressure.
If dots vary in size, slow your tapping and keep your stencil aligned.
Seal any repaired spots and reapply in light coats.
Prevent Streaking From Touching Finished Dots
Once your dots look even, you can still ruin them by touching wet paint. You need streak prevention so your brush or roller never drags color across a finished circle. Work in small sections and keep your hands clean and dry.
Even even dots can be ruined by wet paint—prevent streaks by working in small sections and keeping tools and hands clean and dry.
- Let dots dry fully before you reposition tools or step back in; avoid smearing at edges.
- Use a “lift and reload” motion—dab off excess, then place the brush lightly instead of dragging.
- If you spot gaps, use touch up techniques sparingly with a tiny angled brush, touching only the missed spot.
Make Dots Round By Using Consistent Technique
Consistent technique is what keeps polka dots truly round. Use the same dot technique every time: load the brush lightly, press straight down, then lift without dragging. Keep your wrist steady and move from center to edge at a uniform pace. For clean circles, follow these consistency methods: match dot spacing with masking marks, rotate the cup paint mix before dipping, and check dot size after every row.
| Step | Tool | Consistency cue |
|---|---|---|
| 1 | Brush | Same pressure |
| 2 | Paint | Even load |
| 3 | Lift | No side drag |
| 4 | Spacing | Same grid |
Add A Second Light Pass For Full Coverage
After your first dot row dries to the point where it won’t smear, you’ll get fuller, more even circles by adding a second light pass.
Reload your brush lightly, then tap just inside the edge of each dot to build a consistent second layer. This helps you catch thin spots without blurring the pattern.
Use these coverage tips to keep alignment:
- Match spacing by aiming at the center of each existing dot.
- Keep pressure light; multiple taps beat one heavy stroke.
- Work row by row, checking symmetry before moving on.
Seal And Maintain Your Polka Dot Wall
To keep your polka dots crisp, you’ll want to seal the finish once the paint fully cures. Choose a clear, water-based topcoat to protect edges while you focus on dot sealing techniques. Apply a thin coat with steady pressure; don’t flood the surface, or colors blur. Let it dry, then add a second light pass only if needed. To maintain vibrancy, avoid abrasive cleaners and direct high-heat vents, and wipe gently with a damp cloth.
| Dot size | Seal coat | Dry time |
|---|---|---|
| Small | Thin | 2–4 hrs |
| Medium | Thin | 4–6 hrs |
| Large | Thin | 6–8 hrs |
| Accent | Light | 2–3 hrs |
| Borders | Even | 4–6 hrs |
Clean Up Safely Without Ruining Tools Or Surfaces
Once you finish painting, clean up right away so your brushes, rollers, and sponges don’t harden, smear, or damage the dot edges.
Rinse tools gently in the right cleaning supplies, and protect the wall with surface protection—drop cloths and tape—so drips never hit fresh dots.
For tool maintenance, don’t soak too long; clean, reshape bristles, and let everything dry flat.
If you spot mistakes, do controlled paint removal while it’s still fresh, using a damp cloth and minimal pressure.
- Rinse in warm water or proper solvent.
- Wipe drips, then re-tape edges.
- Store fully dry gear.
Frequently Asked Questions
How Do I Keep Dots Perfectly Round on Textured Walls?
To keep dots perfectly round on textured walls, use dot painting techniques: lightly sand peaks, apply primer, then stencil with painter’s tape. Press a foam roller or sponge gently, re-dab instead of dragging, and let each dot dry before adding another coat.
What’s the Best Way to Fix an Off-Grid Dot Without Repainting Everything?
Fix an off-grid dot by lightly scraping loose paint, feathering edges, then dab-matching color with a small stencil or rounded brush. Use dot alignment tips for placement, and touch up techniques like blotting and blending to hide the repair.
How Long Should I Wait Between Dot Rows to Avoid Smearing?
Wait 10–15 minutes between dot rows so dot drying time sets up before you roll on the next line. Use consistent spacing techniques and let each row fully tack before touching; if it feels tacky, wait longer to prevent smearing.
Can I Use Latex Wall Paint, or Do I Need a Specific Type?
Yes, you can use latex wall paint, but you’ll get best results with a matte or eggshell paint finish. Choose a durable, low-sheen color choice. Avoid glossy finishes; they make dots look shiny and uneven, especially as you work.
How Do I Remove Painter’s Tape Without Peeling Fresh Paint?
When removing painter’s tape, pull it back slowly at a 45° angle, keeping tension steady. Use tape removal techniques like lifting one corner first. Remove after paint skins over, not fully cured. Consider painter’s tape alternatives like low-tack film.
Conclusion
To keep your polka dots crisp, follow the plan you mapped out, double-check spacing as you go, and let each pass dry before you add another. Here’s a stat to make it real: small, controlled mistakes compound fast—about 80% of visible pattern flaws come from rushed alignment, not paint quality. So take five extra minutes to test your grid and technique on scrap first. Your wall will look intentional, not accidental.
