
Can You Paint New Build Walls Right Away or Do You Need to Wait?
You can paint new-build walls, but you shouldn’t rush it—make sure surfaces are dry, dust-free, and properly primed first. Drywall itself dries fast, but joint compound and fresh plaster need extra time to cure; plaster can take days to weeks depending on thickness and humidity. Test moisture with a meter (below ~12–15%), sand and clean well, then use an appropriate primer for adhesion. Follow these steps and you’ll avoid peeling, mold, and rework—keep going to learn timing and prep details.
Can You Paint New-Build Walls Right Away?
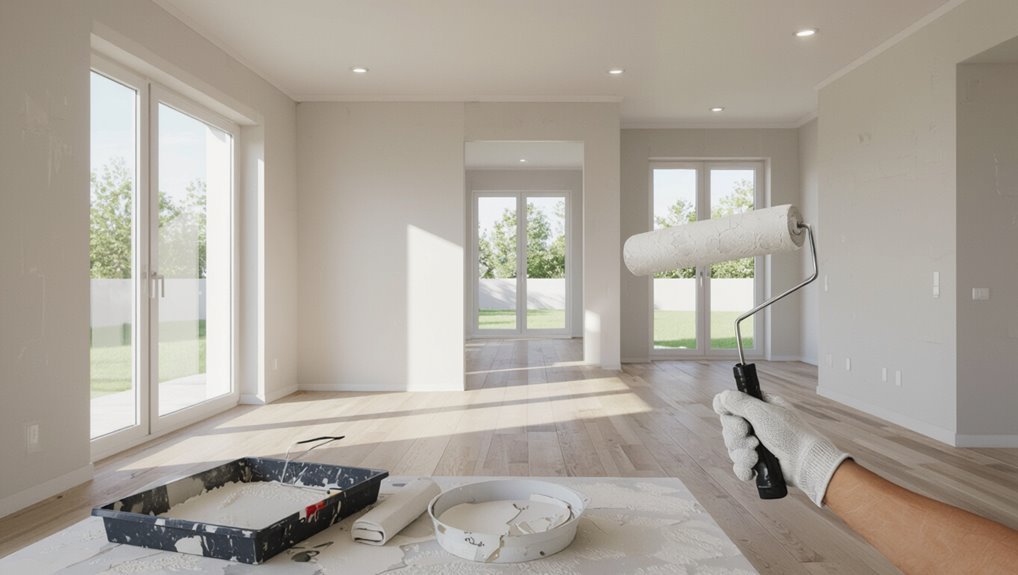
Wondering if you can paint new-build walls right away? You can, but you’ll check wall textures and moisture first.
Smooth drywall, primed properly, accepts most paint finishes; textured surfaces might need more prep. If drywall compound’s dry and the builder’s left a clean, dust-free surface, you’ll prime then paint.
Don’t skip testing a small area for adhesion and coverage.
Why Timing Matters for Paint Adhesion
Because paint sticks best to a dry, stable surface, timing your work affects adhesion and long-term finish: if you paint too soon you risk trapping moisture or uncured joint compound under the coating, which can cause peeling, blistering, or poor bonding.
While waiting until drywall and substrates have fully cured guarantees primers and paints form a strong, lasting bond.
- surface preparation
- moisture management
- adhesion factors
- primer selection
- adhesion testing
New Plaster vs. Drywall: Key Drying Differences
With new plaster you’ll need to wait for full curing, which can take days to weeks depending on thickness and conditions.
Drywall itself dries quickly, but the joint compound and tape seams often need extra drying time before sanding and priming.
Knowing these differences helps you schedule painting so you don’t trap moisture or ruin the finish.
Plaster Curing Time
When you’re deciding whether to paint new walls, understanding curing time is essential because new plaster and drywall dry in very different ways; plaster cures chemically and can take weeks to reach full hardness, while drywall joint compound mostly dries by evaporation and often seems ready within a few days.
You should monitor plaster types and curing methods, control drying conditions and environmental factors.
- Check surface treatment and moisture retention
- Use correct application techniques
- Consider drying accelerators cautiously
- Match plaster finishes to installation tips
- Verify full hardness before priming
Drywall Joint Drying
After you’ve checked plaster curing and hardness, shift focus to drywall joints, which behave quite differently: joint compound mainly dries by losing moisture to the air rather than by chemical curing.
This means that shrinkage, sanding readiness, and paintability depend more on drying time, coat thickness, and room ventilation.
For drywall installation, use proper drying techniques, moisture management, surface treatments, and painting strategies in wall preparation, not plaster curing methods.
How Long Fresh Plaster Typically Needs to Cure
If you’ve just had fresh plaster applied, expect it to need several days to several weeks to cure properly—timing depends on plaster type, coat thickness, and room conditions.
You’ll monitor plaster drying and use basic curing techniques to avoid cracks. Check these factors:
- Coat thickness
- Room humidity
- Temperature
- Ventilation
- Manufacturer’s guidance
Wait until fully hard before priming or painting.
How Long Joint Compound and Drywall Mud Need to Dry
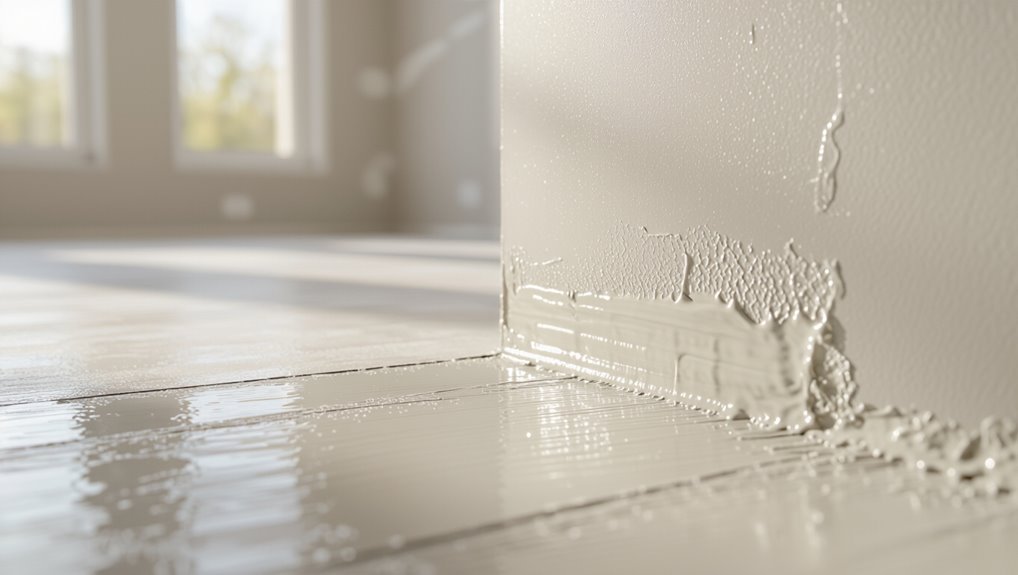
Plaster drying times give you a baseline, but joint compound and drywall mud behave differently and often cure faster.
You’ll typically see surface dry in a few hours to a day, while full hardening through thicker fills can take 24–72 hours depending on compound type, coat thickness, humidity, and ventilation.
You should use proper drying techniques and moisture management, checking hardness before sanding or priming.
Ideal Moisture Levels Before Painting New-Build Walls
Before you paint new-build walls, you’ll want the moisture content to be low enough to prevent adhesion issues and peeling.
Use a moisture meter to test drywall and plaster—aim for readings in the manufacturer’s recommended range (typically below 12-15% for many surfaces).
If levels are higher, follow drying time guidelines and improve ventilation or heating until the readings are acceptable.
Ideal Wall Moisture Content
While new-build walls might look dry, you should never assume they’re ready to paint; measuring moisture is the only reliable way to know. Aim for low percentages and stable ideal humidity conditions before priming.
Use moisture measurement techniques to confirm. Consider these targets and practices:
- Surface moisture below local paint specs
- Wall core moisture acceptable
- Consistent room humidity
- No rising damp
- Stable readings over time
Testing Moisture Levels
Although new-build walls can seem dry to the touch, you should always measure moisture before painting to avoid adhesion problems and paint failures.
You’ll perform moisture testing and a thorough wall inspection, combining surface assessment with humidity control monitoring. Note moisture barriers and environmental factors, then apply appropriate drying techniques.
Confirm paint readiness only after measurements show safe levels to prevent future issues.
Drying Time Guidelines
Now that you’ve measured moisture and inspected the walls, you need clear targets for when it’s safe to paint. Aim for 75% RH or lower, or moisture meter readings per manufacturer.
Use drying techniques and proper wall preparation to reach targets. Consider:
- Dehumidifiers
- Heating and ventilation
- Fans for airflow
- Time per material type
- Recheck with moisture meter before priming
How to Measure Wall Moisture With a Meter
Before you paint, grab a reliable moisture meter and check several spots across each wall to get an accurate picture of dampness.
Use pin or pinless moisture measurement techniques depending on surface and finish. Test high, low, and near openings.
Verify moisture meter calibration against a known reference before use, keep readings consistent, and record locations to retest after drying.
Interpreting Moisture Meter Readings
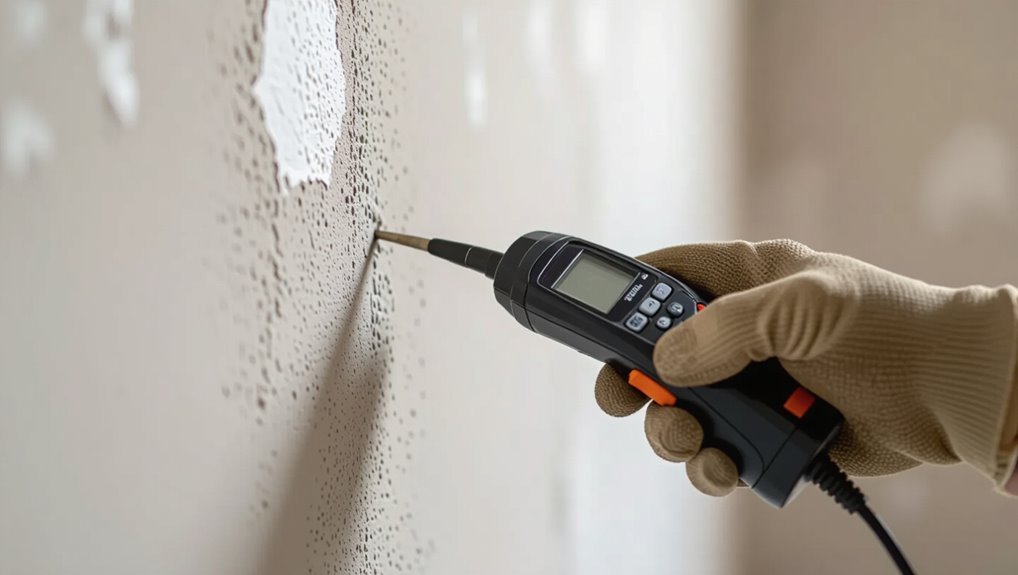
How do you read the numbers and know when a wall is ready for paint? You’ll check moisture meter types, note baseline readings, and focus on interpreting readings relative to material.
Use consistent spots and compare probes versus pinless results. Don’t rely on one number.
- Test multiple locations
- Record and compare
- Know material thresholds
- Prefer consistent technique
- Recheck after drying
How Interior Humidity and Temperature Affect Drying
Because drying depends on the air as much as the substrate, you’ll want to monitor and control interior humidity and temperature to get new-build walls ready for paint.
You should use humidity control and temperature regulation as part of drying techniques and moisture management.
Improve air circulation for consistent wall preparation, and account for environmental factors that influence curing processes to speed, not force, safe drying.
Signs Your New-Build Walls Are Ready to Paint
Before you grab a brush, check that the walls are fully dry with no damp spots and that humidity’s in a safe range.
Run your hand over the surface to spot any bumps, cracks, or uneven jointing that need sanding or filling.
Finally, make sure primer or sealant is applied where required so the paint will adhere and look even.
Dryness And Moisture Levels
If your new-build walls feel damp to the touch or give off a musty smell, they’re not ready for paint; moisture trapped in plaster or drywall can ruin finishes and cause peeling or mold later.
You should check moisture effects and use drying techniques before painting.
- Use a moisture meter
- Ventilate rooms
- Run dehumidifiers
- Track relative humidity
- Wait manufacturer-recommended times
Smoothness And Surface Imperfections
When your new-build walls feel uniformly smooth and any joints, nail pops, or skim-coat seams have been sanded flush, you’re ready to move on to painting; visible imperfections and rough patches are the most common causes of poor finish and will telegraph through paint.
Check for surface imperfections and texture variation, confirm surface integrity, and complete wall preparation so paint application, finish selection, and paint durability aren’t compromised.
Primer And Sealant Presence
Although the drywall may look finished, you’ll want to confirm that primer and any necessary sealants are applied evenly and have cured properly before painting; these layers lock in dust, hide joint compound porosity, and help topcoats adhere.
Check for primer benefits and correct sealant application by noting:
- uniform sheen
- no tackiness
- consistent color
- sealed joints
- proper coverage depth
Visual Signs of Trapped Moisture (Stains, Blisters, Efflorescence)
Because trapped moisture leaves distinct surface clues, you can often spot problems before paint goes on.
During a wall inspection look for dark stains, salt-like efflorescence, blistering or raised paint and musty odors—clear moisture indicators.
Tap and probe suspicious areas; soft or crumbly plaster and peeling wallpaper suggest lingering damp.
Address sources and dry thoroughly before priming and painting.
When Will Paint Peel, Bubble, or Fail on New Builds?
You’ll see paint peel, bubble, or fail when underlying moisture content is too high, contaminants like dust or grease stay on the surface, or the substrate hasn’t cured long enough.
Check moisture readings and surface cleanliness before you paint, and don’t rush curing times.
Addressing these three issues first will greatly reduce finish problems.
Moisture Content Levels
When new-build walls still hold too much moisture, paint won’t adhere properly and you’ll see peeling, bubbling, or flaking within months.
You must check moisture management during wall preparation before painting. Use a moisture meter and follow drying times.
Look for these signs:
- Damp patches
- High hygrometer readings
- Efflorescence
- Soft or crumbling plaster
- Musty odors
Surface Contamination Risks
If contaminants like dust, grease, or residual form-release agents stay on new-build walls, paint won’t bond and you’ll get peeling, bubbling, or premature failure.
You must address surface contamination with targeted cleaning techniques, remove common dust sources, verify paint compatibility, and confirm moisture barriers.
Proper surface treatment and wall preparation reduce environmental factors that cause failure, so clean, test, and prep before painting.
Inadequate Curing Time
Although new-build materials might look dry, they often need longer to cure than you’d expect. Painting too soon can trap moisture or solvents that break the paint bond.
You should assess drying conditions, use ventilation strategies, and pick paint selections that suit environmental factors.
Follow curing methods and timing strategies; proper surface preparation prevents failures.
- moisture control
- wall treatments
- painting techniques
- surface preparation
- timing strategies
Why Primer Matters on New Construction Walls
Because new construction drywall and plaster are porous and uneven, primer creates a consistent surface that lets your paint adhere properly and show true color.
You’ll get primer benefits like sealed porosity, uniform sheen, and reduced paint absorption.
Use proper application techniques—thin even coats, brush-cutting edges, and rolling with nap suited to texture—to guarantee adhesion, hide minor imperfections, and save finish coats.
Which Primer to Use for Fresh Plaster and Drywall
Wondering which primer will give you the best start on fresh plaster and drywall? You’ll choose based on surface porosity, drying time, and finish goals.
Consider primer types and smart application techniques to seal and even absorption.
- Sealers for new plaster
- Bonding primers for porous drywall
- Fast-dry options
- Low-odor choices
- Roll vs. brush application techniques
PVA Primer vs. Acrylic Primer: When to Use Each
Now that you’ve picked a sealer or bonding primer for fresh plaster and drywall, you’ll next decide between PVA and acrylic primers—each suits different needs.
You’ll weigh PVA benefits for smooth, economical coverage and basic moisture management against Acrylic applications offering superior adhesion factors and durability.
Consider Surface preparation, Primer types, Wall treatments and Paint longevity when choosing the right primer for your project.
Tinting Primer vs. Using a Colored Primer
You can tint a white primer to get better coverage and reduce the number of topcoats you need.
Colored primers have limits—they mightn’t match bold hues well and can be costly to custom-mix.
Choose tinting for subtle shifts and savings, and use a colored primer when you need stronger base color or better hiding for deep paints.
Tinting Primer Pros
Although tinting a high-quality primer adds a small upfront cost, it gives you stronger coverage and a more accurate base for your finish coat.
You’ll get tinting benefits with versatile primer types, saving time and coats. Consider:
- Better color hold
- Reduced topcoat coats
- Improved hide on patches
- Consistent undertone
- Easier matching across rooms
Colored Primer Limitations
While tinting your primer can boost coverage and color accuracy, colored primers have limits you should know before choosing one: you’ll enjoy colored primer benefits like reduced topcoat coats and better hide, but colored primer drawbacks include limited shade range, weaker adhesion on some substrates, and difficulty correcting strong stains.
You should test adhesion and final color before committing to a full application.
When To Choose Which
Having covered colored primer limits, it helps to know when tinting a standard primer will serve you better than buying a pre-tinted product. You’ll pick based on color depth, cost, and finish needs.
Consider these points for painting techniques and wall preparation:
- Deep color demands multiple coats
- Tint saves time on coverage
- Pre-tint guarantees consistent batch color
- Tinting offers flexibility
- Surface porosity affects choice
How to Test Paint Adhesion Before Doing the Whole Room
Before you roll paint across the entire room, do a simple adhesion test on a small, inconspicuous patch to confirm the new-build drywall and primer will hold the finish coat.
Inspect the surface for dust, drywall compound or loose primer, then apply a small paint swatch.
After it dries, perform a tape pull or cross-hatch to check adhesion.
Repeat if needed.
Preparing New-Build Walls: Dust Removal and Cleaning
Start by removing every bit of construction dust and loose debris—if you skip this, paint won’t stick evenly and imperfections will show.
Begin by removing all construction dust and loose debris—skip this and paint won’t adhere evenly or hide imperfections.
You’ll need solid dust management and targeted cleaning techniques to prep surfaces. Follow these steps to guarantee a clean, paint-ready wall:
- Vacuum corners and ledges
- Wipe with a damp microfiber
- Degrease spots gently
- Dry thoroughly
- Inspect under light
How to Remove Construction Dust Effectively
Because construction dust clings in fine layers, you’ll need a systematic approach: use dust control methods and post construction cleaning plans.
Combine construction cleaning techniques, effective vacuuming with HEPA-rated units, and air filtration systems.
Choose environmental cleaning solutions, follow surface preparation tips, and consult a cleaning tools comparison to pick microfiber cloths, tack cloths, and soft brushes so you won’t reintroduce dust.
Dealing With Stains, Efflorescence, and Alkali on Plaster
When you spot discolored patches, white powdery deposits, or a chalky haze on new plaster, address them promptly to prevent long-term damage and secure a paint-ready surface.
Use targeted cleaning techniques, efflorescence treatment, and alkali resistance primers. Verify proper drying conditions, surface sealing, and moisture barriers.
Focus on wall preparation, stain prevention, paint compatibility, and correct application methods.
- Identify deposit type
- Neutralize alkali
- Wash and dry
- Seal surface
- Choose compatible paint
Repairing Hairline Cracks and Shrinkage Gaps
After treating stains and sealing the plaster, you’ll often notice fine hairline cracks or slight shrinkage gaps as the wall fully cures; these small defects won’t accept paint evenly and can telegraph through finishes if left alone.
You should perform targeted hairline crack repairs with flexible filler, press in shrinkage gap solutions, smooth and prime patched areas, then allow full cure before painting.
Sanding Tips for Drywall and Skimmed Plaster
While sanding seems straightforward, doing it right makes the difference between a smooth finish and one that reveals every imperfection. Use the right grit, tool, and technique to avoid gouges, dust clouds, or uneven surfaces.
You’ll focus on sanding techniques for drywall preparation, smoothing edges, controlling dust, and improving finish quality.
- Choose appropriate sanding tools
- Manage dust control
- Address surface imperfections
- Vary sanding frequency
- Blend edges seamlessly
When to Sand Lightly and When to Sand Thoroughly
Although a light pass with fine-grit sandpaper can knock down dust nibs and smooth skimmed areas, you’ll need a more thorough sanding—using coarser grits and firmer pressure—where joints, high spots, or heavy texture remain to guarantee an even, paint-ready surface.
You should use appropriate sanding techniques: light sanding for minor imperfections, thorough sanding for uneven areas, always prioritizing consistent surface preparation before priming.
Choosing Paint Type: Latex vs. Oil for Interiors
Once your walls are sanded smooth and primed, you’ll need to pick the right paint base: latex or oil. You’ll weigh latex advantages against oil disadvantages, considering finish differences and durability comparison.
Once walls are sanded and primed, choose latex or oil—balance finish, durability, and practical trade-offs.
Think application techniques, drying times, cost considerations, and environmental impact. Choose what suits your room, schedule, and values.
- Ease of cleanup
- Odor and VOCs
- Longevity trade-offs
- Tool choice
- Budget impact
Selecting the Right Paint Finish for New Walls
Which finish should you pick for your new walls depends on the room’s use and the look you want—flat and matte hide imperfections, eggshell and satin offer a soft sheen and easier cleaning, while semi-gloss and gloss give maximum durability and highlight trim.
For finish selection, consider traffic, moisture and the desired sheen; prioritize paint durability in kitchens, baths and high-traffic halls.
How Many Coats Do New Surfaces Typically Need?
How many coats you’ll need depends largely on the porosity of the new surface—bare plaster soaks up more than skim-coated drywall.
You’ll almost always want at least one primer coat to seal and even out absorption before color.
After priming, plan for one or two finish coats depending on coverage and the paint’s opacity.
Surface Porosity Levels
Because new surfaces absorb paint differently, you’ll need to judge porosity before deciding how many coats to apply.
Check porosity with a quick water test and use surface preparation and moisture measurement to guide choices.
Typical guidance:
- High porosity: multiple coats
- Medium porosity: two coats
- Low porosity: one coat
- Uneven areas: spot priming
- Test patch first
Primer Coat Importance
After you’ve gauged porosity, decide on primer strategy since it evens absorption and promotes adhesion on new build walls.
You’ll typically apply one quality coat, but very porous surfaces may need a second.
Choose primer types—alkyd, acrylic, or bonding—based on substrate.
The primer benefits include sealing, uniformity, and better topcoat performance, reducing repair and uneven finish risks.
Finish Coat Count
Most new-build walls need two finish coats to achieve full coverage and durable color, though you might get away with one if you’re using a high-coverage paint and the primer already provided excellent uniformity.
You’ll notice finish coat benefits quickly: improved appearance and finish coat durability against wear.
- Better color depth
- Hides minor flaws
- Easier cleaning
- Longer lifespan
- Consistent sheen
Estimating Paint Quantity for a New-Build Room
Start by measuring the room’s surfaces so you can calculate the square footage you’ll actually paint; walls, ceilings, doors, and trim all matter. Use room dimensions for accurate paint coverage calculations, factor coats, and subtract openings. Estimate gallons by dividing total square footage by the paint’s coverage per gallon, then round up for touch-ups.
| Area | Sq Ft | Notes |
|---|---|---|
| Walls | 320 | |
| Ceiling | 120 | |
| Doors/Trim | 30 | |
| Total | 470 |
Timing Between Coats and Recommended Drying Times
When you plan coat timing, follow the paint manufacturer’s recommended recoat window and let each layer dry to the indicated touch-dry state before applying the next one; this guarantees proper adhesion, avoids lifting, and gives a true indication of coverage so you don’t end up sanding or redoing work.
Plan coats within the manufacturer’s recoat window and wait until each layer is touch-dry for proper adhesion and coverage.
- Check temperature and humidity
- Confirm paint compatibility
- Allow full cure before heavy use
- Use gentle touch tests
- Record moisture testing results
Using Moisture Meters During and After Painting
Although paint can look dry on the surface, you should use a moisture meter to verify substrate moisture before, during, and after painting new-build walls; it helps you catch trapped damp, confirm drying progress, and avoid adhesion failures or mold growth. Use moisture meter types correctly, follow moisture reading guidelines, meter placement strategies, moisture testing frequency, meter reading interpretation, moisture meter calibration, moisture meter accuracy, moisture detection techniques, meter maintenance tips.
| Topic | Action |
|---|---|
| Calibration | Check regularly |
| Placement | Multiple depths |
| Thresholds | Follow wall moisture thresholds |
| Maintenance | Clean probes |
Short-Term Fixes If You Must Paint Early (Pros/Cons)
If you absolutely have to paint early, you can use a quick-dry primer to give temporary adhesion and help block moisture.
Apply thin, multiple coats of paint rather than one heavy coat to reduce trapping dampness and speed drying.
For added short-term protection, consider a temporary sealant on vulnerable areas, but be aware these are stopgaps and may affect finish or long-term durability.
Quick-Dry Primer Use
Because you can’t always wait for full curing, a quick-dry primer can let you paint new-build walls sooner—but understand it’s a temporary fix with trade-offs.
You get quick dry benefits and faster primer application, but risks include adhesion issues and trapped moisture.
Consider:
- Faster project timeline
- Shorter recoat window
- Potential peeling later
- Masking minor defects
- Temporary moisture risk
Thin Multiple Coats
Quick-dry primer can speed things up, but another short-term tactic is applying several thin coats of paint rather than one thick one—this lets you work around incomplete curing while reducing runs and long dry times.
You’ll use thin coat techniques to build coverage, gain multiple layer benefits like faster tack-free times and fewer drips, but expect longer overall labor and slightly delayed true curing.
Temporary Sealant Application
When you have to paint before new plaster or drywall has fully cured, applying a temporary sealant can stabilize the surface enough to accept paint for short-term needs, but it’s a stopgap rather than a solution.
You’ll weigh temporary sealant types and proper application techniques; use sparingly and test first.
- Quick-drying acrylic
- PVA primer
- Shellac-based sealer
- Spray fixatives
- Patch-and-seal compounds
How to Handle High-Moisture Rooms: Bathrooms & Kitchens
Even in brand-new builds, bathrooms and kitchens demand special paint choices and prep, since constant steam and splashes can lead to peeling, mildew, and discoloration if you use the wrong products.
Prioritize bathroom ventilation and control kitchen humidity, install moisture barriers, choose high paint durability and mold-prevention finishes, plan wall treatments, follow strict surface preparation, consider fixtures, and use proper drying techniques for lasting results.
Painting Newly Installed Plasterboard vs. Skimmed Plaster
If you’ve got fresh plasterboard or a newly skimmed wall, you’ll need to treat them differently because drying times vary.
Check surface prep needs—plasterboard joints and screw heads often need filling and sanding, while skimmed plaster may just need light sanding and dust removal.
Always prime and seal appropriately: use a PVA or specialist primer on board and a mist coat on skim to guarantee an even finish.
Drying Time Differences
Although they look similar, newly installed plasterboard and freshly skimmed plaster dry at very different rates, and you should plan your painting accordingly.
You’ll monitor drying conditions and use moisture management to avoid trapping damp. Expect plasterboard to be ready faster; skimmed plaster can take weeks.
Consider:
- Temperature control
- Ventilation
- Humidity monitoring
- Time allowance
- Manufacturer guidelines
Surface Preparation Needs
Because the base materials differ, you’ll prep plasterboard and skimmed plaster in distinct ways to guarantee a smooth, lasting finish. You’ll use surface cleaning techniques and wall inspection methods: remove dust, check joints, sand imperfections. Address screw pops and hairline cracks before painting.
| Task | Plasterboard | Skimmed Plaster |
|---|---|---|
| Clean | Dry wipe | Gentle damp |
| Inspect | Joints, screws | Cracks, texture |
Priming And Sealing
When you move on to priming and sealing, treat plasterboard and skimmed plaster differently to prevent peeling and uneven sheen: use proper priming techniques and sealing methods to match porosity and finish.
- Seal new plaster with mist coat
- Use PVA or specialist primer on plasterboard
- Sand skimmed areas lightly
- Match primer sheen to topcoat
- Allow full drying between coats
How Quick-Dry Plasters Change Your Painting Schedule
If you’re working with modern quick-dry plasters, you can often move up your painting schedule because these materials lose surface moisture far faster than traditional gypsum-based finishes.
You’ll see quick dry benefits: shorter wait times, earlier priming, and fewer delays. That boosts painting efficiency, but you should still check moisture with a meter and follow manufacturer guidelines before applying topcoat to guarantee adhesion.
When to Wait After Plastering Before Decorating Trim
Although plaster may look dry, you should wait until its moisture content matches the manufacturer’s recommendation before painting or sealing trim, because surface dryness alone won’t guarantee proper adhesion.
You should monitor plaster drying and delay trim painting until readings are within spec.
- use a moisture meter
- follow plaster type guidance
- ventilate space
- avoid spot testing
- check manufacturer times
Common Mistakes When Painting New-Build Walls
Because new-build walls often hide fresh plaster, pipework, or jointing compounds, you can easily make paint fail by rushing—common mistakes include painting over surfaces that aren’t fully dry, skipping proper priming, using the wrong paint sheen, or neglecting to seal gaps and shrinkage cracks first.
You should address new construction challenges by testing dryness, choosing suitable primer and finish, and repairing defects before painting.
Cost and Time Trade-Offs of Rushing a Paint Job
When you rush a paint job on new-build walls, you might save a day or two up front but end up paying for rework, wasted materials, and longer downtime if paint peels, cracks, or shows lap marks.
Do a cost analysis and risk assessment; balance time savings against quality control, labor considerations, material expenses, project planning, and scheduling conflicts.
- Rework costs
- Waste impact
- Labor overtime
- Quality checks
- Timeline hits
Seasonal Effects: How Weather Changes Your Schedule
Speeding through a paint job might save time, but weather can undo that effort faster than you expect. Seasonal conditions dictate when you can apply primer, paint, and finish coats without risking adhesion problems or extended cure times.
You should plan seasonal scheduling around temperature fluctuations and seasonal humidity to manage moisture control, minimize drying challenges, and guarantee consistent paint performance despite weather impacts and climate considerations.
Hiring Pros vs. DIY: When to Call a Painter
Deciding whether to tackle new-build painting yourself or call a pro comes down to time, skill, and risk tolerance.
You’ll weigh pros and cons, cost analysis, and project timelines while doing skill assessments.
Consider painter recommendations, DIY tips, and quality comparisons to inform decision factors.
- budget vs quality
- timeline pressure
- surface prep skill
- warranty/options
- tool access
Long-Term Risks of Painting Too Soon on New Builds
If you paint too soon on a new build, you’ll likely face poor paint adhesion that leads to peeling and frequent touch-ups.
You can also trap moisture behind the paint, which encourages mold and weakens finishes.
Over time those issues may contribute to bigger structural problems and costly repairs.
Paint Adhesion Issues
When you paint a new-build wall before it’s fully cured, the long-term adhesion can fail as moisture escapes and substrates shift, causing peeling, blistering, or flaking months or years later.
You’ll face paint adhesion challenges tied to moisture retention and substrate movement. Consider risks:
- Reduced bond strength
- Uneven sheen
- Early flaking
- Primer failure
- Increased maintenance
Trapped Moisture Problems
Although the surface may look dry, painting new-build walls too soon can trap moisture beneath the finish and create serious long-term problems.
You’ll face moisture retention, trapped vapor and humidity effects that blister or discolor paint.
Use drying techniques, quick dry methods, proper ventilation importance and moisture control before painting.
Apply moisture barriers, surface treatments and curing agents to guarantee coatings adhere and won’t hide damp.
Long-Term Structural Damage
Because paint can seal in hidden moisture and mask early signs of decay, painting new-build walls too soon can lead to serious, long-term structural damage down the line.
You risk trapped long term moisture that weakens framing and compromises structural integrity. Consider these consequences and act cautiously:
- Rot promotion
- Mold spread
- Fastener corrosion
- Insulation degradation
- Load-bearing weakening
Checklist: Are Your New Walls Ready to Paint?
Before you load the brush, run a quick checklist to confirm the new walls are truly paint-ready: surfaces are dry, taped and sanded, joints and nail heads are filled, and any dust or debris has been removed so paint will adhere evenly and look professional.
Check for consistent dryness, smooth texture, and intact primer.
Verify wall preparation matches your chosen paint types and room conditions.
Sample Schedules for Common New-Build Scenarios
You’ll want to compare a typical new-build timeline with a fast-track painting schedule to plan when walls will be ready and when crews can start.
A standard timeline spaces drying, inspections, and finishing over several weeks, while a fast-track approach compresses those steps with stricter controls and quicker curing methods.
Knowing the differences helps you pick the schedule that matches your build pace and risk tolerance.
Typical New-Build Timeline
When planning paint and finish work, it helps to see a typical new-build timeline so you can schedule tasks, materials, and inspections without surprises.
You’ll track steps, align trades, and respect drying times after framing and plastering. Include the construction timeline and allow time for building permits.
Consider this quick guide:
- Site prep
- Framing
- Rough-ins
- Drywall/plaster
- Final finishes and inspections
Fast-Track Painting Schedule
If you’re on a tight timeline, a fast-track painting schedule keeps trades coordinated and finishes drying on time so you won’t delay handover.
Plan drywall completion, sanding, and primer within 48–72 hours. Use fast drying primers and topcoats, allow brief tack cures between coats, stagger paint application by room, and confirm HVAC circulation to accelerate curing while maintaining quality and inspection readiness.
Standards, Further Reading, and Professional Resources
Standards matter: they tell you when a new-build wall is ready for paint, which products meet safety and performance expectations, and what inspection or certification you might need.
You should follow standards compliance and professional guidelines for painting techniques and surface preparation.
Useful resources:
- Local building codes
- Manufacturer datasheets
- Trade association guides
- Certified inspector lists
- Pro contractor forums
Frequently Asked Questions
Will Painted Skirting Boards Transfer Moisture to New Plaster?
No, painted skirting boards won’t transfer moisture to new plaster directly; you’ll rely on moisture absorption by the plaster and proper sealing. If you don’t seal edges, reduced paint durability and trapped moisture can cause issues over time.
Can Underfloor Heating Speed up Wall Drying Safely?
Yes — you can use underfloor heating to speed wall drying safely, but don’t overdo it: combine gradual heating methods, ventilation, and other drying techniques, or you’ll fry plaster edges and cause cracking, so monitor humidity closely.
Should Vents or Extractor Fans Run Continuously After Plastering?
Yes — you should run vents or extractor fans continuously after plastering to support ventilation timing and moisture control, ensuring damp dries evenly; you’ll reduce mould risk and speed safe drying while monitoring humidity and adjusting as needed.
Will Vapor Barriers Behind Plaster Affect Paint Adhesion?
Yes — vapor barrier effects can reduce paint adhesion if trapped plaster moisture stays high; you’ll need proper drying, breathable primer, or moisture-tolerant paint. Test adhesion and verify plaster moisture is low before finishing for reliable results.
Do Antique or Reclaimed Materials Need Special Priming Before Painting?
Of course not—you’ll totally slap paint on antique finishes and reclaimed woods without priming and hope for the best. You shouldn’t: you’ll want stain-blocking or shellac primer for tannins, grime, or old varnish before painting.
