
Can You Use a Roller to Paint the Exterior of a House?
Yes—you can confidently use a roller to paint your house exterior, and it’s often faster on smooth siding and broad trim than brushing alone. Choose the roller nap for the surface: short naps for smooth panels, longer naps or woven rollers for textured surfaces like stucco. Use extension poles, ladders safely, and cut in edges with a brush before rolling to avoid lap marks. Keep a wet edge and clean rollers promptly; keep going to learn tools, techniques, and safety tips.
Can You Use a Roller to Paint a House? Quick Answer
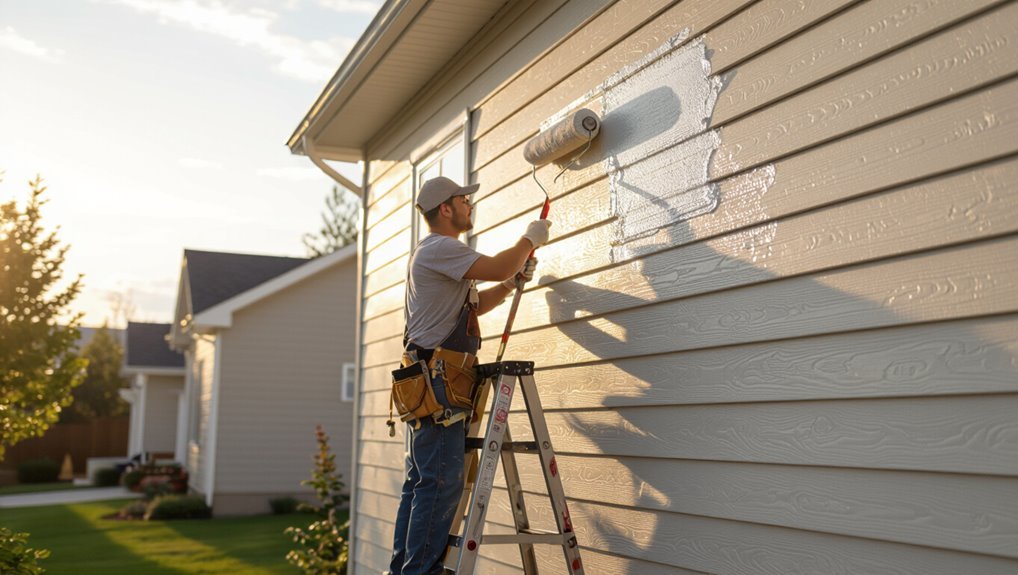
Yes—you can use a roller to paint a house, and it’s often the fastest way to cover large, flat exterior surfaces.
You’ll find roller effectiveness shines on siding and broad trim, spreading exterior paint evenly and quickly.
You should pair the roller with ladders, extension poles, and proper pads to maintain smooth coverage, reduce streaks, and finish faster than brushing alone.
When a Roller Is the Right Tool for Exterior Paint
If your siding is smooth and even, a roller gives fast, consistent coverage that keeps brush marks to a minimum.
You’ll get the best results when temperatures are moderate and humidity is low, so paint dries evenly.
Save brushes for trim and tight spots, and use the roller for the broad, flat areas.
Smooth, Even Surfaces
One clear sign a roller’s the right tool is when your exterior surface is largely flat and you want a smooth, even finish quickly; rollers cover broad areas faster than brushes and leave consistent texture on siding, stucco flats, or primed plywood.
You’ll use proper roller techniques and monitor paint consistency to avoid lap marks, ensuring uniform coverage and fewer touch-ups across wide, even planes.
Mild Weather Conditions
After you’ve got smooth panels covered, think about the weather before you roll—mild conditions make a roller work best because paint will level evenly and dry at a predictable rate.
You’ll avoid issues if you check weather considerations and temperature impacts so coatings cure properly.
Consider these scenarios:
- Warm, low-humidity afternoon
- Cool, dry morning
- Overcast day with steady temps
How Surface Texture Affects Roller Performance
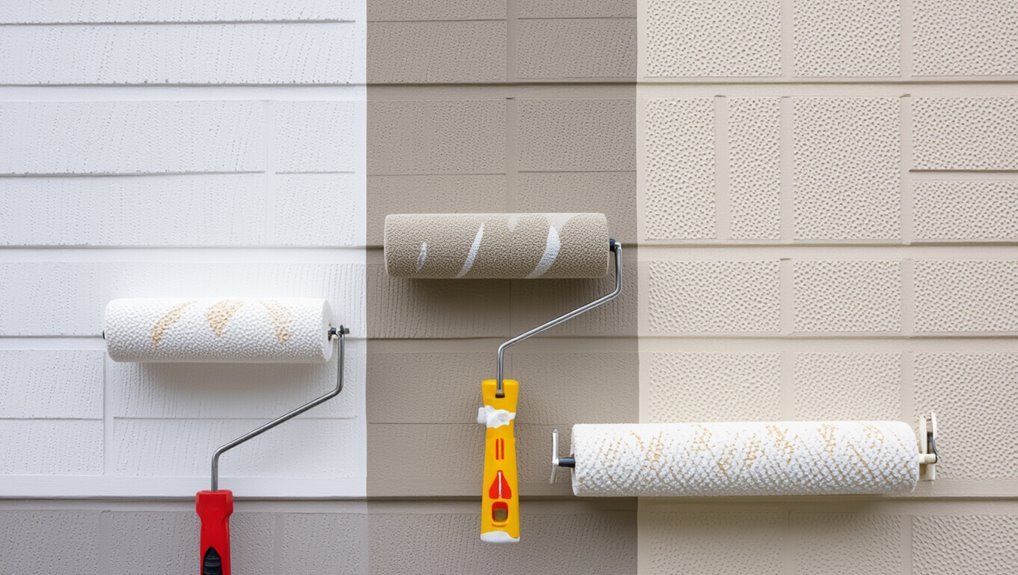
Because the wall’s texture changes how paint spreads and how the roller moves, you’ll need to match pile and pressure to the surface for even coverage.
Rough surfaces need thicker roller texture and heavier pressure to overcome higher paint absorption, while smooth walls suit low-nap rollers and lighter pressure to avoid excess.
Adjust stroke speed and overlap to maintain uniform film and reduce splatter.
Exterior Surfaces That Work Best With Rollers
You’ll find rollers work great on smooth siding panels, letting you cover large areas quickly and evenly.
For stucco and masonry, choose a thicker nap to grab paint from textured crevices without overworking the wall.
Use smaller rollers or foam ones for trim and accents to keep edges crisp and control drips.
Smooth Siding Panels
Smooth siding panels offer one of the easiest exterior surfaces to roll, thanks to their flat, consistent texture that lets paint glide on evenly with minimal passes.
You’ll benefit from roller application techniques and surface preparation essentials to get a smooth finish.
Imagine working with:
- Wide nap roller for even coverage
- Sanding and cleaning beforehand
- Overlap strokes to eliminate lines
Stucco And Masonry
If flat panels roll on easily, rougher exteriors like stucco and masonry need a different approach—these textured surfaces hold paint in crevices and require a thicker nap and more paint per coat.
You’ll choose a heavy‑nap roller and work methodically, backrolling into stucco textures and porous masonry finishes so coverage’s even.
Expect extra coats, longer drying, and occasional touchups for deep recesses.
Trim And Accents
Focus on control when rolling trim and accents, because these areas demand crisp lines and minimal overlap with siding or brick.
You’ll use specific trim techniques and careful edge work, and you’ll layer accent colors sparingly for impact.
Use a small nap roller, steady pressure, and masking where needed.
- Small nap roller
- Steady pressure
- Masking tape
Surfaces That Need a Brush or Sprayer Instead
While rollers cover broad, even areas quickly, certain surfaces call for a brush or sprayer to get proper coverage and finish; you’ll need brushes for tight corners, decorative trim, and textured crevices—choose appropriate brush types for bristle stiffness and shape.
Use a sprayer for fences, ornate railings, and hard-to-reach eaves to maximize speed and even coats, exploiting sprayer benefits for consistent atomization.
Choosing Roller Nap Length for Siding, Stucco, and Wood
Because surface texture dictates how much paint the roller must carry, choosing the right nap length matters for siding, stucco, and wood.
Because surface texture dictates paint load, selecting the appropriate roller nap is essential for smooth wood, siding, and stucco finishes
You’ll match roller nap to siding types and texture differences to control paint absorption and finish quality, adjusting application techniques for even coverage.
- Smooth wood — short nap, low absorption.
- Vinyl/board siding — medium nap, balanced.
- Stucco — long nap, high absorption.
Roller Materials: Foam, Woven, and Microfiber-When to Use Each
Once you’ve matched nap length to the surface, the roller’s material becomes the next decision—foam, woven, or microfiber each handle paint differently and affect finish, shedding, and cleanup. You’ll choose foam for smooth surfaces, woven for heavy-bodied coatings, and microfiber for fine, low-shed finishes; weigh foam vs. microfiber and roller durability when deciding.
| Material | Best Use |
|---|---|
| Foam | Smooth surfaces |
| Woven | Thick coatings |
| Microfiber | Low-shed finishes |
Roller Frame Sizes and Extension Poles for Exterior Work
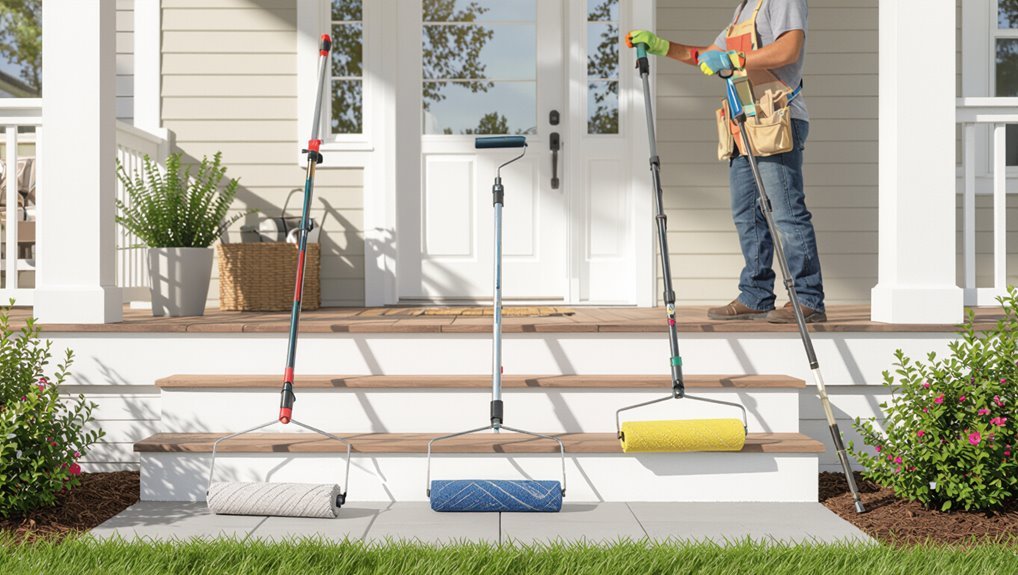
Choose a roller frame width that matches the area you’re covering—9–12 inches for siding and larger sections, 4–6 inches for tight spots.
Pair that with an extension pole length that lets you reach upper stories safely without overextending; 6–12 feet is common for single-story homes and 12–18 feet for taller exteriors.
You’ll work faster and with less strain when the frame and pole are balanced for the job.
Roller Frame Widths
A roller frame’s width determines how much surface you cover with each stroke and influences the nap size you can use, so pick a width that matches the scale of the job and the texture of your exterior.
Choose between roller frame types and roller frame materials that suit durability and weight.
- Narrow: trim, tight spots.
- Medium: siding, balanced.
- Wide: broad walls, faster.
Extension Pole Lengths
Pick an extension pole length that matches the height you’ll reach and the control you need, since longer poles cover tall siding and eaves but can feel heavy and wobble if you overextend.
Choose between telescoping and fixed poles, consider roller height adjustments for comfortable posture, and balance reach with stability.
Test pole extension options before starting so you maintain steady, even coverage on exterior surfaces.
Best Exterior Paints and Primers for Rollers
1 solid rule when rolling exterior surfaces: match your roller type to paints and primers formulated for outside use.
You’ll pick products based on substrate, durability, and finish. Consider exterior paint types and roller primer options so your nap and formulation work together for coverage and weather resistance.
- Acrylic latex for siding
- Elastomeric for stucco
- Oil-based primer for bare wood
Preparing Siding, Wood, and Stucco for a Smooth Roller Finish
Start by cleaning each surface thoroughly so your roller applies paint evenly and the finish lasts. Do surface cleaning, then do texture assessment to choose nap and pressure. For siding preparation follow manufacturer’s guides; for wood treatment sand and prime; for stucco priming use masonry primer to boost paint adhesion.
| Task | Focus |
|---|---|
| Siding | siding preparation |
| Wood | wood treatment |
| Stucco | stucco priming |
| All | paint adhesion |
How to Load a Roller Without Drips or Laps
You’ll want to load your roller so it has full, even coverage without excess paint pooling.
Roll slowly in the tray’s well and on the grid until the nap is uniformly coated to avoid drips.
Keep a light, consistent pressure as you roll on the wall to prevent laps and maintain a smooth finish.
Proper Roller Coverage
Although it seems simple, loading a roller correctly is the key to even coverage without drips or visible lap marks; you’ll want just enough paint to wet the nap without saturating it.
Use proper roller techniques to avoid coverage challenges. Roll in the tray’s shallow well, tap the grid, and test on scrap.
- Dip lightly
- Roll off excess
- Test and adjust
Even Paint Distribution
Even paint distribution comes down to how you load and handle the roller: dip it just enough to wet the nap, roll off the excess on the tray grid, then make several light passes on the wall to spread the paint before applying full pressure. You’ll control paint application and honor surface preparation, preventing streaks.
| Calm | Pride | Relief |
|---|---|---|
| Hope | Skill | Joy |
| Order | Clean | Finish |
| Care | Confidence | Peace |
Avoiding Drips And Laps
When loading a roller, think regarding balance: dip just deep enough to saturate the nap, roll across the tray’s grid to remove excess, then make a light test pass so you’re sure it won’t drip or leave a heavy lap.
Use steady pressure for drip prevention and overlapping passes to minimize lap marking.
- Load lightly
- Test stroke
- Blend edges
Rolling Technique: Cutting In, Patterns, and Overlap
If you want a smooth, professional finish, start by cutting in sharp edges with a brush or edger before you roll; that gives you a clean boundary and prevents heavy buildup along trim and corners.
Use precise cutting techniques, control paint consistency, maintain correct roller positioning, follow pattern application and overlap strategies for even coverage, focus on texture matching and edge blending, and practice drip prevention.
Combining Rollers and Brushes: A Hand-and-Roller Workflow
Start by prepping edges and cutting in with a quality angled brush so you have crisp lines to work toward.
Use the roller for broad coverage, keeping a wet edge and consistent pressure to avoid lap marks.
Finish by feathering and blending the roller edges with the brush to hide seams and guarantee a uniform finish.
Prep And Cut-In
Before you roll, lay out a clear prep and cut-in plan so you know which edges you’ll brush and which you’ll roll.
You’ll tape, inspect surfaces, and choose brush techniques based on paint types. Work from top to bottom, cutting in narrow bands, then roll adjoining areas before paint skins.
- Mask and clean edges.
- Cut in corners with angled brush.
- Blend wet edges.
Roller Coverage Techniques
Lay down paint with a coordinated hand-and-roller workflow so you get even coverage without lap marks: start by cutting tight areas with a brush, then roll adjacent panels using overlapping passes and consistent pressure.
Alternate long vertical and horizontal strokes to blend, keep a wet edge, and reload before thin spots appear.
These roller techniques form practical coverage strategies for smooth, uniform exterior finishes.
Blend Edges With Brush
One simple way to get invisible seams is to use a brush to blend the roller’s edge while the paint’s still wet:
You’ll do brush blending for edge finishing, feathering strokes outward to merge roller texture.
Work swiftly, keep a light touch, and maintain wet edges so connections vanish.
- Light, outward strokes
- Match texture and pressure
- Keep edges wet
When to Add a Paint Sprayer to a Roller Plan
If your goal is to cut hours without sacrificing finish quality, add a paint sprayer when large, uninterrupted surfaces or intricate trim make rolling slow or uneven.
You’ll keep roller advantages for textured areas and control, then use spraying for speed and consistent coverage.
Account for sprayer limitations—overspray, prep, and masking—so you balance efficiency with a clean, professional result.
Common Rolling Problems and How to Fix Them
Sprayers speed the big stuff, but rolling still gives you control—especially on textured surfaces and around trim—so you’ll often switch back and forth.
You’ll face common roller issues during paint application; address them fast to avoid laps, splatter, or uneven nap pickup.
- Thin coverage: load roller evenly, use proper nap.
- Lint/shed: use quality roller, prep by washing.
- Roll marks: maintain wet edge, consistent pressure.
Coverage Estimates and How Many Coats You’ll Need
Because paint coverage varies by finish, color, and surface texture, you’ll want a realistic plan before you roll.
Measure square footage, factor porosity, and use coverage calculations from the paint can to estimate gallons.
For most exteriors, prime and two coats give durable, even color; lighter or drastic color changes may need extra coats.
Follow manufacturer coat recommendations for best results.
Speed vs Quality: Realistic Time Savings and Tradeoffs
When you rush to finish with a roller, you’ll save time up front but often trade away a smoother, longer-lasting finish; knowing where to cut corners—and where you can’t—lets you balance speed and quality smartly.
- Prioritize prep: proper cleaning reduces rework—big speed considerations.
- Skip detail work only if acceptable; expect quality tradeoffs.
- Use larger naps for walls to speed coverage, but touch up edges for durability.
Tools and Supplies Checklist for a Roller Exterior Job
Speeding up with a roller only works if you’ve got the right gear, so gather and organize your tools before you start.
Grab assorted roller types (nap lengths for smooth or rough siding), extension poles, trays, high‑quality brushes for trim, drop cloths, caulk and scraper, spackle, and compatible paint brands.
Keep rags, gloves, and a wet edge plan handy for efficient, neat work.
Safety and Ladder Tips for Second‑Story Rolling
Working on a second‑story with a roller raises the stakes, so prioritize a safe setup: inspect and lock your ladder, position it on firm, level ground, and have a helper steady the base while you work.
Maintain ladder safety and height awareness; secure tools, use a harness if needed, and move the ladder rather than overreaching.
- Wear non‑slip shoes
- Use a tool belt
- Check weather conditions
Cleaning, Drying, and Storing Rollers After Use
Because you’ll want your rollers ready for the next job, clean them promptly and thoroughly right after you finish painting.
Clean your paint rollers promptly and thoroughly after finishing a job so they’re ready for the next.
Use proper cleaning techniques: scrape excess paint, rinse with water for latex or solvent for oil, then wash with soap.
Spin or shake to remove water, let them dry fully on a rack.
For roller maintenance, store covers in a breathable bag and replace worn naps.
Cost Comparison: DIY Roller Job vs. Sprayer Rental or Pro
When you’re weighing whether to roll the house yourself, rent a sprayer, or hire a pro, focus on total cost—not just hourly rates—since materials, prep time, cleanup, and potential touch-ups all add up.
Do a cost analysis with budget considerations in mind, then compare likely outcomes:
- DIY roller: lower material cost, more labor.
- Sprayer rental: faster, rental fees + masking.
- Pro: highest upfront, less risk, warranty.
Frequently Asked Questions
Can You Roller-Paint in Direct Sunlight or Very Hot Conditions?
You shouldn’t roller-paint in direct sunlight or very hot conditions; you’ll compromise roller technique and paint adhesion. Instead, choose cooler morning or late afternoon hours, work in shaded areas, and keep paint’s surface moist for proper bonding.
Will Rollers Work With Elastomeric or Waterproofing Exterior Coatings?
Like spreading thick frosting, you can use rollers for elastomeric or waterproofing coatings; you’ll adjust application techniques and guarantee coating compatibility, pick nap length and roller material, and follow manufacturer specs for proper coverage and adhesion.
Can I Use a Roller for Detailed Trim or Decorative Molding?
Yes—you can, but you’ll need proper roller techniques and complementary trim painting tools. Use small nap rollers for flat trim, back-brush edges with a pointed sash brush, and work slowly to avoid drips and preserve crisp lines.
Are There Eco-Friendly or Low-Voc Rollers Available?
Yes — you’ll find eco-friendly rollers like green brushes whispering through grass; they’re made from recycled fibers and pair well with low voc options in paints, giving you eco friendly materials without sacrificing finish or performance.
How Does Roller Painting Affect Historic or Lead-Painted Siding?
You can use a roller, but you’ll need to prioritize historic preservation and lead safety: test for lead, follow abatement rules, use containment and HEPA cleanup, and consult preservation guidelines to protect original siding and finishes.
