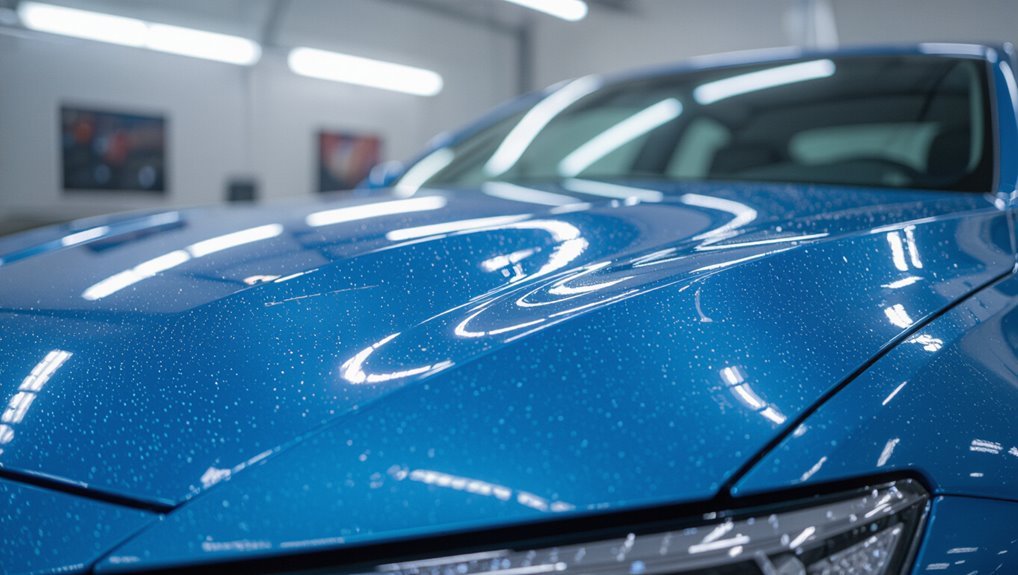
How Long Does Auto Paint Take to Dry: Drying Time Explained
You’ll usually get automotive paint that’s dry to the touch in 30 minutes to a few hours, but full curing takes longer—often 24 hours to several days, and sometimes weeks for urethane systems. Dry-to-touch just means surface solvents evaporated; full cure is chemical cross‑linking that gives durability and chemical resistance. Temperature, humidity, coat thickness, and primer/clear choices all change times, and proper prep and controlled drying speed things up—keep going to learn specifics.
Quick Answer: Average Auto Paint Drying Times
Although exact times vary by paint type and conditions, you can generally expect surface tack-free times of 30 minutes to a few hours and full cure anywhere from 24 hours to several days.
You’ll plan based on paint type, spray technique, and environmental factors like temperature and humidity.
Faster dry times need proper prep, thinner coats, and controlled conditions to avoid runs or incomplete curing.
Dry to the Touch vs. Fully Cured : What’s the Difference?
When paint feels dry to the touch it only means the solvents on the surface have evaporated enough that you won’t leave fingerprints.
However, a fully cured finish has undergone chemical cross-linking all the way through the film and can withstand wear, chemicals, and heat.
Don’t assume “dry” equals durable—handling, polishing, or exposing the panel too soon can cause scratches, solvent pops, or adhesion failures.
- Test gently before handling.
- Use proper drying techniques.
- Control temperature and humidity control.
- Wait manufacturer cure times.
Paint Types Compared: Lacquer, Enamel, Urethane Drying Windows
When you compare paint types, lacquer will be dry to the touch much faster than urethane but it doesn’t reach long-term durability as quickly.
Enamels sit between the two, offering moderate drying and curing times.
Knowing these windows helps you plan sanding, recoat, and final cure schedules.
Lacquer Quick Drying
Because lacquer thins and evaporates rapidly, you’ll notice it dries far faster than enamel or urethane, often becoming touch-dry within minutes to an hour depending on coat thickness and conditions.
You should use proper lacquer spray techniques and accept moderate lacquer finish durability trade-offs.
- Apply thin coats
- Maintain warm, dry air
- Sand between coats lightly
- Avoid heavy buildup
Urethane Longer Cure
Lacquer’s rapid flash times make it tempting for fast-turn projects, but urethane behaves quite differently and needs more patience.
You’ll notice urethane’s cure window is longer: tack-free in hours, full cure in days to weeks depending on temp and thickness.
That longer cure delivers urethane flexibility and superior urethane durability, so you should wait before compounding, polishing, or stressing the finish to avoid damage.
Primer & Clearcoat: How They Change Drying Schedules
Before you apply color, the primer needs its own dry time—usually a few minutes to several hours depending on type and thickness—so don’t rush the next step.
After paint, the clearcoat goes through a curing process that can feel dry to the touch in an hour but may require days to fully harden.
Understanding both primer drying time and clearcoat curing helps you schedule wetsanding, polishing, and reassembly without ruining the finish.
Primer Drying Time
Anyone tackling a repaint needs to know primer drying times, since primers set the schedule for subsequent coats and influence how soon you can apply clearcoat.
You’ll consider primer types and primer application, temperature, and coat thickness.
Typical guidelines:
- Epoxy: 30–60 mins tack-free
- High-build: 1–2 hours
- Surfacer: 2–4 hours
- Sand-ready: 4–24 hours
Clearcoat Curing Process
Although clearcoat often looks dry to the touch within an hour, it keeps curing beneath the surface for days to weeks. The primer beneath it plays a big role in that timeline.
You’ll monitor clearcoat thickness because thicker coats cure slower; primer adhesion, temperature, humidity, and other environmental factors affect chemical crosslinking.
Allow recommended cure times before polishing or stress.
Temperature and Humidity: How Weather Affects Paint Drying
When you’re painting a car, temperature and humidity play the biggest roles in how fast the paint dries: warmer, drier air speeds solvent evaporation and curing, while cold or humid conditions slow both processes and can cause runs, blushing, or longer tack times.
- humidity effects on drying conditions
- temperature fluctuations and paint absorption
- weather impact and moisture levels
- environmental factors, seasonal variations
Airflow and Booth Heating: Speeding Paint Cures Safely
You’ll want to guarantee proper booth ventilation so fresh air moves evenly across the surface without creating dust or turbulence.
Use controlled booth heating to raise temperature steadily, which speeds chemical curing without scorching or trapping solvents.
Together, balanced airflow and precise heat let you shorten dry times safely and consistently.
Proper Booth Ventilation
Good ventilation is the backbone of any paint booth, and getting airflow and booth heating right speeds curing while keeping finishes healthy and safe.
You’ll manage booth pressure and airflow balance to control contamination and drying.
Follow these steps:
- Monitor pressure continuously.
- Verify crossflow and downflow balance.
- Replace filters on schedule.
- Confirm intake/exhaust are unobstructed.
Controlled Booth Heating
1 key variable that speeds paint curing without risking defects is controlled booth heating; you should use calibrated, even heat to accelerate solvent evaporation and crosslinking while avoiding hot spots that cause runs, orange peel, or trapped solvents. You’ll monitor booth temperature, humidity control, airflow management, and choose appropriate heating methods to balance cure speed and finish quality.
| Parameter | Target | Effect |
|---|---|---|
| Temp | 60–80°C | Faster cure |
| Humidity | 40–60% | Avoid blushing |
| Airflow | Balanced | Even finish |
How Long to Wait Between Coats (Primer, Base, Clear)
When you’re ready to apply the next layer, wait only as long as the previous coat needs to tack up—but not fully harden—so the new coat bonds properly without trapping solvents.
Follow these steps:
Follow these steps to ensure each coat bonds properly—timing is key for tack, not full cure.
- Primer: touch-tack in 15–30 minutes, depending on application techniques.
- Base: tack in 10–20 minutes; monitor coat thickness.
- Clear: wait 20–40 minutes.
- Sand between coats only when fully cured for proper adhesion.
Quick, Safe Ways to Accelerate Drying (Do’s and Don’ts)
If you need paint to dry faster without risking the finish, use controlled heat, airflow, and low-humidity conditions while avoiding shortcuts that trap solvents or cause orange peel.
Use gentle fans, moderate HVAC, and desiccant dehumidifiers as safe drying techniques.
Don’t blast with high heat, rush recoats, or skip proper flash times—those common pitfalls cause runs, solvent pops, and soft finishes.
Equipment That Cuts Paint Curing Time (IR Lamps, Bake Booths)
You’ve covered safe airflow, heat, and humidity control; now let’s look at purpose-built gear that speeds curing without wrecking the finish.
- IR lamps: targeted heat application boosts curing efficiency and offers infrared benefits for clearcoats.
- Bake booths: controlled drying technology for consistent paint chemistry reactions.
- Portable ovens: spot cures without overbaking.
- Regular equipment maintenance preserves performance and safety.
Top Mistakes That Slow Cures or Damage Finishes: And Fixes
Although quick fixes and shortcuts can be tempting, common mistakes like applying heavy coats, using the wrong reducer, or skipping surface prep will slow curing or ruin the finish; address them by following mix ratios, allowing proper flash times, and prepping surfaces thoroughly.
| Mistake | Fix |
|---|---|
| Heavy coats | Thin layers, follow paint application |
| Wrong reducer | Match reducer to drying techniques and temp |
Signs Paint Hasn’t Cured Properly and Step‑by‑Step Remedies
When paint hasn’t cured properly, you’ll spot clear, telltale signs—tacky or soft spots, solvents reactivating under a cloth, fingerprints or dust embedded in the finish, blooming or milky haze, and areas that chip or scratch easily.
When paint hasn’t cured, look for tacky spots, solvent reactivation, fingerprints or dust in the finish, haze, and easy chipping.
Check for these issues in varied light and by gently testing inconspicuous sections so you can confirm the problem before you fix it.
- Assess paint adhesion and surface preparation.
- Address moisture issues and environmental factors.
- Stabilize temperature fluctuations and curing agents.
- Use correct drying techniques to prevent chemical reactions.
Realistic Timelines: DIY Projects vs. Professional Repaints
If you’re tackling a DIY job, expect more time and hands-on monitoring than with a professional repaint.
DIY dry times stretch because of limited equipment, variable prep, and curing practices, while pros speed things up with controlled environments, commercial-grade coatings, and faster curing methods.
You’ll weigh DIY techniques against professional standards, choose timing strategies, and use project comparisons to set realistic schedules and expectations.
Frequently Asked Questions
Can Car Paint Curing Time Void My Vehicle Warranty?
Yes — improperly done paint application can void warranty coverage if it causes damage or violates terms. You should follow manufacturer-approved processes and document professional work so you don’t risk losing coverage due to curing-related issues.
How Does Paint Color Affect Drying and Curing Times?
Think of shades like weather: warmer colors often absorb heat, so they can speed surface drying. You’ll find color temperature and paint thickness influence curing—thicker coats and cooler tones usually slow both surface dry and full cure.
Are Additives or Hardeners Safe for Older Vehicle Finishes?
Yes — you can use additives, but test additive safety first and confirm hardener compatibility with the older finish; you’ll avoid damage by spot-testing, following manufacturer ratios, and choosing products formulated for aging or factory-style coatings.
Can I Wash My Car Before Paint Fully Cures?
Yes—you can rinse gently, and by coincidence your careful timing mirrors paint drying itself: use soft washing techniques, avoid pressure washers until full cure, and don’t scrub; let clearcoat harden to prevent marring or lifting.
How Long Before Waxing or Polishing Freshly Painted Panels?
You should wait about 30 days before waxing or polishing freshly painted panels under ideal conditions; proper surface preparation and full cure matter, so avoid aggressive polishing earlier to prevent marring or lifting the new clearcoat finish.
Conclusion
Like waiting for a soufflé, auto paint needs patience and the right conditions to rise. You’ll feel relief when it’s dry to the touch, but don’t celebrate until it’s fully cured — that’s when the finish truly holds up like a suit of armor. Follow proper prep, temperature control, and curing methods, and you’ll avoid heartbreak and costly do-overs. Respect the timeline, and your paint job will reward you with shine and longevity worth the wait.