How Long Does Exterior Paint Take to Dry – Full Drying Time Breakdown by Weather and Paint Type
You’ll usually see exterior paint dry to the touch in 1–4 hours, be safe for light use in 24–48 hours, and reach full cure in a week to several weeks depending on paint type and weather. Latex and acrylic often cure in 2–4 weeks, oil-based in 4–6 weeks, and heavy films or cool, humid conditions can stretch curing up to 90 days. Keep coats thin and follow temps and humidity guidelines to avoid problems; more specifics follow.
Who This Guide Is For And What It Covers
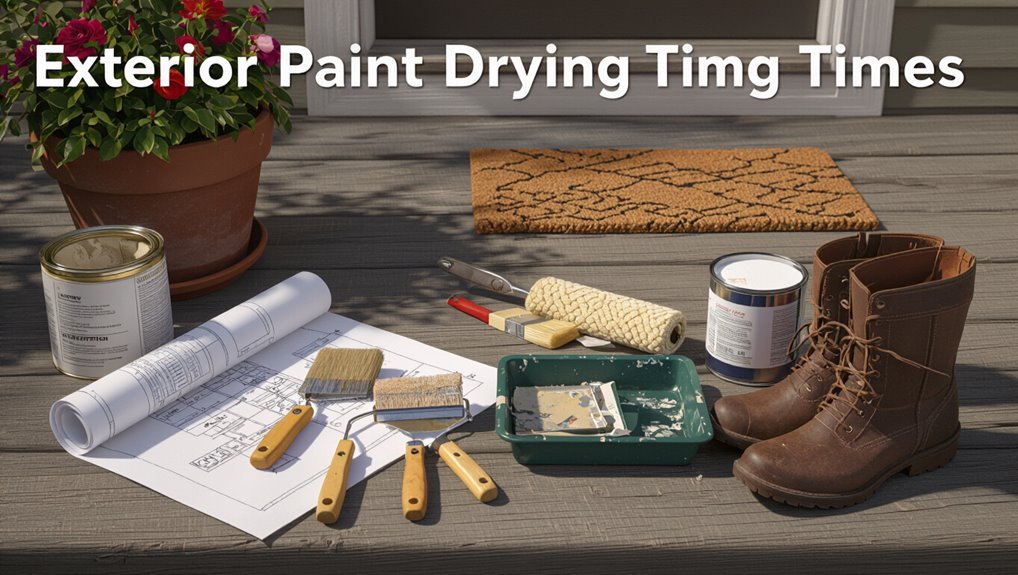
Whether you’re repainting a single door or tackling an entire house, this guide helps you plan and finish exterior paint projects efficiently.
You’ll find a clear content overview that matches audience needs: homeowners, DIYers, and pros seeking drying timelines, weather effects, and paint-type tips.
You’ll get practical steps, cautions, and when to expect touch-ups so you can schedule work confidently.
Quick Answer: Typical Exterior Paint Drying Times
Most exterior paints feel dry to the touch within 1–4 hours, but they typically need 24–48 hours before you can handle light use and up to 7 days to fully cure for maximum durability.
You should wait before heavy use to protect paint adhesion and guarantee paint longevity.
Factors like temperature, humidity, and paint type affect timing, so plan projects accordingly.
Dry to Touch vs. Recoat vs. Full Cure : Exact Meanings
Because drying involves several stages, it’s important you know the exact differences between “dry to touch,” “recoat,” and “full cure.”
Dry to touch means the surface no longer feels tacky—usually within 1–4 hours—so it’s safe to lightly brush with a fingertip.
Recoat time is when paint accepts another layer; full cure is the complete curing process where hardness and durability finish.
Typical Drying Times By Paint Type: Latex, Acrylic, Oil, Specialty
You’ll notice different paints dry at very different speeds—latex and acrylic often feel dry in an hour or two, while oil can take 6–24 hours to be touch-ready.
Environmental factors like temperature, humidity, and wind, plus coat thickness and surface porosity, will change those times.
Keep these variables in mind when choosing paint so you can plan recoat and cure schedules accurately.
Dry Time By Paint
Different paint formulas dry at noticeably different rates, so knowing which type you’re using helps you plan touch-ups, recoat times, and when to expose surfaces to weather.
Check paint composition—latex and acrylic dry fast, often within 1–4 hours to touch; oil-based cures slower, 6–24+ hours.
Specialty coatings vary widely. Look for manufacturer recoat windows and any added drying agents to schedule work confidently.
Factors Affecting Dryness
When you’re planning exterior painting, several factors determine how quickly a coat will dry, and knowing them helps you schedule recoats and protect surfaces from weather.
You’ll assess drying conditions and environmental impact: paint chemistry, application techniques, substrate preparation, temperature fluctuations, moisture levels, airflow management, paint thickness, and seasonal timing.
Adjust methods to control each variable for reliable, consistent results.
Typical Recoat Windows For Exterior Paints
Because environmental factors and paint type affect drying, typical recoat windows for exterior paints usually range from a couple of hours to 48 hours.
Latex paints often let you recoat in 2–4 hours under ideal conditions, while oil-based and alkyd paints commonly require 24–48 hours.
Check manufacturer recoat timing, confirm surfaces feel dry, and test paint adhesion with a gentle tape pull before applying the next coat.
Typical Full Cure Timelines For Exterior Paints
Although paint can feel dry to the touch within hours, full cure for exterior paints usually takes much longer—expect latex and acrylics to reach full hardness in about 2–4 weeks, while oil-based and alkyd systems commonly need 4–6 weeks (sometimes up to 90 days for heavy films or cool, damp conditions).
You’ll plan around cure time to protect paint performance.
- Latex: 2–4 weeks
- Acrylic: 2–4 weeks
- Oil/alkyd: 4–6 weeks
- Heavy film/cold: up to 90 days
How To Test If Exterior Paint Is Ready For Recoat Or Traffic
How do you know the paint’s ready for a recoat or foot traffic?
Check paint readiness by touch: press a clean fingertip gently—no tackiness means surface dry.
Use the fingernail test for tack under light pressure and a timed recoat window per manufacturer.
For traffic, walk softly after 24–72 hours depending on temperature and humidity.
Record recoat testing results to guide future jobs.
Scheduling Exterior Paint Jobs By Weather Forecast
Check local weather patterns before you pick paint days so you know typical temperature swings and wind.
Plan around humidity because high moisture can slow drying and affect adhesion.
And don’t schedule during rain windows—you’ll want several dry days after application for proper curing.
Check Local Weather Patterns
When you’re planning an exterior paint job, look at local weather patterns for at least a week before you schedule—humidity, temperature swings, and forecasted rain all affect drying time and adhesion.
Check local climate and seasonal trends to pick stable days. Consider:
- Recent temperature highs/lows
- Wind speed and direction
- Overnight lows
- Predicted precipitation and storms
Plan Around Humidity
Humidity plays a big role in how fast exterior paint dries and how well it bonds, so you’ll want to schedule work around expected moisture levels.
Check forecasts for prolonged high humidity; aim for days with steady mid to low levels.
Use humidity control techniques like ventilation and timing to improve drying and moisture management, ensuring proper adhesion and fewer touch-ups.
Avoid Rain Windows
Although weather forecasts can change, you should block out extended dry periods—often called “no-rain windows”—before painting exterior surfaces so coats can cure uninterrupted.
Use rain protection strategies and ideal scheduling to avoid ruined work. Plan supplies, monitor hourly forecasts, and delay if storms approach.
- Check 7-day forecast
- Allow manufacturer cure time
- Prepare tarps/coverings
- Reschedule if risk >20%
Weather Timeline: Cold And Damp Conditions For Exterior Paint
If you paint in cold, damp weather, you’ll likely see noticeably longer drying times and a higher chance of problems like tackiness, poor adhesion, and uneven sheen.
Cold paint cures slowly; moisture on damp surfaces prevents film formation and can trap solvents.
Expect tacky finishes for days, delayed recoat windows, and increased risk of peeling.
Wait for warmer, drier conditions before painting.
Weather Timeline: Hot And Humid Conditions For Exterior Paint
When you paint in hot, humid conditions, the paint’s water or solvent can evaporate unevenly—speeding surface dry while slowing full cure—so you’ll often see rapid tack-free times but longer overall cure and higher risk of blistering, sagging, or milky finishes.
- Expect tack-free in hours, cure in days.
- Watch for blistering from trapped moisture.
- Use humidity challenges-aware drying solutions: dehumidifiers, fans.
- Thin coats and extended flash time reduce defects.
Weather Timeline: Windy, Sunny Days And Drying Risks
Because wind and strong sun strip solvents and water quickly, you’ll see exterior paint skin over fast but risk poor film formation and uneven curing. You should monitor wind impact and sunny conditions to avoid blistering, cracking, or adhesion loss. Slow coats, misting, or shading help.
| Risk | Cause | Fix |
|---|---|---|
| Blisters | Rapid drying | Thin coats |
| Cracks | Uneven cure | Shade |
| Poor adhesion | Surface stress | Prep |
Temperature Effects On Exterior Paint Drying
Temperature has a big impact on how quickly exterior paint dries, so you’ll notice faster curing on warmer days and slower drying when it’s cool.
Pay attention to the paint manufacturer’s recommended temperature range, because painting below that can cause poor adhesion, longer tack times, or even film failure.
If it’s cold, you’ll need more drying time and might’ve to postpone the job to avoid problems.
Temperature And Drying Speed
Although paint dries faster in warm conditions, extreme heat can actually slow curing and cause issues like blistering or lap marks.
So you’ll want to aim for moderate, steady temperatures. Use proper temperature effects knowledge and drying techniques to plan.
Consider these factors:
- Daytime highs
- Nighttime lows
- Humidity levels
- Direct sunlight exposure
Cold Weather Challenges
When temperatures drop near or below freezing, exterior paint takes much longer to set and may never cure properly.
So you should avoid painting in cold snaps and plan jobs for milder days.
In cold weather you’ll fight poor paint adhesion, higher moisture levels and frost risk.
Use tailored drying techniques, allow extra cure time, follow precise application tips, and postpone work when conditions are marginal.
Humidity Effects On Exterior Paint Drying
Because moisture in the air slows solvent evaporation and affects film formation, high humidity can greatly extend the time exterior paint needs to dry.
You’ll notice humidity effects like tackiness, longer recoat windows, and risk of runs when moisture absorption occurs in porous substrates.
Consider these scenarios:
- Morning fog raises surface moisture.
- Rain increases drying time.
- Dew forms overnight.
- Wet wood soaks up solvent.
Wind And Airflow: Surface Dry Vs. Defects
You’ll notice wind can make paint feel dry on the surface long before it’s fully cured underneath. High wind speeds speed surface drying but can cause issues like blistering, poor adhesion, or brush marks from uneven solvent evaporation.
Controlled airflow helps curing, so you’ll want to avoid painting in gusty conditions to reduce airflow-induced defects.
Surface Dry Vs. Curing
Strong airflow can make the paint surface feel dry in minutes, but that doesn’t mean it’s cured or safe from defects.
You must trust proper surface preparation and correct paint application; curing still needs time and stable conditions.
Watch for trapped solvents, lack of adhesion, or early abrasion.
- Skin forms fast
- Solvents remain beneath
- Adhesion builds slowly
- Handle gently until cured
Wind Speed Effects
When wind whips across a freshly painted surface, it can make the paint feel dry almost immediately. However, that same airflow often pulls solvents and moisture out unevenly and raises the risk of defects like blistering, poor adhesion, and dust inclusion.
You’ll notice wind speed effects accelerate surface drying but can compromise full curing. Monitor conditions to balance faster drying performance with proper adhesion and finish quality.
Airflow-Induced Defects
Although a brisk breeze can make paint feel dry to the touch within minutes, that rapid surface drying often masks problems you’ll only spot later—blisters, poor adhesion, and trapped dust—that originate when solvents and moisture are stripped unevenly by airflow.
You’ll need to manage airflow impact to prevent drying imperfections. Consider these risks:
- Surface skinning
- Hidden tackiness
- Blistering
- Dust embedment
Sunlight And Shade: UV, Surface Heat, And Blister Risk
If you paint a sun-drenched wall midafternoon, expect faster surface drying but a higher risk of blistering as trapped solvents try to escape under an overheated film.
You’ll balance UV exposure and surface temperature: sunlight effects speed skin cure while heat retention raises blister formation risk.
Shade impact creates drying variability and can slow cure, affecting overall paint performance and final adhesion.
Surface Differences: Wood, Metal, Vinyl, Stucco, Concrete
Curious how substrate type changes drying time? You’ll see variations: porous wood needs wood treatment, metals require metal preparation to prevent rust, vinyl benefits from vinyl cleaning, stucco dries slowly with stucco sealing, and concrete often calls for concrete priming.
Adjust expectations for porosity and thermal mass. Follow surface-specific prep to help coatings cure evenly and avoid failures.
- Wood: porous
- Metal: dense
- Vinyl: nonporous
- Stucco/concrete: heavy
Primer Drying Vs. Topcoat Drying On Exterior Surfaces
Having covered how different substrates affect drying, let’s look at primer versus topcoat behavior on exterior surfaces.
You’ll find primer types dry faster or slower depending on drying conditions and environmental factors; oil primers often take longer than acrylic. Proper surface preparation guarantees paint adhesion.
During topcoat application you’ll need ideal conditions to cure, since temperature, humidity, and wind greatly influence final drying and performance.
How Paint Thickness And Coat Count Affect Drying Time
When you lay on thick coats or stack multiple layers, each pass adds to the time paint needs to dry and cure because solvents must evaporate and film formation must complete through the full depth.
You’ll notice slower solvent escape, variable paint absorption, and risks to drying uniformity.
- Thick single coat: longer cure.
- Multiple thin coats: faster.
- Uneven porosity: blotches.
- Humidity slows all.
VOCs And Solvent Flash-off: Outdoor Odor, Safety, And Drying
Why do outdoor paints sometimes smell strong even after they feel dry?
You’ll notice lingering VOC emissions as solvents continue flash-off beneath the surface.
Monitor drying conditions to reduce solvent exposure and manage odor with ventilation, timing, and low-VOC products.
Prioritize outdoor safety and air quality to minimize health risks and environmental impact while keeping odor management effective.
How Film Formation Works For Latex And Acrylic Paints
Because latex and acrylic paints are water‑based, their film forms through evaporation and coalescence rather than solvent bonding, and you’ll see this in three linked steps: water evaporates, polymer particles pack together, and plasticizers help those particles fuse into a continuous film.
- Evaporation removes water, starting drying mechanisms.
- Polymer particles approach, enabling polymer bonding.
- Plasticizers aid coalescence and curing process.
- Moisture interaction and environmental factors affect final film formation and acrylic properties.
How Oil-Based Paints Cure Through Oxidation
Although oil-based paints start to feel dry as solvents evaporate, they actually cure by oxidizing — a chemical reaction where oxygen from the air links unsaturated oil molecules into a hard, cross-linked film. You’ll notice slower oxidation process in cool or humid conditions, extending curing time.
| Factor | Effect |
|---|---|
| Temperature | Faster cure |
| Humidity | Slows cure |
| Film thickness | Longer curing time |
| Ventilation | Speeds oxidation |
How Specialty Coatings (Elastomeric, Masonry, Enamel) Cure
When you apply elastomeric or masonry coatings, the film needs time to form into a flexible, weatherproof layer that bridges hairline cracks.
With enamels, you’ll notice surface drying first, but true hardness builds over days to weeks as the binder crosslinks.
Temperature, humidity, and coating thickness all affect how quickly those films finish curing.
Elastomeric Film Formation
Elastomeric coatings cure by forming a flexible, continuous film that bridges hairline cracks and moves with the substrate.
You’ll notice elastomeric benefits like weather sealing and improved film durability as polymers coalesce, shed moisture, and lock to masonry.
You’ll apply, wait for tack-free set, and allow full crosslinking.
Steps:
- Surface prep
- Apply evenly
- Tack-free phase
- Full cure time
Enamel Hardness Development
After elastomeric coatings have set and sealed, you’ll notice enamel finishes following a different path to final strength: they build hardness through solvent release, polymer chain alignment, and chemical crosslinking that locks the film into a rigid, durable surface.
You’ll pick enamel types for gloss and flexibility; curing rates vary with chemistry and weather.
Use hardness testing (pencil, König) to confirm readiness before heavy use.
When Do Lab Drying Numbers Apply And When Do Field Conditions Override Them?
If you’ve ever compared paint can labels to real-world results, you’ll notice lab drying times are best treated as ideal benchmarks rather than guarantees.
You’ll rely on lab conditions for baseline times, but field conditions often override them.
Consider these factors:
Consider these factors before you paint — they’ll determine how closely real drying matches the lab times.
- Temperature extremes
- Humidity and dew
- Wind and ventilation
- Surface porosity and contamination
How To Speed Drying Safely Without Harming The Finish
Lab numbers give you a starting point, but once you’re on the job you’ll want safe ways to speed drying without compromising the finish.
Use gentle airflow, low-heat fans, and dehumidifiers; avoid direct heat or solvents. Work in thin coats, follow manufacturer cure times, and keep dust away.
Prioritize paint safety by wearing PPE and ensuring proper ventilation while accelerating drying techniques.
How To Slow Drying Intentionally For Better Flow And Leveling
When you want smoother brushstrokes and fewer lap marks, slowing the dry time gives the paint more time to level and self-heal. You can do this by choosing slower-evaporating formulations, adding approved retarding additives, and controlling temperature and humidity to reduce solvent loss.
Use these slow drying techniques during paint application:
- Lower ambient temperature slightly.
- Increase humidity moderately.
- Add manufacturer-approved retarder.
- Choose slower-evaporating solvent or acrylic blend.
Common Drying-Related Defects And When They Appear
Because drying happens in stages and involves both solvent evaporation and film formation, you’ll sometimes see specific defects tied to particular timeframes—wet-edge problems and brush marks show up almost immediately, while issues like blushing, poor adhesion, or solvent popping can appear during tack-free or curing stages.
You’ll notice paint adhesion issues, blister formation, uneven finish, moisture trapping effects, early color fading, and chalking problems at predictable stages.
How To Fix Tacky Paint And Incomplete Cure
If your paint remains tacky or hasn’t fully cured after the expected time, don’t panic—you can usually salvage the finish by diagnosing the cause and taking targeted steps like improving ventilation, lowering humidity, or allowing more drying time before recoating.
Use these tacky paint solutions and incomplete cure remedies:
- Increase airflow and sun exposure.
- Wait longer before recoating.
- Reduce humidity with dehumidifiers.
- Thin or strip and reapply properly.
When Does Humidity Cause Blushing Or Whitening And How To Fix It?
High humidity can cause paint to blush or turn whitish by trapping moisture in the film as solvents try to evaporate. You’ll often see this when painting in damp conditions or on surfaces that retain moisture.
You should recognize paint blushing from humidity effects, pause repainting, improve ventilation and moisture control, and remove blush with light sanding after full cure.
Prioritize surface preparation.
How To Avoid Lap Marks And Brush Marks During Variable Drying
Keep a wet edge by working in manageable sections so each stroke overlaps the previous one before it starts to dry.
Match your application speed to drying conditions—slow down in heat or wind and speed up when it’s cooler or more humid. That way you’ll minimize lap marks and brush marks as the paint cures.
Plan Wet Edge
Because paint dries at different rates across a wall, you’ll want to plan your wet edge so each stroke blends into the next before it sets.
Use wet edge techniques and timing to avoid lapmarks and brush marks.
Follow this quick checklist:
- Start at one corner, work steadily.
- Maintain a consistent overlap.
- Keep a workable wet edge width.
- Adjust pace for temperature and sun.
Match Application Speed
Once you’ve planned your wet edge, match your application speed to the paint’s drying pace so each stroke blends smoothly into the next.
Watch drying times for your Paint Selection, adjust pace in sun, wind, or humidity, and use consistent Application Techniques—steady strokes, uniform pressure, and controlled overlap.
Move faster on slow-drying formulas, slower on quick-dry ones, keeping edges wet to avoid laps.
Best Practices For Painting In Spring And Fall
If you’re painting outdoors in spring or fall, aim for mild, dry days and plan around temperature swings so your paint can cure evenly. Mornings often offer the most stable conditions before afternoon humidity rises or temperatures drop overnight.
Use spring painting and fall preparation tips to protect surfaces, schedule coats, and monitor forecasts.
- Check temps (50–85°F)
- Avoid rain
- Use breathable primers
- Space coats by hours
Best Practices For Painting In Summer And Winter
Want your exterior paint to hold up through heat or cold? For summer painting, work mornings, use lighter colors, and keep surfaces cool; for winter painting, pick warmest daylight hours, use fast-curing formulas, and avoid freezing nights. Follow manufacturer temps and humidity limits.
| Season | Timing | Tip |
|---|---|---|
| Summer | Morning | Shade surfaces |
| Summer | Midday | Avoid |
| Winter | Daylight | Use warm seals |
Tools That Help Monitor Drying: Moisture Meters, IR Thermometers
You’ll want a moisture meter to check substrate dampness before and after painting so trapped moisture doesn’t slow drying or cause adhesion problems.
Use an infrared thermometer to spot cool, shaded areas and surface temperature swings that affect cure time.
Together these tools give you quick, actionable readings to time recoats and avoid weather-related issues.
Moisture Meter Usage
When monitoring exterior paint drying, a moisture meter gives you direct, reliable readings of substrate dampness so you can avoid sealing in moisture or repainting too soon.
You’ll use moisture meter benefits to check boards, siding, and trim; perform moisture meter calibration before use; and follow thresholds for safe painting.
- Check multiple spots
- Test depth-appropriate
- Recalibrate regularly
- Log readings
Infrared Thermometer Tips
Alongside moisture meters, an infrared (IR) thermometer helps you track surface temperature differences that affect paint drying.
Use it to check sun-exposed versus shaded areas, ensuring consistent paint temperature measurement across surfaces. Aim the gun perpendicular, account for emissivity settings, and allow steady readings.
Proper technique improves infrared thermometer accuracy so you can avoid premature recoats and achieve uniform curing.
How To Read And Use Manufacturer Drying And Recoat Recommendations
Although paint labels can look technical, they give the exact drying and recoat windows you should follow to get a durable finish.
Read manufacturer guidelines, note surface and temperature, and consider drying factors like humidity. Follow those times, but verify by touch.
Examples to apply:
- Check label temp/humidity range.
- Note tack-free and recoat times.
- Allow extra time in cold/wet conditions.
- Record conditions for future jobs.
When To Trust Manufacturer Times Vs. Real-World Testing
Manufacturer times give you a reliable starting point, but you’ll want to confirm them on the jobsite.
Use manufacturer guidelines for baseline dry and recoat intervals, then test small areas under current weather.
Start with manufacturer dry and recoat times, then verify by testing small areas in current weather.
If real world conditions—temperature, humidity, wind—differ from lab specs, extend wait times.
Trust the label unless on-site tests show slower curing; document results for consistency.
Primer Choice: How It Speeds Or Slows Final Cure
Because primer sets the foundation for topcoat adhesion and solvent exchange, your primer choice can speed or slow the final cure considerably.
You’ll pick based on substrate and climate: different primer types change drying and curing. Match primer to paint and use proper application techniques to avoid trapping solvents or adding thin spots.
- Oil-based vs. latex
- Bonding primers
- Quick-dry formulas
- Proper surface prep
Outdoor Safety During Exterior Paint Curing (VOCs, Heat)
Choosing the right primer helps your topcoat cure properly, but you also need to protect people and the environment while paint cures outdoors.
Keep children, pets, and food away, post barriers, and ventilate to reduce VOCs safety risks.
Avoid painting during extreme outdoor heat; high temps speed off-gassing and can cause blistering.
Wear respirators and gloves, and follow label disposal instructions.
When To Call A Pro: Complex Substrates Or Tight Timelines
If your project involves unfamiliar or mixed materials—like previously treated wood with oil-based paint, metal with rust, masonry, or composite siding—or you’re on a tight deadline that won’t tolerate rework, call a pro.
You’ll get expert advice and a thorough project assessment to avoid delays or adhesion failures.
- Material compatibility check
- Surface prep plan
- Accelerated drying techniques
- Schedule coordination
Cost, Warranty, And Liability Risks Of Improper Drying
If you rush painting before surfaces are fully dry, you’ll often end up paying for repairs like blistered or peeling coats.
You could also void the manufacturer’s warranty by failing to follow drying-time recommendations.
That leaves you potentially liable for restoration costs instead of being covered for fixes.
Increased Repair Costs
Many painters underestimate how much improper drying can cost you; rushed or incomplete cures often lead to peeling, blistering, and substrate damage that demand costly rework.
You’ll face higher repair budget needs, unexpected expenses, project delays, and rising maintenance costs.
Consider common consequences:
- Repainting affected areas
- Replacing damaged trim or siding
- Extended labor charges
- Increased material waste
Warranty Void Risks
Poor drying doesn’t just raise repair bills; it can also invalidate manufacturer and contractor warranties, leaving you on the hook for replacement and labor costs. You should follow drying times precisely to avoid negative warranty implications and reduced paint longevity. Review contractor contracts and product instructions, document conditions, and insist on post-job inspection to protect claims.
| Risk | Cause | Action |
|---|---|---|
| Void warranty | Improper curing | Document |
| Rework cost | Rushed schedule | Inspect |
| Liability | Neglected prep | Enforce |
| Shorter life | Trapped moisture | Wait |
| Claim denial | Missing logs | Save |
Quick Troubleshooting Checklist For Onsite Drying Problems
When paint isn’t drying on schedule, check a few key factors right away so you can fix the problem before recoat time or finish quality suffer.
- Verify drying troubleshooting basics: temperature and humidity within paint specs.
- Assess onsite conditions: ventilation and direct moisture sources.
- Check for thick coats or incompatible primers.
- Remove dew, delay rain, or use fans/heaters to accelerate safe drying.
Schedule Templates: 2-Day, 3-Day, And 1-Week Exterior Jobs
For a quick refresh, you can follow a two-day project timeline that schedules surface prep and primer on day one and final coats and touch-ups on day two.
If you’ve got more scope or unpredictable weather, a one-week project plan spaces prep, primer, multiple coats, and inspections to let each layer dry fully.
Pick the template that matches your house size, crew, and local drying conditions so you won’t rush critical drying times.
Two-Day Project Timeline
A two-day exterior paint job focuses on efficiency: you’ll prep and prime on day one, then paint and do touch-ups on day two, assuming good weather and average surface conditions.
Use project management principles and strict time allocation to avoid overruns.
- Day 1: wash, sand, prime.
- Night: inspect drying.
- Day 2: first coat, second coat.
- Finish: trim, cleanup.
One-Week Project Plan
Stretching your exterior paint project across a week gives you breathing room to tackle prep, repairs, priming, and multiple paint coats without rushing, and lets drying times and weather windows work in your favor. You’ll set clear project milestones, schedule inspections, and optimize resource allocation so you finish efficiently.
| Day | Task | Notes |
|---|---|---|
| 1 | Prep | Clean, sand |
| 2 | Repairs | Caulk, patch |
| 3 | Prime | Spot prime |
| 4 | Paint coat 1 | Dry check |
| 5 | Paint coat 2 | Final touch-up |
Frequently Asked Questions
Can Exterior Paint Drying Contaminate Nearby Plants or Soil?
Yes — if paint drips or overspray reach plants or soil, you’ll risk paint toxicity and environmental impact; you’ll avoid harm by using barriers, low-tox paints, proper cleanup, and keeping runoff contained during painting and drying.
Can Pets Safely Contact Freshly Painted Exterior Surfaces?
A neighbor’s dog licked wet siding and got sick, so don’t let pets touch fresh paint; you’ll prevent pet safety issues and avoid paint toxicity. Wait full curing time, keep animals away until surfaces harden.
How Long Before Pressure Washing Is Safe After Painting?
You should wait at least 2–4 weeks before pressure washing; tougher conditions may need 6–8 weeks. Respect pressure washing timing to avoid damage and allow the paint curing process to fully harden for best results.
Does Exterior Paint Drying Affect Home Sale Disclosure or Insurance?
Yes — think of fresh paint as a new chapter you can’t hide; you’ll need to follow disclosure requirements and consider insurance implications, since recent exterior work can affect required disclosures, liability, and coverage eligibility or premiums.
Can Sun-Reflective Paints Change Drying Behavior or Warranty?
Yes — sun-reflective paints can alter drying speed and performance; you’ll get sun reflective benefits like lower heat absorption, but check warranty considerations since manufacturers may specify application, curing conditions, and exclusions for reflective formulations.
Conclusion
You’ve now got the essential timing and signs to avoid costly mistakes—remember, temperature and humidity matter most. One striking stat: at 50% humidity, water-based paint can take up to 50% longer to dry than in 30% humidity, so plan accordingly. If you’re racing weather or handling tricky substrates, don’t rush recoat or curing; follow the recoat windows and call a pro for complex jobs to protect your finish, warranty, and budget.