
How to Fix Bubbling Paint Caused by Water Damage
If paint is bubbling from water damage, first stop the leak — fix plumbing, roof, or flashing — then remove loose paint and any wet drywall or trim. Dry the area fully with fans and a dehumidifier, check for mold, and repair or replace damaged substrate. Sand edges, apply a stain-blocking, moisture-resistant primer, then repaint with mold-resistant paint. Monitor humidity and ventilation to prevent recurrence, and continue below for tips on leaks, insurance, and tougher waterproofing.
Who This Guide Is For And How To Use It
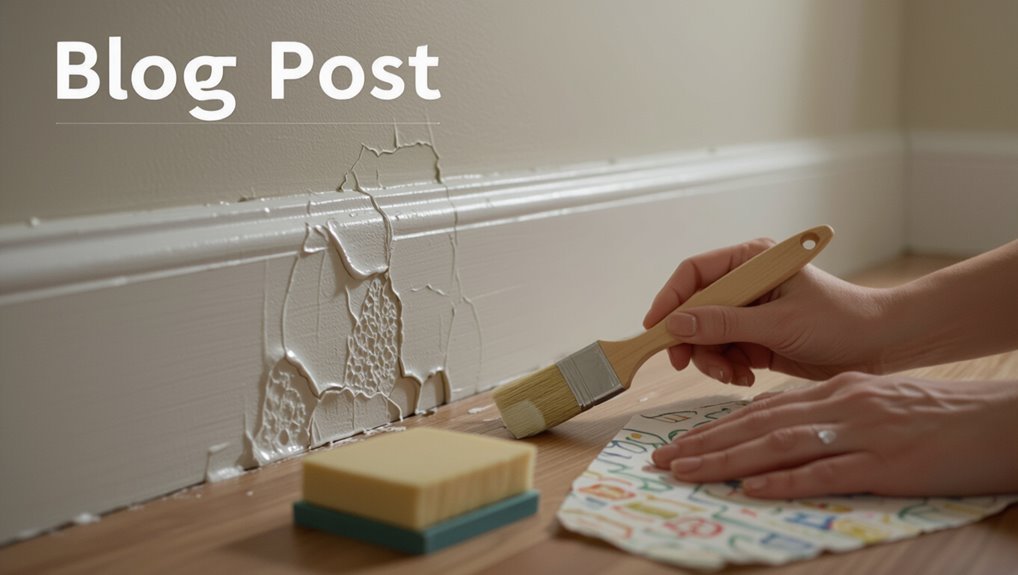
Who’s this guide for—and how should you use it? You’re the target audience if you’re tackling bubbling paint from water damage on walls or ceilings.
This guide overview gives practical steps, tools, and safety tips you’ll follow sequentially. You’ll learn to assess damage, prepare surfaces, choose materials, and apply fixes so you can restore finishes confidently and prevent recurrence.
Quick Answer : How To Stop Bubbling Paint From Water Damage
Start by finding and stopping the leak so you don’t get more water under the paint.
Dry the area thoroughly and run a dehumidifier or fans until the substrate is completely moisture-free.
Once it’s dry, repair any damaged material, prime if needed, and repaint with a suitable waterproof or mold-resistant finish.
Identify Source Quickly
When you spot bubbling paint, act fast: trace the affected area for discoloration, soft spots, or peeling beyond the surface, because those signs point to underlying moisture.
Use basic leak detection—inspect nearby pipes, rooflines, and exterior walls.
Perform a quick moisture assessment with a meter or by touch.
Mark the source, stop further damage, and plan targeted repairs.
Dry And Dehumidify
If the bubbling comes from water, you’ll need to dry the area thoroughly before repairing the paint.
Remove wet materials, ventilate, and use fans for airflow.
Choose appropriate dehumidifier types (portable or whole‑house) to extract lingering dampness.
Monitor humidity with a hygrometer and maintain moisture control below 50% until surfaces are fully dry to prevent recurring bubbling.
Repair And Repaint
Begin by scraping away all loose, bubbled paint and any softened drywall or plaster until you reach a firm edge; you’ll then dry, prime, and repaint the area to prevent the blistering from returning.
After cleaning dust, sand edges, and apply a stain-blocking primer to restore paint adhesion.
Follow careful surface preparation, use quality paint, and apply even coats for durable, blister-free results.
How To Tell If Bubbling Is From Water Or Old Paint
Wondering whether those paint bubbles came from moisture or just old, failing paint? Check for water stains, soft drywall, peeling along seams, and poor paint adhesion. Tap bubbles—hollow sound suggests moisture. Old paint flakes powdery. Use this quick guide:
| Sign | Moisture | Old paint |
|---|---|---|
| Surface feel | Soft/damp | Dry/brittle |
| Stain presence | Visible | Rare |
Common Sources Of Moisture That Cause Paint To Bubble
If you’re seeing paint bubbles, start by checking common moisture sources like leaky roofs that let water trickle into walls and ceilings.
You should also inspect for plumbing failures—hidden pipe leaks or appliance connections can saturate surfaces from the inside.
Finding and fixing these sources stops further bubbling and guides your next repair steps.
Leaky Roofs
When your ceiling paint starts to bubble, a leaky roof is one of the most likely culprits—water sneaks in through damaged shingles, flashing, or clogged valleys and soaks the underlying materials, causing paint to lift and blister. You should inspect, apply roof maintenance tips, and use moisture control methods to stop further damage.
| Cause | Action | Result |
|---|---|---|
| Damaged shingle | Replace | Dry decking |
| Flashing failure | Reseal | Stop leaks |
| Clogged valley | Clear debris | Redirect water |
Plumbing Failures
Although you mightn’t spot a slow drip right away, plumbing failures are a frequent source of the moisture that makes paint bubble. Hidden leaks from supply lines, loose fittings, or failing seals let water soak drywall and trim, lifting paint and causing blisters.
You should schedule plumbing inspections, use leak detection tools, and check under sinks and behind appliances to catch damage early and prevent repainting.
How To Locate The Exact Leak Or Moisture Entry Point
Because moisture can travel, finding the exact leak means tracing both obvious and hidden paths where water could enter; start by inspecting exterior sources (roof, flashing, gutters, siding) and then move inside to check ceilings, walls, and behind fixtures for stains, soft spots, or musty odors.
Use systematic leak detection and moisture mapping, follow perceived water paths, and probe joints, penetrations, and appliance connections.
Inspecting And Assessing Damage: Moisture Meters, Thermal Cameras, And Visual Checks
If you suspect hidden moisture, start by combining visual checks with moisture meters and thermal imaging to pinpoint wet areas quickly and accurately.
You’ll inspect bubbling, peeling, stains, and musty odor, noting locations and severity. Use moisture detection techniques to prioritize repairs and document findings.
Thermal imaging benefits include revealing temperature anomalies that indicate moisture behind walls without invasive probing.
How To Check For Hidden Water Using Moisture Meters
Pick a moisture meter suited to your surface—pin meters for penetration and non‑contact meters for quick scans.
Hold the device steady and compare readings against the manufacturer’s wet/dry thresholds to spot problem areas.
If numbers are high, mark the locations for further investigation or drying before you repaint.
Choose The Right Meter
Wondering which moisture meter will actually find hidden water behind your paint? Choose one designed for wall materials: pin-type for depth, pinless for surface scans.
Prioritize reliable moisture detection, clear readouts, and easy meter calibration. Look for adjustable settings for different materials, durable probes, and a known brand warranty.
That lets you pinpoint wet spots before repairing bubbled paint.
Interpret Readings Correctly
Now that you’ve chosen a suitable moisture meter, you need to read it correctly to tell whether paint bubbles hide active moisture or just old damage.
Hold the probe steady, compare readings against manufacturer wet/dry thresholds, and map hotspots.
Note relative patterns over time—falling numbers mean drying.
Use readings to assess moisture detection confidence and predict paint adhesion risks before repair.
Interpreting Moisture Meter Readings And Thresholds
Before you decide whether bubbling paint is caused by moisture or something else, read the meter correctly: different meters measure moisture in different ways (pin-type reads electrical resistance between probes; pinless uses electromagnetic signals), and each will report values on different scales.
So you need to know the tool’s baseline, the material you’re testing, and the manufacturer’s threshold for concern.
Use moisture meter types knowledge and verify reading accuracy; compare readings to established thresholds for wood, drywall, and painted surfaces before acting.
How To Spot Mold Behind Bubbled Paint
When paint bubbles, check for discoloration patterns like dark spots, greenish or black rings, or streaks that run under the paint.
You’ll also notice texture and surface changes—soft, powdery areas, fuzzy growth, or a slimy film when you touch gently.
If you see those signs, treat the area as possible mold and proceed with caution.
Visible Discoloration Patterns
If paint bubbles look stained or show irregular dark patches, you could be seeing mold growing beneath the surface.
Check nearby patterns: concentric rings, spotty clusters, or feathered edges often point to moisture-related discoloration causes rather than mere dirt.
These patterns can undermine paint adhesion; note spreading, color shifts, and contrast with unaffected areas to decide if removal and remediation are needed.
Texture And Surface Changes
Although bubbling paint often looks like a surface-only issue, pay close attention to changes in texture and the substrate beneath—the telltale signs of mold are usually tactile rather than just visual.
You should make quick texture differences and surface assessments by checking:
- Soft, spongy areas
- Powdery residue
- Raised, cracked edges
- Musty odor under paint
Immediate Steps To Take After Finding Bubbling Paint
Because bubbling is a sign of trapped moisture or adhesion failure, act quickly to prevent further damage and figure out the cause.
Bubbling indicates trapped moisture or failed adhesion—address it promptly to limit damage and identify the cause.
Inspect surrounding areas for water damage, stop active leaks, and ventilate the room.
Gently press loose paint to check adhesion, photograph the issue for records, and move furniture away.
Call a plumber or professional if the source isn’t obvious.
When To Remove Trim Or Drywall To Dry Walls
First check moisture levels with a meter so you know if the wall is still wet or just surface-damaged.
Next inspect the trim for swelling, rot, or loose caulk to decide if it can stay in place.
If moisture’s present and trim is compromised, plan a controlled removal of trim or drywall so you can dry and repair the structure safely.
Inspect Moisture Levels
Before you decide whether to remove trim or drywall, confirm how much moisture is in the wall cavities and where it’s coming from.
Use a moisture meter and visual checks, noting moisture sources and humidity effects.
Then:
- Scan surfaces with a meter.
- Check insulation for damp.
- Inspect plumbing and roof lines.
- Monitor humidity for 24–48 hours.
Assess Trim Integrity
Trim and drywall can hide the true extent of water damage, so you’ll need to decide whether to remove them to let walls dry and to check the studs and insulation.
Do a trim inspection: probe baseboards and casing for soft spots, gaps, or mold.
Perform an integrity evaluation of drywall and framing; remove compromised pieces only when drying or repairs require access to structurally affected areas.
Plan Controlled Removal
Decide where and how much to remove by balancing drying needs against repair scope: cut access holes or pull baseboards only where moisture readings, soft spots, or mold indicate trapped water, and leave intact areas alone to minimize repair work.
- Use moisture meter to target removal.
- Apply controlled removal techniques only as needed.
- Dry cavities before rehanging trim.
- Combine with efficient paint stripping for clean repairs.
How To Dry Wet Walls Quickly And Safely
Start by removing standing water and soaking up as much moisture as you can with towels or a wet/dry vacuum.
Then speed drying with fans and dehumidifiers to prevent mold and further paint damage.
Then accelerate drying with fans and dehumidifiers to stop mold growth and prevent paint deterioration.
You’ll focus on moisture control, use targeted drying techniques, promote air circulation, and gently inspect wall treatments for delamination.
Replace damp insulation and monitor humidity until surfaces are fully dry.
When To Call A Professional Plumber Or Roofer
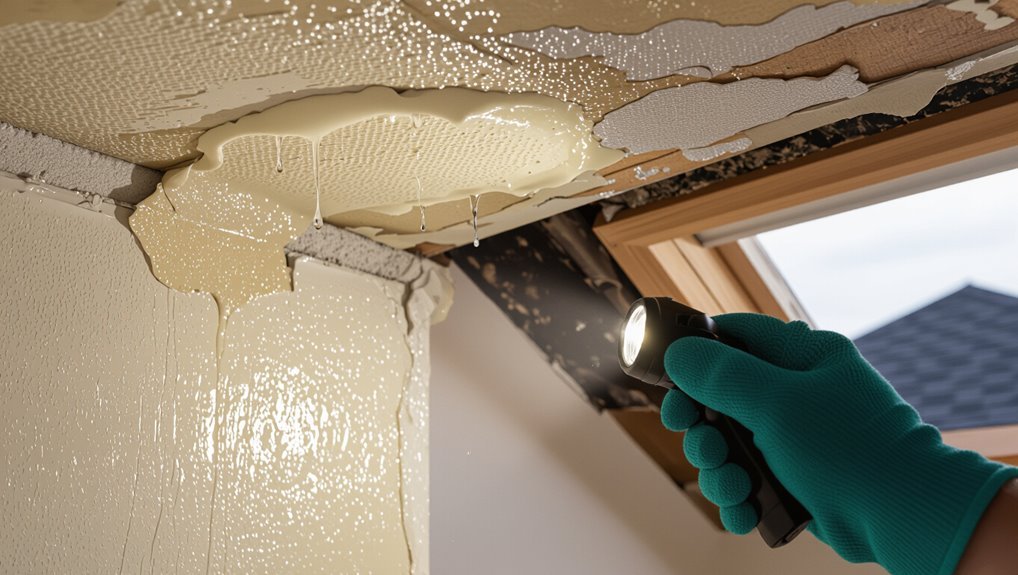
If drying efforts don’t stop ongoing leakage, or you find wet insulation, persistent bubbling, or recurrent stains, call a professional—these signs point to plumbing or roof failures that can keep reintroducing moisture and ruin repairs.
- Severe plumbing issues you can’t locate.
- Repeated interior leaks after patching.
- Visible roof damage needing roof inspection.
- Sagging ceilings or extensive damp odors.
When To Call A Water-Damage Restoration Pro Or Mold Remediation Specialist
When should you call a water‑damage restoration pro or mold remediation specialist?
Call one if bubbling paint covers large areas, you smell musty odors, see visible mold, or suspect hidden water damage behind walls or ceilings.
Pros assess structural risk, test for mold, and recommend restoration options like drying, dehumidification, and containment.
Don’t delay when health or structure is at risk.
Tools And Materials You’ll Need For Repair
Before you start repairs, gather the essential repair tools you’ll need like scrapers, sandpaper, putty knives, a primer brush, and a utility knife.
You’ll also want a clear materials list—patching compound, primer, matching paint, caulk, and drop cloths—to make sure nothing’s missing mid-job.
Having the right tools and materials on hand will keep the repair efficient and prevent mistakes.
Essential Repair Tools
You’ll need a compact set of tools and materials to fix bubbling paint properly: a putty knife or scraper, medium- and fine-grit sandpaper, a wire brush, a quality primer and matching paint, a rust inhibitor for metal surfaces, a filler or spackling compound, clean rags, painter’s tape, and protective gear like gloves and a mask.
- Scraping and sanding
- Surface cleaning
- Filling defects
- Priming and painting
Focus on repair techniques and smart tool selection to work efficiently and safely.
Required Materials List
If you want a solid, long-lasting fix for bubbling paint, gather the right tools and materials so you’re not improvising mid-job.
You’ll need primer, patching compound, sandpaper (various grits), putty knife, utility knife, dehumidifier or fan, stain-blocking primer, and matching paint.
Proper materials selection supports recommended repair techniques like cutting out damaged areas, patching, sanding, priming, and repainting for durable results.
How To Protect Floors And Furniture During Water-Damage Repairs
Start by clearing the work area and moving furniture out of harm’s way whenever possible—lift sofas and tables onto dollies or roll them to another room to keep them dry and paint-free.
- Lay heavy-duty floor coverings to protect hardwood and carpet.
- Wrap furniture for full furniture protection.
- Use plastic sheeting and tape seams.
- Keep pathways clear for ventilation and drying.
How To Remove Bubbled Paint Without Damaging The Substrate
Removing bubbled paint carefully preserves the surface beneath, so take your time and work methodically: score the bubbled area, lift loose edges with a putty knife, and remove only what’s detached to avoid gouging the substrate. You’ll limit bubbling paint causes by drying, cleaning, sanding, and spot-priming for substrate protection before repainting.
| Step | Action |
|---|---|
| 1 | Score |
| 2 | Lift |
| 3 | Remove |
| 4 | Sand |
| 5 | Prime |
When To Repair Versus Replace Damaged Drywall
When evaluating bubbled or damaged drywall, weigh the size, depth, and cause of the problem to decide whether to repair or replace; small, superficial damage from paint failure or minor dents usually calls for patching, while widespread bubbling, soft or crumbling paper, or repeated moisture issues mean replacement is the safer long-term choice.
Weigh size, depth, and cause: patch small, superficial drywall damage; replace widespread bubbling or moisture-compromised walls.
- Inspect extent
- Test for softness
- Consider drywall replacement
- Choose repair techniques accordingly
How To Patch Small Blistered Areas In Paint
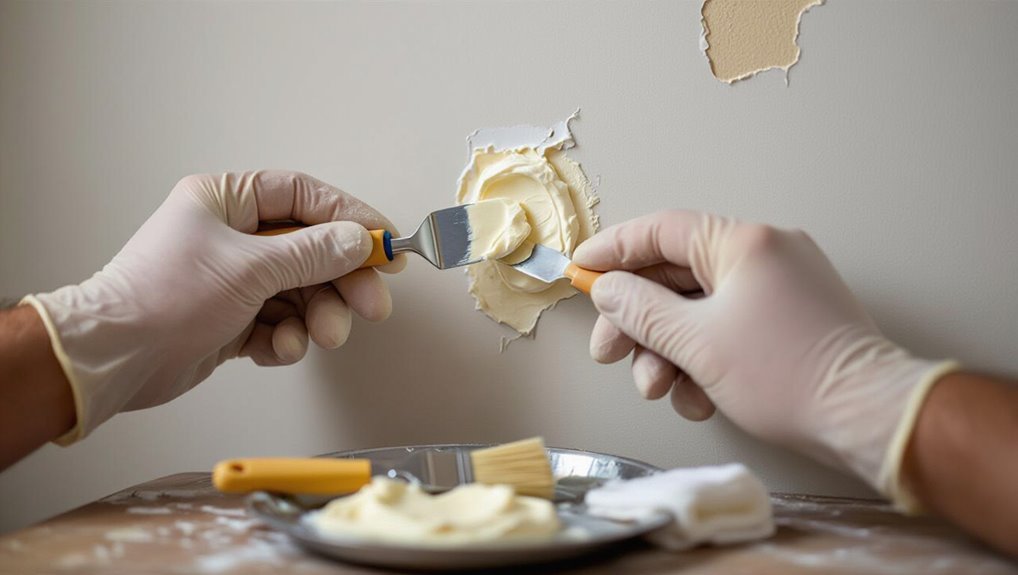
Carefully cut out each small blister and the loose paint around it so you’re left with a sound edge.
Then sand the surrounding area smooth to help new primer and paint adhere.
Wipe clean, apply a quality primer to sealed blistered surfaces, fill low spots with lightweight spackle, sand flush, re-prime patched areas, then repaint.
These repair techniques restore appearance and prevent recurrence.
How To Repair Large Water-Damaged Drywall Sections
If a large section of drywall is water-damaged, you’ll need to cut out the affected area back to solid material, replace it with new drywall, and tape, mud, and sand the seams so the repair blends with the surrounding wall.
Follow these steps for drywall replacement and moisture prevention:
Follow these steps to replace water-damaged drywall and prevent future moisture problems.
- Remove damaged drywall to studs.
- Dry framing thoroughly.
- Install and secure new drywall.
- Tape, mud, sand, prime.
How To Treat And Remove Mold Safely Before Repainting
Because mold can keep growing under paint and ruin your repair, you should remove and treat it before you repaint, using proper protection and mold-specific cleaners to eliminate spores and prevent recurrence.
You’ll wear gloves, goggles, and an N95, contain the area with plastic, scrub affected surfaces, disinfect, dry thoroughly, and discard contaminated materials.
Follow mold removal safe practices and monitor for regrowth.
Which Primers Stop Moisture Stains And Seal Tannins
Once you’ve removed mold and let surfaces dry, pick a primer that blocks moisture stains and seals tannin bleed to keep them from reappearing under your new paint.
Use moisture resistant primers and tannin sealing options suited to substrate.
- Oil-based stain blocker
- Shellac primer
- Latex with stain blocker
- Specialty tannin sealer
How To Choose The Right Primer After Water Damage
After water damage, pick a primer that both blocks stains and resists moisture so your paint job won’t fail again; choose based on surface type, how much staining or tannin bleed you have, and whether the area will stay damp or dry.
Match primer types to needs: shellac for heavy stains, oil for tannins, acrylic or epoxy for ongoing moisture sealing.
Apply per manufacturer directions.
How To Prep A Repaired Surface For Primer And Paint
Prep the repaired area so primer and paint can bond: sand smooth any rough patches, remove dust and loose debris, and wipe the surface with a damp cloth or TSP substitute to eliminate oils and residues.
- Sand and clean using proven surface preparation techniques.
- Repair cracks, fill gaps, and sand flush.
- Degrease and dry thoroughly.
- Follow recommended primer application methods, applying even coats and allowing proper dry time before painting.
Which Paints Resist Moisture For Bathrooms And Basements
Because moisture and mold are common in bathrooms and basements, you’ll want paints formulated to resist dampness, prevent mildew, and hold up to regular cleaning.
Choose moisture resistant paints labeled for high-humidity areas: acrylic latex with mildewcide, mold-resistant enamel, or specialty bathroom paint options with water-repellent additives.
Pick semi-gloss or satin sheens for durability and easier cleaning.
How To Apply Primer And Paint For A Durable Finish
When you want a durable, long-lasting finish, start by choosing the right primer for your surface—stain-blocking for knots and tannins, bonding primer for slick surfaces, and mildew-resistant primer in humid rooms.
Then apply it evenly, sand lightly between coats, and let it fully cure before painting.
Apply primer evenly, sand lightly between coats, and allow full cure before applying paint.
- Clean and dry for proper paint selection.
- Patch and sand.
- Prime thin, even coats.
- Paint with compatible topcoat after curing.
How To Match Texture When Repairing Wall Surfaces
Start by closely evaluating your wall’s existing texture so you can pick the right repair approach.
Choose a compound that matches the texture and workability of the original finish.
Blend and feather the edges carefully so the patch disappears once it’s primed and painted.
Assess Existing Wall Texture
Texture matters: before you patch bubbling paint, closely inspect the surrounding wall to identify the pattern, scale, and depth of the finish so you can match it.
Perform a thorough wall texture evaluation and prioritize surface preparation. Follow these steps:
- Photograph the area.
- Note pattern and scale.
- Test small texture samples.
- Record depth and tool marks.
Choose Matching Compound
Choosing the right compound makes the repair blend seamlessly with the surrounding finish, so pick one based on the existing texture, substrate, and whether you’ll be feathering or building up the area.
You’ll evaluate compound selection for shrinkage, cure time, and sandability, then perform compatibility testing on a small patch.
Match finish and hardness to avoid visible differences after priming and repainting.
Blend And Feather Edges
With the compound matched, you’ll next blend and feather the edges so the repair disappears into the surrounding surface.
Use these steps to match texture with confident blending techniques and feathering methods:
- Lightly skim with a damp sponge.
- Apply thin coats tapering outward.
- Use a textured tool to replicate pattern.
- Sand very gently, then prime and paint to finish.
How To Prevent Future Bubbles With Better Ventilation
If you want to stop paint bubbling from coming back, improve air movement during and after painting so moisture and solvents can escape instead of getting trapped beneath the finish.
Use exhaust fans, open windows, and portable fans to circulate air; consider whole-room ventilation systems and a dehumidifier for humidity control.
Dry surfaces fully before recoating and monitor moisture levels while paint cures.
How To Improve Exterior Flashing And Roof Seals
Check flashing seams for cracks or gaps where water could get behind paint.
Reseal any problem areas with a caulk that’s compatible with both the flashing material and your exterior paint.
At roof-to-wall junctions, add or reinforce step flashing and counterflashing so water’s directed away from the wall.
Inspect Flashing Seams
Because flashing channels water away from vulnerable junctions, you’ll want to start by closely inspecting each seam for gaps, rust, or lifting edges.
Do a flashing inspection and check moisture barriers underneath. Follow these steps:
- Look for corrosion and separation.
- Probe edges for looseness.
- Check underlayment integrity.
- Note areas needing repair or replacement.
Reseal With Compatible Caulk
When seams or flashing laps show gaps or cracked sealant, resealing with a compatible caulk restores a watertight barrier and prevents paint from blistering again. You’ll remove old sealant, clean surfaces, choose caulk compatibility for materials, and apply steady sealing techniques. Tool and cure times matter; smooth joints for long life.
| Tool | Caulk Type | Cure Time |
|---|---|---|
| Knife | Silicone | 24–48 hr |
| Gun | Polyurethane | 48–72 hr |
Reinforce Roof-To-Wall Junction
If your roof-to-wall junction shows gaps, rusted flashing, or loose fasteners, reinforce it now to stop leaks that cause paint bubbling and structural damage.
Follow these steps for proper roof maintenance and moisture barriers:
- Remove old flashing and rust.
- Install corrosion-resistant flashing.
- Seal seams with compatible membrane.
- Fasten and test for leaks; replace damaged underlayment.
How To Fix Plumbing Issues That Cause Recurrent Bubbling
Though plumbing problems often show up as wet floors or slow drains, recurrent paint bubbling on walls or ceilings usually points to hidden leaks, trapped moisture, or sewer gas buildup.
You should schedule a plumbing inspection and use professional leak detection to locate faults.
Repair or replace compromised pipes, fixtures, and seals, dry areas thoroughly, and retest to confirm the issue’s resolved before repainting.
How To Manage Rising Damp And Foundation Moisture
Plumbing leaks aren’t the only cause of bubbling paint—rising damp and foundation moisture can force groundwater into walls and create persistent blistering and salt stains.
- Inspect perimeter for poor foundation drainage.
- Repair cracked footings and seal wall base.
- Install or clear exterior drains and gutters.
- Use damp-proof course and moisture management coatings to stop capillary rise and protect finishes.
How To Choose Dehumidifiers And Fans For Drying
Choosing the right dehumidifier and fan combo makes the difference between a quick, effective dry-out and ongoing moisture problems.
Choosing the right dehumidifier and fan combo turns a slow, messy dry-out into a fast, lasting fix
You’ll match dehumidifier types to room size and temperature—desiccant for cool, refrigerant for warm.
Pick fan sizes that create directed airflow across wet areas; use multiple smaller fans for rooms with obstacles.
Monitor humidity and adjust placement until surfaces stay dry.
How Seasonal Changes Affect Paint Blistering Risk
You’ll notice temperature swings stress paint films, causing expansion and contraction that can lead to blisters.
High humidity prolongs drying and traps moisture under the coating, while low humidity can cause premature skinning and adhesion problems.
In climates with freeze-thaw cycles, trapped water freezes, expands, and forces the paint away from the substrate.
Temperature Swings Effect
When seasons swing between freezing nights and hot afternoons, paint is under stress and can form blisters as it expands and contracts; you’ll see this most on exterior surfaces that heat quickly in sun and cool rapidly at night.
- Temperature fluctuations force cycles of expansion/contraction.
- You’ll notice faster failure on dark, sun‑exposed siding.
- Paint with poor adhesion blisters first.
- Watch for humidity impacts that worsen stress.
Humidity Level Impact
Because moisture in the air affects how paint cures and adheres, high humidity during seasonal changes raises the risk of blistering by slowing solvent evaporation and trapping dampness beneath the film.
You should monitor humidity effects and delay painting when levels are high. Use dehumidifiers, improve ventilation, and control substrate moisture.
Good moisture management prevents bubbles and guarantees proper adhesion and drying.
Freeze-Thaw Cycles
If temperatures swing around freezing during seasonal changes, repeated expansion and contraction can force paint to crack or lift, letting moisture get underneath and form blisters.
You’ll need to address freeze thaw impact and moisture retention to prevent recurrence:
- Inspect exterior for hairline cracks.
- Remove blisters and dry substrate.
- Use breathable, flexible primer.
- Apply weather-appropriate topcoat.
How Paint Type And Application Mistakes Cause Bubbles
Although you might think bubbles are just a surface issue, the paint itself and how you apply it are often the real culprits.
You can cause bubbling by choosing incompatible paint, poor paint adhesion on damp or dirty surfaces, or rushing layers before proper drying.
Use correct application techniques—thin coats, proper drying times, and compatible primers—to prevent trapped moisture and air from forming bubbles.
How To Test Finished Repairs For Remaining Moisture
When the repair feels dry to the touch, don’t assume all moisture is gone—use simple tests to confirm before repainting.
When a repair feels dry, don’t assume it is—test for moisture before repainting.
For proper moisture testing and repair verification, follow these steps:
- Tape a plastic sheet to the area for 24 hours.
- Use a handheld moisture meter across the patch.
- Check for condensation under the plastic.
- Repeat readings until levels match surrounding wall.
How To Maintain Painted Surfaces To Prevent Bubbles
Keep inspecting painted surfaces regularly so you catch small blisters or soft spots before they grow.
Pay attention to rooms with high moisture and use dehumidifiers or exhaust fans to control indoor humidity.
Address any issues promptly to prevent bubbles from returning.
Regular Surface Inspections
Because paint problems usually start small, regular surface inspections let you catch issues before bubbles form and spread.
You’ll use surface preparation techniques and moisture detection methods to assess and act quickly.
- Check for soft spots and peeling.
- Probe edges for loose paint.
- Use a moisture meter regularly.
- Note and repair small leaks promptly.
Control Indoor Humidity
If you want painted surfaces to stay smooth, control indoor humidity so trapped moisture can’t swell the paint and form bubbles.
Use dehumidifiers, exhaust fans, and proper ventilation to keep relative humidity between 30–50%.
Monitor levels with a hygrometer, fix leaks promptly, and dry wet areas quickly.
Good humidity control and moisture management prevent recurring bubbling and extend paint life.
Cost Breakdown: DIY Repair Vs. Hiring A Contractor
Deciding whether to tackle bubbling paint yourself or hire a contractor comes down to time, skill, and money—so let’s break the costs down clearly.
- Materials: low DIY outlay, reasonable for small areas.
- Tools: upfront DIY expense, reusable.
- Labor: contractors add hourly or flat rates.
- Value: cost comparison favors DIY for simple jobs; contractor benefits include speed and guaranteed finish.
Safety Precautions For Mold, Electrical, And Structural Risks
Before you start scraping or repainting, check for mold and airborne spores—wear a mask and ventilate the area if you spot musty odors or discoloration.
Inspect nearby wiring for exposed insulation or overheating signs, and shut off power if anything looks unsafe.
If the substrate feels soft, sagging, or cracked, stop and get a structural assessment before continuing.
Assess Mold And Spores
When you see bubbling paint, treat the area as potentially moldy and take precautions: wear an N95 respirator, gloves, and eye protection; ventilate the space; and keep others—especially children and pets—away until you confirm the issue.
- Use mold identification techniques visually and by smell.
- Collect swabs for spore testing methods.
- Isolate contaminated materials.
- Dispose or remediate per safety guidance.
Check Wiring And Structure
If bubbling paint hints at moisture, check nearby wiring and structural elements immediately to reduce fire, shock, and collapse risks.
Don’t touch wet outlets; cut power if you suspect damage.
Arrange a professional wiring inspection and have a contractor assess structural integrity where plaster, joists, or beams are softened.
Document damage, isolate the area, and schedule repairs promptly to prevent escalation.
How To Document Damage For Insurance Claims
Although you’ll want to act quickly, take a methodical approach to documenting bubbling paint for an insurance claim:
- Photograph all damage from multiple angles and include timestamps — documentation tips.
- Note when and how you discovered the issue for the claim process.
- Save receipts, repair estimates, and contractor notes.
- Keep a dated log of moisture readings, cleanup steps, and communications with insurers.
When Insurance Will Likely Cover Bubbling Paint Repairs
After you’ve documented the bubbling thoroughly, you’ll want to know whether your insurer will pay for repairs.
Check your insurance policies for sudden versus gradual damage clauses and relevant exclusions. You’ll likely get coverage if bubbling follows a covered event (burst pipe, storm), up to coverage limits.
Preventive neglect or long-term seepage is usually excluded, so be ready to prove timing and cause.
Advanced Fixes: When To Consider Vapor Barriers, Waterproofing, Or Professional Solutions
When bubbling keeps returning or moisture sources aren’t obvious, you’ll need to move beyond spot repairs and consider vapor barriers, external waterproofing, or hiring a pro to diagnose hidden issues.
When bubbling returns or moisture sources aren’t obvious, move beyond spot fixes—consider vapor barriers, exterior waterproofing, or a pro.
You should weigh vapor barrier benefits and proven waterproofing techniques.
Consider:
- Install a vapor barrier.
- Exterior foundation waterproofing.
- Interior membrane systems.
- Hire a moisture-detection professional.
How To Confirm Repairs Are Permanent And When To Recheck
If you’ve completed repairs, give the area time and a simple checklist to confirm the fix is permanent: monitor for recurring bubbles, dampness, or musty smells over several seasonal cycles, check exterior grading and gutters after heavy rains, and use a moisture meter or touch tests periodically; if issues reappear within six months, escalate to more intensive waterproofing or professional diagnostics.
| Feeling | Action |
|---|---|
| Relief | Continue moisture monitoring |
| Concern | Reassess repair longevity |
Frequently Asked Questions
Can Bubbling Paint Permanently Weaken Structural Wood or Studs?
Yes — bubbling paint can signal moisture that’ll damage wood and weaken structural integrity over time; you should inspect, dry, and repair promptly, because untreated water-related decay can permanently compromise studs and load-bearing elements.
Will Repainting Hide Ongoing Moisture Problems From Home Inspectors?
No, repainting won’t reliably hide ongoing moisture problems from home inspectors; you’ll still trigger moisture detection tools, and competent inspectors will follow inspector guidelines, so you’ll need to fix the source rather than just conceal visible symptoms.
How Long After Drying Should I Wait Before Reinstalling Sensitive Electronics?
You should wait at least 48–72 hours of drying time for affected areas, longer if humidity stays high; you’ll test devices for moisture, verify outlets are safe, and only reinstall sensitive electronics once completely dry.
Do Landlords Have Legal Responsibility for Repainting After Water Damage?
Yes — you’re generally entitled to tenant rights protection; landlords’ repair obligations usually require them to fix water damage and repaint if it affects habitability or violates lease; check local laws and document requests promptly.
Can Water-Damaged Insulation Be Salvaged and Reused?
Like a soggy book you can’t mend, you usually can’t reuse soaked insulation; you’ll need insulation replacement if moisture detection shows saturation. You should remove wet material, dry surrounding areas, and replace to prevent mold and loss.
