How to Paint a Camo Wall: Creative Diy Step-By-Step Guide
You can paint a camo wall fast by prepping, picking a palette, base-coating, layering mid-tones, and sealing for durability. Clean and prime the surface, patch imperfections, and protect floors. Choose 3–5 harmonious colors with a dark base, mid-tones, and a light highlight. Stencil or freehand organic shapes, blend edges with dry brushing or glazes, then seal with a clear coat. Follow the step-by-step process below to get professional-looking results and learn tips for variations and fixes.
Quick 5‑Step Roadmap to Paint a Camo Wall
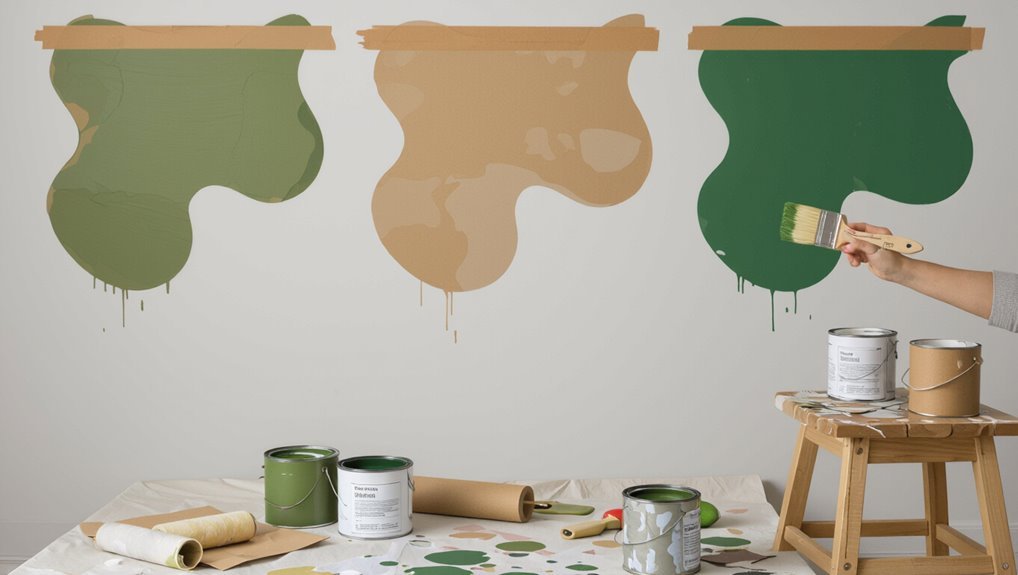
Follow these five clear steps to paint a camo wall: prep the surface, choose a color palette, base-coat the wall, stencil or freehand the camo shapes, and seal the finish—each step builds on the last so you’ll get clean, layered patterns without wasted time or materials.
You’ll learn camo history briefly to guide choices and use design inspiration to mix motifs, tones, and scale confidently.
Which Camo Style Fits Your Room (Woodland, Urban, Modern)
Which camo style suits your room depends on the mood and scale you want to create.
You’ll pick woodland for organic warmth, urban for gritty contrast, or modern for sleek accents. Use camo design inspiration to match furniture and textiles, and focus on room theme integration so patterns complement rather than overwhelm.
- Woodland: earthy, layered
- Urban: high-contrast, textured
- Modern: minimal, geometric
- Mixed: balanced accents
Tools and Supplies for a DIY Camo Wall
Now that you’ve chosen a camo style that fits your room’s vibe, gather the right tools and supplies so the paintwork matches your plan.
You’ll need drop cloths, painter’s tape, quality brushes and rollers, assorted paint trays, foam brushes for edges, and several paint colors.
Grab stencils or cardboard templates for shapes, sandpaper, primer, and a ladder.
Keep rags and a cup for water nearby for DIY inspiration.
Pick a Color Palette That Creates Depth
When you pick a palette, choose three to five colors that work together to create contrast and depth: a dark base, one or two mid-tones, and a lighter highlight.
Choose three to five harmonious colors—dark base, one or two mid-tones, and a lighter highlight—to create contrast and depth.
Use color psychology to set mood and guide depth perception; test swatches on the wall.
- Earthy darks
- Muted mid-tones
- Soft highlights
- Accent shade for contrast
How Much Paint and Materials to Buy
Measure your wall and calculate paint needed by multiplying square footage by coat coverage, then add 10–15% for touch-ups.
Pick primers, multiple paint colors, painter’s tape, brushes, rollers, trays, and drop cloths so you’ve got the right tools on hand.
Buy slightly more paint and extra supplies than the math suggests to avoid mid-project runs to the store.
Paint Quantity Calculation
Before you buy a single can, calculate the total square footage of the wall area you’ll paint and factor in the number of colors and overlap for the camo pattern.
Use paint types and coverage estimates to determine cans needed, then add 10–15% for waste.
Consider:
- Base coat quantity
- Each camo color
- Primer needs
- Touch-up reserve
Materials And Tools
Now that you’ve figured out how much paint you’ll need, gather the specific materials and tools that make the job efficient and neat.
Buy primer, three paint colors (plus tester pots), painter’s tape, rollers, angled brushes, drop cloths, a level, chalk or stencils, sanding block, and a tray.
Consider color psychology and current design trends when choosing hues and finishes.
Prep the Wall: Clean, Patch, and Prime
Before you start stenciling or spraying, make certain you clean the surface thoroughly so dirt and grease won’t ruin the finish.
Patch any holes and sand smooth so your camo looks crisp and seamless.
Finish with a quality primer to guarantee the paint sticks and the colors pop.
Clean Surface Thoroughly
Start by giving the wall a thorough cleaning so paint will adhere evenly and camouflage shapes won’t show imperfections. You’ll choose cleaning techniques based on surface materials, removing dust, grease, and mildew.
Rinse and let dry fully before priming. Follow these steps:
- Dust and vacuum
- Degrease with mild detergent
- Treat mildew with diluted bleach
- Rinse and air-dry completely
Patch Holes Smoothly
Grab a putty knife and inspect the wall for nail holes, dents, and cracks you’ll need to fill before painting.
Choose appropriate patch materials—spackle for small flaws, joint compound for larger gouges.
Apply in thin layers, feather edges, and sand between coats using progressive grit.
These smoothing techniques guarantee an even surface so your camo pattern lays down cleanly and looks professional.
Apply Quality Primer
Seal the surface with a good primer so your camo colors adhere evenly and the finish lasts. You’ll clean, sand, and remove dust, then choose primer types that maximize surface adhesion for your wall material.
Apply thin, even coats and let each dry fully before painting.
- Clean and degrease
- Sand glossy spots
- Pick compatible primer types
- Apply thin coats
Protect Floors, Trim, and Furniture (Drop Cloth & Masking)
Before you paint, cover floors, trim, and furniture with durable drop cloths and precise masking so paint goes only where you want it.
Choose drop cloths types like canvas for reuse or plastic for quick cleanup. Use painter’s tape, low-tack masking, and paper for crisp edges.
Weigh cloths, tuck edges, and secure masking methods to prevent seepage and stray splatters.
Mark Your Working Area and Layout Guidelines
Before you start painting, make sure you’ve protected floors and nearby furniture with drop cloths and tape so stray paint won’t cause damage.
Measure and mark your layout lines with a pencil and level to guide your camo shapes and keep proportions consistent.
Use painter’s tape to establish clear edges and peel it carefully after painting for crisp boundaries.
Protecting Floors And Furniture
Once you’ve cleared a path around your work area, lay down drop cloths or contractor plastic and tape seams so dust and paint won’t sneak under—this gives you a clean boundary to work within and protects floors and furniture from splatters.
Use proper floor protection and furniture covering, secure edges, and keep a tidy perimeter.
- Anchor corners with tape
- Fold cloths at thresholds
- Wrap small furniture
- Keep walkways clear
Measuring And Marking Lines
When you’re ready to lay out your camo pattern, measure and mark a clear working grid so you’ll keep shapes balanced and repeatable across the wall.
Use measuring tools like a tape, level, and laser to set reference points.
Combine simple marking techniques—pencil dots, chalk lines, and light measurements at regular intervals—to map shapes, maintain symmetry, and simplify painting steps.
Establishing Tape Guidelines
Start by outlining your working area with painter’s tape to create crisp, repeatable boundaries and guide the camo shapes; place tape along your measured reference points, keeping lines straight with a level or laser, and press edges firmly to prevent bleed.
Plan tape application, stagger layers, note color zones, and time tape removal for clean edges.
- Mark key angles
- Map color sequence
- Check adhesion
- Remove slowly
Choose Freehand, Stencils, or Tape for Shapes
Want a crisp, precise camo pattern or a looser, organic look? You’ll choose between freehand techniques, stencil options, or tape methods.
Freehand offers fluid shape variations and design creativity; stencils give repeatable edges for pattern consistency; tape methods create sharp, geometric forms.
Mix approaches on different wall zones to balance precision and spontaneity while keeping overall cohesion.
Mix Paint Shades and Test Swatches
Now that you’ve picked freehand, stencils, or tape, it’s time to mix paint shades and test swatches to find the right balance of contrast and harmony.
You’ll do color mixing, try swatch testing on scrap board, and adjust values until shapes read well from a distance.
- Test three value steps
- Note wet vs. dry tones
- Compare neutrals and accents
- Record recipes and ratios
Paint a Flawless Base Coat on a Camo Wall
Roll on an even, well-prepared base coat that gives your camo pattern a consistent field to read from; this means sanding lightly, wiping dust, priming if the surface is porous, and applying thin, overlapping passes so the color lays down uniformly without drips or lap marks.
You’ll use base coat techniques like thin layers, proper drying time, and light sanding to guarantee durable camo wall finishes.
Add the Mid‑Tone Layer for Camouflage Structure
With your base coat smooth and fully cured, it’s time to add the mid‑tone layer that shapes the camo’s visual depth.
You’ll use mid tone blending to soften shifts and introduce camo texture without crisp edges. Work in loose, organic strokes, varying pressure and paint load.
- Use a soft brush
- Vary stroke direction
- Feather edges gently
- Step back often
Create Crisp Camo Shapes With Painter’s Tape
Lay out your painter’s tape to mark the crisp edges of each camo shape before you add any more color.
Start with the mid-tones you’ve already applied, then tape and paint the darker and lighter layers in the order that preserves clean lines.
Remove the tape while the paint is slightly tacky to avoid peeling and keep your shapes sharp.
Prep Tape Layout
Before you apply any paint, map out your camo shapes with painter’s tape so the edges come out crisp and clean.
You’ll plan tape types and layout techniques to suit shapes and paint. Use clean, steady lines and remove tape at the proper time to avoid peeling.
- Low-tack tape for delicate surfaces
- Medium-tack for walls
- Curved templates
- Measure spacing precisely
Layering Paint Order
Now that your tape layout is set, start painting in a deliberate order so each camo layer stays crisp and doesn’t smear into the next.
Begin with the lightest base, let it dry fully, then apply mid-tones and finally darkest accents.
Use layering techniques to control edges; vary paint textures sparingly for depth.
Remove tape slowly at a 45° angle for clean shapes.
Use Stencils and Templates for Repeatable Patterns
When you want consistent shapes across a camo wall, use stencils or templates to reproduce patterns quickly and cleanly.
You’ll align templates, secure edges, and apply paint in layers using stencil techniques and varied template designs to keep edges crisp and repeatable. Practice placement rhythm to avoid overlap and blotches.
- Use low-tack adhesive
- Start with light coats
- Rotate templates
- Clean between colors
Freehand Technique: Draw Organic Camo Blobs
Use a flowing wrist and confident strokes to sketch organic camo blobs freehand—this technique lets you vary shapes and sizes quickly without templates. You’ll apply freehand tips, explore blob variations, practice layering techniques, color blending, edge softening, and add subtle texture effects for design inspiration. Keep shapes loose, alternate scales, and trust instincts.
| Step | Focus | Goal |
|---|---|---|
| 1 | Organic shapes | Base layout |
| 2 | Blob variations | Interest |
| 3 | Texture effects | Depth |
| 4 | Color blending | Harmony |
Layer Highlights and Shadows for 3D Depth
After you’ve laid in loose blobs and added texture, bring the pattern to life by adding highlights and shadows that indicate form and depth.
You’ll use subtle texture techniques and careful color blending to signify raised and recessed areas. Work sparingly, build layers, and step back often.
- Light source consistency
- Thin glaze highlights
- Soft shadow washes
- Preserve midtones
Blend Edges for Soft, Natural Transitions
Start by feathering edges with a nearly dry brush to break hard lines and create subtle changes.
Then soften further using thin glazes, layering translucent color until the shift looks natural.
Work quickly while paint is tacky so blends stay smooth and seamless.
Feathering With Dry Brush
Lightly drag a nearly dry, stiff-bristled brush over the painted edges to soften them and create natural blends between camouflage shapes.
You’ll use feathering techniques and dry brush effects to lift excess paint, skim edges, and unify tones without harsh lines.
- Tap bristles lightly
- Work outward from shapes
- Vary pressure
- Clean brush often
Soften With Glazing
A thin glaze will let you subtly blur hard edges and unify tones without covering the underlying shapes.
You’ll mix glaze medium with paint, apply translucent layers, and feather with a soft brush.
Use glazing techniques to build depth slowly, wipe or rework while wet, and focus on color blending at shifts.
Repeat until edges read natural and cohesive.
Work in Small Rooms and Tight Corners
When you’re painting camo in a small room or tight corner, plan your sequence so you always have an exit and never trap yourself against wet paint.
When painting camo in a tight room, plan your sequence so you always have an exit.
Use small space strategies and corner techniques: work top-down, rotate tools, protect adjacent areas, and dry sections before advancing.
- Use angled brushes
- Tape crisp edges
- Step back often
- Ventilate continuously
Scale the Pattern for Large Walls
When tackling a large wall, pick a repeatable motif that reads well from a distance and won’t look busy up close.
Measure your wall proportions so the pattern elements scale evenly across the space.
Make scalable stencils or templates to keep shapes consistent and speed up the painting.
Choose a Repeatable Motif
Start by picking a simple motif you can repeat across the wall — think irregular blobs, leaf shapes, or rounded polygons.
Then scale that motif to fit your room’s dimensions so the pattern reads correctly from a distance. Use camo patterns and historical influences for inspiration, then repeat consistently.
- Choose high-contrast shapes
- Vary motif sizes slightly
- Maintain rhythm and spacing
- Test on a sample panel
Measure Wall Proportions
Measure the wall’s height and width, then divide those dimensions by your motif size to see how many repeats will fit and where you’ll need to adjust scale.
Use wall dimensions to map a grid, mark centers, and note partial motifs.
Do simple proportion calculations to enlarge or shrink the motif evenly, ensuring balanced coverage and avoiding awkward edges without yet creating stencils.
Create Scalable Stencils
Because your motif needs to repeat cleanly across a large surface, scale your stencil pattern to match the wall grid you mapped earlier so each repeat aligns and partial motifs fall where you planned.
Use design software to tile and print guides, then cut durable stencil materials suited to repeat use. Ascertain overlaps and edge repeats match wall seams.
- plan repeats
- test scale
- choose materials
- mark placement
Speed Hacks: Batch Shapes and Faster Drying
Batching your shapes and speeding up drying are the two best shortcuts for finishing a camo wall faster without sacrificing quality.
You’ll use shape batching to cut stencils once, apply efficient layering, and scale pattern scaling across the wall.
Employ speed drying methods, manage paint blending and color mixing, add subtle texture variations, and plan quick clean up to keep the job moving.
Fix Mistakes and Smooth Uneven Edges
If you spot a stray edge or blotch, act quickly to keep fixes simple and seamless.
Use a damp cloth for tiny smudges, a fine brush for precise touch-ups, and light sanding where edges feel raised. Master smoothing techniques and edge finishing to blend patches invisibly.
- Feather paint with small strokes
- Sand lightly between layers
- Reapply thin coats
- Check from different angles
Seal and Finish Your Camo Wall for Durability
Finish strong by sealing your camo wall to protect the pattern and make it last.
Choose sealing options like matte or satin polycrylic, or a clear acrylic spray for outdoor durability.
Test on a scrap to preserve texture techniques you used.
Apply thin, even coats, allow proper drying, and lightly sand between coats for a durable, professional finish that resists scuffs and fading.
Clean Brushes, Rollers, and Stencils Properly
Start by removing excess paint from brushes, rollers, and stencils—wipe brushes on a rag, roll out rollers on newspaper, and scrape stencils with a putty knife to cut down cleanup time.
Then rinse and condition tools, dry thoroughly, and store properly to extend life.
- Use warm soapy water for solvent-based or water-based needs.
- Comb bristles for brush care.
- Follow roller maintenance steps.
- Prioritize stencil cleaning and proper paint storage.
Styling Ideas That Complement a Camo Wall
When you pair a camo wall with streamlined furnishings and a restrained palette, the pattern feels intentional rather than overwhelming; keep large surfaces neutral—think warm grays, olive greens, or beige—and introduce texture through leather, wood, and matte metals to balance the print.
You’ll add camo decor subtly: choose simple rugs, metal lamps, and curated accent pieces. Let textiles and greenery soften the look.
Color Variations: Bold, Muted, Pastel, Neon Camo
You can make a camo wall pop with bold contrast choices—think deep charcoal paired with bright olive or rust.
Or keep things gentle by mixing soft pastel blends like mint, blush, and dove gray for a subtler, modern look.
Decide whether you want high drama or quiet texture before you pick your palette.
Bold Contrast Choices
Although camo traditionally leans earthy, choosing bold contrast—whether deep jewel tones, soft pastels, muted neutrals, or electric neon—totally changes the wall’s vibe and purpose.
You’ll use dynamic patterns and color psychology to guide contrast, balance, and focal points. Pick palette intensity, test samples, and adjust edges for clarity.
- Jewel-rich contrast
- Muted anchor tones
- High-impact neon accents
- Balanced negative space
Soft Pastel Blends
Shifting from bold contrast, soft pastel blends ask you to trade intensity for subtle harmony while keeping camo’s layered interest.
You choose muted pinks, mint, lavender, and warm beige, then use careful color mixing to keep edges readable.
Apply thin, overlapping shapes with varied opacity, step back to balance tones, and seal with matte varnish to preserve the delicate, wearable camo effect.
Kid‑Friendly Camo Walls and Safety Tips
Want a camo wall that’s fun for kids and safe for your home? Use non‑toxic paints, consider color psychology for calming tones, and secure furniture away from wet areas.
Focus on child safety with rounded edges and washable finishes.
- Choose low‑VOC, water‑based paints
- Test colors for mood impact
- Keep paint tools out of reach
- Use washable topcoats
Outdoor‑Safe Camo Finishes for Patios and Sheds
Before you start painting an outdoor camo pattern, make sure the surface is clean, dry, and free of loose paint or mildew so the finish will adhere and last.
Choose weatherproof paints and primers rated for exterior use—look for UV resistance, mildew inhibitors, and flexible formulations for wood or metal.
Test a small patch and confirm the texture and color hold up after a few days in sun and rain before finishing the whole patio or shed.
Surface Preparation Essentials
Preparing the surface is the most important step for a durable, outdoor-safe camo finish on patios and sheds, and you’ll want to tackle it thoroughly to keep paint adhesion and weather resistance strong.
- Clean dirt, mildew, and loose debris to reveal true surface texture.
- Sand glossy spots for better paint adhesion.
- Fill cracks and holes; let patching cure.
- Prime porous or bare areas before painting.
Weatherproof Paint Choices
Paint choice will make or break your outdoor camo finish, so pick coatings designed for exterior wear, UV resistance, and moisture protection.
Use acrylic or exterior enamel formulas labeled weather resistant finishes and low-VOC for safer application.
Prime bare wood or metal first, then apply thin, even coats.
Seal with a clear UV topcoat to boost outdoor durability and resist peeling, fading, and mildew.
Budget Hacks to Cut Costs on Your Camo Wall
If you’re watching your budget, there are smart shortcuts that won’t sacrifice the camo look—think thrifted tools, pared-down color palettes, and DIY stencils made from cardboard.
Use cost effective materials and budget friendly tools to save. Prioritize primer and durable topcoats. Plan layers to avoid waste.
- Buy sample paints
- Reuse brushes
- Make cardboard stencils
- Limit palette selection
Common Mistakes to Avoid When Painting Camo
While camo painting looks forgiving, small mistakes ruin the illusion fast—so you’ll want to avoid sloppy edges, incorrect color contrast, and heavy, uniform patterns that read as blobs instead of shapes.
You should test color selection on a sample board, vary shapes and scale for believable depth, and resist copying a single reference; use design inspiration to adapt patterns to your room’s light and style.
Troubleshooting: Patch Scuffs and Touch‑Ups
Even though camo hides a lot, scuffs and chips still stand out — especially in high-traffic spots — so you’ll want quick, careful touch-ups to keep the pattern convincing.
Use precise scuff repair and targeted touch up techniques:
- Clean and sand edges gently
- Match colors from your palette
- Layer thin paints with a small brush
- Blend edges with a stipple or sponge
When to Hire a Pro for Complex Camo Jobs
When a camo project stretches beyond simple touch-ups—covering large surfaces, intricate stencils, or challenging substrates, you’ll want a pro who brings experience, the right tools, and a steady hand to avoid costly mistakes.
If camo complexity overwhelms your skillset, hire professional painters for precise layering, durable finishes, and efficient prep. They’ll save time, materials, and frustration while assuring a polished result.
Frequently Asked Questions
Can Camo Paint Be Applied Over Wallpaper Without Removing It?
Yes — you can paint camo over wallpaper, but you’ll need to test wallpaper adhesion first, clean and prime well, and use quality paint for paint durability; otherwise peeling or poor longevity can happen, so prep thoroughly.
Will Camo Paint Affect Home Resale Value?
It can — camo style is niche, so it might limit buyers; you should follow resale trends and opt for neutral tones or easily reversible treatments to preserve appeal and avoid negatively impacting your home’s marketability.
Can I Use a Projector to Trace Camo Patterns?
Yes — you can use a projector to trace camo patterns. You’ll streamline camo pattern techniques by projecting layers, adjusting projector setup for scale and focus, and tracing shapes, then refining edges freehand for authentic texture.
Are There Voc‑Free Spray Sealers Compatible With Camo Walls?
Yes — you can: about 60% of DIYers choose low‑VOC or VOC‑free finishes. You’ll find eco friendly options designed for spray application; just confirm compatibility with your paint and cure times before applying.
How to Remove Camo Paint From Clothing and Upholstery?
You should act fast: scrape excess, blot solvents based on paint types (water‑based with soap, oil‑based with mineral spirits), pretest, launder for fabric care, and use professional upholstery cleaning for stubborn stains or delicate upholstery.
Conclusion
You’ve got the roadmap, picked a style, gathered tools, chosen colors, and planned materials—now take action. Tape clean lines, blend shapes with varied brushes, and step back often to balance contrast. Save money by sampling and reusing supplies, fix scuffs with spare paint, and call a pro if complexity overwhelms you. Practice patience, embrace imperfections, and enjoy the process—finished wall, refreshed room, and a DIY skill you’ll keep using.