
How to Paint a Fade on a Wall Like a Professional
Plan your fade by choosing one main hue and a couple harmonious tones, then test samples in your room lighting. Prep the wall: clean, dry, sand rough spots, and fix cracks. Mark your start and end points with painter’s tape. Paint from dark to light, feathering the edges of the second color while it’s wet to keep a smooth wet edge. Work small sections so timing stays consistent. If you spot banding or streaks, correct immediately, and keep going to get even cleaner results.
Plan Your Wall Fade Colors First
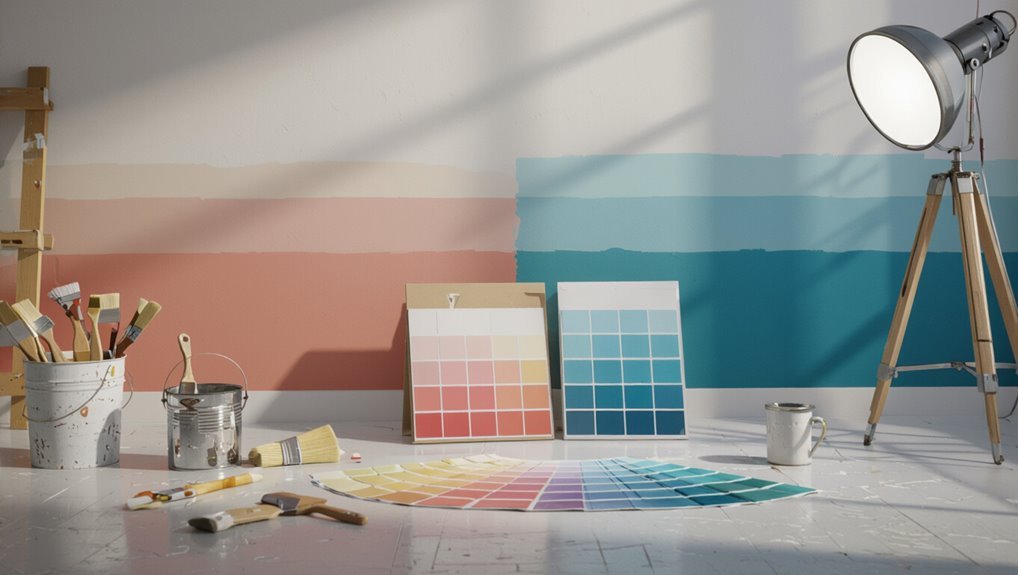
Before you pick up a brush, decide exactly which colors you want in your fade and how they’ll flow across the wall.
Start with color theory: choose a main hue, then add supporting tones that create color harmony. Use color psychology to match mood—calm blues for relaxation, warm tones for energy.
Choose a main hue, add harmonious supporting tones, and use color psychology to match mood—calm blues for relaxation or warm tones for energy.
Pick your paint finishes early; satin fades look smoother than flat, and sheen differences can ruin blending methods.
Sketch shift styles like ombré, smoky haze, or bold bands. Gather design inspiration from fabrics or photos.
Select gradient techniques that fit your skill level, then plan blending methods to keep the flow seamless.
Decide Where the Fade Starts and Ends
Decide where your fade begins and ends so your gradient lands exactly where you want it, not where the paint happens to stop. Measure the wall and mark the start and finish lines with painter’s tape. Use a level so the fade design stays straight. When you choose color selection, pick the “full color” zone first, then plan your blend length beyond the visible edge for a softer shift. In corners, shorten the blend so it doesn’t look smeared. Check from normal viewing height before you roll on paint.
| Mark | Edge | Blend length |
|---|---|---|
| Start | Full hue | 6–12 in |
| Middle | Shift | 12–24 in |
| End | Near fade | 6–12 in |
Choose the Right Wall Surface Condition
Before you paint your fade, assess the wall’s texture and any patches so the finish stays even.
Check for cracks and moisture, then let the surface dry fully and repair anything damaged.
Clean off dust, grease, and loose paint so the primer and paint bond well.
Assess Wall Texture And Patches
A well-prepped surface makes your fade look smooth, not blotchy. Before you start, do a patch assessment and surface evaluation: run your hand over the wall to spot uneven wall texture, bumps, and rough spots. Lightly scrape loose paint, then feather edges so paint adhesion improves and finish quality stays consistent. Use this quick guide for wall preparation:
| Condition | What you see | Action |
|---|---|---|
| Smooth | Even sheen | Light sand |
| Rough | Trowel marks | Prime |
| Flaky | Peeling spots | Scrape |
| Patch | Dry joint | Feather |
| Stain | Dark marks | Spot prime |
Check texture impact; adjust your seamless blending accordingly.
Check For Cracks And Moisture
Once you’ve assessed texture and patches, check the wall for cracks and moisture, because these issues can wreck your fade line and cause peeling later.
Do crack detection with a flashlight and run your fingers along seams, corners, and around outlets.
For moisture assessment, look for dark spots, bubbling, or a musty smell, then tape a plastic square overnight and watch for condensation.
Perform wall inspection before any surface preparation.
If you find damage, use repair techniques—fill, sand, and let everything cure fully.
This boosts paint durability and follows professional advice, avoiding common mistakes.
Clean Surface For Adhesion
Now that you’ve checked for cracks and moisture, clean the wall so paint grips correctly—your fade depends on adhesion importance.
Do surface preparation by running wall inspection for grease, chalky paint, and chalk dust. Use effective cleaning techniques: degrease with a mild cleaner, rinse, and let it dry fully.
For scuffs, sand and surface smoothing, then wipe for dust removal. Repeat dust removal until cloth stays clean.
If the wall is stained or porous, follow priming tips with a suitable primer before paint selection. Confirm surface readiness before you blend your fade.
Test Colors in Your Actual Lighting
Test your paint samples in the exact room lighting you’ll use, because daylight, bulbs, and evening shadows change how colors read.
Watch the undertones at different times of day so you catch any unexpected warmth, coolness, or greenish/pinkish shift.
If the fade color looks off under one condition, adjust the sample before you commit.
Match Test Paint To Lighting
Lighting changes everything, so you should match your test paint to the conditions where you’ll actually live. After you sample, evaluate it under daytime, evening, and any accent lamps to catch lighting effects and shifts in color saturation.
Your goal is consistent color psychology, not a showroom look. Compare multiple paint types too, since coverage and sheen change how a fade reads across the wall. If a swatch turns chalky, grayish, or warmer, adjust before you commit.
- Test next to trim and flooring
- Note sheen (matte vs eggshell vs semi-gloss)
- Watch coverage at different angles
- Compare two paint types side-by-side
- Step back often to judge the fade
Observe Undertones At Different Times
Before you commit to a fade, you need to see how your color’s undertones behave throughout your day. Visit the wall in the morning, midday, and evening, using natural lighting and noting light variations on every section.
Watch how color saturation shifts and whether undertones fight or support tonal harmony with your base and trim. Use color psychology to judge mood influence: cool casts feel calmer, warm casts feel inviting.
Also, recheck after seasonal changes—sun angle and environmental factors can flip undertone perception.
For wall aesthetics, test chips beside your planned fade so your artistic expression stays consistent in real life.
Map Your Gradient Steps for Coverage
Map your fade in clear steps so you don’t miss any zone of the wall. Start by marking a level line for your fade start and end points, then lightly sketch step intervals across the width.
Use gradient mapping: work from the darker side to the lighter, overlapping each band just enough for smooth color blending. Keep a wet edge as you move, and reload your brush before the paint thins.
- Divide the wall into equal sections
- Paint the darkest strip first
- Feather edges with steady pressure
- Overlap bands to prevent harsh lines
- Walk back to check symmetry and coverage
Pick the Sheen for a Cleaner Blend
Choosing the right sheen is what helps your fade look seamless, not streaky. For sheen selection, match the base and fade coats—same brand, same finish level—so light reflects evenly.
In bright areas, use a matte or eggshell wall paint to hide minor roller marks; in high-traffic zones, consider a satin for easier cleaning, but keep it consistent.
When you cut in, use a brush with similar sheen to prevent dull edges. Then paint your blend with smooth, light pressure, feathering each pass so the sheen doesn’t flash between sections.
Use Water or Floetrol for Smoother Blending
When you’re blending a fade, use water or Floetrol to slow the drying and keep paint workable.
Lightly mist the wall as needed for smoother shifts, but don’t soak it.
Focus on keeping your wet edges consistent as you move, so lines don’t set between sections.
Water Or Floetrol For Blending
Do you want that fade to blend smoothly instead of streaking? Use water or Floetrol to improve paint consistency before you start color mixing. Add a little at a time, then test on scrap so your blending techniques stay controllable.
Floetrol usually extends open time; water thins faster, so watch your application speed.
- Check your finish comparison: flat hides seams; satin shows them.
- Adjust roller choice for even nap and cleaner gradient application.
- Maintain edge control by blending while paint stays workable.
- Thin unevenly and you’ll fight streaks during gradient application.
- Keep notes for repeatable color mixing ratios.
Light Mist For Smoother Transitions
A light mist of water or Floetrol helps you smooth out shifts so your fade stops looking blotchy or streaky.
Use mist application techniques: load a clean spray bottle, mist lightly over the blend zone, and pause before painting again. Keep the mist barely visible, so it doesn’t dilute your color too much.
Then roll or brush your next section while the surface is receptive. These fade shift tips prevent harsh lines by softening brush marks and evening out sheen differences.
Work in small bands, re-mist only as needed, and always blend back toward the previous color.
Keep Wet Edges Consistent
To keep your fade looking smooth, you need consistent wet edges across each pass—so the paint blends instead of tacking up. Use water or Floetrol to slow drying, and work a small section at a time.
Reload your brush or roller, feather into the previous stroke, then immediately re-wet the boundary so your wet edge techniques stay uniform.
- Mist lightly to maintain sheen before it dries
- Overlap strokes to avoid hard stop lines
- Keep a damp rag for quick cleanup on runs
- Watch temperature and airflow; adjust thinning as needed
- Use reliable blending methods, not extra pressure
Gather the Tools for a Pro Wall Fade
Before you start blending, gather the essentials: angled brush, 2–3 paint rollers (or a small foam roller), a mini tray, painter’s tape, drop cloths, a sanding block or sponge, and a clean microfiber cloth.
Nail your tool selection and match paint types to your wall’s sheen. Use smart brush techniques for cut-ins, and lean on color theory to pick gradient shades.
Plan gradient styles—linear, radial, or soft diagonal—so you know where blending methods matter most.
Start with solid surface preparation: sand, wipe, then prime if needed.
Choose roller choices for even coverage, and plan finish options and drying times.
Tape Edges to Prevent Paint Bleeds
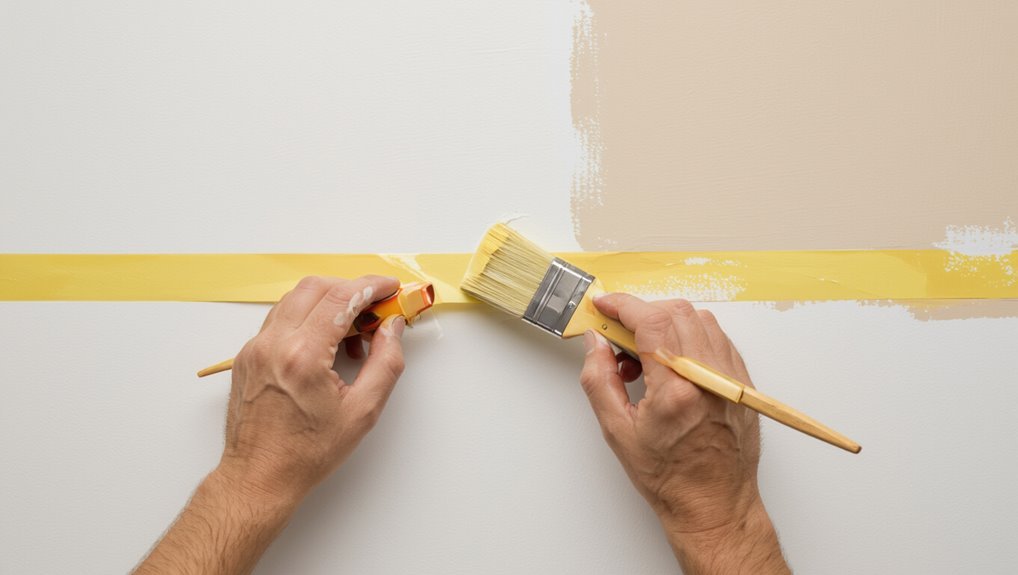
Once you’ve prepped the wall and lined up your tools, tape becomes your first line of defense against messy bleed lines. You control where the fade lands by choosing the right tape types for the job, then you set them with confident edge alignment.
Press firmly along the edge so paint can’t sneak underneath, and keep the tape straight to preserve your gradient line. When you remove the tape, pull it back slowly while the paint is still slightly tacky, so you don’t peel fresh color.
- Use painter’s tape for textured surfaces
- Choose low-tack tape for delicate paint
- Burnish edges with a putty knife
- Plan your seam before you roll
- Pull tape at an angle for clean release
Protect Floors and Trim With Drop Cloths
Before you start painting, lay drop cloths everywhere to catch drips and splatters.
Then mask off trim and baseboards so you don’t get paint where you don’t want it.
Keep the cloths flat and secured as you work so nothing shifts under your brush.
Lay Drop Cloths Everywhere
Start by laying drop cloths across the entire floor area where you’ll work, and tuck the edges tight against the baseboards. You’re doing this for solid drop cloths placement and real protective measures, so no splatter ever reaches your floors or tracks dirt back.
Keep your workspace clean by covering under ladders and along doorways where paint might drip.
- Overlap seams to block seepage
- Weight corners so cloths don’t slide
- Cover vents and outlets you can reach
- Lay extra sections at paint-mixing spots
- Check coverage before each cut-in session
Mask Trim And Baseboards
Masking trim and baseboards keeps your fade clean and your lines sharp. You use masking techniques: lay painter’s tape along edges, then add drop cloths to protect floors and trim. Do baseboard prep by wiping dust, and apply a thin caulk application where wall meets trim for edge sealing.
| Task | Goal |
|---|---|
| Tape edges | block paint bleeding |
| Seal caulk | stop gaps |
| Press cloths | shield floors |
| Wait/cure | clean tape removal |
When you paint, feather the fade up to the tape. After paint sets, do tape removal carefully. Finish with final touches.
Prime Only When the Wall Soaks Unevenly

Prime the wall only when it soaks unevenly—if some spots absorb paint fast while others stay damp, you’ll get a blotchy fade.
Start with surface preparation: scrape flaking paint, fill dents, and sand smooth so wall conditions read consistently.
Do moisture checks by misting small areas; if water darkens patches differently, you’ve got uneven absorption.
Choose primer types that match your substrate, then plan your paint application for even spread.
Use thoughtful color selection, gradient techniques, and edge blending with the right tool selection to keep the fade smooth.
- Patch-test priming for consistent soak
- Seal stains before gradient techniques
- Maintain uniform sheen with edge blending
- Match primer to wall material
- Re-check moisture checks before painting
Cut In the Base Color Without Overworking
After you’ve handled the uneven soak with the right prep and spot-priming, you’ll get the smoothest fade by cutting in the base color without overworking the edges. Keep your brush loaded lightly, and stop touching the same line once the paint flashes. Use firm, controlled strokes, then blend immediately using clean overlap—not repeated passes. Try these cutting in strategies:
| Situation | Base color techniques | Do/Don’t |
|---|---|---|
| Tight corner | Thin edge stroke | Don’t scrub |
| Door trim | Feather at border | Do overlap once |
| Ceiling line | Angle brush | Don’t reload heavy |
| Glossy patch | Dry-brush blend | Don’t chase |
| Fast-dry wall | Work in sections | Don’t stretch |
Roll the Base Coat in Light, Even Passes
Now roll the base coat using light, even passes so you don’t force paint into the fade area. Use steady pressure; let the roller carry the paint, not your arm.
Keep each pass overlapping slightly, but stop before you saturate the blend line. Choose roller types that match your wall texture—smooth nap for a crisp gradient, thicker nap for hiding imperfections.
Apply base coat techniques across one section at a time so it stays workable, then feather the edges with a gentle, clean roll.
- Load roller evenly to prevent streaks
- Maintain consistent speed and angle
- Don’t backroll dry edges too aggressively
- Feather only at the fade boundary
- Keep a wet edge for smooth blends
Apply the Second Color With Controlled Overlap
Tape and mark your overlap line so you know exactly where the fade starts.
Roll the second color carefully up to that line, then pull it slightly into the base coat without flooding the edge.
Finally, blend the border with light, even passes to get a smooth, gradual shift.
Tape And Mark Overlap Line
Press down painter’s tape along your marked boundary, then burnish the edge firmly so paint can’t bleed through. You control the shift by planning tape application before you touch the second color, using overlap techniques that let the fade feel intentional, not accidental.
Align the tape exactly where your overlap should start, and keep it straight through corners. Remove and reapply sections if you spot gaps or wrinkles.
- Burnish with steady pressure, not dragging
- Double-check level lines before paint
- Press tape ends tight to prevent seepage
- Maintain consistent overlap width for smoother fade
- Keep tape on clean, dry surfaces only
Roll Second Color Carefully
Roll the second color on in smooth, controlled passes, letting it overlap the taped edge by the amount you planned. You want a steady roller technique: load evenly, keep light pressure, and move at the same speed each time.
Start near your boundary line, then roll outward into the lighter area without stopping. Overlap each pass slightly with the last, so you don’t create hard streaks or gaps.
Work in small sections, watching how the colors sit together—color psychology matters, because contrast can feel harsher if you over-roll. Reload as needed, not obsessively. Keep a clean roller edge.
Blend Edges For Smooth Transition
To get a smooth fade, you’ll blend the edges of the second color while it’s still wet by overlapping your previous pass just enough to “feather” the boundary.
Work from the dark side toward the light, using light pressure so you don’t drag pigment back. Apply edge blending techniques with a clean brush or roller edge, then stop before the paint starts to tack.
Use these smooth shift tips to control the gradient:
- Keep a wet edge
- Use small, repeated overlaps
- Switch directions between passes
- Wipe tools, then reblend
- Inspect under angled light
Feather the Wet Paint to Create the Fade Zone
Once you’ve laid down your base and fade colors, feather the wet paint at their boundary so the shift looks gradual instead of harsh.
Use simple feathering techniques: lightly reload your brush or roller with fade color, then touch it right at the edge and pull outward. Work in short, overlapping strokes while the paint still stays glossy.
Switch angles as you go to even out coverage. If you see a line forming, stop and blur it immediately with blending tools like a soft brush, clean sponge, or dry cloth, but never reapply heavy paint.
Blend With a Clean, Dry Roller Pass
Let the paint set briefly so it won’t smear, then load your roller evenly before you start blending.
Pull smooth, overlapping passes into the fade area, using a roller that’s clean and dry.
Keep switching to fresh dry sections as needed, so you pull color out cleanly without leaving streaks.
Let Paint Set Briefly
After you apply the base and edge coats for your fade, wait a few minutes so the paint sets slightly but doesn’t dry hard; then take a clean, dry roller and make one light pass through the shift.
This brief pause matters because early paint drying still allows you to soften changes without smearing. Keep your pressure gentle and your motion consistent, rolling only once or twice to keep the gradient smooth.
If you see sharp lines forming, that’s your cue to blend now.
- Reduce overworking
- Protect sharp edges
- Improve fade techniques
- Maintain sheen balance
- Catch changes while workable
Load Roller Evenly First
Load your roller evenly before you blend. You want steady coverage so your fade shifts without harsh bands.
Pour enough paint into the tray, then press the roller in short, repeated strokes to saturate it uniformly. Roll it up the tray ramp, too—this balances paint on the nap and controls your paint consistency.
Keep your pressure light and consistent; that’s the core roller technique. Start blending right away with a gentle overlap, using slow passes so the paint releases evenly.
If you see streaks, reload and rebalance before continuing.
Pull Clean Dry Passes
Once your roller has even paint and you’ve started blending, switch gears: pull clean, dry roller passes to smooth the fade. Use a nearly dry roller, no extra paint, and glide from dark to light in one steady direction. Keep light pressure; let the nap lift and even out edges.
If you see ridges, pause and reload with paint only after the surface stays uniform.
- Make overlapping clean passes, not circles
- Use a consistent speed for each pull
- Keep a clean roller edge for crisp shifts
- Check the fade angle under raking light
- Practice this dry technique on scrap first
Keep the Fade Width Consistent From Top to Bottom
To keep your fade width consistent from top to bottom, you need a reliable reference before you ever paint. Snap a level guide line where the changeover should start, then mark the opposite edge so your fade techniques stay measured.
Use a narrow pencil mark every few feet and lightly extend them with painter’s tape to block any drift. Next, load your brush evenly and apply paint with consistent application, keeping your hand speed the same from pass to pass.
Blend along your taped edges, stop at your marks, and check width frequently with a quick tape measure.
Reload Less: Refresh Tools to Avoid Hard Lines
Keeping the fade width consistent is only half the job—your tools have to cooperate, too. Reload less by renewing supplies at the right moments so your paint application stays even.
Practice tool maintenance: wipe, rinse, and recondition rollers before they drag. Use blending techniques that let each pass feather out, not stop. Maintain edge control by cleaning stray paint from corners, then re-load minimally.
Check color selection against your gradient mapping, and match your paint consistency to the surface preparation. Rotate roller naps, and follow solid roller technique to support fading methods without hard changes.
- Clean roller covers between zones
- Stir paint to steady paint consistency
- Lightly re-damp brushes for smoother blending
- Adjust overlap to protect edge control
- Re-check gradient mapping before color shifts
Work One Side to the Other for Continuity
When you’re painting a fade, start at one edge and blend it into the next so there’s no visible stop.
Work one side to the other, keeping the paint wet as you go so each pass overlaps naturally.
If your section starts to dry, smooth the boundary right away before it sets.
Blend One Edge To Next
Start at the top of one end and work across in a single continuous pass, blending the new edge into the previous wet section before it dries. You’ll keep the fade smooth by overlapping each fresh stroke slightly, using controlled blending techniques that respect your color theory and chosen gradient styles.
Before you start paint application, you should confirm wall preparation is clean and dry; then you’ll connect edges so the visual impact feels intentional. Use your own artistic expression while minding color psychology and design balance. Finish with light finishing touches once coverage is even.
- Feather the border
- Maintain consistent pressure
- Blend with a dry brush
- Check sheen changes
- Step back for balance
Keep Wet Paint Continuous
To keep your fade smooth, work one side of the wall to the other in a single, continuous run, staying in the wet paint so each new pass overlaps the last.
Load your roller technique first, then use a wet brush to refine gradient technique at the edges. Keep paint consistency even, and adjust it with your color mixing before you start each pass.
Focus on edge control: don’t lift until you reach the far boundary. Use feathering technique to soften blending areas, and repeat blending methods only while paint stays workable.
Master smart paint application; stop changes mid-stroke, not after.
Feather Each Pass While Paint Is Still Wet
Keep a damp edge as you work, and feather each pass before the paint sets. You want the feather technique to overlap while the surface is still workable, so your blending methods look smooth instead of striped.
Load your brush lightly, then pull outward from the boundary line with gentle pressure. Work in short sections and stop before the edge dries; reload and repeat. If the fade starts to crown, mist the boundary and continue, don’t scrub.
- Overlap wet strokes 1–2 inches
- Angle the brush for soft lift
- Maintain consistent pressure
- Watch sheen for drying cues
- Correct immediately to avoid ridges
Use a Soft Brush or Rag for Micro-Transitions
A soft brush or a damp rag makes micro-transitions feel invisible. Load only a little paint, then lightly skim the edge where two tones meet.
Use soft brush techniques by pulling in short, overlapping strokes, blending back into the darker area. If you need smoother tapering, switch to rag blending methods: fold a clean rag, dampen it slightly, and dab or sweep across the boundary without soaking.
Work in small sections, stepping back often to confirm the gradient disappears. Let it tack, then repeat for finer steps until the fade looks seamless.
Maintain Even Pressure to Prevent Roller Lines
Even pressure matters, because uneven roller contact leaves visible ridges at the height where the roller slows or presses harder.
Keep your roller technique consistent across the whole fade by practicing pressure control while you run smooth paint application strokes. Match roller choice and paint viscosity to your wall, and maintain paint consistency so paint loads evenly.
Use these blending tips: overlap slightly, start each pass at the same spot, and watch edge management where the gradient methods meet.
- Press lightly, then steady your grip
- Refresh your blend each overlap
- Adjust for thicker paint viscosity
- Use smoothing techniques for dry edges
- Re-check pressure during gradient methods
Avoid Chatter by Loading the Roller Correctly
Loaded roller chatter usually comes from uneven paint supply on the nap. To avoid it, you load the roller evenly: dip, then roll off excess against the tray so both sides carry the same amount.
Don’t overload—drips create turbulence that shows as speckling and skipping. Use a smooth roller technique, applying light-to-medium pressure and keeping your strokes consistent in speed and angle.
If you see skipping, reload rather than forcing paint. Also confirm paint consistency: it should flow without running, because thick mixes trap air and trigger chatter during the fade.
Prevent Lap Marks by Managing Dry Time
To prevent lap marks, you need to control the dry time between passes so the paint stays workable.
Reload your roller and overlap each new pass while the previous one is still tacky, keeping the edges from setting. If you wait too long, you’ll see the seam—so adjust your pace to match your room’s airflow and temperature.
Control Dry Time Between Passes
Timing controls your fade. To prevent lap marks, you must control dry time between passes during paint application. Use consistent drying techniques: let the first coat reach tacky-dry, not fully cured, before you feather the next stroke.
If it’s too wet, the edges smear; if it’s too dry, you’ll get a hard ridge.
- Touch test: tacky surface, no transfer
- Work in small sections to keep timing consistent
- Maintain airflow and avoid direct fan blasts
- Keep a steady stroke pace so each pass matches
- Dry-erase your mistakes by lightly re-feathering early
Maintain Even Lap Overlap
To prevent lap marks, keep your overlap consistent by feathering the edge of each pass before the previous one fully sets. Use your lap technique to guide the roller: start each stroke, roll through the fade area, then lightly skim back over the boundary so the wet edges merge. Watch the sheen; if it dulls, you’re late. Adjust timing and pressure, and choose blending tools to smooth shifts immediately. Check progress with quick comparisons:
| Check | Wet Edge | Fix |
|---|---|---|
| Start overlap | 50% | Feather more |
| Mid-pass | Glossy | Light re-roll |
| Final edge | Tack-free | Stop and blend |
Back-Roll to Smooth Thick Spots
Back-roll immediately after you lay down the paint to even out any thick spots and prevent lap marks from showing.
Use a back roll technique with a lightly loaded roller, then work vertically and slightly overlapping the last pass. Keep your pressure even; you’re smoothing application, not adding more paint. If a spot looks raised, roll it once more while paint is still wet.
- Watch roller load to avoid ridges
- Maintain consistent speed for smooth application
- Angle your strokes to blend edges
- Don’t overwork; stop when texture levels
- Keep a wet edge to reduce visible fades
Fix Dark or Light Patches Right Away
Fix dark or light patches as soon as you spot them—don’t wait for the paint to dry.
Immediately stop and lightly brush the area with a damp roller or clean brush to lift excess pigment or blend edges. Let the surface tack up, then do patch repair using a small amount of fresh base paint.
Use color matching by comparing to the surrounding fade tone in natural light, not just wet paint. Feather the repaired spot outward one inch at a time, keeping pressure even.
If it still shifts, repeat once after it dries fully.
Correct Uneven Blending With Extra Feather Strokes
Once your patch starts looking uneven, add extra feather strokes to merge it with the surrounding fade—don’t reapply full coverage yet. You’re correcting edges, not repainting the whole area, so you control changes.
Use your feather technique by lightly dragging a dry-ish brush or sponge outward, then stop blending where the existing fade already looks right. Keep your blending tools clean and slightly damp, and wipe off excess paint before each pass.
Use a dry-ish brush or sponge to feather outward, then stop blending when the fade matches—keep tools slightly damp and wipe excess.
- Feather strokes should widen gradually
- Work from the patch outward
- Reload less paint each pass
- Blend in short, overlapping motions
- Stop when texture matches the wall
Check the Fade in Natural Light
How does your fade look after the sun hits it? Step outside or open nearby windows and watch the wall in natural lighting for several minutes.
Move your body a few feet left and right, and change your viewing height—crouch, stand, then step back—to catch shifts you missed indoors.
Check how the lighter edge blends into the darker area; you want a smooth, even change, not a hard line or sudden band.
Use color perception cues: if one side looks warmer or cooler, adjust and repaint while the paint is still workable.
Blend Through Corners and Trim Lines
Before you chase a perfect fade, blend it through corners and across trim lines so the change stays smooth from every angle.
When you reach a corner, feather the edge beyond the junction, then continue the same value on the return wall to lock in corner blending.
For trim transitions, don’t stop at the caulk line; carry the fade under/around it with light pressure, keeping brush marks going the same direction.
Use a clean, slightly damp rag to knock down ridges and sight-check alignment as you go.
- Extend each band past edges
- Keep wet edges consistent
- Use light pressure near trim
- Feather out brush marks
- Recheck from doorway angles
Seal Edges With Caulk for Crisp Color Boundaries
Before you paint, caulk any gaps so you get clean lines instead of messy leaks.
Then tape your edge for control and caulk smoothly along the boundary, removing excess as you go.
Let the caulk cure fully before you start the fade so the color stays crisp.
Caulk Gaps For Clean Lines
Once your base coat and fade colors sit where you want them, you can seal the edges by caulking any small gaps between tape, trim, or cut-in lines.
Use steady caulk application to lock color boundaries before they blur. Match caulk colors to your wall so gaps disappear, and choose the right caulk types for indoor durability.
Apply with proper caulk tools, then refine with clean fingers or a damp rag for crisp caulk finishes. Keep up caulk maintenance so seams stay tight, and plan caulk removal if you ever repaint.
- Pick compatible caulk products for adhesion.
- Follow precise caulk techniques along corners.
- Maintain smooth, thin bead caulk tips.
- Allow curing before touching adjacent paint.
Tape Edges Then Caulk Smoothly
Tape the edges firmly so your fade line stays sharp, then run a thin bead of caulk right along the tape boundary to seal any tiny gaps that would let colors bleed. Use smart tape techniques: press edges down with a plastic putty knife, then check for lifted corners. Keep caulk application light—too much smears under paint. After you finish the bead, wipe excess with a damp rag, leaving a smooth skim.
| Step | Goal |
|---|---|
| Tape press | No bleed paths |
| Caulk line | Crisp edge |
| Quick wipe | Clean boundary |
Let Caulk Cure Fully
After you run that thin caulk line, give it time to cure fully so the seal holds as paint dries. Don’t rush caulk drying; check the label and wait at least the recommended hours, or longer in humid rooms.
During cure, avoid wiping, sanding, or touching the edges, and keep airflow steady. Your caulk application should rely on proper caulk types—choose paintable, flexible varieties for expansion zones.
Use reliable caulk techniques with the right caulk tools, like a caulk gun and smooth finishing tool. Then follow caulk tips and caulk maintenance: inspect seams after the fade cures.
- Crisp boundaries stay sharp
- Smudges won’t bleed
- Flex resists cracking
- Better caulk benefits long-term
- Cleaner rework later
Let the Wall Dry Safely With Good Ventilation
To help your fade set cleanly, let the wall dry in a well-ventilated room. Turn on fans, open windows, and keep air moving across the surface—use practical ventilation techniques instead of blasting one spot.
Check drying times your paint label recommends, since thick areas and cooler temperatures take longer. Avoid closing off the space too soon; trapped moisture can cause uneven texture or soft edges in your fade.
If you notice a lingering odor or dampness, increase airflow and wait. Keep pets and kids away while it dries safely.
Wait the Right Time Before Adding Another Coat
Let your first coat dry completely before you touch up the fade.
Lightly touch the surface—if it feels tacky or dry to the touch, you can usually move on, but always avoid recoating too soon.
Check the manufacturer’s recoat window and follow it to prevent peeling, bubbling, or muddy shifts.
Allow Proper Drying Time
Before you add another coat, you need to wait for the first one to dry completely—typically 2 to 4 hours, but check the paint label for the exact window. You control results by letting moisture escape and stabilizing the surface so your fade stays crisp.
Use reliable drying techniques: keep air moving, avoid heavy recoat too soon, and respect cool or humid conditions.
- Dry longer in humidity or cooler rooms
- Don’t trap solvent under thick layers
- Test the surface lightly before recoating
- Maintain steady ventilation for uniform cure
- Better paint adhesion starts with full dry time
Check Tack Before Recoating
Check the surface for tackiness before you recoat, because paint that still feels sticky can smear and blur your fade. Do a quick tack check with a fingertip: touch lightly, then lift. If it drags or strings, wait. If it feels dry and firm, you’re ready. Use your recoat timing to protect edges where colors meet; rushed coats trap soft layers.
| Touch feel | What it means | Action |
|---|---|---|
| Sticky | Paint not cured | Wait |
| Tacky, dull | On the edge | Test again |
| Dry, smooth | Ready to coat | Recoat |
Follow Manufacturer Recoat Window
Follow the manufacturer’s recoat window so every layer cures cleanly. You must respect recoat timing, not intuition.
When you wait too little, the fade edges smear and the finish stays soft; when you wait too long, adhesion can weaken and you’ll see lap marks.
Check the label, then touch-test only after the specified time, matching conditions like humidity and temperature.
Keep paint consistency steady—thin coats dry faster, thicker ones need more time.
- Read the can for exact hours or days
- Verify surface dryness before recoating
- Maintain similar film thickness across the fade
- Adjust for humidity and airflow
- Stir often to avoid color shift
Lightly Sand Between Coats for a Sleek Transition
After each coat dries, lightly sand the surface with a fine-grit sandpaper (about 220–320) to knock down any raised edges where the fade changes.
Use sanding techniques that focus on smooth, even pressure—don’t press hard or you’ll cut through and blur your fade. Wrap sandpaper around a small block so you keep the gradient consistent.
Then wipe away all dust with a damp rag or tack cloth, and let it fully dry. This step makes shift tips work better by helping each new coat bond smoothly and level out brush marks for a sleek finish.
Spot Prime Problem Areas Before Repainting
Even with a smooth sanding job, some spots may still soak up paint unevenly or show faint patches where the fade has changed. You need spot priming before repainting to lock in durability and improve paint adhesion.
Start with issue identification: look closely at corners, repaired drywall, and old tape lines. Then do careful surface preparation, cleaning and drying before you prime.
- Use correct area selection: prime only uneven spots, not the whole wall.
- Confirm paint consistency for easy blending.
- Apply priming technique in thin coats, feathered edges.
- Check color matching after drying.
- Finish with problem solving if patches reappear.
Create a Subtle Ombré With Longer Gradient Steps
To keep your fade looking natural, build the ombré in longer gradient steps rather than jumping straight from dark to light.
After wall preparation, choose your base and mid-tone, then mix a slightly lighter blend. Roll a band, lightly feather the edge, and repeat with small step increases.
Use consistent blending methods: overlap wet strokes, keep your brush damp, and avoid hard lines.
Check color harmony under daylight, then adjust with a touch of tint before you go lighter.
By layering smoother shifts, your ombre techniques stay subtle and professional.
Let each pass set until matte, then refine the boundary.
Make a Bold Fade With Higher Contrast Colors
For a bold fade, choose two paint colors with noticeably different values—think deep charcoal to crisp off-white or navy to warm cream—so the change reads instantly.
You’ll make confident bold color combinations by assigning one color as the “anchor” and the other as the “fade.” Use a wide brush and overlap strokes, then feather the edge before it dries; that’s where advanced blending techniques show up.
Work in small sections so the shift stays controlled, not muddy.
- Test swatches at wall lighting
- Mark your start/end bands lightly
- Keep a clean brush edge
- Blend back toward the lighter value
- Step back often to judge contrast
Paint a Vertical Fade With Tight Symmetry
Start by drawing two faint vertical guide lines so your fade lands perfectly centered between them. Tape along those lines if you need crisp edges.
Pick two wall colors and plan the midpoint where they meet. Load your roller or brush with the darker shade at the center, then feather upward and downward toward the guides.
Pick two wall colors, plan the midpoint, load darker paint at center, then feather upward and downward toward your guides.
Keep your hand speed identical on both sides; symmetry depends on timing. Use blending tools—a clean damp brush or sponge—to soften the blend right where the colors overlap.
Refresh paint before edges dry, and check alignment from eye level.
Paint a Diagonal Fade Without Distorting the Blend
Before you blend, map a diagonal line across the wall and mark the midpoint where the two colors meet.
Use diagonal blending techniques: drag your brush lightly along the seam, then feather outward in short strokes, keeping even pressure. Don’t chase the edge; you control it by maintaining wet paint contact and reloading color only when needed.
Check for color harmony considerations by stepping back every few minutes, then correct before the blend dries.
- Keep the diagonal guide visible as a reference
- Overlap each pass by one brush width
- Blend from light into mid, not vice versa
- Wipe and slightly dampen the brush between sides
- Maintain consistent pace for a clean shift
Do Ceiling-to-Wall Fades Without Drips
Tackle ceiling-to-wall fades by controlling your paint load before it ever reaches the edge.
First, set a firm ladder stance and tape the ceiling line. Use an angled brush or small roller, then load lightly and wipe off excess on a tray edge.
Start at the ceiling, feather your first strokes downward, and keep a wet edge so the blend stays smooth. For the ceiling junction, work in short sections, blending outward each pass.
Practice drip prevention by holding the brush almost flat, pressing lightly, and stopping your stroke before paint pools.
Troubleshoot Wall Fade Problems Like a Pro
Once you’ve nailed the ceiling edge, you’ll want to troubleshoot the wall blend quickly so it stays smooth and intentional. If you see lap marks, streaks, or a sudden color jump, it usually comes down to paint load, drying time, or brush/roller technique.
Do fade troubleshooting by checking paint adhesion, then revisit surface preparation and texture assessment. If the fade fades unevenly, confirm color matching and blending techniques while you lock in gradient consistency and edge definition.
Watch moisture issues—damp patches sabotage paint adhesion and ruin your gradient.
- Adjust paint load
- Shorten or extend drying times
- Rework edges immediately
- Fix moisture with repairs
- Recheck color matching and ratios
Frequently Asked Questions
What if My Fade Ends up Muddy Instead of Smooth?
If your fade ends up muddy, you’re overmixing or painting too wet. Use cleaner brush strokes, let layers dry, and refine fade techniques. When color mixing, blend gradually with lighter shifts, wiping your brush between shades to prevent buildup.
How Do I Blend Across Textured Walls Without Losing the Transition?
Blend across textured walls by dry-brushing lightly, feathering edges with a clean brush, and using thin coats. Keep your wet edge, overlap slightly, and adjust pressure. Your blending techniques with proper texture considerations prevent harsh lines and preserve the shift.
Can I Paint a Fade Over Existing Glossy Paint?
Yes—you can paint a fade over existing glossy paint, but you need technique tips first: scuff-sand glossy areas, wipe dust, prime with bonding primer, then choose compatible color choices. Roll on base, fade edges, and keep a steady, wet blend.
How Do I Remove Visible Roller Lines After They’Ve Dried?
After drying, you remove roller lines by lightly sanding with 220–320 grit, wiping dust, then spot-recoating. Use a smooth roller technique, feather edges outward, and consider paint additives for better leveling. Let it dry fully before a final light pass.
What’s the Best Way to Clean Tools Before Paint Sets?
Clean tools fast—like rinsing smoke away. Rinse brushes and rollers in warm water or appropriate paint solvents, scraping off residue immediately. For oil-based paints, use the right paint solvents, then wash with soap, dry thoroughly before storage.
Conclusion
You can nail a professional wall fade by planning colors, mapping steps, and testing in your actual lighting—then painting with consistent overlap and patience. If it helps, remember that even pros rely on layering: most smooth gradients require multiple thin coats because paint covers unevenly as it dries. After you finish, step back, check symmetry, and do quick touch-ups while the paint’s still workable. With practice, your fades will look intentional—not accidental.
