How to Paint a House Interior – Complete Room-By-Room Painting Guide
You can paint your entire interior like a pro by planning rooms, gathering quality paint, brushes, rollers, tape, drop cloths, and safety gear, then measuring surfaces to estimate paint and time. Clean, patch, and sand walls, protect fixtures and floors, cut edges with an angled brush, roll maintaining a wet edge, and follow drying and recoat times. Clean tools and dispose of waste properly. Keep going to get room-by-room steps, color and finish tips, and troubleshooting advice.
Painting Made Simple: Quick Overview
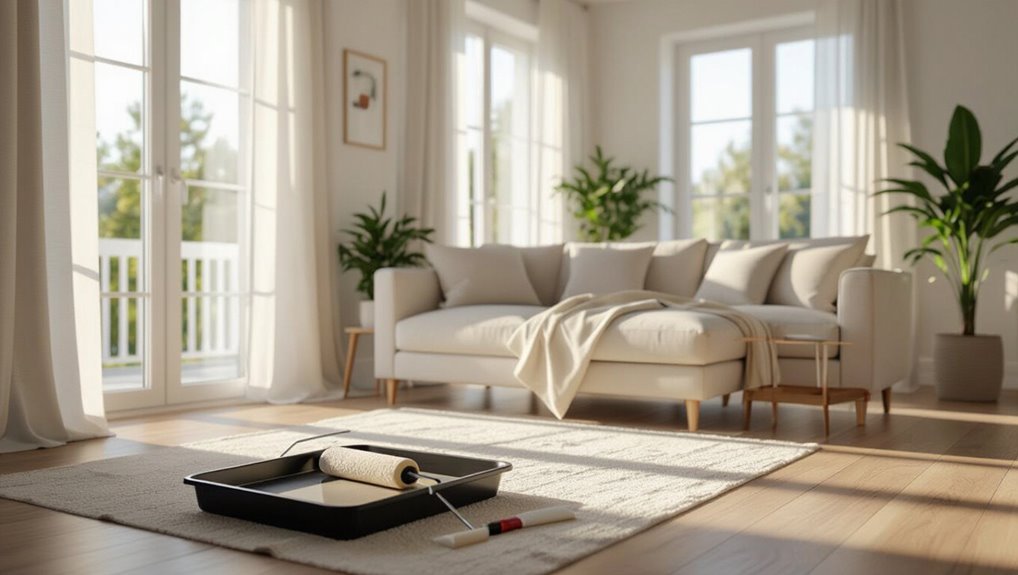
Start by gathering the essentials: paint, brushes, rollers, tape, drop cloths, and a good primer.
You’ll plan each room’s sequence, prep surfaces, and protect floors.
Think about color psychology to set mood and room ambiance; test swatches in daylight.
Work wall by wall, cut edges first, roll broadly, and touch up.
Pace yourself; finish priming before painting.
Materials Checklist: Paint, Tools, Safety
Before you begin, gather the right paint, tools, and safety gear so the job goes smoothly and safely.
Choose quality paint brands, primer, and appropriate sheen for each room. Collect rollers, brushes, trays, drop cloths, painter’s tape, sandpaper, putty knife, ladder, and extension pole.
Wear respirator, goggles, gloves, and knee pads; keep a first-aid kit and ventilation fans handy.
Measure & Estimate Paint And Time
1 room can take anywhere from a few hours to a full weekend, so measure carefully and plan your time and paint accordingly.
You’ll calculate paint quantity from room dimensions and paint coverage, factor surface conditions and color selection, and include preparation time.
Use time estimation to build a realistic project timeline, add labor costs, and apply budgeting tips for accurate estimates.
Prep Fast: Clean, Repair, Sand Walls
Before you even open a can of paint, clean the walls thoroughly to remove dust, grease, and mildew so the new finish will stick.
Patch holes and cracks, let fillers dry, then sand smooth to create an even surface.
Do this upfront and you’ll cut down on touch-ups and get a professional-looking result.
Clean Surfaces Thoroughly
Start by removing dust, dirt, and cobwebs so paint will stick and look even. You’ll use surface preparation techniques that focus on degreasing, wiping, and rinsing. Test cleaning tools effectiveness—microfiber, sponges, and specialty cleaners—on inconspicuous spots. Keep surfaces dry before painting.
| Task | Tool | Result |
|---|---|---|
| Degrease | Cleaner | Remove oils |
| Dust | Microfiber | Even finish |
| Rinse | Sponge | No residue |
| Dry | Cloth | Paint-ready |
Repair And Sand
Patch, sand, and smooth any imperfections so paint lays down evenly and lasts. You’ll fill dents, nail holes, and cracks, then let compound dry.
Use progressive sanding techniques—start coarse, finish fine—to blend repairs with the surrounding surface.
Check for remaining wall imperfections by eye and touch. Wipe dust, prime patched areas, and you’ll create a uniform, paint-ready wall.
Remove Or Protect Fixtures And Outlets
You’ll want to remove or fully protect fixtures and outlets so paint doesn’t drip, stain, or seep into electrical components. You’ll remove covers, label wires, and use outlet protection like taped plastic. For light fixtures, do fixture removal or mask with drop cloths. Secure switches, vents, and hardware before painting.
| Item | Action |
|---|---|
| Outlet | Cover |
| Light | Remove |
| Switch | Tape |
| Vent | Mask |
Choose Paint Types And Finishes By Room
You’ll pick paint types based on each room’s use—durable, washable formulas for kitchens and baths, and softer options for bedrooms and living areas.
Match finishes to function: flat or eggshell hides imperfections, satin and semi-gloss resist moisture and clean easily.
Think about traffic, humidity, and how much scrubbing the walls will need before you choose.
Paint Types By Room
Pick paint types and finishes room by room to match each space’s use, traffic, and lighting.
You’ll choose options for kitchen cabinets that resist stains, bathroom tiles that handle moisture, and durable paints for high-traffic zones.
Consider living room ambiance and bedroom comfort using color psychology.
Reserve bold tones for accent walls, mind ceiling textures, and prioritize paint durability where wear is expected.
Finishes And Sheens
Because sheen affects both look and performance, choosing the right finish for each room matters as much as color.
You’ll weigh matte finish and eggshell texture for low sheen options in bedrooms, satin finish for living areas, and semi gloss sheen or high gloss paint where durability factors and light reflection matter.
Use a finish comparison to manage color variation and wear.
Choose Paint Colors For Every Room
How do you choose colors that feel right for each room without second-guessing yourself? Use color psychology and light effects to guide mood setting and space perception. Balance personal style with current trends, try complementary colors and accent walls, and test color combinations in natural light.
| Room | Mood | Tip |
|---|---|---|
| Living | Warm | Layer neutrals |
| Bedroom | Calm | Soft blues |
Cut In Corners And Edges Like A Pro
Start by picking the right angled sash brush so you’ve got control in tight corners.
Use steady hand techniques—short, confident strokes and bracing your wrist against the wall—to keep lines sharp.
If you slip, don’t panic: wipe excess with a damp cloth or use a small artist brush to clean up mistakes.
Choose The Right Brush
When you’re cutting in corners and edges, pick a brush that gives control without sacrificing paint flow: a 2½–3-inch angled sash brush with high-quality synthetic bristles offers the precision and durability you need for clean lines on trim, ceilings, and windows. Choose by brush types, brush sizes, brush materials and brands; learn brush techniques and brush maintenance for lasting performance.
| Feature | Purpose |
|---|---|
| Size | Precision |
| Material | Durability |
| Type | Shape control |
| Care | Longevity |
Steady Hand Techniques
Steady your wrist and work deliberately: cutting in clean corners and crisp edges comes down to consistent pressure, controlled strokes, and knowing when to load or wipe your brush.
Use steady hand techniques and practice brush control to steady your lines and save time.
- Rest your pinky on the wall for stability
- Load less paint; fewer drips
- Move slowly, keep a steady rhythm
Clean Up Mistakes
Fixing stray paint and sharpening your edges is easier than you think if you tackle mistakes right away and use the right tools.
Keep a wet rag, small angled brush, and a steady fingertip of paint for fast error correction techniques.
Use painter’s tape, proper brush angles, and slow strokes as mistake prevention strategies.
Patch, feather, and recoat for seamless corners and edges.
Roll Walls Efficiently Without Lap Marks
A smooth, streak-free finish starts with the right rhythm: roll panels while wet edges remain tacky, overlap by 50%, and finish each section with a light “feather” stroke.
Use proper rolling techniques and consistent paint application to avoid lap marks.
- Maintain a 2–3 foot wet edge
- Work in manageable panels
- Reload roller evenly and avoid pressure changes
Paint Ceilings: Technique & Tools
Start by setting up safe access and good lighting so you can see laps and drips as you work. Use ladder safety, masking tape, and consider ceiling textures. Choose paint sprayers or rollers for paint durability; manage humidity control and lighting effects to judge color contrast.
| Tool | Tip | Caution |
|---|---|---|
| Roller | Low-nap for texture | Drips |
| Sprayer | Even coat | Overspray |
| Tape | Clean lines | Adhesion |
Paint Trim, Baseboards, And Doors Cleanly
Before you pick up a brush, prep trim, baseboards, and doors by cleaning, sanding, and filling gaps so paint will stick and look smooth.
Use a steady hand, quality angled brushes, and painter’s tape where needed to create clean, crisp lines.
Work methodically from top to bottom and wipe up drips immediately to keep edges sharp.
Prep Surfaces Thoroughly
Prepare trim, baseboards, and doors by cleaning, sanding, and filling imperfections so paint will adhere smoothly and look professional.
You’ll do surface cleaning, perform surface inspection, sand gloss, and fill gaps. Wipe dust, caulk seams, and prime bare wood. Finish edges neatly before painting.
- Clean with degreaser and a scrub pad
- Sand and vacuum dust
- Fill, caulk, and spot-prime
Paint Clean, Steady Lines
When you paint trim, baseboards, and doors with a steady hand and the right tools, the whole room looks sharper and more finished.
Use quality angled brushes, a sash brush for corners, and painter’s tape with proper tape techniques to block edges.
Paint away from tape, peel it while wet, and use light strokes for line smoothing so edges stay crisp and clean.
Work High Walls, Stairs, And Tight Spots
Tackle high walls, stairs, and tight spots with the right tools and a clear plan so you don’t struggle or risk accidents.
You’ll use high wall techniques, sturdy ladders, and mindful stair safety to reach edges and corners. Move slowly, secure ladders, and use extension poles or mini-rolls for confined areas.
Use high-wall methods, sturdy ladders, and careful stair safety—move slowly and use extension poles or mini-rolls for tight spaces.
- Use extension poles and angled brushes
- Secure ladders and spotters
- Pack small rollers for tight spots
Paint Plaster, Brick, And Textured Walls
Before you pick up a brush, make sure you prep plaster, brick, or textured walls by cleaning, repairing cracks, and sanding loose paint.
Choose a paint and primer formulated for porous or rough surfaces—masonry or acrylic-latex products usually work best.
Test a small area to confirm adhesion and coverage before you commit to the whole wall.
Preparing Surface Properly
A clean, sound surface is the foundation of a lasting paint job, so inspect plaster, brick, and textured walls for cracks, loose material, efflorescence, and mildew.
Then remove or repair those issues before you prime. You’ll do surface cleaning and wall preparation with appropriate cleaners, patching compound, and sanding to guarantee adhesion.
- Wash and rinse thoroughly
- Patch and sand smooth
- Use a masonry primer where needed
Choosing Right Paint
When selecting paint for plaster, brick, or textured walls, pick a formulation that matches the surface porosity and wear level so the finish lasts and looks even.
Test breathable masonry primers on brick, flexible acrylics on plaster, and high-build coatings for texture.
Check eco-friendly options, compare durability and VOCs, and read paint brands’ technical data.
Buy samples and spot-test before committing.
Kitchens & Bathrooms: Moisture‑Resistant Paint
Because kitchens and bathrooms get the most steam and splashes, you’ll want paint that resists moisture, mildew, and frequent cleaning without peeling or staining.
Choose semi-gloss or satin mildew-resistant formulas, prep surfaces well, and guarantee good kitchen ventilation to reduce condensation. Monitor bathroom humidity and use exhaust fans.
- Pick washable, scrubbable paint
- Prime glossy or damaged areas
- Recoat with mildew inhibitors
Bedrooms & Living Rooms: Mood And Sheen
Kitchens and bathrooms demand hard‑wearing, moisture‑resistant finishes, but bedrooms and living rooms let you focus on atmosphere and finish. You’ll use color psychology to set calm or energy, pair paint sheen with mood lighting, and choose eggshell or satin for durability without glare.
| Room | Sheen | Mood |
|---|---|---|
| Bedroom | Eggshell | Relaxing |
| Living Room | Satin | Inviting |
Fast Whole‑House Repainting Strategies
Tackle a whole‑house repaint efficiently by planning zones, scheduling crews or tasks back‑to‑back, and standardizing materials and tools so you minimize setup and downtime.
Use efficient scheduling, room prioritization, and teamwork tips; focus on surface preparation, quick drying products, paint sprayers, and proper paint storage.
Consider color psychology when sequencing rooms to maintain flow.
- Prep checklist
- Spray vs. roll plan
- Storage rotation
Common Painting Mistakes And Fixes
When you rush prep, pick the wrong finish, or skip proper tools, small errors quickly become obvious and costly. Knowing the common mistakes lets you fix them fast and avoid repeating them.
Identify common errors like poor color selection, inadequate surface preparation, and wrong application techniques.
Correct by sanding, priming, using proper tools, and choosing finish options that boost paint durability for long-lasting results.
Drying, Recoating, And Touch‑Up Checklist
1 clear checklist will keep your drying, recoating, and touch‑up work efficient and professional: monitor drying times, follow recoat guidelines, and note humidity effects so paint cures properly.
Use precise touch up techniques for blended patches and feathering edges.
- Wait recommended drying times before sanding or recoating
- Follow recoat guidelines for product type
- Use targeted touch up techniques for seamless repairs
Clean Up, Tool Care, And Store Leftovers
Wrap up the job the right way by cleaning tools immediately, storing leftover paint properly, and disposing of waste responsibly so your brushes, rollers, and cans stay usable for the next project. Use paint disposal methods recommended locally, label cans, and follow leftover storage solutions to prevent waste. Clean, dry, and hang tools.
| Item | Action | Tip |
|---|---|---|
| Brushes | Wash | Hang dry |
| Rollers | Rinse | Stand up |
| Cans | Seal | Label |
| Waste | Dispose | Local rules |
When To Hire A Pro: Costs And Complex Jobs
You’ve cleaned up and stored supplies so the project ends tidy, but some painting jobs are better left to pros—especially when costs, safety, or complexity rise.
Consider cost considerations and job complexity when deciding. Hire a pro if you face structural repairs, high ceilings or scaffolding, or intricate trim and finishes.
- Structural or moisture repairs
- High or hard-to-reach areas
- Detailed trim, murals, or specialty finishes
Frequently Asked Questions
How Do I Dispose of Old Lead‑Based Paint Safely?
You should test for lead first using certified lead testing, then hire pros for safe paint removal and containment. Don’t sweep or dry-sand; bag debris, label it, and follow local hazardous-waste facility rules for disposal.
Can I Paint Over Wallpaper Without Removing It?
About 70% of DIYers report better results when they remove wallpaper first. You can paint over wallpaper, but you’ll risk poor paint adhesion; for best results, do wallpaper removal or prep thoroughly to guarantee long-lasting coverage.
What Paint Finish Is Best for Children’s Rooms and Toys?
Satin or eggshell works best for children’s rooms and toys because they’re durable and washable; you’ll want low-VOC paints, non-toxic finishes, and safety tips like good ventilation, keeping kids away during application, and testing colors and durability first.
How Long Should I Wait Before Moving Furniture Back In?
Measure twice, move once: you should wait 24–48 hours for paint to dry to the touch, but respect full drying times of 7–30 days before full furniture placement to avoid sticking, scuffs, and trapped odors.
Are Low‑Voc Paints Truly Odorless and Non‑Toxic?
No — low‑VOC paints aren’t truly odorless or entirely non‑toxic, but they offer low VOC benefits: they’ll cut fumes and smells considerably, so you’ll breathe easier and reduce health risks compared with traditional paints.
Conclusion
You’ve got the roadmap: prep, paint, dry, and touch up—room by room. Keep your checklist handy, protect fixtures, and don’t skimp on primer or drying time. Measure carefully and buy a bit extra; “measure twice, cut once” applies to paint too. If a job feels beyond your tools or patience, call a pro. With care and a clear plan, you’ll transform your space and save time, money, and headaches.