How to Paint a Tin Ceiling Without Making a Mess
You can repaint a tin ceiling cleanly by prepping, containing, and working methodically: clear the room, tape heavy plastic sheeting over walls and floors, wear a respirator and goggles, scrub and dry the metal, sand lightly, treat rust, then apply a metal primer. Use a brush for crevices and a roller or sprayer for flats, work in thin overlapping coats to avoid drips, and clean spills immediately—keep going and you’ll find detailed steps, tips, and troubleshooting ahead.
How to Paint a Tin Ceiling Without Making a Mess Quick Answer
You can keep the job tidy by using low-splash paint, a fine-nap roller or an airless sprayer, and plenty of drop cloths and masking.
Wear goggles and a respirator, cover furniture and floors carefully, and work in small sections to control drips.
That way you’ll finish quickly and cleanly with minimal mess.
One-sentence summary of the safest, cleanest method
If you want the safest, cleanest result with minimal fuss, prime the tin with a bonding primer, cover floors and fixtures thoroughly, and spray or roll thin, even coats of a high-quality metal or enamel paint while wearing a mask and eye protection.
For how to paint a tin ceiling, prep carefully, use proper PPE, work in well-ventilated stages, and clean up drips immediately.
Basic Understanding What Is a Tin Ceiling and Why Special Preparation Matters
A tin ceiling is usually made of thin stamped metal — often steel or tin-plated steel — that can show rust, old paint, or lacquered finishes you’ll need to address before painting.
Because metal reacts differently than drywall, you’ll have to strip loose coatings, treat corrosion, and use metal-friendly primers so paint will stick and last.
The original finish (bare metal, lacquer, or enamel) also affects adhesion and may dictate primers or bonding agents you’ll choose.
What is a tin ceiling (materials and common conditions)
Tin ceilings are stamped metal panels—usually steel, tinplate, or sometimes copper or zinc—installed to mimic ornate plasterwork. They often show age through paint build-up, surface rust, dents, or loose seams that demand special prep before repainting.
You’ll also find variations in thickness, backing (plywood or lath), decorative relief depth, and prior coatings; knowing these helps you assess cleaning, rust treatment, and minor repairs.
Why tin ceilings require different prep and painting techniques
Because metal reacts and ages differently than drywall or wood, you’ll need specific prep and painting steps for a tin ceiling to get durable, attractive results.
You’ll remove old paint flakes, degrease surfaces, and address rust or dents before priming with a metal-friendly primer.
Using proper primers, thin coats, and low-pressure application prevents runs and guarantees lasting adhesion and finish.
Common finishes and how they affect paint adhesion
Many tin ceilings come with different factory or aftermarket finishes—bare metal, lacquer, enamel, or aged patina—and each changes how paint sticks and what prep you’ll need.
You’ll strip or scuff lacquer and enamel for adhesion, degrease bare metal and apply a rust inhibitor, and gently clean patina to preserve character while using a bonding primer.
Choose products rated for metal.
Tools, Materials, and Safety Gear You Need
Before you start, gather metal-safe primers and paints (we’ll compare oil and latex), plus the right applicators—brushes, rollers, or a sprayer depending on pattern detail and coverage.
You’ll also need cleaning supplies, sandpaper, rust treatments, and fillers to prep the surface properly.
Finally, make sure you’ve got PPE and room containment materials to protect yourself and the surrounding area.
Paints and primers recommended for tin (metal-safe, oil vs. latex)
When you’re prepping a tin ceiling, choosing the right primer and paint matters as much as your cleaning and sanding.
Use a metal-safe, rust-inhibiting primer—oil-based or bonding primer for bare or rusty tin.
For topcoat, choose high-quality acrylic latex for ease and flexibility, or oil-based enamel for durability and sheen.
Match primer and paint base for proper adhesion and longevity.
Brushes, rollers, sprayers and when to use each
Although a tin ceiling will accept several application methods, choosing between brushes, rollers, and sprayers comes down to the ceiling’s detail, your experience, and how much cleanup you’ll tolerate.
Use a small angled brush for crevices and trim, a low-nap roller for flat panels, and an HVLP or airless sprayer for fast, even coverage on large areas—mask thoroughly and practice first.
Cleaning supplies, sandpaper, rust treatments, and fillers
Once you’ve picked your application method, you’ll need the right cleaning supplies, sandpaper, rust treatments, and fillers to prepare the tin for paint.
Gather degreaser or trisodium phosphate, soft brushes, lint-free rags, 120–220 grit sandpaper, rust converter for flaky spots, metal filler or epoxy for holes, and a putty knife.
Test filler adhesion before priming.
Protective equipment and room containment materials ()
Before you start sanding or spraying, gear up and seal the room to protect yourself and the rest of the house.
You’ll need PPE and containment:
- NIOSH-rated respirator, goggles, disposable coveralls.
- Drop cloths, plastic sheeting, painter’s tape to seal vents and trim.
- Extension poles, ventilation fan, HEPA vacuum for cleanup.
Follow instructions and work methodically.
Quick Preparatory Checklist (before you start)
Before you start painting, check the ceiling for rust, loose or damaged tiles, and any old coatings that may need stripping or priming.
Lay out a dust- and paint-control plan—drop cloths, masking tape, and plastic sheeting—and make sure fixtures, furniture, and floors are protected while you set up ventilation.
Finally, estimate how much paint you’ll need and schedule the work so each coat has adequate drying time.
Assessing ceiling condition: rust, loose tiles, previous coatings
If the ceiling’s surface shows signs of rust, loose panels, or old paint, you’ll want to identify and document each issue before you start painting.
Check for flaking or bubbling paint, soft spots, and fastener failures. Note rust extent and any oil-based coatings that need primer.
Plan repairs: tighten or replace tiles, remove loose paint, treat rust, and sand for a stable, paintable surface.
Creating a dust- and paint-control plan (drop cloths, masking, plastic sheeting)
Once you’ve noted rust, loose tiles, and any peeling paint, set up a dust- and paint-control plan so repairs and painting don’t create a bigger mess.
Lay heavyweight drop cloths on surfaces, secure edges with low-tack tape, and drape plastic sheeting over vents and immovable items.
Mask trim and seams carefully; keep a trash bin and shop vacuum nearby for quick cleanup.
Ventilation and protecting fixtures, furniture, and floors
Because paint fumes and sanding dust can build up quickly in a closed room, make sure you plan ventilation and protect fixtures, furniture, and floors before you open any cans or start sanding.
You’ll want to:
- Open windows, run fans, and use a respirator for safety.
- Remove or cover light fixtures and tape edges.
- Lay heavyweight drop cloths and seal seams to protect floors and furniture.
Estimating paint quantity and timeline
With ventilation set and fixtures protected, you’ll want to figure out how much paint and time the job will take so you don’t run out mid-project.
Measure ceiling square footage, account for embossed pattern coverage, and check paint spread rate.
Plan for primer plus one or two topcoats.
Allocate drying time between coats and a buffer day for unexpected delays to finish confidently.
Step-by-Step Painting Process (Clean, Prime, Paint) Main How-To
Start by sealing off the room and protecting floors and furniture so dust and paint won’t spread.
You’ll then clean and degrease the tin, treat rust and patch any holes or loose panels, then lightly sand to roughen the surface for better adhesion.
Finish by applying a metal primer with proper technique and drying times before you paint.
Step 1: Safe room setup and containment
Before you touch a brush, prepare the room to protect yourself and everything below the ceiling: clear furniture from the workspace or move it to the center and cover with drop cloths, open windows or set up ventilation, and tape plastic sheeting or contractor paper along the walls and doorways to contain dust, primer mist, and paint.
Wear a respirator, goggles, and gloves; cover floors with weighted drop cloths.
Step 2: Cleaning the tin ceiling (degreasing and removing chalky residue)
Scrub the tin ceiling thoroughly to remove grease, dust, and chalky paint residue so the primer will bond properly.
Use a mild degreaser diluted per label, a soft-bristle brush, and a microfiber cloth. Rinse with clean water, wring cloths often, and let surfaces dry fully.
Test a small area to guarantee all chalkiness is gone before priming.
Step 3: Rust treatment and patching holes or loose panels
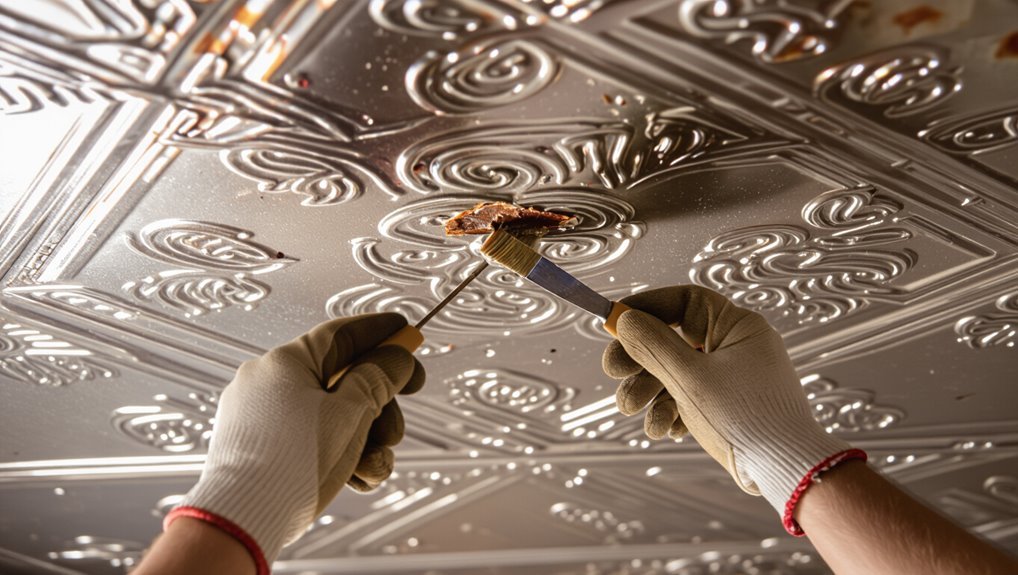
Now you’ll address any rust, holes, or loose panels so the paint goes on smooth and lasts.
Scrape flaky rust with a wire brush, vacuum debris, and apply a rust converter to stubborn spots.
Patch holes with metal filler or epoxy, pressing a thin patch underneath if needed.
Tighten or re-secure loose panels with screws or clips, ensuring seams sit flush before priming.
Step 4: Light sanding and surface roughening for adhesion
Lightly sand the tin to give the primer something to bite into — a quick scuff, not a full strip, is all you need.
Use 220–320 grit sandpaper or a non-woven abrasive pad, working gently along patterns to avoid flattening details.
Wipe away dust with a tack cloth or damp rag, and make sure panels are dry and free of debris before you move to priming.
Step 5: Applying metal primer (technique, drying times)
Begin by choosing a rust-inhibiting, adhesion-promoting metal primer formulated for tin or steel—oil-based or a high-quality acrylic bonding primer work well—and stir it thoroughly before use.
Apply thin, even coats to avoid drips, keeping a wet edge. Follow manufacturer drying times—typically 1–4 hours between coats for acrylic, longer for oil.
Allow full cure before topcoating, usually 24–48 hours.
Step 6: Choosing application method: brush, roller, or spray (pros/cons)
With your primer cured, pick the application method that matches your ceiling’s texture, workspace, and comfort level:
| Method | Best for |
|---|---|
| Brush | Detail, corners |
| Roller | Flat panels, speed |
| Spray | Deep relief, fast |
| Combo | Control and coverage |
Choose based on detail versus speed, ventilation, overspray risk, and your steady hand.
Step 7: Applying paint coats (sequence, overlap, wet edge tips)
Start by planning your paint sequence so you keep a wet edge and avoid lap marks: work in small sections across the ceiling, cutting in corners and edges first with a brush, then roll or spray each panel before the edge dries, overlapping each pass by about 50% to guarantee even coverage.
Maintain consistent pressure and speed, feather edges, allow manufacturer’s dry time, and apply a second coat only when the first is fully set.
Step 8: Touch-ups, edge cleanup, and removing masking without drips
Once the paint’s dry to the touch and you’ve inspected the ceiling from several angles, do your touch-ups and edge cleanup while masking is still in place to catch stray drips.
This lets you fix thin spots, smooth roller marks, and sharpen lines without spreading fresh paint onto surrounding surfaces.
Use a small brush for edges, wipe runs with a damp cloth, wait, then remove tape slowly at a 45° angle.
Painting Techniques to Minimize Mess
When you spray indoors, mask off surrounding areas and use a fine-tip nozzle and low pressure to cut overspray.
Use roller and brush techniques—short, controlled strokes and a well-loaded brush—to minimize splatter, and set up containment with plastic sheeting and a fan creating slight negative pressure while sanding.
Work from stable scaffolding or with extension poles on secure footing so you don’t drop tools or paint.
Best practices for spraying indoors without overspray
Although spraying saves time, you’ll need tight control and preparation to avoid overspray indoors.
Seal vents, light fixtures, and adjacent walls with plastic and painter’s tape. Use a fine-tip nozzle, low pressure, and short bursts while keeping the gun perpendicular to the ceiling.
Work in small sections, ventilate with fans, and wear a respirator and eye protection to protect finishes and yourself.
Roller and brush techniques to reduce splatter
Because tin ceilings show every drip, you’ll want to control your roller and brush strokes to prevent splatter and runs.
Use a low-nap roller and load it lightly, rolling slowly in one direction.
Hold brushes at a shallow angle, tap off excess paint, and work in small sections.
Finish with gentle, overlapping strokes to smooth edges and avoid flicking paint.
Containment and negative-pressure tips for dust control during sanding
If you’re sanding a tin ceiling, set up containment and negative pressure before you touch the surface to keep dust out of the rest of the house.
Seal doorways and vents with plastic sheeting and painter’s tape. Run a HEPA-filtered shop vacuum or negative-air machine exhausting outside.
Work in small sections, wipe surfaces with damp cloths, and change filters frequently to maintain suction and clean air.
Using extension poles and scaffolding safely to avoid drops
When you’re painting a tin ceiling, use extension poles and scaffolding that keep your hands free and your balance steady so you won’t drop tools or paint cans; secure pole attachments, lock scaffold braces, and test stability before climbing.
Wear a tool belt, tether small items, and use paint trays that clip to poles.
Move scaffolding on level ground, work with a partner, and inspect gear regularly.
Common Problems, How to Fix Them, and How to Avoid Them
You’ll run into a few common issues when painting a tin ceiling—peeling or flaking paint, runs and drips, visible seams or texture changes, and rust that comes back.
For each problem you’ll need a specific fix (proper surface prep and primer for peeling, scrape and feather plus recoat for runs, blending techniques for seams, and rust treatment plus rust-inhibiting primer for corrosion).
I’ll walk you through how to correct each one and how to prevent them before they start.
Problem: Paint peeling or flaking causes and remedies
Peeling or flaking paint on a tin ceiling happens because the metal’s smooth surface, old coatings, moisture, or poor prep keep new paint from bonding properly.
Scrape loose paint, clean with a degreaser, sand lightly for tooth, and apply a metal primer.
Fix leaks, control humidity, and use compatible paint.
Repaint only after surfaces are fully dry and properly primed.
Problem: Runs, drips, and sags corrective steps
Catch drips early—runs, drips, and sags happen when paint’s too heavy, the surface is tilted, or you apply coats too thickly.
Smooth fresh runs with a wet brush, feathering edges immediately. If dried, sand lightly, wipe clean, prime bare spots, then repaint thin, even coats.
Use a steady hand, proper nozzle or brush, and work against gravity to prevent repeats.
Problem: Visible seams or texture changes blending solutions
1 common problem with tin ceilings is visible seams or mismatched texture where panels meet; they stand out when paint highlights differences in sheen, embossing depth, or leftover old paint.
To fix this, sand and feather edges, fill gaps with thin metal-appropriate filler, prime junctions, and use a microtexture roller or thin glaze to match pattern.
Prevent by prepping thoroughly.
Problem: Rust reappearing prevention and long-term treatment
When you remove surface rust and paint a tin ceiling, tiny corrosion spots can still come back if moisture or old rust residues remain.
So you need a treatment plan that both halts existing corrosion and prevents its return. After cleaning, apply a rust converter, prime with a metal-specific primer, and use a rust-inhibiting topcoat.
Control humidity and inspect annually to catch recurrence early.
Best Practices and Maintenance After Painting
Let paint cure fully before you rehung light fixtures or decorations—follow the manufacturer’s recommended times to avoid smudges or adhesion failures.
Clean the tin ceiling gently with a soft cloth and mild cleaner to preserve the finish, and avoid abrasive tools or harsh chemicals.
Watch seasonal humidity and temperature changes, since moisture and extreme swings can affect paint adhesion and long-term durability.
Curing times and when to rehang fixtures
Though the paint may feel dry to the touch within a few hours, you should wait for full curing before rehanging light fixtures or heavy décor to avoid smudges, adhesion failures, or trapped moisture.
Wait at least 7–14 days for latex, 24–72 hours for fast-curing enamels, and up to 30 days for oil-based finishes.
Test small areas before mounting.
Cleaning and maintenance to preserve finish
A regular, gentle cleaning routine will keep your tin ceiling looking fresh and protect the paint finish from dirt, oils, and humidity-related damage.
Dust monthly with a soft brush or microfiber cloth.
For stains, use a mild detergent diluted in water and a nonabrasive sponge; rinse and dry promptly.
Touch up chips with matching paint and inspect seams for corrosion or loose panels.
Seasonal and humidity considerations for longevity
After you’ve cleaned and touched up paint, think about how seasons and humidity will affect the ceiling over time.
You’ll want to monitor moisture sources, use dehumidifiers in summer, and guarantee attic ventilation in winter to prevent condensation and rust.
Reapply rust-inhibiting primer where needed, inspect seals after storms, and address peeling quickly to maintain finish and avoid costly repairs.
Cost, Time, and When to Hire a Pro
Expect a DIY paint job on a tin ceiling to take a weekend and cost mostly for primer, paint, and supplies, while hiring a pro adds labor but speeds completion and covers prep, repairs, and safety.
You should call a professional if panels have complex damage, you’re working at high ceilings, or the tin has ornate panels that need careful restoration.
We’ll compare rough estimates and show practical signs that a pro is worth the cost.
Rough cost and time estimates for DIY vs. professional job
You can save a lot by doing the job yourself, but plan for time, materials, and elbow grease—DIY painting a tin ceiling typically runs $50–$200 in supplies and 6–12 hours of work for a single room, while hiring a pro usually costs $300–$1,200+ and takes a few hours to a day depending on access and detailing.
| Option | Cost | Time |
|---|---|---|
| DIY | $50–$200 | 6–12 hrs |
| Pro | $300–$1,200+ | Few hrs–1 day |
| Hybrid | $100–$600 | 4–12 hrs |
Signs you should hire a pro (complex damage, high ceilings, ornate panels)
Saving money with a DIY approach makes sense for many rooms, but some situations really call for a professional.
If your tin has structural dents, rust-through, or loose panels, or the ceiling sits very high or over stairs, hire a pro.
Intricate embossed panels need careful restoration and masking that pros handle faster and safer, avoiding costly mistakes and scaffolding hazards.
Frequently Asked Questions
You probably have practical questions like whether you can spray-paint a tin ceiling in an occupied home, if sanding is always required, and what color and sheen work best.
You’ll also want to know how long paint holds up before touch-ups and whether you can paint over rusted panels instead of replacing them.
I’ll answer each of these clearly so you can decide what’s safe and effective for your space.
Can I spray-paint a tin ceiling in an occupied home?
Worried about spraying a tin ceiling while people are home? You can, but take precautions: evacuate pets and sensitive occupants, seal off rooms and HVAC vents, and run ventilation fans or use a respirator.
Choose low-VOC paint and fine-filter masking. Test a small area first.
Schedule work when fewer people are present and limit odor exposure by airing out the space afterward.
Is sanding always necessary on old tin ceilings?
Sometimes you do, but not always: whether you need to sand an old tin ceiling depends on its condition and the finish you’re applying.
If paint is flaking, rusted, or glossy, sand to remove loose material and dull the surface for adhesion.
If it’s sound, lightly clean and prime with a bonding primer.
Always remove dust before painting.
What paint color and sheen work best for tin ceilings?
If the ceiling’s surface is sound and prepped, pick a color and sheen that highlight the tin’s pattern without overwhelming the room.
Go with soft neutrals or muted pastels to keep focus on texture. Use satin or semi-gloss for durability and light reflection; eggshell can work in low-moisture areas.
Avoid high-gloss unless you want a dramatic, reflective finish that shows every imperfection.
How long does painted tin last before needing touch-up?
How long a painted tin ceiling will go before needing a touch-up depends on paint quality, surface prep, and room conditions; with good prep and a durable satin or semi-gloss paint you can expect 7–15 years of low-maintenance finish in normal indoor environments.
High-traffic or humid rooms shorten that span.
Inspect annually for chips, flaking, or stains and spot-treat small areas promptly to avoid larger repairs.
Can I paint over rusted tin without replacing panels?
Because rust can keep spreading beneath paint, you shouldn’t just slap a coat over flaky metal and expect it to hold — but you can often paint rusted tin without replacing panels if you remove loose rust, treat the surface, and prime with a rust-inhibiting product first.
After sanding and wire-brushing, apply a rust converter where needed, wipe clean, prime, then use a metal-specific paint for lasting protection.
Visual Guide and Quick Reference ()

You’ll find before-and-after photos and a simple diagram showing how to set up containment so you can see results and protect the room.
Use the quick checklist printable on painting day to keep tools, safety gear, and drying times on track.
Keep these visuals handy so you can move efficiently and avoid common mistakes.
Before-and-after photos and containment setup diagram
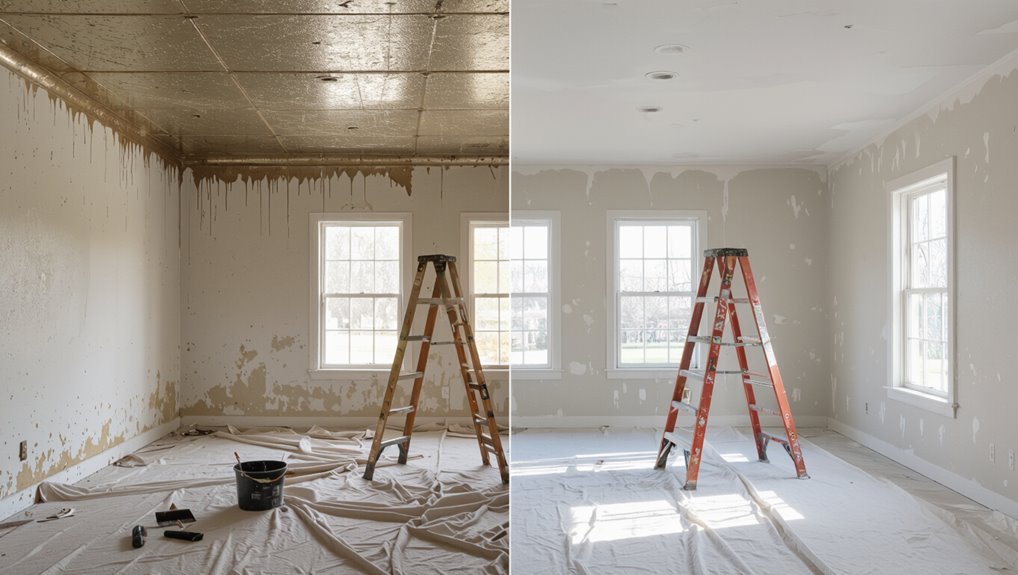
Before-and-after photos give you a clear benchmark of progress, and a simple containment setup diagram shows how to protect furniture and airflow while you work.
Photograph from multiple angles before priming, label images, and note lighting.
Sketch a floor plan showing drop cloths, taped seams, plastic sheeting, and fan placement for exhaust.
Keep the diagram visible while you paint.
Quick checklist printable for day-of painting ()
A one-page checklist keeps your tin-ceiling day on track: print it, pin it where you can see it, and use it as a quick visual guide and reference while you work.
Use this compact list to stay efficient and tidy:
- Prep: cover, tape, remove fixtures.
- Prime: spot-prime and let dry.
- Paint: steady strokes, check for drips, clean up.