
How to Paint Bubbles in Watercolor for Realistic Effects
Start with a light circle sketch and damp paper, then lay pale, transparent washes to suggest refraction and reflected color. Lift highlights with a clean brush or masking fluid, add a soft core shadow opposite the highlight, and glaze thin cool or warm tints for depth. Vary sizes, overlap edges for clusters, and keep edges controlled—sharp highlights on front bubbles, softer edges behind. Finish with crisp white sparkles and subtle cast shadows; keep going to learn layering, glazing, and problem fixes.
Quick Step-by-Step: Paint a Watercolor Bubble
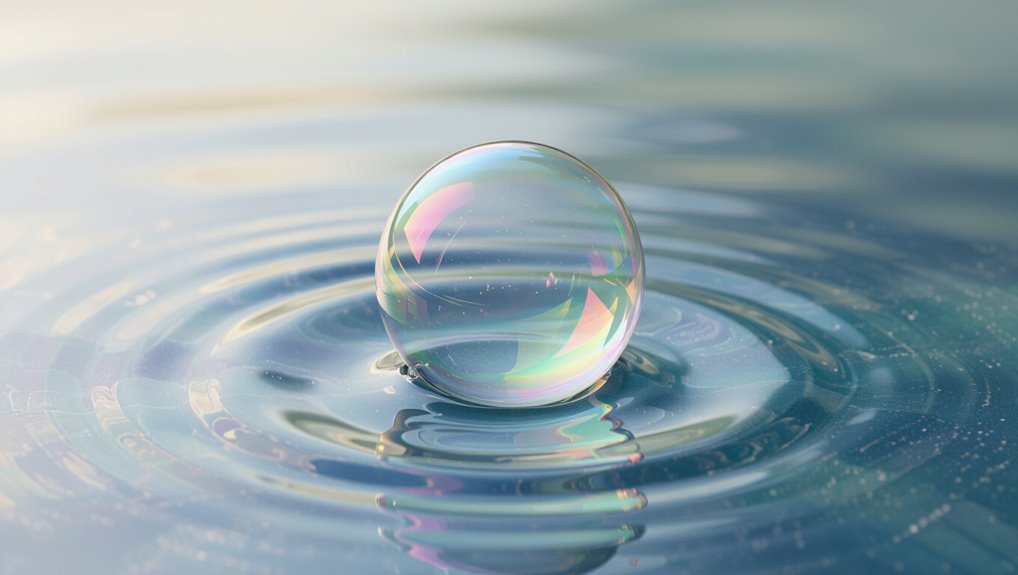
Start by sketching a light circle to establish the bubble’s shape and position.
Wet the paper slightly, drop in pale washes, lift highlights with a clean brush, and add soft edge shadows to indicate roundness.
Vary bubble shapes and sizes, glazing thin hues guided by color theory to suggest reflections.
Mix bubble shapes and sizes, glazing thin, color-theory–led hues to suggest shimmering reflections.
Finish with crisp white highlights and subtle cast shadows for depth.
What Makes Bubbles Look Real in Watercolor
A believable watercolor bubble hinges on three visual cues: transparency, reflected color, and convincing light.
You’ll study bubble anatomy—thin edge highlights, subtle core shadows, and rim glare—to suggest form.
Use soft washes for light refraction, tiny color shifts from surroundings, and crisp white accents for specular highlights.
Control contrast and edges so each bubble reads as delicate, clear, and luminous.
Supplies: Paper, Brushes, Paints for Watercolor Bubbles
Three essentials—paper, brushes, and paints—determine whether your watercolor bubbles read as delicate, transparent forms or muddy, lifeless blobs.
Choose heavyweight, cold-pressed or hot-pressed paper types for reliable lift and bloom control.
Use varied brush sizes—rounds from tiny detail to larger washes—to lay edges, glazes, and soft blends.
Select transparent pigments and a neutral gray for subtle tints.
Look Closely: Highlights, Core Shadows, and Reflections
Look closely at each bubble to place the bright highlight where the light hits most directly, since that tiny white spot sells the form.
Define the core shadow beneath the highlight to give the bubble weight and curvature.
Notice and paint the faint reflected colors from nearby objects so the bubble reads as part of its environment.
Placement Of Bright Highlights
Start by locating the brightest highlights first, since they anchor the bubble’s form and tell you where light hits most directly. You’ll judge highlight intensity and refine highlight placement to sell roundness. Place tiny crisp whites where light concentrates, soften edges outward, and keep surrounding colors light.
| Spot | Edge | Reflection |
|---|---|---|
| Bright | Soft | Mirror |
Defining Core Shadow
After you’ve locked in the highlights, shift your attention to the core shadow that gives the bubble its volume: this is the darkest band opposite the highlight where light bends around the sphere and pigments compress.
You’ll use delicate core shadow techniques—soft edges, graded washes, subtle glazing—to suggest depth and curvature.
Observe light interaction closely and adjust pigment intensity for believable, three-dimensional results.
Capturing Reflected Colors
When you study a bubble closely, you’ll see its surface acting like a tiny mirror that borrows and bends nearby colors; capturing those reflected hues is what makes the bubble read as part of its environment.
Observe adjacent colors, then use subtle glazing and careful color mixing to suggest tiny swirls and sharp highlights.
Let edges stay soft where light diffuses, crisp where reflections concentrate.
Set Up References and Thumbnail Sketches
Before you lift a brush, gather clear photo references and make quick thumbnail sketches to lock in composition and lighting.
Use reference images for visual inspiration, note size comparison and bubble shapes, and test color studies sparingly.
Try varied sketch techniques and thumbnail variations to solve composition planning, edge placement, and focal points so your watercolor process starts efficient and confident.
Mix Colors for Transparency and Subtle Reflections
If you want bubbles to read as delicate, transparent forms, mix very dilute washes and layer thin glazes to build subtle reflections and depth.
You’ll practice color mixing with muted ultramarine, quinacridone, and pale yellow, glazing slowly to retain luminosity.
Use lifting and soft edges for highlights, vary pigment strength, and apply transparency techniques to suggest internal color shifts without heavy outlines.
Prepare Paper and Control Washes for Crisp Edges
Pick a heavyweight, cold-press paper so your washes sit cleanly without buckling.
Use masking fluid or frisket to preserve highlights and taping for sharp margins, and learn simple resist tricks to keep edges crisp.
Pay close attention to your water-to-paint ratio and blot excess to control bloom and feathering.
Choose the Right Paper
Paper matters — you’ll get cleaner edges and better control with a heavyweight, 100% cotton watercolor paper that resists buckling and lets you lift pigment without pilling.
Choose paper weight around 300gsm (140lb) or heavier for smooth handling. Match paper texture to your style: cold-pressed for subtle texture, hot-pressed for smooth details.
Stretch or tape edges to keep washes flat.
Masking And Resist Techniques
Start by planning where you want your highlights and crisp bubble edges, then use masking and resist techniques to protect those areas before laying in washes. You’ll apply masking fluid for negative space, use wet on dry and dry brush techniques, and build layering methods for texture variation and transparency effects. Focus on edge control, color blending, light direction, bubble shapes, dynamic compositions, color harmony.
| Purpose | Technique |
|---|---|
| Protect highlights | Masking fluid |
| Crisp edges | Wet on dry |
| Texture | Dry brush techniques |
| Harmony | Layering methods |
Control Your Water Levels
While you’re planning washes, control your water so paint stays where you want it—too much and edges bleed, too little and washes look patchy.
You’ll prepare paper by pre-wetting selectively, test wash consistency on scrap, and work from light to dark.
Maintain water control with a damp brush and blotting cloth, adjusting pigment ratio so edges stay crisp and bubbles retain shape.
Preserve Highlights: Masking vs. Negative Painting
When you want to keep the bright, glassy highlights of bubbles intact, you can either mask them off or paint around them with negative painting—each method gives you different control over edges and timing.
Use masking techniques for crisp, untouchable highlights; remove masks before glazing.
Use negative painting to define highlights by surrounding tones, working wet-on-dry for precision and planning your layer order carefully.
Wetting Techniques for Soft Edges and Halos
After you’ve decided whether to mask or use negative painting for highlights, control of moisture becomes the next decisive factor for soft edges and halos. You’ll use wetting techniques, precise brush control and water application to shape halo effects and soft edges. Practice layering methods, blending techniques and controlled washes to manage edge definition and atmospheric effects.
| Tool | Purpose |
|---|---|
| Mop brush | Wetting, soft edges |
| Rigger | Controlled washes |
| Sponge | Blending techniques |
Paint the Rim, Core Shadow, and Cast Shadow
Because the rim, core shadow, and cast shadow define a bubble’s form and placement, you’ll paint them with deliberate edges and graduated values to sell the illusion of translucency.
Start by lifting tiny highlights along rim details, then add a soft-edged core shadow opposite the light.
Finally, place a faint, crisp cast shadow on the surface using subtle shadow techniques to anchor the bubble.
Watercolor Glazing to Build Depth Without Mud
Now that the rim, core shadow, and cast shadow are in place, you can build depth without muddying colors by glazing—applying thin, transparent washes over dry layers so each tint reads clearly.
Use glazing techniques with restrained pigment, drying between passes. Favor cool over warm glazes sparingly, and plan layering strategies to preserve luminosity, controlling value and edge softness for convincing, crisp bubble form.
Add Reflected Colors to Sell Transparency
While you keep glazing to a minimum, introduce subtle reflected colors to convince the eye that the bubble is transparent and sitting in a real environment.
Use color theory and observe light interaction nearby. Apply small, cool edges, warm hints, and faint background tints.
- Sample surroundings
- Mix muted tones
- Keep values light
- Blend edges subtly
Lift and Correct Highlights for Brighter Whites
If highlights look dull or muddied, lift paint gently to restore bright whites and sharpen the bubble’s sparkle. You’ll use highlight techniques like soft lifting with a clean damp brush, paper towel blotting, or tiny gouache touches. Practice correction methods to avoid halo edges.
| Tool | Action | Result |
|---|---|---|
| Brush | Lift | Brighter |
| Towel | Blot | Cleaner |
| Gouache | Paint | Crisp |
Paint Groups of Bubbles: Overlap and Depth Cues
When you paint groups of bubbles, let some edges overlap so they read as a cluster rather than isolated spheres.
Use slightly darker values where bubbles sit behind others to push them back in space.
Keep highlights crisp on the front-most bubbles to sell the depth.
Overlapping Edges
Because bubbles rarely float alone, you’ll need to paint them in groups and let their overlapping edges do the work of suggesting depth.
Use subtle overlapping reflections and respect bubble transparency so edges read clearly.
Follow these steps:
- Paint nearest edges crisp.
- Soften edges behind.
- Keep highlights continuous.
- Let thin washes show through adjoining forms for believable overlap.
Depth Through Value
Contrast guides the eye, so you’ll use value to push some bubbles forward and tuck others back—darker, slightly warmer edges and stronger midtones read closer, while lighter, cooler washes and faint edges recede.
Paint grouped bubbles with clear value contrast: deepen overlaps, soften distant forms, and reduce detail.
Use atmospheric perspective—cooler, lighter tones for far bubbles—to suggest space and layered depth.
Fix Common Mistakes Quickly
If a wash goes muddy or a bubble loses its crisp edge, you can often correct it without starting over.
Spot clean with a damp brush, lift pigment while paper’s damp, glaze subtle colors after drying, and redefine highlights with opaque white or clear paper.
Common pitfalls are overworking; keep these quick fixes handy and act promptly.
- Blot
- Lift
- Glaze
- Re-highlight
Practice Exercises and Mini Demos
When you’re ready to build skill and confidence, work through short, focused exercises that isolate each step of bubble painting—wetting the paper, dropping pigment, lifting highlights, and glazing edges—and repeat them at different scales and pigment strengths.
Practice drawing varied bubble shapes, quick value studies, and tiny demos of color blending. Time yourself, note results, and rerun weaker steps until they improve.
When to Simplify or Stylize for Speed and Composition
When you’re short on time or need a clear focal point, simplify bubble shapes and highlights so they read at a glance.
If you want to indicate movement or energy, stylize with elongated forms, blurred edges, or streaked reflections to convey motion.
Balance the two—use simplification for readability and stylization to boost dynamism.
Simplify For Readability
Use a few clear shapes and simple edges so your bubbles read instantly on the page; you’ll get more impact and faster results by suggesting details instead of painting every highlight and ripple.
You’ll rely on bubble anatomy and color theory to indicate form. Simplify by choosing:
- One clear edge
- Minimal highlights
- Soft shadow wash
- Limited palette to unify composition
Stylize To Convey Motion
You’ve pared bubbles down to clear shapes and few marks; now push those same choices to indicate motion. You simplify bubble shapes and tweak highlights, suggesting motion dynamics with streaks, blur, or offset rims. Choose economy for speed and composition: a trio, a sweep, a scatter.
| Sweep | Trio | Scatter |
|---|---|---|
| Streak | Hue shift | Blur |
| Offset rim | Size gradation | Drip |
Frequently Asked Questions
How Do I Photograph Bubbles for Accurate Reference Lighting?
You’ll arrange bubble shapes against a neutral background, vary lighting angles with side, back, and top lights, use diffusers and reflectors, shoot at different exposures, and capture close-up highlights and refractions for accurate reference lighting.
Can I Use Masking Fluid for Tiny Bubble Highlights?
Yes: you can—though tiny masking fluid dots can feel clumsy compared to lifting; use masking fluid for crisp bubble highlights, then lift soft edges with a damp brush to juxtapose sharp gleams against gentle washes for realism.
Are Synthetic Brushes Okay for Glazing and Lifts?
Yes — you can use synthetic brushes for glazing and lifts; synthetic vs natural matters for snap and absorbency, but synthetics handle glazing well. Take care with brush care: clean thoroughly, reshape tips, and store dry to preserve performance.
How Do I Adapt Techniques for Gouache or Acrylics?
You adapt watercolor bubble methods by using gouache techniques for opaque highlights and reworking, and acrylic layering for fast builds and glazing; you’ll block shapes, layer opacities, lift selectively, and finish with crisp white accents for realism.
How Long Should Layers Dry Between Glazes?
You should wait 10–30 minutes for thin layers, longer for thicker washes; make certain layer drying before glazing techniques so pigments don’t lift. For heavy or humid conditions, pause 1–2 hours or fully dry overnight for safest results.
Conclusion
You’ve learned the small alchemy that turns wet pigment into shimmering spheres. Picture lifting a brush like a wand, laying down a pale crescent, then softening shadows until a bubble breathes on the page—weightless, cool, and almost singing. Keep watching how light bends and overlaps, practice quick sketches like catching soap in sunlight, and soon your bubbles will float off the paper with believable, gleaming joy.
