
How to Paint Crown Molding Without Tape and Still Get Clean Lines
You can get clean crown-molding lines without tape by using a steady angled sash brush, sanding and priming first, then cutting a precise primer edge and painting with small, controlled, feathered strokes. Work in short sections, keep a damp cloth and small brush for immediate touch-ups, and use thin coats—sand lightly between them if needed. Secure your ladder and drop cloths, use low-VOC paint for comfort, and keep going to learn pro tricks and timelines.
How to Paint Crown Molding Without Tape : Quick Step-by-Step
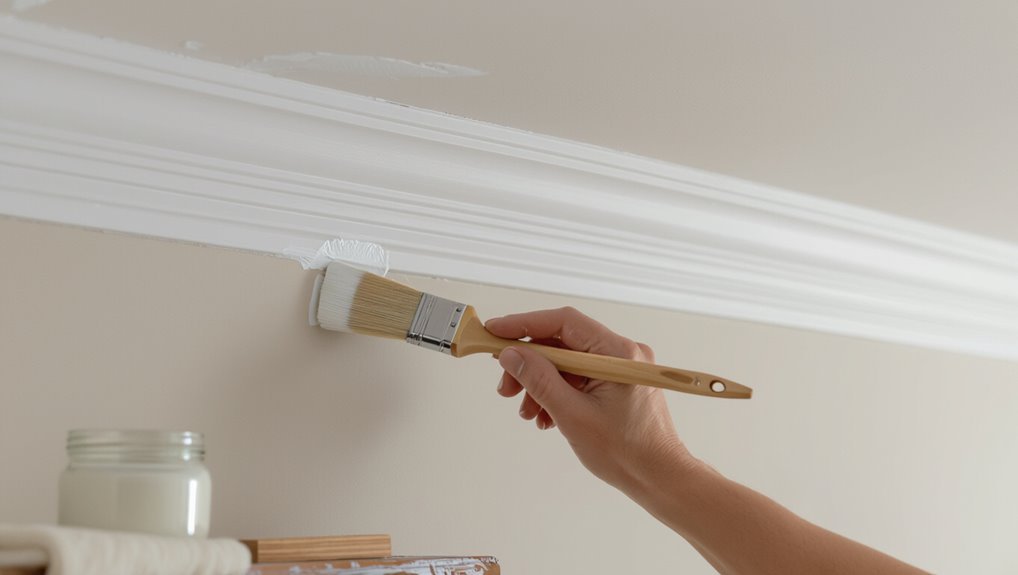
Grab a steady angled brush and get ready—painting crown molding without tape is faster than you think if you use the right technique.
You’ll prep surfaces, sand lightly, and cut an accurate primer edge. Use steady wrist motions, small controlled strokes, and feather edges for clean paint application.
Work in short sections, check lines under good light, and correct mistakes immediately for sharp crown molding techniques.
Why Skip Tape: Benefits and Trade-Offs
Why skip tape? You save time and avoid sticky residue while still getting precise edges if you use proper painting techniques.
You’ll trade cushioning for skill—careful brush control, steady angles, and quick corrective moves. Tape alternatives can help in tricky spots, but expect a learning curve.
If you value speed and fewer materials, going tape-free is a smart choice.
Tools You Need for Tape-Free Crown Molding
You’ll need a few key tools to get clean, tape-free edges: a high-quality angled brush for control in tight corners, a steady-edged sash brush for long runs, a small trim brush for touch-ups, a light-load roller or mini-roller for flat surfaces, and a good-quality, easy-drip paint.
Add a comfortable ladder, a bright work light, fine-grit sanding block, and a tray. Choose brush types and paint finishes that suit sheen and surface for durable, neat results.
Best Brushes for Cutting In Crown Molding
With your tools set and the work area prepped, choosing the right brushes for cutting in makes the rest of the job far easier.
Pick firm, tapered best synthetic brushes that hold paint and keep a crisp edge. Choose sizes 1–2 inches for detail and broader ones for longer runs.
Follow simple brush maintenance tips: clean promptly, reshape bristles, and store flat.
Angled Sash vs. Trim Brush: When to Use Each?
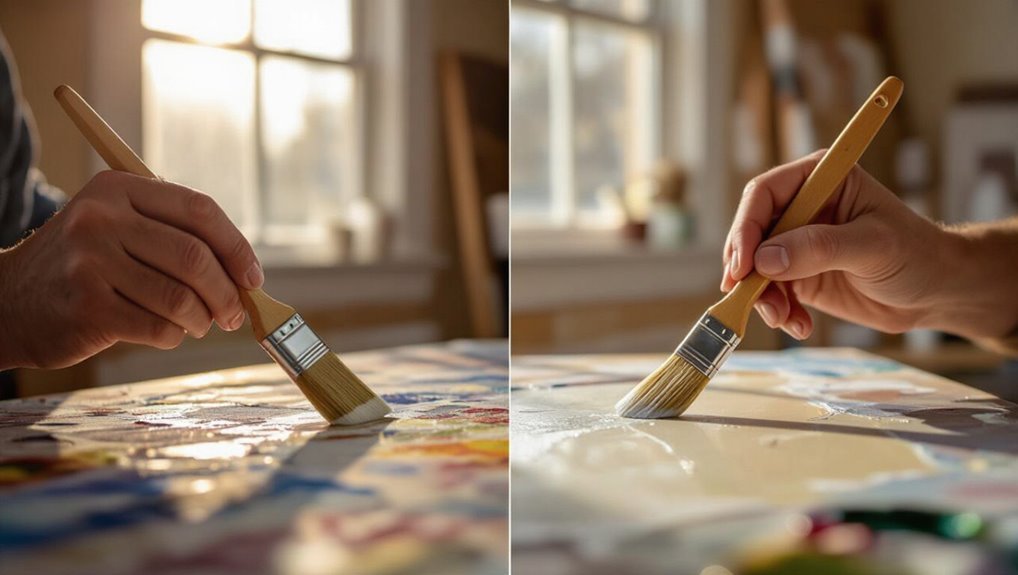
Sometimes the choice comes down to the cut you need: an angled sash brush gives you a sharp, controlled edge for tight corners and window-like profiles, while a straight-trim brush (often called a trim brush) covers broader runs and smooths flat surfaces faster.
You’ll weigh angled sash considerations for control and trim brush techniques for speed; pick based on profile and reach.
Brushes for Ornate Profiles and Tight Detail
If you need to move from broad runs to intricate curves, swap into smaller, more precise tools that follow the profile instead of skimming it.
You’ll want brushes that nip into ornate profiles and capture tight detail without drag.
- 1/2″ sash brush for corners
- Angular sash for contours
- Round liner for grooves
- Mini foam for flat nooks
- Stubby filbert for sculpted edges
Trim Paint Types That Give the Cleanest Lines
Pick a paint that dries hard, levels smoothly, and resists brush marks—those qualities give you the sharpest edges on crown molding. Choose trim paint brands with reliable finish durability; you’ll prefer acrylic-enamel or waterborne alkyd for crisp lines. Test small areas, thin coats, and light brushing.
| Type | Benefit |
|---|---|
| Acrylic-Enamel | Durable finish |
| Waterborne Alkyd | Smooth leveling |
| Oil-Based | Toughness |
| Hybrid | Quick dry |
Choosing Sheen: Molding vs. Ceiling
When deciding sheen, think of the molding as an accent and the ceiling as the background: choose a higher sheen for molding to highlight its profile and a flatter sheen for the ceiling to mask flaws and reduce glare.
You’ll match sheen selection to molding materials and room light, balancing durability and subtlety.
- Semi-gloss for painted wood
- Satin for MDF
- Eggshell for textured ceilings
- Flat for flaws
- Consider light levels
Picking Durable Trim Paint for Crown Molding
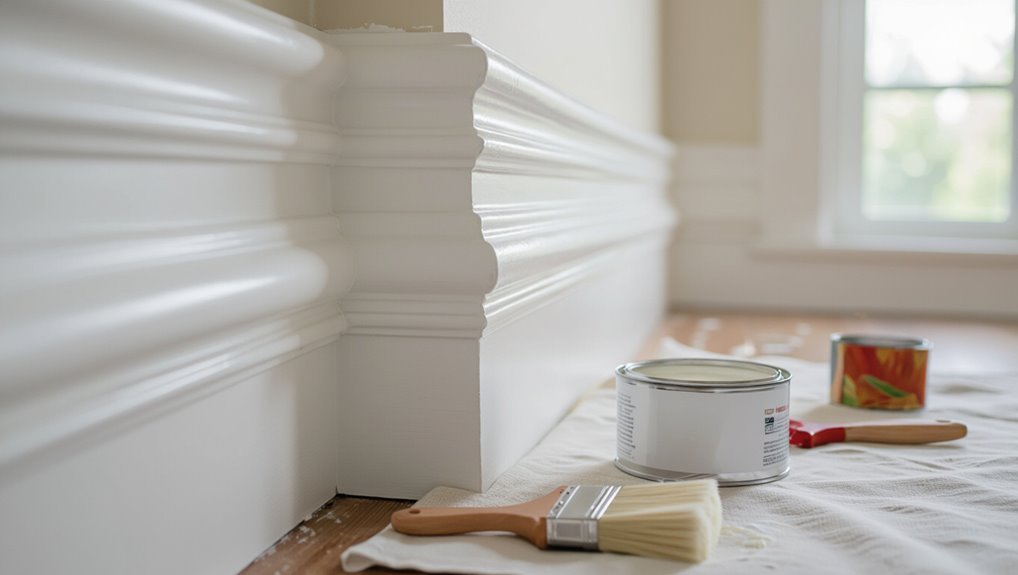
How do you choose a trim paint that stands up to scuffs and keeps your crown molding looking sharp?
Pick a high-quality acrylic or hybrid enamel offering durable finishes and easy touch-ups.
Choose a premium acrylic or hybrid enamel for a tough, touch-up friendly trim finish that stays sharp and durable.
Prioritize stain resistance and washability for busy halls.
Balance sheen with room lighting during color selection, testing swatches on trim.
You’ll get lasting, crisp edges without frequent repainting.
Clean and De-Grease Crown Molding First
Before you paint, remove dust from the crown molding with a soft brush or vacuum to prevent bumps in the finish.
If there’s grease or grime, wipe the trim with a suitable solvent, following product instructions and ventilation guidance.
Rinse any residue with clean water and let the molding dry completely before priming or painting.
Remove Dust First
1 essential step is to remove dust and grease from the crown molding so paint will stick evenly; start by using simple dust removal techniques with proper cleaning supplies, and work methodically along seams and corners so paint adheres cleanly.
- Vacuum with brush attachment
- Microfiber wipe-downs
- Soft-bristle brush for crevices
- Tack cloth for final pass
- Inspect under light for missed dust
De-Grease With Solvent
After you’ve removed loose dust, tackle any grease or grime so paint will bond properly.
Choose solvent types like mineral spirits for oil-based residues or isopropyl alcohol for light oils. Test first in an inconspicuous spot.
Apply with a clean cloth, using gentle de greasing methods—wipe along molding contours, changing cloths as they soil.
Don’t oversaturate; you’ll avoid residue.
Rinse And Dry Thoroughly
Wipe the molding with a clean, damp cloth to remove any solvent and loosened dirt, then rinse again with fresh water so no residue is left to interfere with adhesion; you want the surface visibly clean and tack-free.
You’ll use simple cleaning methods and effective drying techniques to guarantee paint bonds.
- Microfiber cloths
- Warm water rinse
- Mild detergent
- Gentle air drying
- Light towel patting
How to Sand Molding for Paint Adhesion
Start by inspecting the molding for old gloss, dirt, or loose paint—sanding works best on a clean, dry surface.
Use sanding techniques like 120-grit to dull gloss, then 220-grit for a smooth finish.
Sand along grain and in crevices with a foam pad or folded sandpaper.
Wipe dust with a tack cloth to guarantee maximum paint adhesion before priming and painting.
Repair Dents and Gaps Before You Paint
Patch visible dents and fill gaps so your crown molding looks seamless and the paint holds up.
You’ll use simple repair techniques: clean the area, apply wood filler or caulk for gap filling, sand smooth, and recheck profiles before painting. Quick, precise fixes prevent paint failures and keep lines sharp.
- Clean surface
- Apply filler
- Smooth/sand
- Reinspect profile
- Touch-up edges
Priming Crown Molding: When and How
Once your dents are filled and the profile matches, prime the molding to seal repairs and create a uniform surface for paint to adhere to.
You should prime when bare wood, filled areas, or stains are exposed. Use stain-blocking primer and light sanding between coats.
Good priming techniques guarantee even paint application, improve adhesion, and reduce required topcoats, saving time and preventing bleed-through.
Masking Alternatives to Tape (Edge Guards, Shields)
You can skip traditional tape by using edge guards like the Painter’s Edge Guard, which give a straight, paint-free line along the ceiling.
Metal trim shields work great for tight corners and are reusable for multiple rooms.
For a budget option, cut a simple cardboard guard to fit your molding and hold it in place as you paint.
Use Painter’s Edge Guard
Grab a painter’s edge guard when you want crisp lines without the hassle of tape; these rigid shields press against the molding or wall, letting you roll or brush right up to the edge and catch any stray paint.
You’ll use a painter’s edge for clean edges, speed, and less touch-up.
- Align shield to molding
- Hold firmly steady
- Roll toward shield
- Feather brush strokes
- Remove and inspect
Metal Trim Shields
Metal trim shields give you a durable, reusable alternative to painter’s tape for protecting adjacent surfaces when painting crown molding.
You place the shield against the wall or ceiling, steady it, and run your brush or roller along the edge for precise paint application. They resist nicks, won’t absorb paint, and suit metal finishes where durability matters, saving time and improving control.
DIY Cardboard Guard
If you want a quick, budget-friendly shield, a DIY cardboard guard works surprisingly well for protecting walls and ceilings while painting crown molding.
You’ll cut, bend, and hold the guard at the molding edge, using clipped clothespins or clamps to steady it.
Try simple cardboard guard techniques for precise control and affordable DIY edge protection.
- cut to fit
- bend for angle
- clamp or clip
- overlap seams
- replace when damp
Setting Up Drop Cloths and Ladders Safely
Before you climb, lay out drop cloths and position your ladder so you can work steadily and keep paint off floors and furniture.
Use weighted or non-slip cloths, tape edges, and clear the area of tripping hazards.
Check ladder stability, lock spreaders, and set legs on solid ground.
Wear shoes with grip and follow basic safety precautions to prevent slips and spills.
Lighting and Sightlines That Reveal Imperfections
Pay attention to the angle of your light because low, raking light will highlight brush marks and uneven edges that overhead lighting can hide.
Step back and change viewing distance—what looks smooth up close can read flawed from across the room, and vice versa.
Move a portable light or your ladder to check the molding from multiple sightlines before declaring the job done.
Light Angle Awareness
Light hitting crown molding at a low angle will expose every seam, brush stroke, and uneven edge, so you’ll want to check your work under the same lighting that will live in the room.
Use light reflection techniques and set ideal lighting conditions to spot flaws early.
- Position a portable light low and angled
- Check from multiple heights
- Use cool, consistent bulbs
- Mark trouble spots
- Repaint small areas promptly
Viewing Distance Effects
How close are you likely to stand when you’ll notice every flaw? Consider visual perception: small drips or uneven edges vanish from afar but scream up close.
Walk the room, view molding from typical sightlines—seated, standing, across the room—and under real lighting.
That distance impact guides how much touch-up you’ll need; prioritize areas people actually see at their usual viewing distances.
How to Hold the Brush for Precise Crown Cuts
When you’re cutting crown molding, hold the brush like a pencil—grip it near the ferrule with your thumb and index finger and let the handle rest against your middle finger so you get fine control and steady pressure.
Use a confident brush grip and precision technique to guide thin, controlled strokes.
- Short, steady holds
- Light wrist support
- Rest forearm on ladder
- Angle tip toward edge
- Pause between strokes
Master the Pull-and-Glide Brush Stroke
A steady pull-and-glide stroke gives you a crisp, even line along the crown’s edge, so load the brush lightly, set the bristles at the proper angle, and draw the paint toward you in one confident motion.
You’ll maintain control by keeping wrist steady, using consistent pressure, and overlapping short passes.
These brush stroke techniques are essential crown molding tips for clean, tape-free results.
Loading Your Brush: How Much Is Too Much?
Because too much paint makes feathering and drips inevitable, load the brush with a thin, even coat—dip only the bottom third of the bristles, tap off excess on the can’s rim, and test on scrap wood so you can judge how much the brush holds before you start the molding.
Keep brush loading consistent; check paint consistency for smooth strokes.
- Dip shallow
- Tap excess
- Test first
- Reload sparingly
- Wipe edges
Using a Two-Brush Method for Cleaner Edges
Grab a second brush and keep your edges sharp: use a narrow angled brush for cutting in and a wider sash brush to smooth the main stroke, so you can cleanly feather paint without reloading or risking overlap. You’ll practice brush technique and edge control, switching brushes to maintain consistent pressure and avoid blobs.
| Tool | Purpose |
|---|---|
| Angled brush | Precise cutting |
| Sash brush | Smooth fills |
| Both | Consistent edge control |
| Tip | Light pressure |
Cut a Crisp Line Where Crown Molding Meets the Ceiling
To get a crisp line where the crown molding meets the ceiling, practice a steady brush stroke with the right angled sash brush and keep your wrist guided along the trim.
If you still see small gaps or unevenness after painting, press painter’s putty into the seam and smooth it flush before touching up.
That combo of perfect brush technique and putty will give you a clean, professional edge.
Perfect Brush Technique
Start by seating your brush firmly against the ceiling edge and angling the bristles so they kiss the molding without slipping onto the flat surface; this steady placement is the core of cutting a crisp line.
You’ll rely on brush control and subtle stroke variation to guide paint precisely.
- steady hand
- light pressure
- short strokes
- feathered finish
- clean reloads
Use Painter’s Putty
When paint tends to bleed where crown molding meets the ceiling, press a thin bead of painter’s putty into the seam and smooth it with a damp finger or a small tool so you get a tight, invisible joint.
You’ll appreciate painter’s putty benefits: it seals gaps, prevents bleed, and sands smooth.
Practice using putty techniques for neat, repeatable edges before you paint.
Cut a Crisp Line Where Crown Molding Meets the Wall
A clean edge where crown molding meets the wall makes the whole room look finished, so use sharp tools and steady technique to get a crisp line.
You’ll practice crown molding techniques and focus on painting precision: steady wrist, angled brush, light pressure, acute sightline, and trimming excess.
Follow these steps:
- Hold brush at 45°
- Load minimal paint
- Paint from molding outward
- Use steady strokes
- Check and touch edges
Feather Paint Edges for Seamless Blending
Use a dry brush to soften the paint at the joint so you don’t create a hard edge.
Work with light, overlapping strokes to blend the new paint into the existing finish.
Keep your pressure gentle and check your progress as you go to maintain a seamless look.
Use A Dry Brush
Feather the paint edges with a dry brush to blend fresh strokes into the surrounding finish without leaving hard lines. You’ll use dry brush techniques and mind paint consistency so edges fade naturally.
Lightly wipe excess, then skim the edge once. Repeat until seamless, avoiding overworking the area.
- wipe excess paint
- test bristle dryness
- thin paint if draggy
- short strokes
- check from distance
Blend With Light Strokes
When you work with light, overlapping strokes, you’ll blend new paint into the existing finish so edges disappear without a ridge; keep your wrist loose and the brush tip barely touching the surface to avoid buildup. Use light stroke techniques and blending methods to feather edges; practice slow, confident motions for smooth shifts.
| Calm | Precision | Pride |
|---|---|---|
| Soft | Clean | Joy |
| Gentle | Smooth | Confidence |
| Quiet | Seamless | Satisfaction |
Working in Sections to Avoid Drips
Because paint runs downhill, tackle the molding in manageable sections so you can keep edges wet and smooth before drips form.
You’ll focus on drip control and section timing, working one span at a time, wiping runs immediately, and finishing each segment before the paint sets.
- Plan short spans
- Load brush moderately
- Watch for runs
- Smooth wet edges
- Move steadily
Use a Steady Wrist and Elbow for Consistent Strokes
Keep your wrist steady to guide the brush with smooth, even pressure across the molding.
Let your elbow lead longer strokes so you move from the shoulder and avoid jerky starts and stops.
Together, a controlled wrist and elbow motion will give you consistent, professional-looking lines.
Steady Wrist Technique
Stabilize your forearm on the ladder rail and move your wrist and elbow together so each stroke stays smooth and even; this keeps the brush tip tracking the crown’s profile and prevents wobble or uneven paint lines.
You’ll maintain a steady grip and improve brush control with deliberate, consistent motions.
- steady grip
- wrist alignment
- smooth pace
- light pressure
- controlled finish
Elbow-Led Strokes
Once your wrist is steady on the ladder rail, lead each stroke from the elbow so your arm moves as a unit and the brush tip follows the crown’s profile without wobble. You’ll use the elbow technique with focused stroke practice to keep lines crisp.
| Grip | Motion | Tip |
|---|---|---|
| Light | Elbow-led | Steady |
| Firm | Smooth | Aligned |
| Relaxed | Consistent | Clean |
| Controlled | Repeat | Confident |
How to Feather and Blend Between Coats
Because each coat can reveal tiny ridges or brush marks, you’ll want to feather and blend carefully between coats to get a seamless finish.
Because each coat can reveal tiny ridges, feather and blend between coats for a seamless finish.
Use light pressure, short strokes, and a soft brush or damp sponge to smooth edges.
Practice feathering techniques and blending methods to avoid visible shifts.
- light pressure
- short strokes
- soft brush
- damp sponge
- inspect under light
Fix Small Paint Mistakes Without Re-Taping
If you nick the wall or ceiling, use feathered brush touches to gently pull paint back into the trim without re-taping.
For gaps or small cracks, apply a thin bead of paint-safe caulking and smooth it with a damp finger for an invisible finish.
These quick fixes keep your edges crisp and save time on touch-ups.
Feathered Brush Touches
Keep a light hand and a small, soft-bristled brush ready so you can quickly feather out tiny paint errors without re-taping the trim.
Use feathering techniques and steady brush control to blend edges, work from dry paint outward, and remove small smudges.
- Light strokes
- Blend outward
- Thin paint load
- Steady wrist
- Quick touch-ups
Paint-Safe Caulking
One simple tool can save you from re-taping: paint-safe caulking lets you seal tiny gaps and cover small paint smudges quickly and cleanly.
You apply thin beads with precise caulk application, smooth with a wet finger or tool, and wipe excess. It dries paintable, so you can touch up without tape.
Use it for sealing gaps between molding and wall for crisp, lasting lines.
Use a Damp Cloth to Sharpen Wet Edges
When the paint’s still tacky, wipe a slightly damp, lint-free cloth along the molding to remove tiny ridges and create a crisp line where paint meets ceiling or wall.
You’ll use the damp cloth technique for wet edge sharpening, working steadily and lightly to avoid lifting paint.
- Use lint-free cloth
- Keep cloth slightly damp
- Work in small sections
- Wipe toward finished edge
- Clean cloth frequently
Best Drying Times to Avoid Smudging Between Coats
Although paint can feel dry to the touch within an hour, you should wait the manufacturer’s recommended recoat time—usually 4–6 hours for latex and 24 hours for oil-based—to avoid smudging or lifting the first coat.
Follow best drying practices: control temperature and humidity, facilitate airflow, and resist touching edges. That minimizes avoiding smudge risks and gives crisp, durable molding finishes.
When to Sand Between Coats on Molding
Sand between coats whenever the surface feels rough, shows brush or roller marks, or if you need to knock down raised grain—usually after the paint has fully cured to the manufacturer’s recoat time.
Sand between coats when the finish feels rough, shows marks, or to knock down raised grain after curing.
You’ll use light sanding techniques with fine grit and proper sanding tools to smooth edges and promote adhesion before the next coat.
- Fine-grit sanding sponge
- 220–320 grit sandpaper
- Sanding block
- Tack cloth
- Vacuum or brush
How Many Coats Do Trim Surfaces Usually Need?
Most trim jobs require two coats of paint for full coverage, but you might need a third for darker colors or badly stained surfaces.
The substrate, paint quality, and whether you’re using primer all affect how many coats you’ll need.
I’ll explain how those factors change your approach so you can get a durable, even finish.
Typical Trim Coat Count
Typically, you’ll apply two coats of paint to trim: a quality primer (if the surface is bare or stained) followed by one or two topcoats for coverage and durability.
You’ll pick finishes and typical colors based on trim styles and desired sheen; glossy white is common for crisp lines.
Consider surface prep and light when deciding final coat count.
- Primer
- Base coat
- Second topcoat
- Touch-up
- Finish selection
Factors That Influence
You’ve covered the usual coat sequence, but how many coats your trim actually needs depends on several variables.
You’ll consider color selection (darker or contrasting hues often need extra coats), surface preparation quality (sanded, primed, patched surfaces take fewer), paint type, sheen, and wear exposure.
Test a small area, let layers dry fully, then judge if another coat’s necessary for even coverage.
Painting Ornate Moulding Details and Profiles
When painting ornate moulding, take your time and work with the profile rather than against it. You’ll use ornate techniques to follow curves, avoid flooding recesses, and overcome profile challenges by brushing into details.
Move slowly, rotate the brush, and feather edges.
- Use small angled brushes
- Thin paint slightly
- Brush with the grain
- Clean recesses first
- Work in sections
Handling Inside and Outside Corners Cleanly
After you’ve worked the profiles and edges, focus next on nailing the inside and outside corners so lines stay sharp and paint doesn’t puddle.
After profiles and edges, perfect the inside and outside corners so lines stay sharp and paint never puddles
You’ll use precise corner techniques: cut brush strokes short, feather edges, and wipe excess.
For outside corners, pull paint away from the peak.
For inside angles, roll then tap and employ subtle blending strategies to hide joins and maintain crisp shifts.
Painting Crown Molding on High Ceilings: Poles and Scaffolds
If your crown molding sits up near a vaulted or tall ceiling, you’ll want the right poles and scaffold setup before you load your brush—working from unstable ladders wastes time and risks sloppy lines.
Choose gear prioritizing poles safety and scaffold stability. Use steady platforms, adjustable extension poles, secure guardrails, wide bases, and a helper to steady equipment.
- Adjustable extension poles
- Secure scaffold platform
- Guardrails and wide base
- Non-slip shoe tips
- Helper for stability
Working Around Fixtures and Vents Without Tape
Work carefully around light fixtures, vents, and ceiling fans so paint stays off metal and plastic without relying on tape.
Turn power off, remove detachable covers, and note fixtures positioning before you begin.
Cut power, take off removable covers, and mark fixture positions before starting to ensure safe, accurate painting.
Use an angled sash brush and steady hand to cut in close to openings.
For vent painting, mask internals with plastic and paint edges from multiple angles to avoid drips.
Painting With Textured Ceilings: Tips for Clean Edges
Textured ceilings can make getting a clean line along crown molding trickier, but with the right approach you can keep paint off the bumps and grooves.
You’ll work slowly, use a small angled brush, and feather paint away from the ceiling. Focus on control, not speed, to achieve clean edges.
- slow, deliberate strokes
- small angled brush
- feathering technique
- steady hand support
- minimal paint on brush
Quick Practice Tests to Try Before You Start
Before you start on the molding, practice your brush strokes on a scrap board so you get a smooth, consistent line.
Try different angles and vary the pressure to see how the paint spreads and how the edge looks against the wall.
Once you find the angle and pressure that give a clean line, you’ll be ready to work confidently on the actual molding.
Brush Stroke Practice
A few quick practice strokes will save you time and touch-ups once you’re on the molding—grab the same brush and paint you’ll use, steady your wrist, and try a few long, even passes on scrap wood or cardboard to get a feel for pressure, angle, and paint flow.
Practice brush stroke techniques and brush handling with focused repetition:
- smooth long pulls
- light feathering
- even paint load
- consistent tempo
- edge control
Angle And Pressure Tests
When you test different angles and pressures on scrap trim, you’ll quickly learn how tilt and hand force change the paint laydown and edge crispness.
So try shallow, medium, and steep brush angles with light, moderate, and firm pressure to see how the paint behaves.
Record which angle adjustments and pressure techniques give the sharpest edge, then match those settings when you paint the molding for consistent, clean lines.
Maintaining Steady Lines When Switching Hands
If you switch hands while painting crown molding, keep your wrist and elbow aligned so your brush flows with the stroke rather than fighting it.
Use a steady grip and practice hand coordination to keep consistent pressure and angle. Pause between strokes, breathe, and reset your posture.
- Check wrist alignment
- Match brush angle
- Maintain steady grip
- Smooth, continuous strokes
- Slow hand coordination shifts
When Painters’ Tape Still Makes Sense
When edges are irregular or the molding sits next to delicate or textured surfaces, you’ll want the extra protection tape offers.
It helps prevent paint from snagging on rough profiles and keeps texture from getting smudged. Use low-tack tape and press the edges firmly for the cleanest result.
When Edges Are Irregular
Because uneven edges can make a crisp line hard to achieve by brush alone, you’ll want to use painter’s tape to protect adjacent surfaces and get a clean finish.
Use tape when you face irregular edges and need effective techniques to mask gaps and setbacks.
- Clean and dry surface
- Press tape firmly
- Use a flexible tape
- Seal edges with caulk
- Paint and remove wet
Delicate Or Textured Surfaces
Although textured or delicate surfaces can easily snag tape or trap paint, you can still get sharp lines by choosing the right tape and prepping carefully.
For delicate surfaces and textured finishes, pick low-tack painter’s tape, test a hidden spot, and dust thoroughly.
Press tape edges firmly, use a seal coat of tinted primer if needed, then paint confidently and remove tape while tacky.
Time-Saving Tips for Multiple Rooms
Batching your work across rooms will save hours—set up one station for cutting in, one for rolling, and one for touch-ups so you don’t pack and unpack supplies repeatedly.
Use time management strategies and efficient workflow techniques to move quickly between rooms. Keep a checklist, label mixed paints, and sequence rooms by drying times.
- Checklist per room
- Label paints
- Sequence by drying
- Single-tool stations
- Quick-touch kit
Clean and Store Brushes After a Tape-Free Job
Rinse brushes promptly after your tape-free job to prevent paint from drying in the ferrule; trapped paint ruins bristles and makes future cutting-in uneven.
Rinse brushes promptly after tape-free work—wet ferrules prevent trapped paint, ruined bristles, and uneven future cutting-in.
Use warm water (or solvent), comb bristles, reshape, and let dry flat or hanging.
For proper brush storage, cover tips or use a sleeve to keep shape.
Regular brush maintenance extends life and preserves crisp lines.
Touching Up Long-Term Wear on Crown Molding
Start by inspecting the molding for chips, cracks, and scuffs so you know exactly which areas need attention.
Match the paint color and sheen carefully to avoid obvious patches.
When you touch up, feather the new paint into the old so the edges blend seamlessly.
Assess Damage Areas
Before you grab paint, take a close look at the molding to identify scuffs, chips, and areas where the finish has thinned from years of contact—these are the spots you’ll need to repair first.
You’ll perform a damage assessment and pick repair techniques tailored to each flaw.
- Scuffs
- Small chips
- Gap seams
- Gouges
- Loose trim
Match Paint Blend
Matching paint for long-term wear means more than grabbing the nearest leftover can—you’ll need to recreate the original sheen, color, and texture so repairs disappear into the surrounding molding.
Inspect the color palette under natural light, test small swatches, and adjust tint until it matches.
Match the paint finish—eggshell, satin, or semi-gloss—and use the same primer and application method for consistency.
Feather And Blend Edges
Once you’ve matched color and finish, you’ll need to feather and blend the repair so the edge disappears into the surrounding molding.
Use small brushes and light strokes, then soften with a dry brush. Apply minimal glaze if needed; feathering techniques and blending methods guarantee seamless shift.
Let layers cure, then inspect and touch up sparingly.
- small brush strokes
- dry brush soften
- thin glaze option
- cure between coats
- final sparing touch-ups
Troubleshooting Common Trim Painting Problems
If you run into drips, brush marks, or paint that won’t stick, don’t panic—you can fix most trim painting problems with a few targeted steps. Check paint application and brush maintenance: sand glossy spots, clean or replace brushes, thin high-viscosity paint, and use primer on bare wood.
| Problem | Quick Fix |
|---|---|
| Drips | Smooth and recoat |
| Poor adhesion | Prime first |
Cost and Time: Tape-Free vs. Taped Crown Painting
When you’re weighing tape-free versus taped crown painting, the main trade-offs are time and cost: tape-free cuts materials expense and masking time but may take longer per cut for careful brush control, while taping speeds up painting runs and reduces touch-ups at the expense of buying quality painter’s tape and spending minutes to apply it correctly.
Weigh time versus cost: tape saves time and touch-ups, tape-free saves supplies and rewards steady brush control
- Faster runs with tape
- Lower supplies cost tape-free
- More precision practice
- Fewer touch-ups taped
- Balance cost comparisons and time efficiency
Low‑VOC and Eco-Friendly Trim Paint Options
Choosing between tape-free and taped approaches also gives you a chance to rethink the products you use—especially if indoor air quality matters to you.
Pick low‑VOC primers and VOC free paints labeled for trim to minimize odors and toxins. Look for eco friendly options with durable, washable finishes.
Test samples to confirm adhesion and sheen before committing to full molding coverage.
Handling Color Transitions at Molding Edges
When you reach molding edges between two colors, match paint edges carefully so the change looks intentional, not sloppy.
Use a slightly damp brush and feather your strokes outward to soften any hard lines.
Practice steady, light passes to keep paint buildup from creating a ridge.
Matching Paint Edges
Because your crown molding sits at the junction of two surfaces, matching paint edges requires careful attention to tape lines, brush control, and paint consistency to keep connections crisp and invisible.
You’ll use matching techniques and focus on edge precision so colors meet seamlessly without feathering.
- Use a steady angled brush
- Match paint sheens
- Cut in with minimal paint
- Wipe excess immediately
- Inspect under good light
Feathering Brush Strokes
Feather your brush strokes along the molding edge to create a seamless color shift between wall and trim; keep your hand light and extend each stroke slightly beyond the edge so the paint tapers instead of stopping abruptly.
You’ll use precise brush control, working wet-on-wet to soften the boundary.
Practice short, overlapping strokes for consistent edge blending, lifting the brush gradually to avoid buildups.
When to Call a Pro for Crown Molding Painting
Not sure if you can handle the tricky corners and tall ladders yourself?
Call a pro when the job needs advanced crown molding techniques, structural repairs, or flawless finishes.
Professional painters save time and reduce risk.
- uneven joints
- high ceilings
- damaged molding
- complex profiles
- limited equipment
One-Room Timeline: Step-by-Step Schedule
You’ll start by choosing prep and masking options that fit your time and skill, from quick tape to full dropcloths.
Then plan priming and paint order so you work efficiently—cut in the molding, roll the walls, and finish trim last.
Factor in drying times between coats and leave time for cleanup so the room’s ready when you are.
Prep And Masking Alternatives
Start by clearing the room and deciding which prep and masking approach suits your schedule and skill level—quick tape-and-cover for a same-day finish, or careful hand-cutting and caulking if you’ve got two days and want factory-sharp lines.
Focus on paint preparation and smart masking techniques to save time and reduce touchups.
- Clean and sand surfaces
- Patch gaps, caulk seams
- Use painter’s tape selectively
- Try edge guides or shields
- Remove dust before painting
Priming And Paint Order
If you’ve prepped and masked the room properly, prime the crown molding first so the trim gets full coverage before you tackle the ceiling and walls; this prevents bleed-through and lets you spot any remaining gaps or sanding flaws.
Use priming techniques like thin, even coats and feathered edges.
Then follow a logical paint application: ceiling, trim touch-ups, finally walls for clean, crisp junctions.
Drying Times And Cleanup
Once the final coat is on, give each surface its recommended drying time so you don’t smudge fresh paint or trap solvents under new layers.
Use drying techniques like fans and low heat, then inspect edges. For cleanup, wipe tools promptly and dispose rags safely.
Follow this one-room timeline:
- Ventilate and wait specified hours
- Use fans for airflow
- Check tackiness
- Clean brushes immediately
- Store leftover paint properly
Quick Checklist to Finish Your No-Tape Crown Paint Job
Gather your tools, clear the area, and run through a short, focused checklist to wrap up your no-tape crown molding paint job smoothly.
Inspect edges for bleed or missed spots, touch up with a steady brush, verify paint finish matches trim, check color selection against lighting, remove drop cloths, clean brushes, and allow proper drying time.
Final walk-through guarantees crisp lines and a polished look.
Pro Tips Painters Swear By for Clean Trim Lines
Professional painters swear by a few focused habits that give you razor-sharp trim lines every time.
- Master paint techniques and edge precision with steady application speed.
- Prioritize surface preparation and trim safety before you start.
- Maintain brush maintenance and check paint consistency regularly.
- Use proper painter tools and control lighting effects for visibility.
- Make color selection deliberate to hide minor imperfections.
Frequently Asked Questions
Can I Paint Crown Molding Without Removing Light Fixtures?
Yes—you can often paint crown molding without removing light fixtures, but you’ll need to guarantee light fixture safety by turning off power, using covers and careful crown molding techniques, and working slowly to avoid drips or accidental contact.
How Do I Protect Wood Floors From Paint Drips Without Tape?
You’ll lay down heavyweight drop cloths and secure them with weights, use furniture covers to shield nearby pieces, wear shoe covers, keep a paint tray away from traffic, and clean spills promptly with a damp cloth.
Will Painted Crown Molding Yellow Over Time Near Vents?
Yes, it can yellow near vents over time; you’ll need regular crown molding maintenance and choose heat-resistant, low-VOC paints to boost paint longevity, clean vents often, and touch up or repaint when discoloration appears.
Can I Use Spray Paint for Tape-Free Crown Molding Edges?
Yes—you can, but don’t expect automatic perfection: you’ll need careful spray paint application and steady hands for edge precision. Practice on scrap trim, use low-pressure cans, short bursts, and mask nearby surfaces for cleaner results.
How Do Temperature and Humidity Affect Trim Paint Drying Times?
Temperature and humidity directly affect drying conditions: if it’s cold or humid, paint takes longer to set and you’ll risk tackiness. You’ll adjust paint consistency and ventilation, so it skins over faster and cures evenly.
