
How to Paint Diagonal Stripes on a Wall With Perfect Alignment
Start by planning stripe width and angle, then prep the wall: fill, sand, prime and clean so tape sticks. Measure and mark consistent diagonal reference points, use a laser level or snapped chalk lines, and snap lines from floor to ceiling. Apply high-quality painter’s tape, burnish the edges, paint with thin coats using rollers and angled brushes, then remove tape at a 45° while paint is tacky for crisp edges. Keep going to learn pro tips and troubleshooting.
Step-by-Step Diagonal Stripe Tutorial (Quick Start)
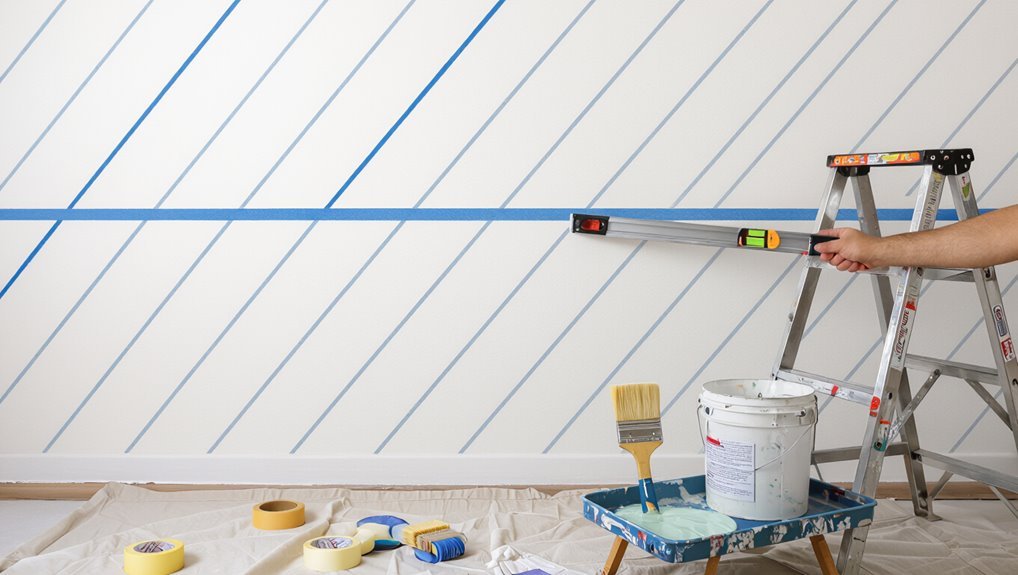
Start by measuring and marking your wall so your diagonal lines stay straight and evenly spaced; use a level and pencil to draw light guide lines from one corner to the opposite.
Tape along guides, paint alternating stripes, and let each coat dry before removing tape.
Consider color psychology when choosing hues to guarantee pattern balance, and finish edges with a small brush for crisp seams.
Why Diagonal Stripes Transform a Room
When you paint diagonal stripes, you’ll add visual depth and instant interest that draws the eye across the room.
They can make a small space feel larger by guiding sightlines and creating perceived expansion.
Plus, the angles introduce dynamic movement and energy that change the whole room’s mood.
Visual Depth And Interest
Although diagonal stripes catch the eye with bold movement, they do more than decorate—they create a sense of depth by guiding your gaze across planes and toward focal points, making ceilings feel higher or corners recede.
You’ll use visual texture and color psychology to layer interest and mood.
- Contrast for definition
- Matte vs. gloss for texture
- Accent hues to direct focus
Perceived Space Expansion
Diagonal lines stretch the eye, so diagonal stripes make a room feel larger than its actual dimensions by directing attention along extended pathways instead of halting it at walls.
When you choose angles and color contrast with perception psychology in mind, you manipulate apparent depth and width.
Thoughtful spatial design uses stripe scale and orientation to trick sightlines, expanding perceived space without structural change.
Dynamic Movement And Energy
Motion gives a room an instant pulse: diagonal stripes make your eye travel across surfaces, creating a sense of momentum that turns static walls into active features.
You’ll harness dynamic contrast and visual rhythm to energize spaces, guide sightlines, and set mood.
- Energize: amplify motion.
- Guide: direct circulation.
- Focus: highlight architecture.
Tools for Crisp Diagonal Stripes
When you want clean, sharp diagonal stripes, the right tools make the job faster and neater: a quality measuring tape and level (or laser level) for accurate layout, painter’s tape designed for crisp edges, a sharp utility knife for scoring tape, high-density foam rollers or angled brushes for smooth application, and a drop cloth to protect floors.
Use proper tape types, paint brushes, wall prep, color selection, design inspiration, pattern planning, tool maintenance, stripe trends, project timelines, and visual balance.
Best Paints and Sheens for Diagonal Stripes
Pick a high-quality interior latex or acrylic paint for walls since they’re durable and easy to work with.
Choose a sheen—matte hides imperfections, eggshell balances durability and washability, and satin or semi-gloss stands up best to cleaning and light scuffs.
For long-lasting color, use stain‑blocking primers, stick to reputable brands, and consider UV-resistant formulas in sunny rooms.
Paint Types For Walls
Choose a high-quality acrylic latex paint for the bulk of your diagonal stripes: it dries fast, resists yellowing, and lays down smoothly over most primed walls.
Use eco friendly paints and low VOC paints where possible, combine premium brands with specialty primers for paint durability and proper wall preparation.
Consider texture finishes and color psychology; prefer non toxic options for safe paint application.
- Select primer
- Test swatches
- Seal edges
Sheen Choices Explained
Because sheen affects both appearance and durability, deciding how glossy you want your diagonal stripes matters as much as color. You’ll weigh sheen impact on visibility, cleaning, and flaws; use a sheen comparison to pick matte for subtlety, eggshell for balance, or satin for durability.
| Sheen | Look | Use |
|---|---|---|
| Matte | Low | Hides flaws |
| Eggshell | Soft | Living rooms |
| Satin | Durable | High-traffic |
Color Durability Tips
While diagonal stripes grab attention, you’ll want paint and sheen that keep those lines crisp and vibrant over time; opt for high-quality acrylic latex paints for color retention and flexible binders that resist cracking.
You should choose sheens that balance washability and sheen uniformity to aid color longevity and simplify paint maintenance.
- Satin for durability
- Eggshell for subtlety
- Semi-gloss for trims
Measure Your Wall and Calculate Stripe Count
Start by measuring the height and width of the wall with a tape measure, noting both dimensions to the nearest 1/8 inch so your stripes line up cleanly. Use those wall dimensions for stripe calculation: divide diagonal length by desired stripe count, adjust for trim and outlets, and mark reference points before taping.
| Measure | Purpose |
|---|---|
| Height | Calculate diagonal |
| Width | Confirm spacing |
Choosing Stripe Width for Your Room Size
Think about how the stripe width will change the feel of the room: narrower stripes make a space feel busier and taller, while wider stripes read more modern and calming.
Use stripe psychology and space balance to match proportions. Consider:
- Small rooms — choose wider stripes to avoid clutter.
- Tall rooms — narrow stripes emphasize height.
- Multipurpose spaces — medium stripes preserve balance.
Pick an Angle That Flatters Your Space
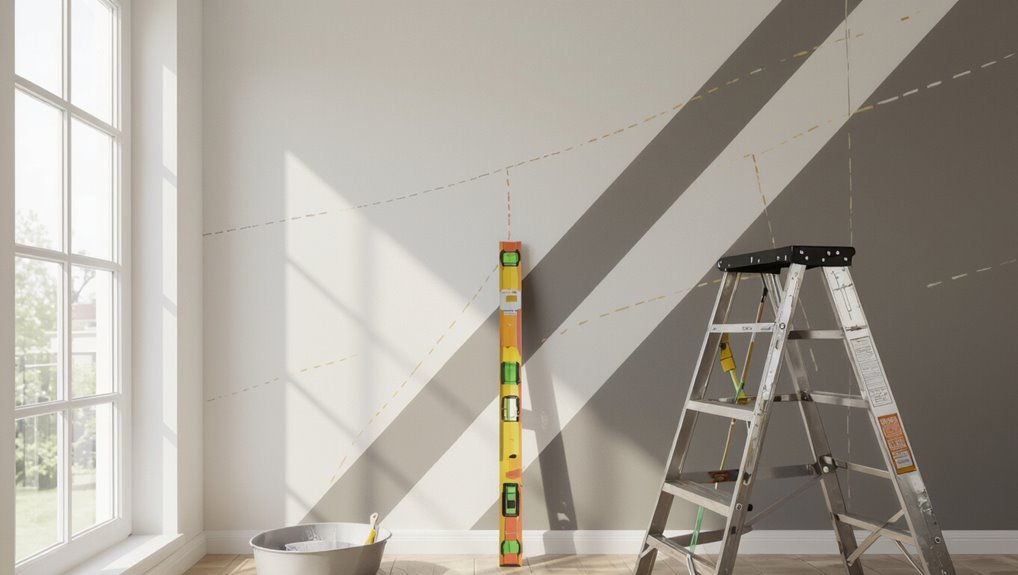
Because the angle you choose directs the eye, pick one that complements the room’s shape and function: steeper diagonals (closer to vertical) accentuate height and draw attention upward, while shallow angles widen a space and create a calming, horizontal flow.
When planning angle selection, consider furniture lines and sightlines for space enhancement; test with painter’s tape to confirm the visual effect before committing.
Plan Stripes Across Multiple Walls and Corners
When your design wraps around corners, keep stripe lines continuous so the pattern reads as one flow instead of disjointed segments.
Mark consistent reference points on each wall—use a level and tape measure to transfer exact angles and spacing across the corner.
Check alignment as you go and adjust those reference marks before you start painting.
Line Continuity Across Corners
If you’re carrying a continuous diagonal stripe across corners, plan its angle and path before you tape anything so the line reads seamless where walls meet; use line alignment techniques and corner shift strategies to visualize trajectory.
Tape and test with a light pencil mark, then paint.
- Map angle continuity
- Align tape edges precisely
- Feather paint at the joint for seamless flow
Measuring Reference Points
Before you tape, mark a set of reliable reference points on each wall and corner so your diagonal lines line up exactly where the walls meet.
Use a level and chalk line as alignment tools, then measure from a fixed floor or ceiling baseline.
Apply stripe measurement techniques: record distances between marks, transfer them consistently around corners, and recheck before taping to guarantee continuity.
Color Combos and Contrast for Diagonal Stripes
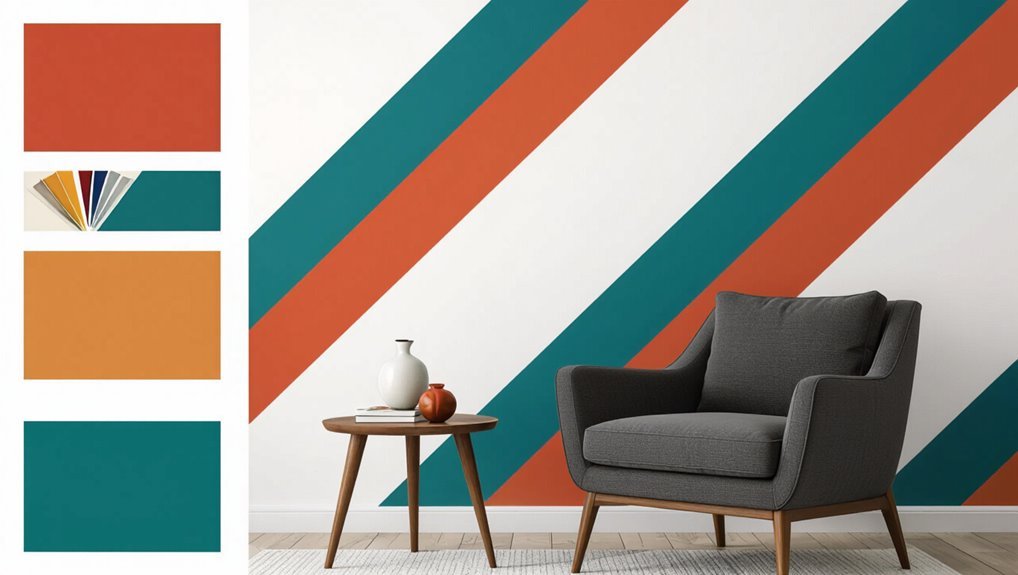
Color choices make or break diagonal stripes, so pick combos that match your room’s mood and scale: high-contrast pairings like navy and white give crisp, graphic impact, while softer duos like sage and cream create a subtle, elongated look.
- Use color selection and contrasting hues to define accent impact.
- Consider color psychology and mood influence for visual harmony.
- Apply trend analysis and complementary colors sparingly for balance.
Create a Mockup: Digital and Paper Methods
When you’re planning diagonal stripes, create a mockup so you can see scale, color interaction, and angle before you commit to tape and paint.
Use mockup inspiration from magazines, then try digital tools and design software for pattern visualization and precise layout design.
Combine with quick paper sketching for tactile artistic planning and rapid color selection to confirm rhythm, contrast, and stripe width.
Baseline Reference Points Every Wall Needs
Before you tape or paint, measure corner to corner so you know the true diagonal and can avoid skewed stripes.
Then establish a level baseline across the wall as your anchor for every stripe line.
With those two reference points set, your layout will stay accurate as you work.
Measure Corner To Corner
Start by measuring from one corner of the wall to the opposite corner to establish the baseline diagonal that will guide every stripe. You’ll use that corner measurement for diagonal alignment and consistent spacing.
Mark endpoints, note the exact length, and repeat for adjacent walls to confirm symmetry.
- Record length precisely
- Mark endpoints clearly
- Recheck opposite diagonal
Establish Level Baseline
Pick a straight, level reference that spans the wall and snap a chalk or laser line so you’ve got a true horizontal to work from.
Use baseline tools like a level, laser, chalk reel, and tape measure to mark consistent reference points.
Apply baseline techniques: transfer marks from the horizontal, verify with a plumb, and recheck before taping to guarantee diagonal stripes stay perfectly aligned.
Use a Laser Level for Precise Diagonals
When you want perfectly straight diagonal stripes, use a laser level to mark your guide lines quickly and accurately; it projects a crisp beam across the wall so you can align tape without guessing.
You’ll appreciate laser level advantages and laser level accuracy for repeatable results.
Follow steps:
- Position beam along planned angle.
- Secure tape to beam line.
- Check level periodically and adjust.
Measure Diagonal Spacing With a Tape Measure
Measure each diagonal interval carefully with a tape measure so your stripes stay evenly spaced across the angled layout.
Use consistent tape measure techniques: mark start and end points, read from the same edge, and double-check each mark.
Use consistent tape-measure technique: mark start and end points, read from the same edge, and always double-check marks.
Work along the line, measuring between adjacent marks to confirm equal widths.
These diagonal spacing tips prevent cumulative error and keep pattern alignment crisp.
Transfer Floor-to-Ceiling Measurements Accurately
Now that your diagonal marks on the wall are evenly spaced, transfer each one straight down to the floor and up to the ceiling so your stripes line up end-to-end.
Use measuring tools and measurement techniques for height adjustments and stripe placement. Consider wall types, space considerations, scale factors, visual balance, alignment methods, and accuracy tips.
- Confirm corners
- Note thresholds
- Recheck marks
Snap Chalk Lines for Long Straight Diagonals
1. You’ll set accurate long diagonals by using chalk line techniques and reliable diagonal line tools. Measure and mark end points, anchor the chalk reel, then pull taut and snap firmly to leave a crisp, visible line.
Work in sections for very long walls, re-chalking as needed. Keep lines straight by steady tension and checking alignment before painting.
Draw Light Pencil Guides Without Harming Paint
Use a soft graphite pencil (2B or softer) so you don’t press into the paint.
Make only light guideline strokes along your chalk lines to keep marks minimal and easy to remove.
After the paint’s fully dry, erase gently with a soft eraser to avoid scuffing the finish.
Choose Soft Graphite Pencil
A soft graphite pencil will give you clear, erasable guidelines without gouging or scuffing the wall’s finish, so pick a B or 2B for easy visibility that wipes away cleanly after painting.
Use graphite pencil techniques and note soft pencil advantages for crisp, light marks that won’t damage paint.
- Control pressure
- Test on scrap
- Erase gently
Mark Light Guideline Strokes
Before you start painting, mark light guideline strokes with a soft, steady hand so the pencil shows clearly without pressing into the finish. Use gentle pressure and test pencil types for best guideline visibility. Keep lines minimal to avoid scuffs while you tape and paint.
| Pencil types | Tip |
|---|---|
| Soft graphite | Light, visible |
| Mechanical | Consistent |
| H and B | Compare |
Erase Gently After Painting
When the paint’s fully dry, erase your pencil guides with light, deliberate strokes so you don’t scuff the finish or lift paint. You’ll protect the stripe edges and preserve wall care routines by using a soft eraser and gentle pressure.
Focus on controlled motion; avoid scrubbing.
- Soft eraser for minimal paint removal
- Short strokes, steady hand
- Inspect and touch up small marks only
Choose and Apply Painter’s Tape for Sharp Edges
1 good-quality painter’s tape makes the difference between crisp, professional-looking stripes and paint bleed, so pick a tape rated for delicate surfaces if your wall has fresh primer or wallpaper and a medium-adhesion tape for sealed drywall.
Use precise tape application techniques: measure, mark, and press firmly.
Follow tape alignment tips using a level or chalk line so your diagonal stripes stay consistent and straight.
Seal Tape Edges to Prevent Bleed-Through
After you’ve pressed the tape firmly along your chalk lines, seal the edges so paint can’t sneak underneath and ruin the crisp stripes.
Use proper tape types and clean surfaces, then apply edge sealing with a dry tool.
Focus tape application, wall preparation, precision tools, and paint techniques to avoid paint bleed.
- Burnish edges
- Test small area
- Remove tape angled
Prep Walls for Even Stripe Adhesion
Start by cleaning the wall thoroughly so dust and grease don’t prevent tape and paint from sticking.
Patch any dents or holes and sand rough spots smooth for an even surface.
Finish with a suitable primer to promote consistent adhesion and true color.
Clean Walls First
Wipe down the wall thoroughly so tape and paint will stick evenly—dust, grease, and cobwebs will lift paint and cause edges to bleed.
Use mild detergent, rinse, and let paint drying begin before taping. Focus on wall preparation and surface cleaning to improve paint adhesion and stripe alignment.
- Choose proper paint tools and tape application.
- Consider wall priming.
- Note wall texture; plan surface repair.
Repair Surface Imperfections
Fix dents, holes, and rough spots so your diagonal stripes sit clean and crisp.
You’ll do surface preparation by filling holes, sanding uneven texture treatment areas, and performing surface cleaning to remove dust. Proper wall repair improves finish quality and supports adhesion techniques.
Check paint consistency before paint application so stripes lay smoothly and edges stay sharp during final stripe painting.
Prime For Adhesion
Before you paint, prime the wall so the stripes adhere evenly and the colors read true; a quality primer seals porous spots, evens sheen, and gives your topcoat a consistent surface to grab onto.
You’ll focus on paint preparation, surface cleaning, wall condition, wall texture, primer types, adhesion techniques, and color adhesion for consistent coverage during paint application.
- Clean
- Prime
- Apply
Fix Common Wall Imperfections Before Taping
Start by scanning the wall for dents, nail holes, cracks, and peeling paint so you know what needs attention before you tape.
Fill holes and sand smooth to match wall texture, removing loose paint.
Fill holes and sand until the surface matches the wall texture, removing loose paint for a seamless finish.
Caulk hairline cracks and wipe dust away.
Let repairs cure fully; a clean, even surface guarantees reliable tape application and crisp diagonal stripes without paint bleeding or uneven edges.
Prime Walls for Consistent Stripe Coverage
Prime the wall with a quality primer to guarantee your diagonal stripes look even and the topcoat adheres properly.
You’ll improve paint consistency and save coats by sealing patched areas and varying porosity. Good wall preparation prevents bleed and uneven sheen.
- Seal repairs for uniform absorption.
- Choose primer matched to topcoat.
- Sand lightly and remove dust before painting.
Cut In Diagonal Stripe Edges by Hand
Grab a steady-edged angled brush and line up the tip with your marked diagonal guides; you’ll cut the stripe edge by painting a thin, confident bead of paint along the line, keeping your wrist steady and the brush angled slightly away from the stripe to prevent excess paint from pooling.
Use hand cutting with precise brush control, painter’s precision, alignment tips, tape application, surface preparation, paint consistency, steady hands, and cleaning tools.
Steady Your Brush With a Straightedge or Ruler
Pick a sturdy, straight ruler or metal straightedge that won’t flex as you paint.
Clamp or tape the straightedge firmly so it won’t slip mid-stroke.
Keep even pressure on the brush against the edge to maintain a crisp, consistent stripe.
Choose The Right Ruler
Because a straight edge sets the foundation for crisp diagonal stripes, choose a ruler that’s long enough to span at least one stripe and rigid enough not to flex when you press it against the wall.
Consider ruler materials and ruler types to match your wall and paint.
- Aluminum — lightweight, rigid.
- Plastic — affordable, flexible.
- Wood — sturdy, comfortable.
Secure The Straightedge
Once you’ve positioned the straightedge along your chalk or pencil guide, clamp or tape it firmly to the wall so it won’t shift as you paint; a steady edge keeps your brush from wobbling and guarantees clean, crisp stripe lines.
Use secure tools, align straightedge to mark guidelines accurately, employ tape precision at edges, achieve symmetry across panels, and maintain focus while working.
Maintain Consistent Pressure
Steady your wrist and press the brush lightly against the straightedge or ruler so the bristles glide evenly along the guide, keeping the paint bead from bulging or thinning.
You’ll use pressure techniques and pressure application to guarantee pressure consistency and pressure stability while practicing pressure control and pressure management.
- Even pressure distribution
- Small pressure adjustment checks
- Smooth pressure application
Roll Paint Inside Taped Stripes Without Seeping
Load your roller sparingly and roll along the taped stripe with light, even pressure to avoid forcing paint under the tape. You’ll control paint thickness and use a steady roller technique, brushing out excess toward the stripe center so edges stay crisp. Move slowly, check for beading, and remove tape once tacky, not fully cured.
| Tip | Action | Check |
|---|---|---|
| Load | Light | Even |
| Roll | Slow | Crisp |
| Edges | Center | Beads |
| Tape | Remove | Tacky |
| Finish | Inspect | Clean |
Apply Multiple Coats While Preserving Edges
When you need extra coverage, apply thin, even additional coats so paint builds without seeping under the tape; let each layer become touch-dry before reloading the roller.
When requiring extra coverage, apply thin, even coats—let each layer become touch-dry before reloading the roller.
Keep pressure light at the edges, and wait the manufacturer’s minimum recoat time to preserve crisp lines. Use edge preservation techniques and paint layering methods to maintain clarity.
- Feather edges lightly
- Inspect between coats
- Match drying times
Remove Tape at the Right Time for Clean Lines
Peel the tape while the paint is still tacky to help prevent jagged edges.
Pull it back slowly at a 45-degree angle so you don’t lift the fresh paint.
If any spots need touch-ups, wait until the paint fully dries before fixing them.
Remove Tape While Wet
If you want crisp, paint-store-worthy edges, pull the tape off while the paint is still tacky—never wait for it to fully dry.
You’ll master tape removal timing and wet paint technique by acting promptly.
Follow these steps to guarantee clean diagonal stripes:
- Lift tape at a 45° angle.
- Keep a steady, even motion.
- Inspect edges and touch up tiny flaws.
Peel Slowly Backward
After you’ve lifted the tape at a 45° angle and kept your motion steady, pull it back slowly against itself to preserve the crisp paint edge.
During tape application and wall preparation you’ll time removal to protect paint adhesion. Good project timing aids stripe maintenance and honors color selection and visual balance.
Trust pattern planning so your diagonal stripes stay sharp and aligned.
Touch Up Small Bleeds and Uneven Edges
Grab a small artist’s brush and a damp cloth to fix any tiny bleeds or uneven lines quickly and cleanly.
Grab a small artist’s brush and damp cloth to swiftly fix tiny bleeds and smooth uneven lines.
You’ll focus on bleed correction and edge refinement: dab excess paint, feather edges, and wipe while wet for crisp shifts.
Finish with light sanding if needed, then repaint sparingly to preserve straight diagonals.
- Assess
- Correct
- Protect
Wrap Stripes Seamlessly Around Corners
When you reach a corner, plan your tape lines so the stripe pattern continues without a gap or overlap; measure and mark matching angles on both walls, then transfer those marks to the tape before applying it.
Use corner alignment techniques to butt tape precisely, press edges firmly, and paint in thin coats.
Consider stripe color selection to maintain visual continuity and clean shifts around the corner.
Align Stripes Across Doors and Windows
Once you’ve wrapped stripes neatly around corners, carry that same precise layout mindset to doors and windows so the pattern reads as continuous rather than chopped.
You’ll check door frame fit, do surface preparation, and mark height adjustment lines. Maintain stripe continuity with window alignment, plan color change and edge blending, and guarantee pattern integration across openings.
- Measure precisely
- Tape carefully
- Inspect seams
Keep Stripe Alignment With Trim and Moldings
3 steps will keep your diagonal stripes lining up cleanly with trim and moldings: measure from a fixed reference, transfer those marks onto the trim, and tape with consistent spacing so the pattern reads uninterrupted.
You’ll use stripe alignment techniques and trim integration tips during wall preparation essentials, account for moldings consideration, and apply visual cohesion strategies and design balance approaches to maintain crisp shifts and a unified look.
Scale Stripe Patterns for High Ceilings
Because high ceilings change how stripes read from the floor, you’ll want to scale the band widths and spacing so the pattern feels balanced from typical viewing angles.
Adjust for ceiling height, room proportion, wall orientation, and lighting effects; prioritize pattern consistency, color selection, texture contrast, and visual balance.
- Measure vertical sightlines.
- Test painted swatches.
- Maintain repeatable intervals.
Scale Stripe Patterns for Small Rooms
In a small room, scale your diagonal stripes tighter and subtler so they don’t overwhelm the space; narrower bands and closer spacing make the pattern feel intentional and help preserve a sense of openness.
You’ll choose stripe color choices that reflect light—pale neutrals or soft pastels—to enlarge perception.
Consider pattern psychology: small repeats soothe the eye, creating rhythm without clutter, so the room feels balanced.
Design Intentional Alternating Widths and Offsets
Decide the stripe widths first so you can balance visual weight across the wall.
Calculate offsets by measuring from a fixed corner and using consistent increments or a repeating pattern to keep seams aligned.
Test your measurements with a paper template or chalk line before taping to avoid surprises.
Plan Stripe Widths
Start by mapping out the stripe widths on paper or with painter’s tape on the wall so you can visualize alternating widths and any offsets before you cut paint.
Consider stripe psychology and width aesthetics to balance scale and mood. Plan deliberately.
- Vary widths for rhythm.
- Use consistent diagonals for cohesion.
- Test a small mockup for contrast.
Offset Calculation Methods
Because offsets change how stripes meet corners and wrap around rooms, you’ll want a simple calculation method before you tape—measure the wall’s diagonal run, pick your primary stripe width, then alternate offsets by adding or subtracting that width (or a fraction of it) to create intentional staggering; this lets you predict seam locations, keep the pattern balanced across adjacent walls, and avoid awkward half-stripes at edges.
Use offset measurements, stripe adjustments, pattern repetition, alignment techniques, visual symmetry, design balance, color harmony, wall dimensions, angle precision, stripe spacing.
Use Stencils or Masking Film for Complex Patterns
For complex diagonal patterns, use stencils or masking film to get crisp, repeatable lines without fretting over freehand accuracy.
You’ll focus on stencil selection and masking techniques to handle pattern complexity while ensuring application precision, boosting design creativity, and trusting material durability.
- Pick durable stencils and flexible masking film.
- Align repeats for consistent spacing.
- Seal edges to prevent bleed for sharp results.
Avoid Common Mistakes That Ruin Symmetry
Before you tape, measure and mark the wall precisely so each diagonal stripe starts and ends where it should.
Keep your masking tape aligned consistently along your guide lines to maintain uniform widths and clean edges.
If you stick to exact marks and steady tape placement, the symmetry will hold up across the whole wall.
Measure And Mark Precisely
Start by establishing a consistent reference line—use a level or laser to mark a straight baseline and a precise corner point so every diagonal stripe aligns the same way across the wall.
Use marking techniques and alignment tools, measurement accuracy, precision methods, guideline importance, marking materials, diagonal formulas, spacing strategies, tape positioning, visual aids.
- Calculate angles.
- Mark intervals.
- Verify symmetry.
Use Consistent Tape Alignment
While lining up tape, keep each piece flush and consistently oriented so every stripe reads the same across the wall; small shifts in angle or edge placement are what break symmetry. You’ll check tape width considerations, use steady tape application techniques, and press edges firmly. Consistency prevents paint bleed and uneven spacing.
| Check | Action |
|---|---|
| Width | Match tape |
| Edge | Burnish |
Troubleshoot Crooked or Uneven Diagonal Lines
If your diagonal stripes look crooked or uneven, don’t panic—you can usually fix them without redoing the whole wall.
Use alignment adjustments and measurement techniques to restore visual symmetry. Re-evaluate tape application and paint selection for color harmony and pattern consistency.
For error correction, try:
- Re-measure, re-mark accurately.
- Re-tape edges, press firmly.
- Feather paint, clean lines.
Fix Color Bleed After Paint Has Dried
Though color bleed can feel permanent once the paint’s dry, you can usually clean it up with a few targeted fixes.
Start with surface cleaning and gentle sanding to improve adhesion improvement, then use precise tape application and proper paint technique for touch up methods.
Review color selection and wall preparation to prevent recurrence, and match finish options for seamless blending.
Repaint a Stripe Without Redoing the Wall
If a stripe needs repainting, first match the existing angle so your brush or roller follows the same diagonal line.
Feather the edges by lightly dragging the brush outward to soften shifts between the new and old paint.
Use touch-up paint and gentle blending strokes to make the repair disappear without redoing the whole wall.
Match Existing Stripe Angle
When you need to repaint a single diagonal stripe without redoing the whole wall, the key is matching the exact angle and width so the repair blends seamlessly with the existing pattern.
Use stripe angle measurements and alignment techniques to match slope. Then square and tape, paint carefully, and remove tape when tacky.
- Measure precisely
- Dry-fit guides
- Paint in thin coats
Feather Edge Transitions
Feathering the stripe edges lets you repaint a single diagonal band without redoing the whole wall, blending new paint into old for an invisible repair.
You’ll use feather techniques: load a brush lightly, drag toward the stripe edge, and soften strokes into the adjacent color.
Work in thin layers, build coverage gradually, and create subtle gradients that hide overlap while preserving crisp stripe alignment.
Touch-Up Paint Blending
One simple method lets you repaint a single diagonal stripe without stripping the whole wall: match your paint, thin it slightly, and blend the new into the old with controlled, overlapping strokes.
Use touch up techniques and paint blending to hide edges.
Follow steps:
- Feather edges with a damp brush.
- Apply thin coats, letting each dry.
- Lightly sand between coats.
Estimate Paint Quantity for Striped Walls
Start by measuring the wall area you’ll stripe—multiply the width by the height to get square footage, then subtract windows and doors—to determine how much paint you need for full coverage and for each color.
Use a paint calculator to convert square footage to gallons, add 10–20% for waste, and account for stripe materials (tape, primer).
Divide quantities per color.
Schedule Drying Time Between Stripes and Coats
After you’ve figured paint quantities and primed your wall, plan specific drying windows before removing tape or applying the next color.
You’ll use proper drying techniques and deliberate layering strategies to avoid bleed and smudges. Follow timing guidelines and test small areas for tackiness.
- Wait manufacturer’s recommended dry time.
- Use fans and ventilation.
- Allow extra cure before heavy traffic.
Protect Furniture and Floors While Painting Stripes
Before you lay down paint, move or cover nearby furniture and floors so splatters and drips don’t become costly mistakes. Use drop cloths for floor covering, clear furniture arrangement paths, and apply furniture protection film. Do surface preparation and wall cleaning first. Follow ventilation tips, monitor paint drying, and adopt clean up strategies to limit paint spills.
| Item | Purpose | Tip |
|---|---|---|
| Drop cloths | Floor covering | Secure edges |
| Film | Furniture protection | Tape gently |
| Ventilation | Drying | Open windows |
| Cleanup | Paint spills | Keep rags ready |
Safe Ladder and Scaffold Techniques
Ladder-safety habits will keep you steady while painting diagonal stripes: pick a ladder rated for your weight and tools, set it on firm, level ground, and lock all spreaders or braces before climbing.
Maintain ladder safety and scaffold stability, secure platforms, and avoid overreaching.
- Check feet and locks.
- Keep three points of contact.
- Use guardrails and tie-offs.
Speed Techniques for Large Stripe Projects
For large stripe projects, plan your layout and workflow so you spend more time rolling paint than fiddling with tape: optimize stripe spacing and wall preparation, use efficient paint layering and quick-dry formulas, and embrace pattern variations that suit design trends.
Apply DIY techniques that respect color psychology while maintaining artistic expression, sequence coats logically, and move systematically to finish faster with consistent, precise results.
Cheap Tools and Tricks for a Pro Stripe Finish
You’ve planned the layout and streamlined your workflow—now get a pro-looking stripe finish without spending much. You’ll use budget friendly materials and simple DIY stripe techniques to mask edges, smooth rollers, and tidy touch-ups. Keep tools minimal, practice steady hand pressure, and dry between coats.
- Frog tape for crisp edges
- Mini-roller for even coverage
- Small angled brush for clean touch-ups
Photograph Diagonal Stripes for Social Sharing
Want your diagonal stripes to pop on Instagram or a blog? Use diagonal photography tips: shoot at a 45° angle, align stripes with the frame, and favor natural side light to reveal texture.
Clean composition, minimal props, and steady shots make sharing easier. Edit slightly for contrast and color accuracy, then schedule posts for ideal social media sharing engagement.
Maintain and Clean Painted Striped Walls
After you’ve photographed and shared your striped wall, keep it looking fresh with a simple maintenance routine.
Use wall maintenance and paint care practices: surface cleaning with mild cleaning solutions, spot touch up techniques, and periodic protective coatings.
Keep your striped wall fresh with gentle cleaning, smart spot touch-ups, and occasional protective coatings for lasting color.
Prioritize wall protection and long term upkeep.
- Gentle cleaning tips
- Quick touch up techniques
- Scheduled maintenance routine
Adapting Diagonal Stripes for Renters and Temporary Spaces
If you’re renting or decorating a temporary space, you can still enjoy bold diagonal stripes by using nonpermanent methods like removable wallpaper, peel-and-stick vinyl, or low-tack painter’s tape with washable paint.
You can choose temporary solutions and rental friendly designs—removable options, wall decals, fabric panels, or painter’s tape—offering color inspiration, design flexibility, and creative alternatives that act as space enhancers without damage.
Next Patterns: Scale Up After Mastering Diagonals
Once you’ve got diagonal stripes down, start scaling patterns by enlarging stripe widths incrementally so proportions stay balanced.
Practice shifting angles smoothly between sections to create intentional shifts that don’t jar the eye.
Finally, try repeating motifs at different sizes to see how scale changes the room’s rhythm.
Gradual Pattern Enlargement
When you’ve got diagonal stripes down, scale them up gradually so your skills and confidence grow without overwhelming the room; you’ll test gradient blending and stripe psychology as you enlarge motifs, keeping balance and visual weight in check.
- Start small: double stripe width, same angle.
- Adjust contrast: soften edges for flow.
- Step back: evaluate proportions before committing.
Complex Angle Transitions
As you move beyond simple diagonals, introduce angle changes deliberately so each shift reads intentional and not chaotic.
You’ll plan anchor lines and reference points, practice complex angle techniques on a scrap, and mark every pivot.
Use level and bevel tools to counter diagonal alteration challenges, tape precisely, and paint in controlled segments so each new angle aligns cleanly with the previous.
Repeating Motif Scaling
Having mastered diagonal shifts and clean pivots, you can scale a repeating motif to add rhythm and impact across a larger wall.
You’ll plan grid spacing, adjust tape angles, and test motif variations for visual balance. Use repeating patterns to guide alignment and increase scale gradually so seams read crisp and intentional.
- Measure
- Mockup
- Probe
Frequently Asked Questions
Can Diagonal Stripes Hide Wall Stains or Water Damage Long-Term?
Yes — diagonal stripes can help with stain camouflage and short-term damage concealment, but you’ll need to repair and prime water-damaged areas first; otherwise stains may bleed through and the concealment won’t last long.
Will Diagonal Stripes Affect My Home’s Resale Value?
Yes — diagonal stripes can help or hurt resale value, depending on resale trends and buyer preferences. You’ll appeal to trend-seeking buyers but risk turning off traditionalists, so balance boldness with neutral zones to maximize interest.
Can I Tape and Paint Stripes Over Wallpaper Safely?
Yes—you can tape and paint over wallpaper if you test first: use low-tack painter’s tape, consider removable tape types, and assess wallpaper durability; if adhesive or paper peels, strip or prime to avoid damage and poor adhesion.
How Do Lighting Changes Alter Stripe Appearance Throughout the Day?
Lighting intensity shifts change how stripes read: you’ll see contrasts soften or sharpen, and color perception will shift toward warmer or cooler tones as daylight or bulbs change, so plan stripe value and finish accordingly.
Are There Health or VOC Concerns With Striped Accent Walls?
About 60% of consumers now choose low-VOC paints; you should pick low-VOC paint materials to protect indoor air quality, avoid strong odors during application, ventilate well, and let the room off-gas before regular occupancy.
