
How to Paint Shapes on a Wall: Clean Lines, Bold Results
You can get crisp, bold shapes by prepping carefully, choosing high-coverage paint, and using quality tape and tools. Clean and repair the wall, prime glossy or stained areas, then sketch and mask your design. Roll thin even coats, seal tape edges, and remove tape while paint is tacky for sharp lines. Work lightest to darkest with adequate drying time, touch up chips as needed, and follow simple maintenance—keep going for step-by-step techniques and pro tips.
What You’ll Learn: Paint Precise Shapes on Any Wall
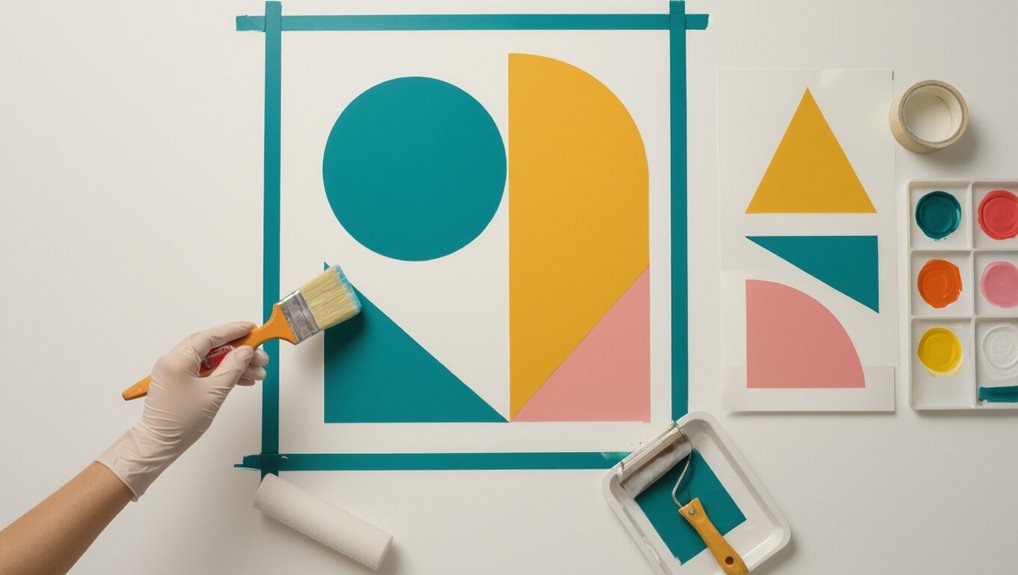
You’ll learn how to plan, mask, and paint crisp shapes—triangles, circles, stripes, and custom forms—so they look deliberate and professional on any wall.
You’ll choose colors using color theory, sketch balanced compositions, and select tapes and brushes for clean edges.
You’ll consider shape symbolism to convey mood and scale, test samples, and follow step-by-step masking and painting for flawless results.
Who Can Benefit From Painting Shapes on a Wall
Whether you’re updating a nursery, brightening a rental, or adding a modern accent to your office, painting shapes on a wall is an approachable way to transform a space.
You’ll find it useful if you’re a home decorator, DIY enthusiast, artist, parent, renter, interior designer, educator, event planner, muralist, or working on children’s rooms.
- home decorators
- DIY enthusiasts
- artists and muralists
- parents and educators
- renters and interior designers
Quick Overview: Project Steps at a Glance
Start by gathering your supplies and sketching a simple plan so you know what shape, size, and colors you’ll use; then prep the wall, tape your design, apply paint in thin even coats, and finish with clean-up and touch-ups.
Use project inspiration to guide layout choices, consult basic color theory for contrast and harmony, work methodically, let coats dry, and tweak edges for crisp results.
Choose the Right Paint for Crisp Shapes
Any painter aiming for crisp, clean shapes should pick a paint that offers good coverage and minimal bleed. Flat or matte finishes can hide imperfections but often need more layers, while eggshell or satin go on smoother and help edges look sharper.
You’ll consider paint types and basic color theory to guarantee contrast, opacity, and visual balance.
- Coverage level
- Pigment quality
- Opacity
- Undertone effects
- Sheen consistency
Pick the Right Finish: Matte, Eggshell, Satin, or Semi-Gloss
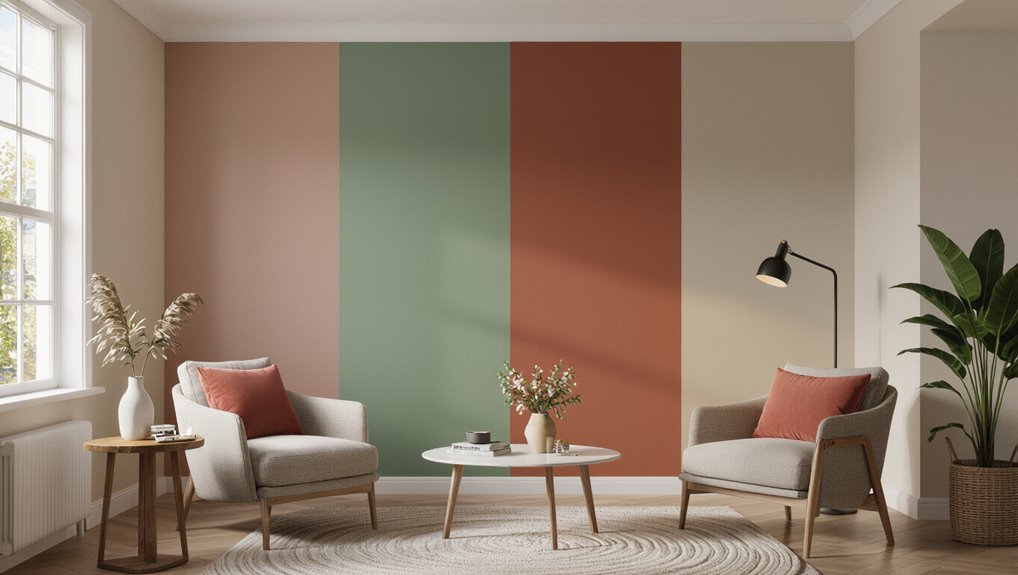
Which finish will give your shapes the look and durability you want?
You’ll choose based on sheen and wear: a matte finish hides texture and reduces glare, eggshell offers subtle depth, satin adds slight sheen and easier cleaning, and semi-gloss advantages include durability and crisp edge definition for trim-like shapes.
Pick what balances appearance with maintenance for your room’s activity level.
Estimate How Much Paint You’ll Need for Different Shape Sizes
A few simple calculations will help you figure out how much paint to buy for shapes of different sizes; measure each shape’s area, add a bit for overlap and touch-ups, and multiply by the paint’s coverage per coat.
Use a paint coverage calculator for accurate shape size estimation and plan coats, priming, and waste.
- Measure area precisely
- Count coats needed
- Include primer
- Add 10–15% waste
- Round up to nearest can
Tools That Guarantee Clean Lines
Three simple tools will make the difference between crisp edges and a messy mural: quality painter’s tape, a sharp angled sash brush, and a compact foam roller.
You’ll learn tape techniques to block paint and prevent bleed, use the sash brush for precise edge finishing and corners, then smooth with the foam roller for even coverage.
Clean tools equal clean lines.
Best Painter’s Tapes for Sharp Edges and Why They Differ
When you want razor‑sharp edges, picking the right painter’s tape matters: different tapes vary in adhesive strength, edge design, and backing flexibility, and those differences determine how well they prevent bleed and conform to textured surfaces.
Choose the right painter’s tape—adhesive, edge, and backing determine bleed prevention and texture conformity for razor‑sharp edges
You’ll choose based on painter’s tape types and tape adhesion differences to match paint, substrate, and removal timing.
- Low tack for delicate surfaces
- Medium tack for general walls
- High tack for rough textures
- Waterproof for exterior paints
- Delicate edge for crisp lines
Specialty Tools: Edge Guides, Circle Templates, and Stencils
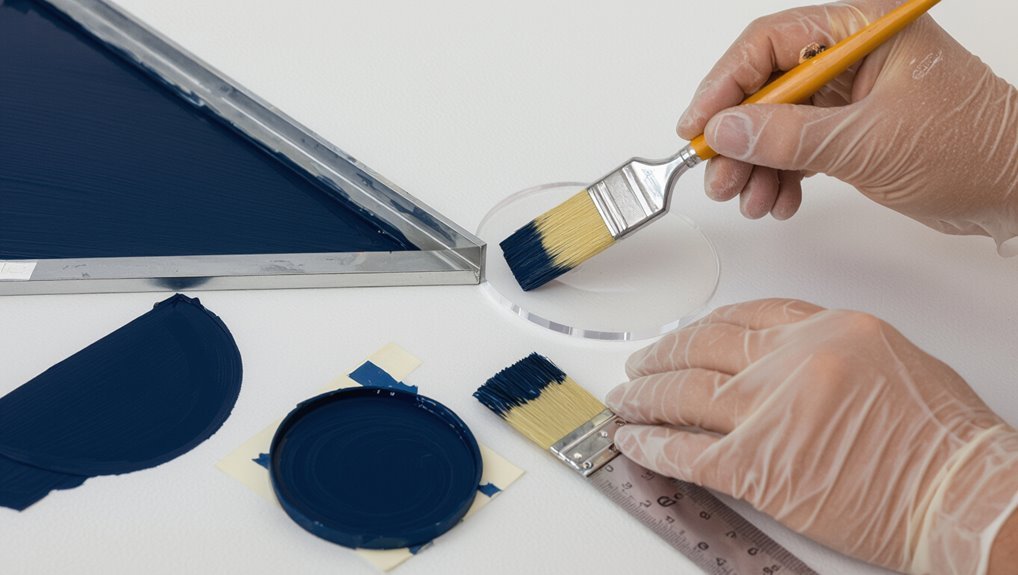
One simple set of specialty tools can make complex shapes look professional: edge guides keep lines straight, circle templates give perfect curves, and stencils let you repeat detailed motifs quickly.
You’ll use edge alignment techniques to position guides, clamp templates for consistent radii, and choose stencil design options that suit scale.
Work steadily, remove guides while paint’s tacky, and touch up crisp edges.
Prep Your Wall for Flawless Paint Adhesion
Before you start painting shapes, make sure the wall is clean and completely dry so paint will stick.
Patch any holes or cracks and sand smooth for an even surface.
Wipe away dust and grease with a mild cleaner so your shapes look crisp and last.
Clean And Dry Surface
Although it might seem simple, you’ll get the best results if you start with a clean, completely dry wall—dust, grease, and leftover residue can stop paint from sticking and cause peeling or uneven coverage.
Use surface preparation techniques and wall cleaning methods to guarantee adhesion. Consider these steps:
- Wipe with a damp microfiber cloth
- Use mild detergent for grease
- Rinse thoroughly
- Let fully air dry
- Vacuum corners
Repair Holes And Cracks
After cleaning and drying the wall, check for holes, cracks, and dents so they don’t show through your paint.
For hole repair, remove loose debris, apply patching compound or spackle, then sand smooth once dry.
For crack filling, widen tiny gaps slightly, push in flexible filler, and feather edges.
Prime repaired areas before painting for consistent adhesion and finish.
Remove Dust And Grease
Dust and grease can stop paint from sticking, so wipe walls with a microfiber cloth to remove loose dust. Then degrease high-traffic areas (around light switches, trim, and the kitchen range) with a mild detergent or trisodium phosphate solution. Rinse thoroughly and let the surface dry before you prime or paint.
Use these dust removal techniques and grease cutting solutions:
- Microfiber wiping for loose dust
- Vacuuming corners and trim
- Mild detergent for general grime
- TSP for stubborn grease
- Final rinse and full drying
Fix Wall Dings and Dents Before You Paint
Start by inspecting the wall closely for dings, dents, and loose paper so you know exactly what needs repair before painting.
Scrape loose paper, sand edges, and clean the area. Use appropriate wall patching techniques—spackle for small holes, joint compound for larger repairs—then sand smooth.
Follow proper wall surface preparation so paint adheres evenly and your shapes look crisp.
When to Prime and Which Primer to Choose
Before you paint your shapes, you’ll want to prime as soon as patching and sanding are fully dry so the surface is sealed and consistent.
Choose a primer based on the wall material and the paint type—latex primers for drywall and water-based paints, and oil or shellac primers for stains or high-moisture areas.
Picking the right primer at the right time makes your colors truer and your edges cleaner.
Surface Prep Timing
If your wall has fresh drywall, stains, or uneven patches, prime it now so the paint adheres evenly and colors read true. If the surface is clean and previously painted with good adhesion, you can skip priming and go straight to paint.
Plan surface preparation timing and ideal drying intervals before taping.
- Wait recommended cure times
- Check humidity and temperature
- Sand between coats
- Use tack cloths
- Test adhesion
Primer Type Guide
When you want colors to pop and bind properly, choosing the right primer matters: pick primer types based on surface—latex for drywall, oil-based or bonding primer for glossy or stained areas, and stain-blocking for tannins.
Prime before masking and textured work. Use thin, even coats; sand between coats if needed.
Application tips: maintain humidity, follow dry times, and apply with a roller or brush suited to the primer.
Choose Shape Styles That Fit Your Room
Because the shapes you pick set the room’s mood, match their style to the space’s scale, function, and existing decor.
You’ll balance shape aesthetics with room functionality, choosing curves for softness, angles for energy, or organic forms for warmth.
Consider traffic, furniture lines, and lighting when deciding.
- Curves soften seating areas
- Angles energize workspaces
- Organic forms add warmth
- Repeats create rhythm
- Negative space keeps balance
Scale Guidelines: How Big Should Your Shapes Be?
Think about room size ratio when deciding shape scale—large rooms can handle big, bold shapes while small rooms benefit from smaller, more frequent motifs.
Match the shapes to your furniture and function so patterns don’t compete with seating, storage, or focal pieces. That way your design feels balanced and purposeful.
Room Size Ratio
If you’ve got a small room, keep your shapes proportionally smaller so they don’t overwhelm the space; in larger rooms you can go bolder and scale up to create impact.
Consider room dimensions and shape proportion when planning. Balance, sightlines, and focal points matter.
- Measure walls before sketching
- Use thirds or golden ratios
- Test with paper cutouts
- Keep negative space
- Adjust scale for ceilings
Furniture And Function
Start by mapping how your furniture sits against the wall so your painted shapes complement use and flow: large sofas or beds call for bigger, lower-centered shapes to anchor the piece, while narrow consoles or accent chairs pair best with smaller, vertical motifs that won’t compete for attention.
Match shape scale to furniture arrangement, keep sightlines clear, and treat patterns as functional decor that supports room purpose.
Use Grids and Guides to Map Your Design Accurately
While you mark a grid, you’ll turn a complex mural into manageable squares that make layout and proportion simple to transfer from paper to wall.
Use grid techniques and clear design mapping to plot focal points, control scale, and keep symmetry. You’ll measure, level, and pencil guides before painting to avoid mistakes.
- Measure precisely
- Use a level
- Number squares
- Mark key anchors
- Check proportions
Transfer Complex Shapes From Paper to Wall
You’ll start by tracing the complex shape onto sturdy paper and cutting a clean stencil for crisp edges.
Use your grid to match key points and scale the pattern up or down so every detail lands in the right place.
Then transfer the stencil or the scaled grid points to the wall and secure them before you paint.
Trace And Cut Stencil
If your design has curves or intricate details, trace-and-cut stencils let you transfer them cleanly onto the wall. You’ll trace the pattern onto a sturdier material, cut it precisely, and use the result to paint repeatable, crisp shapes.
Use proper stencil materials and stencil techniques to avoid bleed and misalignment.
- Choose durable plastic or cardstock
- Secure edges with tape
- Cut with a sharp blade
- Test on scrap
- Reuse and clean carefully
Grid And Scale Transfer
Start by drawing a grid over your paper design and reproducing a proportionally scaled grid on the wall so you can copy each square one at a time. This method makes it easy to transfer complex shapes accurately without guessing their placement or size.
You’ll use simple grid techniques, label coordinates, and check scale accuracy as you map, sketch, and adjust each square for precise painting.
Mark Measurements for Symmetrical Patterns
When you’re planning a symmetrical pattern, measure and mark from a clear central point so each element aligns precisely. Use a level and a laser or chalk line for straight axes, then mark spacing with a tape measure and pencil ticks at consistent intervals.
Use measurement tools for symmetrical spacing and note reference lines.
- Center anchor
- Equal intervals
- Level checks
- Repeatable marks
- Verify symmetry
Masking Strategies for Straight Lines and Angles
Although clean paint edges depend on careful prep, masking is the step that actually guarantees crisp straight lines and sharp angles.
You’ll pick high-quality painter’s tape, press edges firmly, and use a putty knife for seal. For angle precision, mask from the apex outward, remove tape at a 45° pull while paint’s tacky, and touch up tiny bleed spots with a small brush.
Masking Curves and Circles Without Wrinkles
Before you tape, make sure the wall is clean and dry so the tape will stick without bubbling.
When you apply the tape for curves or circles, stretch it gently and press it down from the center outward to smooth wrinkles.
Take your time and re-seat any edges that lift so your paint lines stay crisp.
Preparing The Surface
Masking curves and circles cleanly takes a bit of technique, but you can do it without wrinkled tape or jagged edges.
Prep focuses on surface texture and compatible wall materials so tape bonds and paint stays crisp. Clean, sand, and prime as needed before masking.
- Remove dust and grease
- Smooth rough patches
- Test tape adhesion
- Use appropriate primer
- Verify wall materials
Stretching Tape Smoothly
Start by aligning the tape along your curve, then gently stretch and press it down in short sections so it conforms without puckering.
Work slowly, smoothing edges with your fingertip or a plastic tool, overlapping short pieces for tight arcs.
Use proper tape application techniques to prevent paint bleed.
After painting, follow tape removal tips: peel back at a 45° angle while paint is tacky for crisp results.
Blend Two-Tone Edges for Seamless Joins
When two colors meet on a wall, you’ll want to soften their junction so the change looks intentional and smooth; blending the edge prevents a harsh line and makes the design read as a single composition.
Soften color junctions on a wall—blend edges to avoid harsh lines and create a cohesive, intentional design.
You’ll use blending techniques for subtle color shifts, feathering strokes and glazing to merge tones so the join looks deliberate.
- feather brush strokes
- thin glaze layers
- work wet-on-wet
- soften with dry brush
- step back and assess
Paint Application Methods for Even Coverage
1 simple rule will improve your finish: apply paint consistently, not haphazardly. You’ll use a paint roller for broad areas and a precise brush technique for edges, keeping wet edges and even pressure. Work in sections, maintain a uniform coat, and avoid overworking.
| Tool | Area | Tip |
|---|---|---|
| Roller | Large | Load evenly |
| Brush | Edges | Short strokes |
| Detail brush | Corners | Light pressure |
| Foam | Smooth | Thin coats |
Rolling vs. Brushing vs. Spraying Shapes
When you pick a roller, your speed and pressure will determine coverage and texture.
Use a brush when you need control for crisp edges and fine detail.
If you spray, practice technique and mask carefully to manage overspray.
Roller Speed And Coverage
A few factors—tool type, paint viscosity, and wall texture—determine how fast you can work and how much coverage you’ll get when rolling, brushing, or spraying shapes.
Use proper roller technique for even application and focus on coverage consistency to avoid patchiness.
- Choose nap for texture
- Load roller correctly
- Overlap passes slightly
- Maintain steady speed
- Inspect for thin spots
Brush Control And Detail
Decide which tool fits the shape and detail you’re after: rollers speed up filling large areas but struggle with edges. Brushes give you the most control for crisp lines and tight corners. Sprayers let you cover complex curves fast but need masking to protect surrounding surfaces.
Use proper brush techniques—angle, pressure, and short strokes—to gain advanced control, steady your wrist, and finish sharp, clean edges.
Spray Technique And Overspray
You’ve picked your tool based on shape and detail, so now weigh how spraying compares with rolling and brushing for speed, control, and mess.
Use a proper spray technique for even coverage, and practice overspray control to protect surrounding areas. Choose spraying for large, simple shapes; brush or roll for edges and texture.
- Faster coverage
- Edge precision
- Masking importance
- Ventilation needs
- Cleanup routine
How to Avoid Paint Bleed Under Tape
Although crisp edges look effortless, preventing paint bleed under tape takes a few deliberate steps: choose quality tape—follow tape selection tips for surface type—and press edges firmly.
Thin your paint slightly for better flow but avoid drips; paint consistency adjustments matter.
Use light coats, brush or roll away from the tape, and remove tape while paint’s tacky to keep lines sharp and clean.
Seal Tape Edges With the Base Coat for Crisper Lines
After pressing the tape firmly, run a thin layer of the base color along the tape edge to seal any tiny gaps before applying your topcoat.
Press the tape firmly, then seal the edge with a thin base-color layer before applying your topcoat for crisp results.
You’ll lock the tape application, prevent bleed, and get crisp shapes. Let the base coat dry fully, then paint the top color with steady strokes.
- Prevents seepage
- Enhances contrast
- Preserves edges
- Simplifies cleanup
- Boosts durability
Cut Tape and Use a Utility Knife Safely
Before you start cutting, set your tape on a stable, firm surface so the blade won’t slip.
Score the tape with controlled, shallow passes rather than one deep slice to keep lines clean.
Always keep fingers behind the blade, wear eye protection, and retract the knife when you’re done.
Choose Proper Cutting Surface
A sturdy, flat cutting surface keeps your utility knife from tearing paint or slipping when you cut tape, so pick a clean workbench, thick scrap wood, or a self-healing cutting mat that’s larger than the piece you’ll trim.
Use appropriate cutting surface types and ideal cutting tools to protect edges and work safely.
- protect paint edges
- stabilize tape
- prevent blade binding
- extend blade life
- reduce slips
Score Tape With Control
Score the tape firmly with a fresh utility blade so paint won’t lift when you remove the masking.
You’ll use controlled, short strokes and steady pressure to follow edges; change blades often.
Practice score tape techniques on scrap material to build control precision.
Cut just deep enough to sever paint film yet avoid damaging the wall, keeping movements deliberate and the blade angle low for clean removal.
Protect Fingers And Eyes
Once you’ve scored the tape, protect your fingers and eyes while you finish cutting and removing sections—sharp blades and flying paint chips can cause quick injuries.
You should wear gloves, goggles, and cut away from your body, keeping fingers clear of the blade. Pause if the cut binds and replace dull blades promptly for consistent control and improved eye safety.
- Wear cut-resistant gloves
- Use safety goggles
- Cut away from you
- Keep fingers back
- Replace dull blades
Remove Tape Without Ripping Paint
If you pull the tape off too fast, you can strip fresh paint right down to the wall, so slow, steady removal is key.
Peel back at a 45° angle, holding the wall near the edge to support the paint.
Use tape application techniques that seal edges, score any bleed, and follow tape removal tips: warm the line slightly and pull toward the painted area.
Fix Imperfect Edges After Tape Removal
Even with careful removal, you may see small smudges, ragged lines, or tiny bleeds along the edge—don’t panic.
You can fix them fast: use precise tools and tape techniques, then focus on edge smoothing with light sanding, fingertip paint touch-ups, or a fine brush. Clean, steady corrections preserve your shapes.
- Sand lightly
- Feather paint
- Use a fine brush
- Match color
- Protect finish
Layer Shapes: Sequencing for Multi-Color Designs
Start by planning your color sequence so overlapping hues and highlights fall in the right order.
Factor in drying times between coats and use masking order tricks to protect finished layers while you work.
With a clear sequence, you’ll avoid smudges and get crisp, multi-color shapes.
Plan Color Sequence
Think through the order you’ll paint each color so overlapping edges stay crisp and you won’t trap wet paint under new layers.
You’ll apply color theory and shape psychology to prioritize background, dominant hues, then accents, avoiding smudges and visual clutter.
- Start with largest, lightest fields
- Reserve bold accents for last
- Paint midtones between extremes
- Consider visual weight
- Test small swatches first
Drying Time Management
Because wet edges can ruin crisp intersections, plan your sequencing around actual drying times so you don’t trap fresh paint under new layers.
You’ll stagger coats, test touch-dry spots, and use drying techniques like fans or slow-dry additives selectively.
Monitor environmental factors—humidity, temperature, ventilation—to predict cure times.
Wait fully between contrasting colors to prevent bleed and preserve sharp, layered shapes.
Masking Order Tricks
When layering multiple colors, plan your masking from the lightest to the darkest and from the most recessed to the most prominent shapes so each edge stays crisp and each coat sits where you intend.
You’ll use masking techniques to protect edges, sequence coats, and build creative patterns without bleed. Follow this order to simplify work and maintain clean shifts.
- Base first, largest areas
- Recessed details next
- Midtones after
- Prominent shapes last
- Peel after final dry
Create Clean Overlaps and Shadow Effects
If you want overlapping shapes to look intentional and professional, plan their order and edges before you paint so each overlap stays crisp and the shadows read correctly. Use precise overlap techniques and subtle gradients to suggest shadow depth. Tape edges, paint base layers first, then add shadows last.
| Step | Tool | Tip |
|---|---|---|
| 1 | Tape | Seal edges |
| 2 | Base | Let dry |
| 3 | Shadow | Feather |
| 4 | Refine | Clean edge |
Paint Textured Walls: Tips for Uneven Surfaces
Start by prepping the surface—clean, patch, and sand rough spots so paint adheres evenly.
Use flexible painter’s tape and press it into the texture to keep crisp edges.
Thin or thicken your paint slightly to match the wall’s texture and maintain smooth coverage.
Prep The Surface
Prep the surface so your geometric design looks crisp even on textured walls. You’ll assess surface texture, clean grime, fill deep pits, sand rough peaks, and match primer to desired wall color for uniform coverage.
- Inspect for loose paint and holes
- Wash with mild detergent
- Use patching compound sparingly
- Sand to blend edges
- Prime for consistent adhesion
Use Flexible Tape
After you’ve smoothed and primed the wall, use flexible painter’s tape to get crisp edges over textured surfaces. Press tape into valleys, seal edges with a putty knife, and paint lightly. For clean lines, wait before tape removal and pull at a 45° angle.
| Step | Action | Tip |
|---|---|---|
| 1 | Position tape | Align pattern |
| 2 | Seal edges | Use putty knife |
| 3 | Paint | Light coats |
| 4 | Wait | Dry fully |
| 5 | Remove | Slow tape removal |
Adjust Paint Consistency
Thin your paint slightly so it flows into nooks and settles evenly on textured surfaces, and test the mix on a scrap before you roll the whole wall.
You’ll use paint viscosity adjustments and paint thinning techniques to match texture. Try small increments, stir thoroughly, and note results to repeat successful mixes.
- Measure additions
- Start conservative
- Stir consistently
- Test small areas
- Record ratios
Work Around Obstacles: Outlets, Trim, and Windows
When you paint shapes near outlets, trim, or windows, take a moment to plan how you’ll protect and work around each obstacle so your edges stay crisp and the hardware stays paint-free.
Use blue tape for trim, paper or foam for outlet coverage, and small brushes for tight corners.
Good obstacle navigation includes removing covers, masking edges precisely, and cleaning stray paint immediately.
Paint Large-Scale Geometric Patterns Efficiently
Start by measuring and planning your layout so every triangle or stripe lines up and repeats correctly.
Use high-quality, sharp-edge painter’s tape and press it down firmly to get crisp lines.
Work in sections, removing the tape while the paint’s tacky to avoid tearing edges.
Measure And Plan
Measure the wall and rough out your design on paper before you touch any tape or paint so you’ll avoid costly mistakes.
You’ll measure placement precisely, establish a planning grid, and mark reference points. Work from a center line outward, note symmetry, and confirm proportions before painting.
- Use a laser or long tape
- Sketch to scale
- Mark key intersections
- Double-check levels
- Photograph reference points
Use Sharp-Edge Tape
One clear strip of sharp-edge painter’s tape makes the difference between crisp geometric lines and ragged edges, so choose a high-quality tape and press it firmly along your planned boundaries.
You’ll seal edges with a credit card or putty knife, check alignment, and paint in thin coats.
For clean results, pull tape removal slowly at a 45° angle while paint’s tacky to avoid lifting.
Paint Perfect Circles and Arcs by Hand
If you want clean, consistent circles and arcs on your wall, you’ll rely on a few simple tools and steady wrist motion to guide the paint. With a pencil, string, and a makeshift compass you can mark perfect guides, and with the right brush and technique you’ll follow them smoothly for professional-looking results.
Use circle techniques and arc strategies to plan, steady, and finish.
- Mark center and radius
- Use thin, steady strokes
- Choose a round, firm brush
- Remove excess paint between passes
- Sand and touch up edges for crispness
Easy Mural Ideas Using Repeated Shapes
Once you’ve mastered painting clean circles and arcs, you can use those shapes as building blocks for simple, striking murals.
Choose a limited palette and repeat circles, hexagons, or scallops in grids or waves to form cohesive mural themes.
Experiment with scale and color contrast, and plan shape combinations that guide the eye across the wall for bold, organized impact.
Kid-Friendly Shapes and Durable Finishes for Playrooms
Durability matters in playrooms, so pick kid-friendly shapes—like rounded clouds, simple animals, stars, and large polka dots—that are easy for little eyes to enjoy and easy for you to paint cleanly.
Use washable, scrub-resistant finishes and thoughtful color choices to support playful patterns while staying resilient.
- Rounded edges reduce chips
- Choose scrubbable paints
- Limit high-contrast areas
- Test color choices first
- Plan wear zones
Temporary Shapes: Removable Paint Techniques and Decals
When you want playful designs that won’t be permanent, removable paint techniques and decals give you flexibility to change the room as kids grow.
You can try low-tack removable options like chalkboard paint alternatives, peel-and-stick decal designs, or temporary stencils.
They let you test colors, reposition shapes, and refresh themes without damage, making updates fast and kid-friendly as interests evolve.
Time and Drying Considerations Between Coats and Colors
Because paint needs time to form a skin and off-gas, you should wait the manufacturer’s recommended drying time between coats and before adding a new color to avoid tackiness, lifting, or muddy edges.
You’ll follow proper drying times and coat intervals to keep edges crisp.
- Check surface tack
- Note humidity/temperature
- Use thin coats
- Allow full curing
- Test a small area
Common Mistakes That Ruin Clean Lines and How to Avoid Them
Even with proper drying times, a few common mistakes will still blur your edges if you don’t watch for them.
Poor tape application, dirty or glossy walls, and overloading the brush invite bleed. Press tape edges firmly, sand or degloss shiny areas, and wipe dust.
Respect surface tension by using thin coats and a light touch near edges so paint won’t pull under.
Troubleshoot Paint Runs, Sags, and Uneven Edges
If you spot a paint run, stop it right away by brushing or blotting excess paint before it dries.
For sags, smooth them while the paint is tacky with a loaded brush or roller to blend the area.
To fix uneven edges, wait until the paint’s dry enough to cleanly re-cut the line with a steady brush or a bit of sand and touch-up.
Stop Runs Quickly
Stop runs quickly by catching them as soon as you see sagging paint or a glossy drip forming: run a clean, damp brush or a well-loaded roller lightly over the area to redistribute the paint, then smooth it with long, even strokes to blend the edge.
Use proper paint techniques and test color combinations nearby.
- Work fast
- Light pressure
- Blend outward
- Inspect lighting
- Clean tools
Smooth Sags Out
Once you catch a run, you’ll often need to smooth out any remaining sag or uneven edge before the paint dries. You’ll gently push excess paint toward the center, use a clean brush or roller to blend, and apply light pressure. Practice sag prevention and simple smoothing techniques to avoid rework.
| Tool | Action |
|---|---|
| Brush | Blend |
| Roller | Smooth |
| Knife | Lift |
| Cloth | Dab |
Sharpen Uneven Edges
While you’re working to fix runs and sags, sharpening uneven edges is about removing excess paint and redefining the line so your shape looks crisp and intentional.
You use edge sharpening techniques and uneven surface solutions to restore clarity, scrape gently, sand, and repaint precise strokes.
- scrape excess
- sand feathered edges
- use a fine brush
- employ a straightedge
- touch up thin coats
Repair and Touch Up Small Chips After Finishing
Fixing small chips after your paint has dried keeps your shapes looking crisp and professional.
You’ll handle chip repair by cleaning the area, lightly sanding edges, and applying matching paint with a fine brush or toothpick.
Use approved touch up techniques: thin layers, feathered edges, and quick drying between coats.
Inspect under good light and blend until the patch disappears into the surrounding finish.
Care for and Clean Painted Shapes Over Time
After you’ve repaired any chips, keeping your painted shapes looking fresh is mostly about routine care and the right cleaning methods.
You’ll do paint maintenance with gentle soap, soft cloths, and spot cleaning; avoid abrasive scrubbing. Consider light dusting and reapplying protective coatings where needed to preserve edges and color.
- Dust weekly
- Spot-clean stains
- Test cleaners
- Recoat small areas
- Protect high-traffic zones
Cost-Saving Tips and Where to Splurge for Better Results
You can save a lot by doing prep work yourself—taping, sanding, and priming are tasks that cut pro time and cost—while investing in quality paint and the right brushes pays off in finish and longevity.
Use budget friendly materials for drop cloths, tape, and rollers, but splurge on premium brushes and high-quality paint for crisp edges and durable results; rent specialty tools if needed.
Inspiration Sources and Templates to Try Next
When you’re looking for fresh ideas, start with places that spark creativity fast: design blogs and Instagram mood boards for current trends, nature and architecture for color and form, and vintage magazines or fabric patterns for unexpected motifs.
Seek sparks where trends, nature, architecture, and vintage patterns collide for quick, fresh design inspiration.
Use color inspiration and shape trends to guide templates you’ll adapt.
Try these prompts:
- Mid-century geometric mashup
- Botanical silhouette repeats
- Architectural grid play
- Playful asymmetry study
- Textile-motif reinterpretation
Frequently Asked Questions
Can I Paint Shapes Directly Over Wallpaper Safely?
You can, but you’ll need proper wallpaper preparation first: clean, repair seams, and prime. That guarantees paint adhesion and shape durability; otherwise shapes may peel or show texture, so don’t skip sealing and use quality paints.
How Do Painted Shapes Affect Resale Value?
They can boost or hurt resale value depending on resale trends and shape popularity; you’ll appeal to niche buyers with bold, trendy shapes but should stick to neutral, popular designs if you’re aiming for broad marketability and quicker sales.
Are There Voc-Free Paints That Still Give Crisp Edges?
Yes—you can get VOC-free paints that deliver crisp edges: choose high-quality color selection, use sharp-edged tape, and employ careful application techniques, roll light coats, and cut in steadily for clean lines and bold, durable results.
Can I Hang Heavy Items on Painted Shapes Long-Term?
Yes — you can hang heavy items on painted shapes long-term if you use proper hanging techniques, secure anchors into studs or rated anchors, respect weight limits for each anchor, and avoid adhesives that can damage paint or drywall.
What Warranty or Guarantees Exist for Professional Paint Work?
Pristine promises: you’ll get written warranties covering paint quality and workmanship, often conditional on proper surface preparation. Contractors usually guarantee adhesion and finish for a set term, and they’ll repair defects if you report them promptly.
