
How to Prepare a Concrete Wall for Painting the Right Way
You’ll start by inspecting the wall for cracks, efflorescence, loose paint, and moisture, then clean with a stiff brush and appropriate cleaner. Repair cracks and spalls with proper patching compounds, treat salt deposits, and verify the surface is dry using a moisture meter. Etch smooth concrete if needed, apply a masonry primer, and paint in suitable temperature and humidity. Follow maintenance tips to protect the finish, and keep going to learn detailed steps and product choices.
Quick Pre-Paint Checklist for Concrete Walls
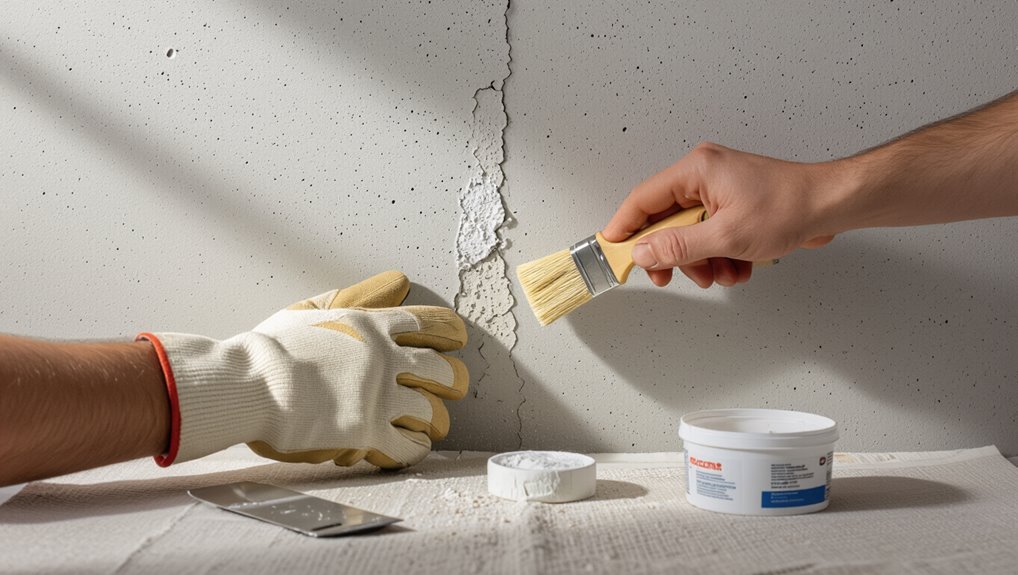
Start with a quick inspection: check for cracks, spalling, efflorescence, mold, and loose or flaking paint so you know what repairs and cleaning you’ll need.
You’ll note areas needing patching, then choose cleaning techniques—pressure wash, detergent scrub, or mold remover.
After repairs, focus on surface preparation: remove dust, etch glossy spots, and guarantee the wall’s dry and sound before priming and painting.
What You’ll Accomplish: Durable Painted Concrete
You’ll end up with a tough, long-lasting finish that protects the concrete from moisture, stains, and surface deterioration while giving walls a clean, uniform look.
Proper prep improves adhesion, addresses porosity, and minimizes peeling.
Who Should Prep a Concrete Wall Before Painting
Knowing how prep choices affect durability helps you decide who should handle the work.
You can DIY minor cleaning, patching, and basic surface treatments if you’re comfortable with painting techniques and follow safety precautions.
Hire a pro for extensive repairs, structural issues, or specialized finishes to guarantee proper adhesion and longevity.
Pros bring tools, experience, and warranties you likely won’t match.
When to Paint Concrete: Ideal Timing and Conditions
Pick a dry, mild day to paint concrete—temperature and moisture are the two biggest factors that determine how well paint will cure and adhere.
You should aim for perfect temperatures and stable humidity levels, follow seasonal considerations, and guarantee concrete curing is complete before starting.
For best weather and peak conditions, finish surface preparation, avoid extremes, and allow proper paint drying time for lasting results.
Safety Gear and Ventilation for Concrete Prep
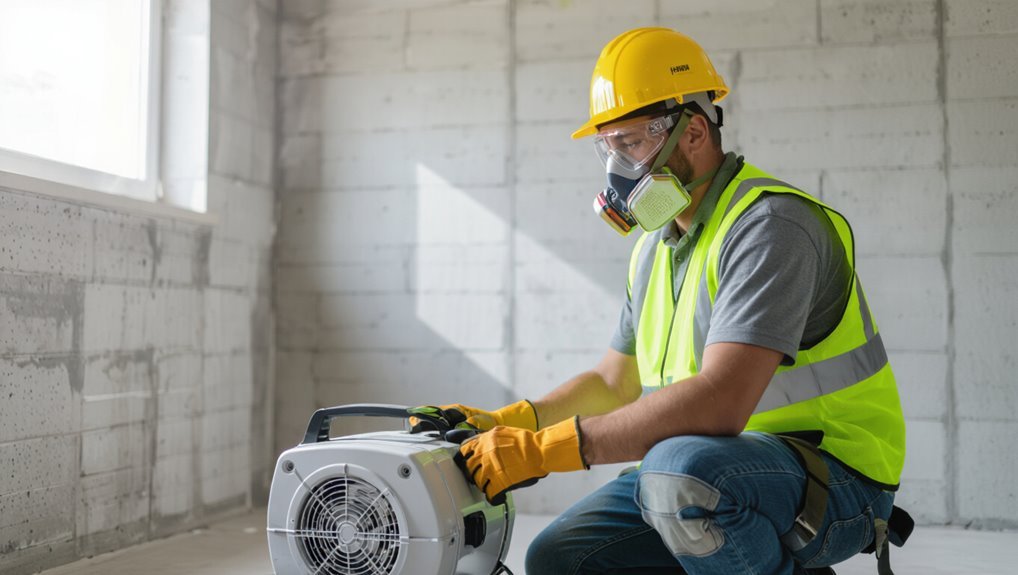
One essential step before you start prepping concrete is gearing up properly: wear a respirator rated for dust and vapors, chemical-resistant gloves, eye protection, long sleeves, and sturdy shoes.
Follow safety practices and use ventilation methods like exhaust fans or open windows to clear fumes. Use PPE consistently and position airflow to move contaminants away from you.
- Inspect PPE fit
- Maintain airflow
- Replace filters timely
Tools and Materials for Concrete Wall Prep
Before you start sanding or patching, gather the right tools and materials so the job goes quickly and safely; since you already set up PPE and ventilation, keep that gear accessible while you work.
For a concise tools overview, bring grinders, wire brushes, scrapers, sandpaper, trowels, and a shop vac.
For material selection, pick patch compound, concrete primer, masonry caulk, and compatible paint.
Inspecting a Concrete Wall for Paint Readiness
Start by scanning the surface for cracks, spalling, and loose mortar so you can plan repairs.
Check for moisture by feeling for dampness, using a moisture meter, and looking for white powdery efflorescence that signals water issues.
Address any damage or persistent moisture before you paint to guarantee proper adhesion and a lasting finish.
Surface Damage Assessment
Although the wall might look fine at a glance, you need to perform a systematic surface damage assessment so paint will adhere and last.
Use inspection methods to catalog damage types, crack assessments, and moisture issues, then choose repair techniques, cleaning solutions, and surface treatments that guarantee paint adhesion.
- Map cracks and spalls
- Test patched repairs
- Confirm cleaned, sound substrate
Moisture And Efflorescence Detection
1 key step in prepping concrete for paint is detecting moisture and efflorescence—issues that’ll prevent coatings from adhering and cause premature failure. You’ll use moisture meters, tape tests, and visual checks; address salts with efflorescence treatment and install moisture barriers if needed.
| Test | Action |
|---|---|
| Moisture meter | Measure % |
| Tape test | Check dampness |
| Visual salt | Scrub |
| Probe | Check depth |
| Repair | Seal or barrier |
Moisture Testing for Concrete Walls Before Painting
Before you paint, check for moisture with a concrete moisture meter to get accurate readings below the surface.
You can also spot surface dampness by taping a plastic sheet to the wall for 24 hours and looking for condensation.
If the meter shows high moisture or you see trapped dampness, don’t paint until the wall dries and the source of moisture is fixed.
Moisture Meter Methods
Moisture meters give you a quick, reliable way to check a concrete wall’s dampness before you paint, helping you avoid blistering, peeling, and mold problems later on.
Use both pin and non‑pin meters, compare readings, and follow manufacturer guidelines for moisture measurement techniques and concrete moisture testing.
- Pin meters: depth checks
- Non‑pin: surface trends
- Record multiple spots
Surface Dampness Indicators
Alongside meter readings, you’ll want to look for surface dampness indicators that give immediate, visible clues about wetness and drying behavior. You’ll check for dark patches, efflorescence, peeling, musty odor, and blistering. Note each moisture sign and test further if present; don’t paint until the wall’s dry.
| Indicator | What to do |
|---|---|
| Dark patches | Observe timing |
| Efflorescence | Scrape/test |
| Peeling | Probe surface |
| Musty odor | Investigate |
| Blisters | Delay painting |
Spot Structural vs. Hairline Shrinkage Cracks
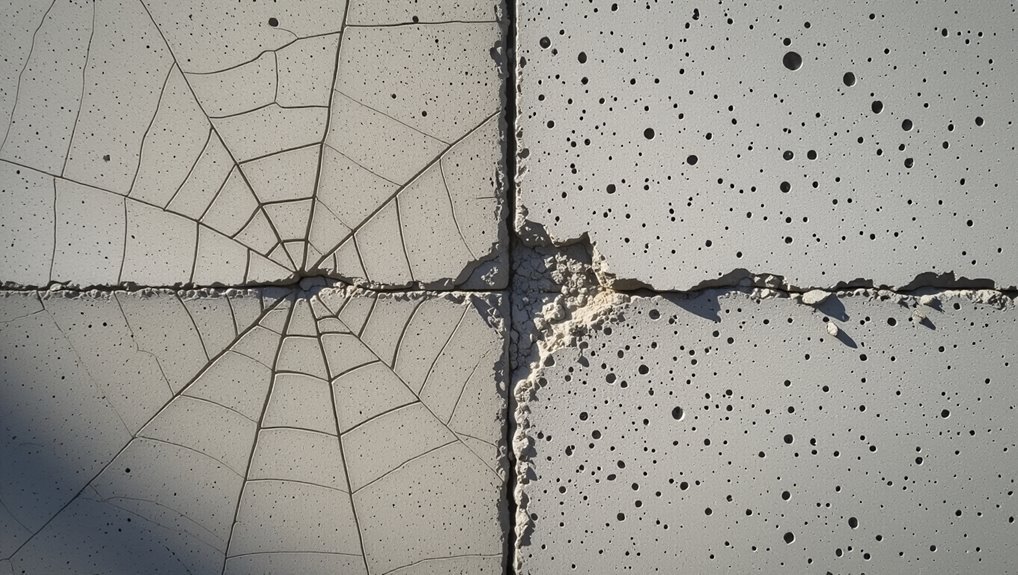
When you’re evaluating cracks in a concrete wall, it’s important to tell structural cracks from hairline shrinkage cracks because they need different fixes: structural cracks are wider, may change over time, and suggest movement or load problems, while hairline shrinkage cracks are narrow, stable surface fissures from curing.
Distinguish structural cracks from hairline shrinkage: size, movement, and cause determine whether you need major repair or simple filler.
Use structural crack analysis and hairline crack identification to decide repair:
- measure width and monitor movement
- probe depth and surrounding soundness
- choose epoxy, mortar, or paintable filler accordingly
Spot Spalling, Delamination, and Surface Scaling
Check the concrete for signs of spalling and figure out what’s caused it—freeze-thaw cycles, corrosion of embedded metal, or poor cover and finishing are common culprits.
When you find delaminated areas, chip out loose material, clean and prime the substrate, and use a suitable patching mortar to restore soundness.
Finally, take steps to prevent future scaling by improving drainage, sealing cracks, and applying breathable coatings or sealers.
Identify Spalling Causes
Because spalling can look similar while having different causes, you’ll need to tell spot spalling, delamination, and surface scaling apart before you repair them.
Identify moisture, freeze-thaw, or poor consolidation as causes. Know spalling types to target spalling prevention measures appropriately.
- Moisture infiltration: hidden corrosion or freeze-thaw
- Impact/abrasion: spot spalling
- Poor mix/placement: surface scaling
Repair Delaminated Areas
Start by removing loose or delaminated concrete and exposing a solid, sound substrate before you patch: chip away flaky areas with a hammer and cold chisel or use a rotary tool with a masonry cup wheel.
Then probe the edges to verify you’ve reached firm material. Clean, dampen, and apply a bonding agent, then use a suitable patch mortar.
Address delamination causes and follow proven repair techniques.
Prevent Future Scaling
To prevent future scaling, you’ll need to address the root causes—moisture, freeze-thaw cycles, poor consolidation, and incompatible finishes—and use correct materials and workmanship when you repair or coat the wall.
You’ll perform scaling prevention by guaranteeing good drainage, proper patching, and compatible surface treatments.
Choose breathable sealers, follow manufacturer specs, and inspect periodically.
- Guarantee drainage
- Use compatible patches
- Apply breathable surface treatments
Remove Dirt, Dust, and Loose Debris Effectively
Begin by removing loose dirt, dust, and flaking material with a stiff-bristled broom or a dry brush, working from top to bottom so debris falls away rather than recontaminating cleaned areas.
Next, use targeted cleaning methods: sweep thoroughly, vacuum with a brush attachment, and brush stubborn areas.
Rinse lightly if needed and allow to dry completely before proceeding with repairs or priming.
Clean Grease, Oil, and Stains From Concrete
Next, you’ll identify the type of stain—grease, oil, paint, or organic matter—since each needs a different treatment.
Pick a cleaner formulated for that stain (degreasers or poultices for oil, detergent or trisodium phosphate for general stains) and follow label directions.
After scrubbing, rinse thoroughly and neutralize any cleaner residue so the surface is ready for priming.
Identify Stain Types
Although concrete soaks up spills, you can usually tell what caused a stain by its color, texture, and location.
Use stain identification to categorize common stains before treatment. Note where stains sit and how they spread so you can plan stain removal and future stain prevention.
- Dark, oily spots near machinery
- Rust-colored streaks by metal
- Organic, irregular damp patches
Choose Appropriate Cleaner
Before you start scrubbing, pick a cleaner that matches the stain type and the concrete’s condition so you don’t damage the surface or waste effort.
Assess surface types, then choose cleaning products: stain removers for oil, acid based cleaners for mineral stains, or biodegradable cleaners and eco friendly options for gentler needs.
Test cleaner effectiveness in a small area and prioritize residue removal.
Rinse And Neutralize
Start by flushing the cleaned area with plenty of water to remove loosened dirt, cleaner residue, and dissolved stains; this prevents chemicals from lingering and interfering with paint adhesion.
Use proper rinse techniques and follow neutralization methods for alkaline cleaners. Dry thoroughly before priming.
Recommended steps:
- Rinse from top down with a garden hose or pressure washer.
- Neutralize with diluted vinegar or manufacturer solution.
- Blot and air-dry.
Remove Efflorescence Safely
Tackle efflorescence early so it doesn’t compromise paint adhesion: that white, powdery mineral deposit forms when water carries salts to the surface of concrete and then evaporates, leaving a brittle residue that prevents primers and paints from bonding properly.
For efflorescence removal, brush or vacuum loose deposits, then apply a mild acidic cleaner per instructions, rinse thoroughly, and wear gloves and eye protection for safe cleaning.
When and How to Pressure‑Wash Concrete
A pressure washer can save you hours of scrubbing and remove deep-seated dirt, mildew, and leftover cleaners that will interfere with paint adhesion.
So use it when the wall is structurally sound, dry, and free of peeling paint or active efflorescence. You’ll follow safe pressure washing techniques and practical concrete cleaning tips to prep surfaces.
- Start with low pressure and test.
- Hold nozzle 12–18 inches away.
- Move evenly; avoid concentrated blasting.
Using Muriatic Acid Safely for Heavy Stains
When heavy stains won’t budge with soap and a pressure washer, you’ll sometimes need muriatic acid (diluted hydrochloric acid) to etch and clean concrete; used correctly it removes rust, mineral deposits, and stubborn efflorescence that block paint adhesion. Follow muriatic acid safety: wear PPE, ventilate, dilute properly.
| Step | Action |
|---|---|
| 1 | Test patch |
| 2 | Neutralize and rinse |
Etch Smooth Concrete Surfaces for Better Adhesion
Prep the surface by etching smooth concrete to give paint something to grab onto; mechanically smooth slabs and dense finishes won’t bond well unless you create a slightly roughened profile.
Prep smooth concrete by etching to create a slightly rough profile so paint can properly bond.
You’ll use etching techniques as part of surface preparation to improve adhesion, rinse thoroughly, and let dry before priming. Follow safety precautions and test a small area first.
- Acid etch
- Mechanical abrasion
- Neutralize and rinse
Choosing the Right Patching Compound for Concrete
Once your etching and sanding give the concrete a proper profile, you’ll need the right patching compound to fix cracks, chips, and surface voids before priming and painting.
Choose based on location, depth, and moisture: cementitious mixes for larger repairs, polymer-modified mortars for better adhesion, and epoxy or vinyl for small, durable fixes.
Review patching techniques and compound types for compatibility.
Step-by-Step: Repairing Cracks in Concrete Walls
Start by evaluating each crack to determine its size, direction, and whether it’s active (still moving) or dormant; that’ll guide your repair method and materials.
Start by assessing each crack—size, direction, and activity—to choose the proper repair method and materials.
Clean debris, widen narrow hairlines, and dry the area. Use appropriate crack sealing and repair techniques, then finish smooth for painting.
- Clean and inspect
- Inject sealant or use mortar
- Sand and prime before paint
Fixing Spalled Areas and Replacing Missing Concrete
Start by evaluating how extensive the spalling is so you know whether to patch small areas or replace chunks of concrete.
Remove all loose or crumbling material with a chisel and wire brush so repairs will bond properly.
Mix and apply the correct patching compound, then follow cure times precisely to restore strength before painting.
Assess Damage Extent
Before you grab a trowel, walk the wall and note every spall, crack, and void so you can decide what needs patching versus full replacement.
Use a systematic damage evaluation to prioritize repairs and outline repair strategies. Measure defect size, depth, and location to estimate materials and labor.
- Surface severity
- Structural concern
- Accessibility and moisture
Remove Loose Concrete
After you’ve mapped out the damage, tackle any loose or hollow concrete so patches bond to solid material.
Chip away spalled areas with a hammer and chisel, remove dust and debris, and undercut edges to create a firm key.
Inspect concrete surface conditions, correcting flaky or weak zones. This improves paint adhesion factors and guarantees new material adheres reliably before you patch.
Patch And Cure Properly
Repair spalled areas by firmly backing and filling them with a compatible patching mortar, making sure you follow the manufacturer’s mix and application instructions.
You’ll use proven patching techniques, compacting in layers, and replace missing concrete precisely.
Apply recommended curing methods to avoid shrinkage and bond failure. Monitor moisture and temperature until set.
- Compact in thin layers
- Follow cure schedules
- Inspect for voids
Repairing Hairline Shrinkage Cracks Correctly
Spot and fill hairline shrinkage cracks with a flexible, paintable sealant so they don’t telegraph through your finish later.
You should clean debris, widen tiny gaps slightly for adhesion, and use a backer rod where needed.
Apply the sealant smoothly, tooling it flush, and allow full cure.
Proper crack filling and concrete sealing prevent moisture entry and guarantee an even painted surface.
Filling Holes and Surface Imperfections Smoothly
Start by walking the wall and marking every hole, pit, and uneven spot so you know exactly what needs attention.
Choose the right patching compound for each defect—vinyl-based fillers for small pits, cementitious patch for deeper voids, and epoxy for structural damage.
Apply and smooth the material flush with the surface, then sand or trowel as needed for a seamless finish before priming.
Assess And Mark Defects
Before you mix any patching compound, thoroughly inspect the wall and mark every crack, hole, and rough spot so you know what needs fixing and where.
Use inspection methods and assessment tools to catalog defect types, apply clear marking techniques, and note repair strategies and documentation practices.
Then prioritize fixes and plan work.
- Visual mapping
- Measurement notes
- Severity tags
Use Appropriate Patch Materials
Now that you’ve marked every defect and prioritized repairs, pick patching materials that match the size and type of each flaw so repairs sit flush and hold up under paint.
Choose among patch material types, follow patch application techniques, note patch drying times, weigh patch durability considerations and patching compound comparisons, consult a patching tools review, read patch repair guidelines, and avoid patching common mistakes.
Cure Times: How Long Repairs Must Dry Before Priming
When you patch or skim a concrete wall, let the repair fully cure before priming so the primer bonds and the finish lasts. Cure times vary by repair material, thickness, temperature, and humidity, but small surface patches often need 24–48 hours while deeper fills can take several days to a week or more.
You should follow manufacturer cure times and match repair methods to conditions.
- Check moisture with a meter.
- Allow extra time in cold/wet weather.
- Thin layers dry faster; avoid priming too soon.
Choose Primers and Bonding Agents for Concrete
Because concrete is porous and can vary in moisture and alkalinity, you’ll need a primer or bonding agent that’s formulated for masonry to guarantee proper adhesion and long-term performance.
Evaluate concrete primer options like acrylic, epoxy, or masonry-specific primers.
Match bonding agent types—acrylic, latex, or polymer-modified—to substrate condition and paint system.
Follow manufacturer instructions and test a small area before full application.
When to Use a Masonry Primer or Bonding Agent
You’ll want to prime fresh or porous concrete and use a bonding agent on slick, damaged, or previously painted surfaces to guarantee good adhesion.
A masonry primer seals and evens out absorbent areas, while a bonding agent helps coatings stick to smooth or flaky substrates.
Check the wall’s condition—new, chalky, cracked, or contaminated surfaces usually need one of these products before painting.
When To Prime
Wonder whether your concrete needs a primer or a bonding agent? You’ll prime when surfaces are porous, patched, or chalky.
Use appropriate priming techniques and match primer types to condition and paint.
- Porous or new concrete: use a masonry primer
- Repaired or skim-coated areas: spot-prime before full coat
- Previously painted, peeling surfaces: remove loose paint, then prime
Bonding Agent Benefits
Adhesion matters: when you’re painting concrete that’s smooth, glossy, or has been patched, a masonry primer or bonding agent helps the new paint grab hold and prevents peeling.
Choose based on substrate and paint—cementitious, acrylic, or epoxy bonding agent types—and follow manufacturer instructions.
Proper bonding agent application guarantees uniform coverage, improved adhesion, and longer-lasting finish, especially where paint would otherwise struggle to stick.
Surface Condition Guide
If the concrete is smooth, previously painted, damp, or patched, use a masonry primer or bonding agent to guarantee the new coat grips properly.
For rough, porous, and clean concrete you can often skip specialty products and apply an acrylic masonry primer instead.
You’ll assess surface texture and choose treatments to maximize paint adhesion.
- Smooth or sealed: bonding agent
- Damp or patched: masonry primer
- Porous: acrylic primer
Best Paint Types for Concrete Walls
Choosing the right paint makes the difference between a durable, attractive finish and one that flakes or stains quickly; for concrete walls you’ll typically pick between masonry latex, elastomeric, and specialty concrete coatings, each designed for different conditions and performance needs.
You’ll choose the best concrete paints based on porosity, moisture, and exposure, and balance durability with paint color options to match style and light.
Calculate Paint and Primer Quantities
Now that you’ve picked the right type of paint for your concrete wall, you’ll need to figure out how much paint and primer to buy so you don’t run short or waste money.
Measure surface area, factor paint coverage and paint finish, then use a paint calculator for quantity estimation.
Consider primer types, color selection, and application techniques.
- Measure wall surface area accurately
- Use a paint calculator with coverage data
- Add extra for texture and touch-ups
Masking, Taping, and Protecting Adjacent Surfaces
Start by surveying the area and deciding what needs protection—trim, windows, floors, fixtures, and nearby landscaping—and gather the right materials: painter’s tape, drop cloths (reusable canvas or heavy plastic), masking film, and adhesive-edge paper.
Use proven masking techniques: secure edges with tape, cover large areas with film or cloth, and anchor protections to prevent blow-offs.
Prioritize surface protection for clean, efficient painting.
Create Clean Edges Around Trim and Fixtures
With protective coverings in place, focus on getting razor-sharp edges where the concrete meets trim and fixtures. You’ll use careful cleaning techniques, precise tape application, and consistent edge precision to guarantee trim protection and effective fixture masking as part of paint preparation.
- Clean seams and remove dust before taping.
- Apply low-tack tape for straight lines.
- Mask electrical and plumbing fixtures tightly.
Prep Interior Basement Concrete vs. Exterior Foundation
Because interior basement concrete and exterior foundation walls face different moisture, temperature, and exposure challenges, you’ll prep each surface with distinct steps:
Focus interior basement prep on drying, dehumidifying, cleaning efflorescence, and sealing vapor sources; for exterior foundation prep, remove dirt, check drainage, repair cracks, and use masonry sealers designed for freeze/thaw.
Tailor primers and coatings to environmental risks and warranty requirements.
Prep Steps for Decorative Concrete Feature Walls
When prepping a decorative concrete feature wall, you’ll start by thoroughly cleaning and repairing cracks or spalls so the surface’s finish is sound.
Check for moisture and efflorescence and treat any issues before you proceed, since lingering salts or dampness will ruin paint adhesion.
Finally, prime and prepare the texture—use a suitable primer and smooth or enhance the surface as needed for your chosen finish.
Surface Cleaning And Repair
Start by clearing the wall of dirt, dust, efflorescence, and loose material—these contaminants keep coatings from bonding and will show through even the best paint.
You’ll use appropriate surface treatment and repair techniques: clean with a stiff brush or pressure washer, patch cracks with cementitious filler, and sand rough spots.
Followed by priming, the surface will be ready for paint.
- Brush/pressure wash
- Patch cracks
- Sand/smooth
Moisture And Efflorescence Control
Moisture is the single biggest threat to a decorative concrete feature wall, so you should identify and stop water sources and treat any salts before painting; left unchecked, damp and efflorescence will lift coatings and ruin the finish.
Inspect for leaks, install moisture barriers where needed, dry thoroughly, and apply appropriate efflorescence treatment.
Test moisture with a meter and only proceed when levels are stable.
Priming And Texture Preparation
Before you apply paint, make sure the surface is primed and the texture’s ready to accept coatings: choose a primer matched to your paint type and the concrete’s porosity, repair cracks or spalls, and remove loose laitance or dust so the primer bonds evenly.
Use proper priming techniques and select texture options that suit finish and adhesion.
- Bonding primers
- Skim coats
- Textured finishes
Best Practices for Painting Over Existing Concrete Paint
When you’re repainting over existing concrete paint, assess adhesion and surface condition first so you know whether you can repaint directly or need to remove loose coating; good preparation prevents peeling and guarantees the new paint bonds and looks professional. Follow best practices: clean, sand glossy areas, spot-prime bare concrete, and use compatible products for existing coatings.
| Task | Action |
|---|---|
| Clean | Pressure wash |
| Sand | Scuff glossy |
| Prime | Spot-prime |
| Paint | Compatible coat |
How to Deal With Persistent Moisture or Dampness
If dampness keeps appearing on your concrete wall, don’t just paint over it — identify and stop the water source first.
Then let the surface dry fully before any repairs or coatings. Use moisture barriers, drainage solutions, ventilation strategies, and humidity control.
Consider waterproof coatings, dehumidifier use, and landscaping adjustments.
Apply surface treatments, insulation options, and crack sealing.
- Assess sources
- Implement fixes
- Monitor dryness
Temperature and Humidity Limits for Painting Concrete
Before you paint, check the temperature and humidity so the coating can cure properly.
Aim for an ideal temperature range of about 50–85°F (10–29°C) and keep relative humidity below 85%, with 40–60% being preferable.
If conditions fall outside those limits, wait or use heaters/dehumidifiers to stabilize the environment.
Ideal Temperature Range
Paint concrete only within a controlled temperature and humidity window, because extreme heat, cold, or moisture can ruin adhesion and cure times.
You should monitor temperature effects and avoid rapid swings, since they’ll stress coatings and slow drying.
Watch humidity impact separately (see next section). Aim for steady conditions so paint bonds and cures properly.
- Aim for stable daytime temps
- Prevent rapid drops
- Avoid direct sun or cold drafts
Acceptable Humidity Levels
Because moisture interferes with adhesion and slows curing, you should keep relative humidity in a controlled range when painting concrete—generally between 40% and 70%—and avoid conditions that promote condensation on the surface.
Monitor with a hygrometer, plan work when levels are stable, and use dehumidifiers or ventilation for humidity control.
Proper moisture management guarantees primer and paint bond and cure as planned.
Allow Proper Drying and Curing Times Before Painting
If you’ve just finished mixing and applying your concrete, don’t rush—curing and drying determine how well paint will adhere and how long the finish will last.
If you’ve just mixed and applied concrete, be patient—proper curing and drying ensure paint adhesion and lasting finish.
You’ll need to follow proper drying techniques and curing methods: monitor moisture, maintain recommended temperature, and wait manufacturer-recommended days before painting.
- Check surface moisture with a meter
- Keep consistent temperature/humidity
- Respect curing timeframes
Primer Application Techniques for Even Coverage
Once the slab’s fully dry and cured, you’ll want to apply a quality primer to guarantee even adhesion and color uniformity.
Choose primer types suited to concrete—acrylic, epoxy, or masonry—then test a small area.
Use a roller for broad coverage and a brush for edges, keeping wet edges and consistent strokes.
Follow manufacturer drying times and apply a second coat if needed.
Sanding and Smoothing Primed Concrete Surfaces
Once the primer’s dry, check the wall by running your hand and a straightedge over the surface to assess smoothness and spot high or rough areas.
Pick abrasives based on those findings—coarse grit for heavy imperfections, fine grit for feathering and final smoothing.
Wear a mask and work in even passes to avoid gouging the primer.
Assess Surface Smoothness
Before you paint, take a close look and feel of the primed concrete to judge how smooth the surface really is; small imperfections will telegraph through finish coats, so you’ll need to sand and smooth any rough spots, drips, or high ridges.
Perform a smoothness assessment and surface evaluation, then address issues using targeted smoothing techniques:
- Run your hand to find ridges
- Visually spot drips or skips
- Lightly tap to detect hollows
Choose Appropriate Abrasives
Pick abrasives that match the primed concrete’s condition and the level of smoothing you need: start with a coarser grit (60–80) for heavy ridges or drip removal, move to medium grits (100–150) for general leveling, and finish with fine grits (180–220) to knock down sanding scratches before repainting.
Choose abrasive types—carbide, aluminum oxide, or silicon carbide—based on firmness, and follow proper surface preparation for consistent adhesion.
Common Mistakes That Make Concrete Paint Peel
If your concrete paint is peeling, it’s usually not the paint’s fault but something that went wrong during prep or application.
You should identify peeling causes quickly and fix surface, moisture, or adhesion problems so paint adhesion improves.
Common mistakes include:
- Painting over dirty or damp concrete
- Skipping primer or wrong primer choice
- Applying paint too thick or in unsuitable conditions
Troubleshoot Adhesion, Bubbling, and Blistering
When paint won’t stick or forms bubbles and blisters, you need to diagnose the root cause rather than just repainting over the problem.
Check for adhesion problems by testing surface adhesion and consider paint removal if needed.
Address blistering issues and bubbling challenges with proper preparation tips: cleaning, concrete treatments, and correct curing techniques.
Evaluate environmental factors and paint compatibility before recoating.
Long-Term Maintenance to Protect Painted Concrete
Keep a regular cleaning routine to remove dirt and mildew so the paint stays intact and looks fresh.
Plan to reapply a suitable concrete sealant on a set schedule to maintain protection.
Routinely inspect for hairline cracks and repair them promptly to prevent moisture damage.
Regular Cleaning Routine
Regularly cleaning painted concrete prevents dirt, mildew, and salts from degrading the finish and extending the life of your paint job.
You should set a cleaning frequency based on exposure and use gentle cleaning techniques to avoid damage. Aim for routine inspections and spot cleaning, and follow safe methods.
- Sweep or rinse monthly
- Soft wash yearly
- Spot-treat stains promptly
Sealant Reapplication Schedule
Cleaning will help paint last, but sealant reapplication is what protects the surface over the long haul; you’ll want a clear schedule so you don’t wait until wear shows.
Check every 2–5 years depending on exposure, testing small areas first.
Match sealant types to finish and climate, and follow recommended application techniques—clean, dry, apply evenly, and allow full cure—to maintain protection.
Inspect And Repair Cracks
Inspect the wall for cracks at least twice a year and after any significant temperature swings or settling, because small fissures let moisture and salts undermine paint and concrete over time.
You should identify crack types, clean and prep areas, then apply appropriate repair methods to prevent spreading.
- Hairline vs structural: monitor
- Clean, widen, then fill
- Use flexible sealant or epoxy depending on severity
Cost-Saving Tips Without Sacrificing Durability
When you want to save money without cutting corners, focus on choosing the right prep steps and materials so your paint job lasts—use affordable primers designed for masonry, repair only the damaged areas, and select mid-grade exterior paint that balances cost and longevity.
You’ll prefer cost effective materials, durable finishes, and simple maintenance strategies to maximize paint longevity while avoiding unnecessary replacement or overcoating.
When to Call a Pro for Concrete Wall Prep
If the wall shows large cracks, persistent moisture, spalling, or structural movement that you can’t confidently repair, call a pro—these issues can hide underlying problems that simple DIY fixes won’t solve.
You’ll get professional advice on repair scope, moisture remediation, and safety.
Consider hiring pros when:
- damage seems structural
- mold or water intrusion exists
- you lack proper tools or permits
Final Pre-Paint Checklist Before You Start
Before you pick up a brush, run a quick checklist to confirm the surface, materials, and environment are ready for paint.
Check for dust, repairs, and proper adhesion; guarantee primer, paint, rollers, tape, drop cloths, and safety gear are on hand.
Verify temperature and humidity, ventilation, and dry time.
This finalizing preparation list covers essential items so you won’t interrupt work.
Frequently Asked Questions
Can I Paint Concrete Directly Over Wallpapered or Panel-Covered Walls?
No — you shouldn’t paint concrete wallpaper or paint directly over wallpapered or panel-covered walls; you’ll compromise paint adhesion. Remove wallpaper or panels, clean and repair the concrete, prime properly, then apply paint for lasting results.
How Do I Prime Painted Concrete That Still Releases a Faint Powdery Residue?
You can—first dry-scrub and vacuum off powdery residue, then etch if needed; you’ll use a high-adhesion masonry primer or bonding primer. Priming techniques include roller/brush application, thin multiple coats, and full cure before painting.
Will Anti-Graffiti Coatings Interfere With Standard Concrete Paint Adhesion?
Yes — anti-graffiti coatings can reduce standard paint adhesion if they’re sacrificial or non-porous; you’ll choose compatible products to preserve anti graffiti benefits and coating longevity, or remove the coating before repainting.
Can I Use Exterior Concrete Paint Indoors for a Basement Feature Wall?
Like a tough coat on a statue, you can use exterior concrete paint indoors for a basement feature wall if you guarantee proper ventilation, primers, and low-VOC options; it’ll support interior design and enhance basement aesthetics without off-gassing.
How Do I Paint Over Concrete With Active Efflorescence Recurring After Cleaning?
You should stop moisture, treat efflorescence with a masonry cleaner and efflorescence treatment, let the wall dry completely, apply a salt-blocking primer, then use compatible paint to guarantee long-term paint adhesion and prevent recurrence.
