How to Prevent Basement Mold: Simple Effective Methods
You can stop basement mold by cutting moisture at its source: fix leaks, improve grading and gutters, and seal foundation cracks. Keep indoor humidity 30–50% with a dehumidifier and good ventilation, insulate cold pipes and rim joists to prevent condensation, and remove or replace damp materials quickly. Monitor humidity with a hygrometer and address any spikes promptly. Wear protection during cleanup and keep kids and pets away. Keep going for practical checklists and step-by-step fixes.
How To Stop Basement Mold Now : Quick 5-Step Checklist
1 simple checklist will get you started: act fast, dry the area, remove contaminated materials, clean surfaces with a mold-appropriate cleaner, and fix the moisture source.
You’ll inspect for leaks, run dehumidifiers, and improve ventilation.
Document tasks, toss unsalvageable items, and schedule regular basement maintenance.
Document every step, discard what’s ruined, and set up routine basement checks to prevent mold returning.
These steps support mold prevention and help you keep conditions inhospitable to regrowth.
How To Identify Mold Versus Dirt Or Stains
You can tell mold from dirt or stains by looking for irregular colors like black, green, or gray and fuzzy or spotty patterns.
Gently touch suspect areas—mold may feel slimy or powdery and can smudge, while dirt is usually dry and rubs off easily.
Also trust your nose and growth behavior: a musty odor or spreading over time usually means mold, not a one-time stain.
Visual Characteristics
When you’re trying to tell mold from ordinary dirt or stains in the basement, look for texture, color patterns, and growth behavior: mold often appears fuzzy or slimy, shows irregular, spreading patches (black, green, white, or rusty), and may reappear after cleaning, whereas dirt or mineral stains usually have a flat, uniform appearance and don’t grow back.
| Feature | Mold colors | Growth shapes |
|---|---|---|
| Appearance | black/green/white | irregular |
| Behavior | reappears | spreads |
Texture And Touch
Besides color and spread, texture and what things feel like under your fingers give reliable clues. Gently rub spots: powdery or velvety texture usually signals mold, while gritty or ingrained residues are often dirt or mineral stains.
Use gloves, avoid disturbing suspected mold, and combine tactile checks with mold prevention techniques and improved basement air quality to confirm and address problems safely.
Smell And Growth Patterns
How can you tell mold from ordinary dirt by nose and pattern? You’ll notice a persistent musty odor and clustered spots that spread irregularly—signs of mold spores, not simple grime. Scrape gently: dirt rubs off; mold embeds. Track progression over days. Use a flashlight and magnifier to spot fuzzy or powdery textures and concentric rings that indicate biological growth.
| Feature | Indicator |
|---|---|
| Smell | Musty odor |
| Texture | Fuzzy/powdery |
| Removal | Rubs off / embedded |
| Pattern | Concentric rings |
| Progression | Spreads over days |
Why Basements Are Prone To Mold Growth
Because basements sit below ground level and stay cooler and damper than the rest of your home, they create ideal conditions for mold spores to settle and grow.
You’ll find varied mold types feeding on organic materials, worsened by hidden moisture sources like leaks, condensation, or poor drainage.
You should inspect, ventilate, and reduce humidity to limit growth and spread.
Basement Moisture Checklist: Readings And Thresholds That Predict Mold
You should keep basement relative humidity below 50%, and ideally between 30–50%, to limit mold risk.
Monitor both air and surface temperatures—cool surfaces that fall below the dew point will attract condensation even if air humidity seems acceptable.
Use a hygrometer and infrared or surface thermometer to track these readings regularly so you can act before mold appears.
Ideal Relative Humidity
Want to know the single most important number for keeping mold away? Keep basement relative humidity between 30%–50%.
You’ll prevent condensation, discourage mold growth, and improve comfort. Use a hygrometer to monitor levels and apply humidity control—dehumidifiers, ventilation, and sealing leaks—when readings rise above 50%.
Aim for stable readings; frequent swings promote dampness and mold despite short low readings.
Surface & Air Temperatures
Relative humidity tells you how much moisture is in the air, but temperatures determine where that moisture will condense—on cold walls, floors, or pipes—so you should monitor both surface and air temperatures alongside RH. You’ll track surface vs air temps to spot temperature fluctuations that cause dew points and adjust HVAC for humidity control.
| Measurement | Action |
|---|---|
| Surface temp | Insulate cold spots |
| Air temp | Balance HVAC |
| Dew point | Reduce RH |
| Variance | Stabilize temps |
Find Hidden Leaks And Water Entry Points That Cause Basement Mold
Because water can sneak in through tiny, unseen cracks, finding hidden leaks and entry points is the first step to stopping basement mold before it starts.
You’ll use leak detection and inspection techniques to locate moisture sources, perform plumbing checks and foundation assessment, and install water barriers.
Combine drainage solutions and humidity control to eliminate entry risks and keep the space dry.
Fix Grading, Gutters, And Downspouts To Keep Water Off The Foundation
If water pools near your foundation, it doesn’t matter how well you seal the basement—moisture will keep finding its way in, so fix the grading, gutters, and downspouts to divert runoff away from the house.
Use proper grading techniques to slope soil away, add simple drainage solutions like swales or French drains, and install moisture barriers for foundation protection to keep water moving away.
Repair Gutters And Downspouts To Prevent Basement Seepage
Check your gutters regularly for clogs and damage so water can flow freely away from your foundation.
Make sure downspouts extend several feet from the house and point downhill to prevent pooling near the basement.
If you spot leaks or loose joints, repair them promptly to stop seepage before it reaches the basement.
Inspect Gutters Regularly
1 simple habit can cut your risk of basement seepage: inspect and maintain your gutters and downspouts regularly.
You’ll spot clogs, corrosion, or loose fasteners early, keeping gutter maintenance effective for proper water diversion away from foundations.
Check after storms, clear debris, and repair leaks promptly to prevent overflow and seepage.
- Clear debris monthly
- Tighten loose hangers
- Seal minor leaks
Ensure Downspouts Extension
A downspout that empties too close to your foundation invites water into your basement, so extend it to discharge runoff at least 3–4 feet away (or onto a splash block or safe drainage slope).
You should schedule downspout maintenance, secure extensions, and route rainwater management away from your home.
Clear debris, check anchors, and guarantee joints don’t leak so water won’t pool near the foundation.
Repair Leaks Promptly
Fix leaks in gutters and downspouts as soon as you spot them to stop water from seeping toward your foundation and into the basement.
You’ll prevent stains and mold by doing quick repairs, using sealant or replacing sections, and combining leak detection with routine moisture monitoring.
- Inspect seams and hangers.
- Patch or replace damaged sections.
- Schedule seasonal checks.
Seal Foundation Cracks And Gaps That Invite Moisture
Because even tiny cracks let in enough moisture to feed mold, you should inspect and seal foundation gaps as a priority. Use crack sealing foam or caulk, apply exterior moisture barriers, and monitor for new openings. Seal around pipes and windows, grade soil away from the foundation, and maintain gutters.
| Task | Recommended Material |
|---|---|
| Small cracks | Silicone caulk |
| Large gaps | Expanding foam |
| Exterior | Bituminous barrier |
| Around penetrations | Non-shrink grout |
| Monitoring | Visual inspection schedule |
When To Install Or Replace A Sump Pump
If your sump pump is older than 7–10 years, runs constantly, or makes unusual noises, it’s time to replace it to keep your basement dry.
You should also install a pump if you’ve had repeated flooding, rising groundwater near the foundation, or a finished basement that would be costly to repair.
Acting now prevents moisture that leads to mold and protects your home.
When To Replace Existing Pump
When your sump pump starts cycling more often, fails to start during heavy rain, or makes grinding or rattling noises, it’s time to contemplate replacing it rather than repairing it.
You should track sump pump maintenance and watch for clear pump replacement signs.
- Age over 7–10 years.
- Persistent failures during tests.
- Frequent overheating or leaking.
Signs You Need Installation
Not sure whether you need a sump pump? If your basement floods, humidity stays high after a mold inspection, or water pools near the foundation, you should act.
Older homes, frequent storms, or failing drainage justify installation. Choose proven installation techniques, position the pit where water collects, and plan for battery backup.
Prompt installation prevents mold and structural damage.
How To Test Basement Waterproofing: DIY Checks And When To Call Pros
Curious whether your basement’s waterproofing is holding up?
Do a quick DIY assessment: check for damp spots, musty smells, and peeling paint.
Test drains and window wells during rain.
If you spot persistent leaks, rising water, or structural cracks, call pros for advanced waterproofing techniques and repairs.
Early action prevents mold and costly damage.
Choose The Right Interior Sealants And Waterproof Paints
If your DIY checks turned up damp spots or minor leaks, you can often stop moisture and discourage mold growth with the right interior sealants and waterproof paints.
Choose sealant types for cracks, joints, and masonry—silicone for flexibility, polyurethane for durability.
Pick waterproof paint with appropriate paint finishes (eggshell or satin for washability).
Prep surfaces, follow cure times, and ventilate during application.
How To Manage Condensation On Cold Pipes And Walls
Because cold surfaces attract moisture, you’ll need to tackle pipe and wall condensation proactively to keep mold from taking hold.
Use ventilation, dehumidifiers, and targeted condensation solutions to cut humidity; dry surfaces promptly and monitor problem spots.
Consider pipe insulation where appropriate, but avoid replacing structural insulation here.
- Improve airflow
- Run a dehumidifier
- Wipe and monitor hotspots
Use Insulation Strategically To Reduce Damp Surfaces
To keep basement surfaces dry, use insulation with a built-in vapor barrier on walls and rim joists so moisture can’t pass through.
Wrap cold water pipes with foam or preformed insulation to prevent condensation.
Seal and insulate rim joist areas to close thermal gaps and stop damp air from condensing on framing.
Choose Vapor Barrier Insulation
Choose insulation that includes a built-in vapor barrier or add a separate vapor-retardant layer so moisture doesn’t condense on cold basement walls and framing.
You should select vapor barrier materials and insulation types that suit your climate and wall assembly to cut humidity and mold risk.
- Compare permeability ratings.
- Match materials to framing.
- Seal seams and edges tightly.
Insulate Cold Water Pipes
If you want to cut down on damp, mold-friendly surfaces in your basement, insulate cold water pipes so they won’t sweat when humid air hits their cold metal.
You should fit proper pipe insulation along exposed runs, seal joints, and pick closed-cell foam for reliable condensation control.
Regularly inspect for damage and replace crushed or wet sections to keep surfaces dry and mold risk low.
Seal Rim Joist Areas
After insulating cold water pipes, check the rim joist—the band of wood at the top of your foundation—because it’s a common spot where cold exterior air meets warm, humid basement air and creates condensation that feeds mold.
Seal gaps, add rim joist insulation, and install moisture barriers to cut damp surfaces and air leaks.
- Caulk and spray foam
- Rigid foam with tape
- Vapor-retardant facing
Improve Ventilation To Cut Humidity Naturally
Since damp, stagnant air feeds mold, improving your basement’s ventilation is one of the simplest, most effective ways to cut humidity naturally.
You should install or upgrade ventilation systems and guarantee vents aren’t blocked. Use fans or passive vents to boost air circulation, open windows when weather allows, and create pathways for fresh air to move through corners and behind storage to keep humidity down.
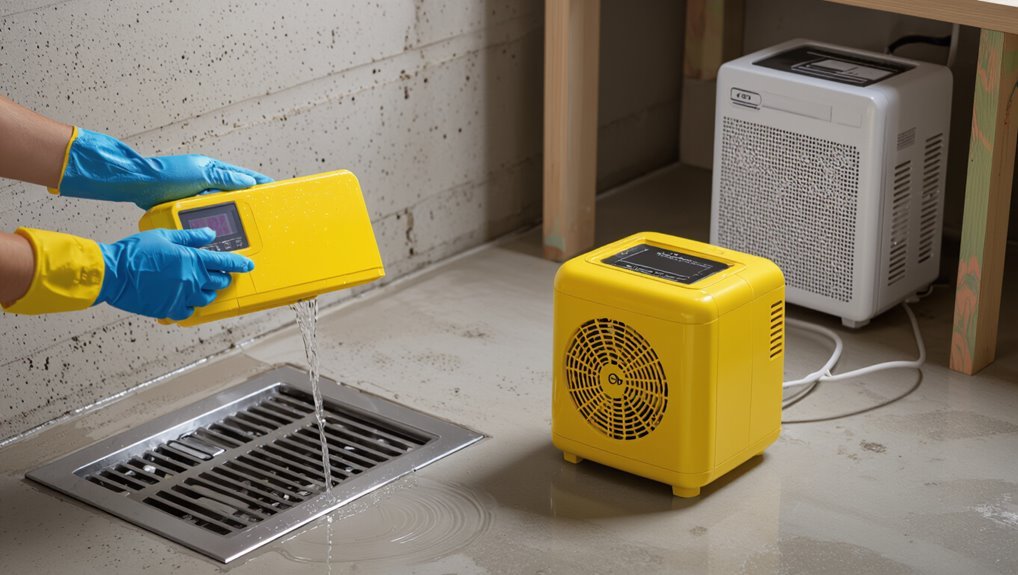
How To Choose And Place A Dehumidifier For Year-Round Control
To keep mold at bay year-round, you’ll want a dehumidifier sized for your basement’s square footage and moisture load.
Place it centrally or near the dampest area with clear airflow and a nearby drain or pump for continuous drainage.
Maintain it regularly—clean filters, empty or check the drain, and run it on a hygrometer-controlled setting for steady humidity control.
Choose Right Capacity
When you’re picking a dehumidifier for year-round basement control, focus on capacity first: a unit that’s too small will run constantly and fail to lower humidity, while an oversized one wastes energy and cycles inefficiently.
Use capacity planning for effective moisture management and match unit pints/day to basement size and wetness.
- Estimate cubic feet and dampness level.
- Add capacity buffer for extreme seasons.
- Prefer continuous drain option.
Ideal Placement Spots
1 good spot can make your dehumidifier far more effective: place it where air flows freely and moisture accumulates, not tucked behind boxes or in a corner. Position near sump or low points to aid effective drainage solutions, use air circulation methods and link to ideal ventilation systems. Consider basement layout optimization, insulation types, moisture barrier installation, humidity control techniques, mold resistant materials.
| Spot | Benefit | Note |
|---|---|---|
| Near sump | Drains easily | Check slope |
| Center | Circulates air | Avoid obstructions |
| Entry | Controls influx | Pair with vents |
| Low corner | Collects moisture | Use barriers |
Maintenance And Operation
Because a dehumidifier only works as well as you maintain and place it, pick a unit sized for your basement and set it up where it can run continuously without obstruction; position near drains to aid drainage solutions and support air circulation while considering ventilation strategies, insulation options, moisture barriers, sump pump maintenance, plumbing inspections, thermal comfort, seasonal adjustments, and humidity monitors.
- Clean filters regularly.
- Check condensate lines.
- Calibrate humidity monitors.
Dehumidifier Settings And Maintenance Tips
Although basements vary in size and layout, you should set your dehumidifier to maintain relative humidity between 45% and 50% to discourage mold growth without overworking the unit.
Choose dehumidifier types suited to room size, empty condensate regularly, clean filters monthly, and inspect coils seasonally.
Check settings after temperature changes, use auto mode if available, and schedule annual professional servicing.
How To Monitor Basement Humidity With Affordable Tools
If you want to catch rising humidity before mold gets a foothold, use simple, affordable tools like digital hygrometers, smart plugs with humidity sensors, or battery-powered data loggers to track conditions over time.
Monitor trends for humidity control and climate regulation, combine DIY tools with moisture meters, and improve basement ventilation and air circulation.
- Place digital hygrometers low and high.
- Log with affordable monitoring devices.
- Spot-check using moisture detection tools.
Control Indoor Moisture Sources: Laundry, Drying, And Spills
When you control everyday indoor moisture sources—laundry, indoor drying, and spills—you cut off the most common routes mold uses to start in basements. Use smart laundry practices, quick spill management, and efficient drying techniques; run vents, use dehumidifiers, and clean promptly. Moisture solutions include timed drying and absorbent mats.
| Action | Effect |
|---|---|
| Ventilate | Reduces humidity |
| Wipe spills | Prevents growth |
| Dehumidify | Stabilizes air |
Store Items Smartly To Prevent Trapped Moisture
After you’ve minimized everyday moisture, pay attention to how you store things so you don’t trap dampness against floors or walls.
Use smart storage choices and moisture barriers to keep items dry and ventilated.
- Store items in breathable plastic bins with tight lids.
- Elevate boxes slightly on blocks for airflow.
- Use desiccant packs and check contents regularly.
Use Shelving And Pallets To Protect Belongings
Put belongings on sturdy shelving or pallets to keep them off damp floors and improve air circulation; you’ll cut mold risk and make inspections easier.
Choose shelving options for space optimization and storage organization, plan pallet placement with moisture barriers beneath, and use accessibility solutions so you can reach items.
Prioritize item protection and flood prevention by elevating boxes, tubs, and furniture, keeping everything tidy and inspectable.
Choose Mold-Resistant Building Materials And Finishes
Materials matter: choosing mold-resistant building materials and finishes helps you prevent mold growth before it starts by limiting moisture absorption and inhibiting spore support.
Materials matter — use mold-resistant materials and finishes to limit moisture absorption and stop mold before it starts
Use options that suit basements and your budget.
- Choose moisture resistant drywall and fungal resistant insulation in walls.
- Apply mold resistant paints on masonry and studs.
- Install waterproof flooring to reduce seepage and surface mold.
How To Finish A Basement Without Creating Mold Traps
When you finish a basement, plan the layout and detail work so every surface and junction discourages trapped moisture and hidden mold growth.
Use finishing techniques that keep drywall off concrete, slope floors toward drains, and install proper vapor barriers.
Choose mold resistant materials for framing, insulation, and finishes.
Seal gaps, guarantee ventilation, and route utilities accessibly to avoid creating hidden damp cavities.
Safe DIY Mold Cleanup For Small Areas
Even with careful finishing, small mold patches can still appear, and you’ll want to handle them promptly and safely.
Use mold identification techniques to confirm growth, ventilate the area, and wear PPE. Gather DIY cleanup supplies: detergent, non-ammonia cleaner, scrub brush.
- Isolate area and dry it.
- Clean gently, discard porous items.
- Recheck and monitor humidity.
When To Call A Mold Pro : And What They’ll Do
Wondering if the problem has outgrown your DIY skills? Call a pro when mold covers large areas, returns after cleaning, or causes symptoms.
They’ll perform mold assessment and mold testing, explain health risks, recommend professional remediation, and use proven removal techniques.
Expect discussion of air quality results, prevention strategies, and transparent service costs so you can decide confidently.
Address Wood Rot And Structural Damage Caused By Mold
If mold has been dampening basement wood for long enough, it can lead to serious wood rot and compromise joists, beams, and subflooring—so you’ll want to inspect and address damage promptly.
- Assess structural damage and remove unsalvageable wood.
- Apply wood preservation techniques and treat salvageable framing.
- Install proper moisture barriers, improve ventilation, and monitor humidity to prevent recurrence.
Pest Control To Lower Basement Mold Risk
Because pests bring moisture and damage that encourage mold growth, controlling them is a key step in protecting your basement.
Seal entry points, fix leaks, and keep stored items off damp floors so rodents, insects, and other critters can’t create the damp conditions mold loves.
Schedule regular pest inspections, use integrated pest management and pest prevention, improve drainage solutions, ventilation strategies, moisture control, and add thermal insulation for mold resistance.
Seasonal Maintenance Checklist To Prevent Mold Flare-Ups
Each season, check that your dehumidifier’s output matches the basement’s needs and clean or replace its filter if performance drops.
Clear gutters and downspouts and flush floor drains so water’s carried away from the foundation.
Seal any visible foundation cracks to keep moisture out before it becomes a mold problem.
Inspect Dehumidifier Performance
When you inspect your dehumidifier this season, focus on performance metrics—current humidity reading, runtime, and cycle frequency—to spot declining efficiency before mold gets a foothold.
You’ll do dehumidifier maintenance that guarantees steady humidity control and faster problem detection.
- Check displayed humidity vs. hygrometer.
- Note runtime and compressor cycles.
- Clean filters and verify drain function.
Clean Gutters And Drains
If water can’t flow away from your house, it will find a way into the basement—so clean gutters and clear drains before heavy rains start.
You should perform regular gutter maintenance: remove debris, check hangers and downspouts, and guarantee water directs away.
Schedule seasonal drain cleaning to prevent backups.
Prompt attention lowers basement moisture and reduces mold risk.
Seal Foundation Cracks
Because tiny foundation cracks let groundwater and humid air seep in, sealing them is one of the most important seasonal steps you can take to prevent mold flare-ups.
You should inspect, patch with epoxy or hydraulic cement, and add moisture barriers outside or inside to stop leaks. Consider professional foundation repairs for large gaps.
- Inspect regularly
- Patch promptly
- Install barriers
Storm Prep: Prevent Mold After Heavy Rain Or Flooding
After heavy rain or flooding, act quickly to keep mold from taking hold in your basement: inspect for storm damage, perform a post flood inspection, and start emergency cleanup.
Use water diversion and drainage solutions plus moisture barriers and basement upgrades to reduce flooding risks.
Apply approved mold inhibitors and follow drying techniques to limit spores.
Prioritize safety and professional help when needed.
How To Dry Out A Flooded Basement Safely And Quickly
Before you touch anything, make sure power is off and the area is safe to enter so you don’t risk electrocution or contamination.
Pump or bail out standing water promptly to limit damage and stop mold growth.
Once the water’s gone, set up fans, a dehumidifier, and remove wet materials to dry the space thoroughly.
Assess Safety First
When you’re facing a flooded basement, start by evaluating safety so you don’t make the situation worse—turn off electricity at the breaker if water has reached outlets or appliances, wear protective gear like rubber boots and gloves, and keep children and pets away until the area’s secure.
Assess safety equipment and identify basement hazards before proceeding.
- Check power and gas.
- Don PPE.
- Mark unstable areas.
Remove Water Quickly
Once the area’s safe and power is shut off, act fast to extract standing water so mold has less chance to take hold.
Use pumps, wet/dry vacs, and buckets to speed water removal. Clear drains and create temporary drainage solutions to direct flow outside.
Remove soaked items you can’t salvage and isolate affected areas to limit contamination and simplify cleanup.
Dry And Dehumidify
Because standing water’s gone, you need to dry and dehumidify quickly to stop mold spores from multiplying; act now to restore air and surfaces.
Use fans, wipe surfaces, and run a dehumidifier. Focus on proper dehumidifier placement for even air flow and ongoing moisture control.
- Ventilate with fans.
- Position dehumidifier placement centrally.
- Monitor humidity until stable.
HVAC Strategies To Lower Basement Humidity
Although your basement might feel sealed off, your HVAC choices still control much of its humidity, and tweaking them can keep mold from getting a foothold.
You should schedule HVAC maintenance, verify ducts are sealed, and balance ventilation to reduce moisture.
Set the system to circulate air, use a chilled-water or cooling coil when possible, and add a dedicated dehumidifier tied into HVAC for steady humidity control.
Landscaping Solutions That Reduce Basement Moisture
You can cut basement moisture by grading soil away from the foundation so water runs downhill instead of toward your walls.
Add gutter extensions to carry roof runoff well clear of the foundation.
Plant water-absorbing shrubs and perennials to soak up excess moisture around the house.
Grade Soil Away From Foundation
When soil slopes toward your foundation, water will pool against the walls and find its way into cracks and joints.
Regrading the landscape to shed water away is one of the simplest, most effective steps you can take to keep your basement dry. You should combine grading with drainage systems and landscaping modifications.
- Slope soil 6 inches over 10 feet.
- Compact and mulch to prevent erosion.
- Add swales directing runoff away.
Install Proper Gutter Extensions
If gutters pour water close to your foundation, extending them keeps runoff well away and cuts the chance of leaks and mold in your basement. You should follow gutter maintenance tips, inspect extensions, and secure downspouts. Extension installation benefits include directing water farther and reducing soil saturation.
| Task | Frequency | Benefit |
|---|---|---|
| Inspect | Monthly | Prevent clogs |
| Secure | After storms | Stay in place |
| Extend | As needed | Reduce leaks |
Choose Water-Absorbing Plants
Extending gutters keeps runoff away from your foundation, but landscaping can add another layer of protection by absorbing excess water before it reaches your basement.
You’ll choose water-absorbing plants to divert moisture, enjoy plant benefits, and even practice indoor gardening with containers near entryways.
Consider these options:
- Native deep-rooted shrubs
- Rain garden perennials
- Swale-tolerant grasses
Exterior Waterproofing And Drainage Upgrades For Long-Term Protection
Although interior fixes can help, you’ll get the longest-lasting protection by addressing water outside your foundation: sealing exterior walls, improving grading, installing or repairing gutters and downspouts, and adding or upgrading drainage systems like French drains or exterior waterproof membranes.
You should pick proven drainage solutions and durable waterproof membranes, inspect and maintain them regularly, and hire pros for proper exterior waterproofing to prevent recurring basement mold.
Budget-Friendly Fixes That Deliver Big Mold Prevention Gains
Tackling big exterior repairs is ideal, but you don’t need a major remodel to cut basement mold risk—many low-cost fixes deliver noticeable results.
- Seal cracks with affordable materials and install moisture barriers.
- Use DIY solutions: dehumidifiers, fans for air circulation, and basic insulation for temperature regulation.
- Schedule routine inspections and seasonal checks as preventive measures to catch issues early.
Health Precautions: Protecting Your Family During Cleanup
Before you start cleaning, protect your family by controlling exposure: wear gloves, N95 respirators, and goggles, keep kids and pets out of the area, and ventilate the space with fans or open windows where possible.
During cleanup, limit time spent in contaminated zones, discard porous materials, use damp cleaning to avoid airborne mold, and follow cleanup safety steps to minimize mold exposure risks.
Tracking Results: How To Know Your Prevention Is Working
Once cleanup is done and safety practices are in place, you’ll want to confirm that your prevention measures are actually working.
Track progress with simple checks and tools so issues stay small.
Keep tabs with simple checks and basic tools so small issues stay small and never become big problems.
- Schedule periodic mold testing to detect hidden growth.
- Use humidity monitoring (aim 30–50%) and log readings.
- Inspect vents, sump pump, and sealant for wear or water entry.
Common Myths About Basement Mold Debunked
Ever wondered which mold “facts” you can trust and which are myths that waste your time?
You’ll see common myth misconceptions: mold only grows on dirty surfaces, bleach fixes it permanently, or basements need constant heat.
For effective mold prevention, focus on moisture control, ventilation, and quick repairs.
Don’t rely on quick fixes; act on proven moisture solutions.
A Simple Action Plan You Can Start This Weekend
Pick three practical tasks you can finish this weekend to cut basement moisture and stop mold before it starts: clear gutters and downspouts, inspect and seal foundation cracks, and set up or clean a dehumidifier and improve airflow.
Use these mold prevention tips as weekend projects to act fast and reduce risk.
- Clean gutters
- Seal cracks
- Service dehumidifier
Frequently Asked Questions
Can Mold Return After Professional Remediation Without Visible Water Problems?
Yes — mold spores can return after remediation if humidity control slips or hidden moisture persists. You’ll need ongoing monitoring, dehumidifiers, and fixing leaks; otherwise spores can regrow even without obvious water problems.
Are Certain Houseplants Increasing Basement Mold Risk?
Yes — some houseplants can raise houseplants moisture and worsen air quality in basements; treat overwatered pots as small ponds, pick low-moisture species, use well-draining soil, and avoid overcrowding to keep humidity controlled.
Can Mold in the Basement Affect Pets Differently Than Humans?
Yes — mold can affect pets differently than humans; you’ll notice pet health issues like coughing, sneezing, skin irritation, lethargy, or appetite loss. Watch for mold symptoms and get veterinary care if signs persist.
Do Insurance Policies Typically Cover Mold Remediation Costs?
Mostly no: you’ll likely face limited mold coverage, and your insurer will cite policy exclusions for gradual damage or neglect. You should check specifics, document damage promptly, and consider endorsements or separate remediation riders.
Will Basement Mold Testing Detect Past (Inactive) Mold Exposure?
No — mold testing methods detect current spores, strains, and conditions; they won’t reliably prove past exposure. You’ll need medical history, inert sample limits, and expert interpretation to infer inactive mold effects from environmental mold detection methods.
Conclusion
You’ve got the tools to stop basement mold before it takes hold. Follow the checklist, monitor humidity, and seal leaks so moisture can’t creep in like an uninvited guest. Protect your family with masks and gloves when you clean, and track results with simple readings to know you’re winning. Don’t buy myths—use the action plan this weekend and turn your basement into a dry, healthy space you can actually use.