How to Remove Painter’s Tape Without Peeling Paint
Pull painter’s tape back on itself at a 45° angle, keeping it low and close to the painted surface to avoid lifting. Remove it when paint is dry to the touch but not fully cured, and aim for moderate temperature and low humidity. If the tape resists, warm the adhesive with a hair dryer or score the edge with a utility knife, then smooth any lifted paint with a damp cloth. Follow these tips and you’ll learn simple fixes and prep steps that improve results.
Quick Steps: Remove Painter’s Tape Without Peeling Paint
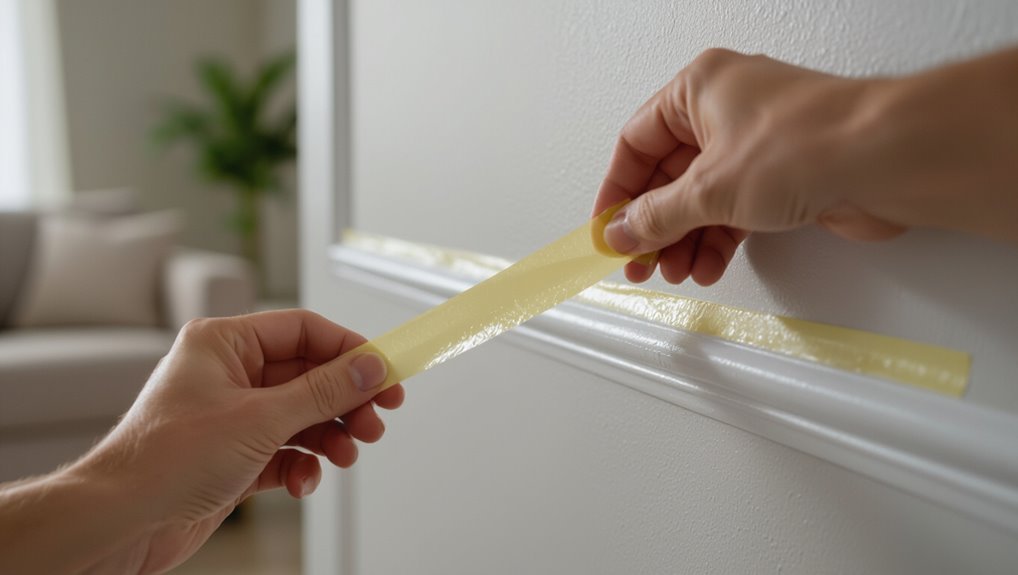
Start slow and steady: pull the tape back on itself at a 45-degree angle, keeping the strip as close to the painted surface as possible to reduce lifting.
Work slowly, heat stubborn adhesive with a hair dryer, and score edges if paint resists.
Match removal techniques to tape types and age; pause if paint peels, smooth edges with a damp cloth, then continue gently to finish cleanly.
Choose the Right Painter’s Tape for Your Surface
Before you start taping, match the tape to the surface material so it sticks where you need it and peels off cleanly.
Pick an adhesion level—low for delicate drywall and higher for rough or exterior surfaces—so paint won’t lift.
Also look for tapes that promise a crisp, clean edge and easy release to avoid tearing or residue.
Surface Material Match
Because different surfaces grab tape differently, you’ll want to match the tape’s adhesive and backing to the material you’re working on.
Consider surface compatibility: delicate drywall, fresh paint, glass, or textured masonry each need specific material types.
Choose low-tack tapes for fragile finishes, medium options for standard walls, and specialty backings for rough or outdoor surfaces so removal won’t damage paint.
Tape Adhesion Level
Now that you’ve matched tape type to surface, check adhesion level to make sure it won’t pull paint or fail to stick. Test small areas so you balance tape longevity with secure hold. Choose low-adhesive for delicate finishes, medium for general walls, high for rough or exterior uses.
| Adhesion | Best Use |
|---|---|
| Low | Delicate surfaces |
| Medium | Painted walls |
| High | Rough/exterior surfaces |
Edge Clean Release
Pick a tape that gives a clean-edge release so your lines stay sharp without tearing or lifting paint when you pull it off.
Choose tape suited to your surface—delicate edges need low-tack, textured walls may need stronger adhesion.
Use edge clean techniques like pressing down the edge and scoring painted edges.
Combine with careful tape removal strategies: pull slowly at a 45° angle for best results.
Prep Surfaces Before Taping to Prevent Lifting
Prep the surface so tape sticks where you need it: clean off dust, grease, and loose paint, and make sure the area is dry and smooth.
Test tape quality on a small, inconspicuous spot to confirm surface compatibility.
Sand glossy areas lightly and remove debris.
For porous or newly painted surfaces, wait the recommended cure time to reduce lifting and protect existing finishes.
How to Apply Painter’s Tape for a Crisp Edge
Start by cleaning and drying the surface so the tape will stick without lifting.
Align the tape precisely along your line, pressing it down firmly for a straight guide.
Then seal the edge by painting a thin coat over the tape and letting it dry before applying your final color.
Surface Preparation First
Before you lay down any tape, make sure the surface is clean, dry, and free of dust, grease, or loose paint—these contaminants are what cause bleed-through and uneven edges.
You’ll choose tape types based on surface compatibility and desired crispness. Clean, test, and press edges firmly.
Follow this quick checklist to calm your nerves and boost confidence:
- Clean
- Dry
- Test
- Press
Align Tape Precisely
Now that the surface is clean and edges are pressed, lay the tape along your guide line with steady hands so the adhesive sits flush against the surface.
Use tape alignment techniques like snapping a chalk line, measuring marks, and aligning to corner seams.
Press firmly with a plastic card, check for gaps, and adjust before painting for precision application and a crisp, straight edge.
Seal Edge With Paint
Press a thin coat of your base or trim color along the tape’s edge to seal it — this fills any tiny gaps so the topcoat won’t bleed under the tape.
You’ll protect lines using edge sealing techniques and proper tape application methods; then peel.
Feel confident, proud, relieved, surprised:
- Calm
- Proud
- Relieved
- Satisfied
Tools for Removing Painter’s Tape Safely
Gather the right tools and you’ll make tape removal quicker and reduce the chance of paint damage.
You’ll want a sharp utility knife for scored edges, a plastic scraper to lift without gouging, and a hairdryer or heat gun on low to ease stubborn adhesive.
Match tape types to appropriate removal techniques and use gloves and a clean cloth to protect finishes.
How Paint Curing Time Affects Tape Removal
You’ll want to know the difference between paint drying and full curing because tape removal timing depends on how hardened the paint actually is.
Temperature and humidity affect both processes, so warmer, drier conditions speed curing while cold or humid ones lengthen it.
Aim for the manufacturer’s recommended wait time—typically removing tape after paint is dry to the touch but before full cure helps prevent peeling.
Paint Drying Vs. Curing
Although paint may feel dry to the touch within hours, it’s still curing beneath the surface—and that difference matters when you remove tape. You’ll protect paint durability by respecting the curing process.
Wait before peeling to avoid lifting. Follow this emotional checklist:
- Relief — no ruined edges
- Pride — clean lines preserved
- Calm — less stress
- Confidence — job lasts longer
Temperature And Humidity Effects
After respecting drying and curing times, pay attention to temperature and humidity because they directly change how long paint needs before tape can come off.
You’ll monitor humidity levels and avoid temperature fluctuations that slow curing or make edges gummy.
In cool, damp conditions wait longer; in warm, stable rooms you can be more confident removing tape earlier without risking peeled or tacky paint.
Optimal Wait Time Guidelines
Because paint continues to cure long after it looks dry, you should base tape removal on the specific paint type and conditions rather than appearance alone.
You’ll want ideal timing for different paint types and environments to avoid tears.
Follow this emotional, concise guide:
- Wait latex: 24–48 hours.
- Wait oil: 72+ hours.
- Humid/slower: add time.
- Hot/dry: remove sooner.
When to Pull Painter’s Tape: Timing Rules
When the paint’s dry to the touch but not fully cured, pull painter’s tape to guarantee clean edges—wait too long and the cured paint can lift, pull too soon and wet paint may smear.
You should test small inconspicuous areas, remove tape at a 45° angle, and time removal during moderate temperature and humidity.
Good tape removal timing reflects solid painter’s tape techniques.
Step‑By‑Step: Remove Tape Without Damaging Paint
Now that you’ve judged the right moment to pull the tape, follow a clear, steady method to avoid lifting or smudging paint.
Choose removal techniques based on tape types, angle the strip back on itself, pull slowly and evenly, and use a hair dryer for stubborn edges.
Feel relief as clean lines appear.
- Prep
- Angle
- Pull
- Warm
Removing Old or Stubborn Painter’s Tape Safely
If tape’s been stuck too long or it’s tearing as you pull, don’t force it—use gentler, targeted techniques to protect the finish.
Warm the adhesive with a hair dryer on low, lift edges with a utility knife or dental pick, and peel slowly at a 45° angle.
Try adhesive remover or rubbing alcohol for residue. These tape removal techniques are practical stubborn tape solutions.
Fix Peeled Paint: Sanding, Filling, and Touch‑Ups
Start by evaluating the damage: scrape away loose paint, sand the edges smooth, and determine whether gouges need filling before you touch up.
Start by assessing damage: remove loose paint, smooth edges, and decide if gouges need filling before touch-up.
You’ll use paint repair techniques and patching methods to restore surfaces. Follow these steps to feel confident:
- Sand edges feathered.
- Apply filler, let dry.
- Sand flush, prime.
- Touch up with matching paint.
Prevent Painter’s Tape Residue on Different Finishes
Anyone can end up with sticky residue after removing painter’s tape, but you can prevent it by matching your approach to the surface finish: glossy, semi-gloss, eggshell, and flat paints each react differently to adhesive and solvent-based cleaners.
So choose low-tack tape, remove it at the right angle and temperature, and test any residue-removal method on an inconspicuous spot first.
For tape residue removal, pick cleaners and tools rated for surface finish compatibility to avoid dulling or lifting paint.
Dealing With Textured Walls, Trim, and Fragile Surfaces
When you’re working around textured walls, delicate trim, or other fragile surfaces, take a gentler, more deliberate approach to avoid tearing paint or pulling off texture.
Use low-tack tape, remove slowly at a 45-degree angle, and lift in short, steady motions while supporting the adjacent surface with your other hand.
Peel gently: use low-tack tape, lift slowly at 45° in short, steady motions while supporting nearby surfaces.
- Slow
- Support
- Low-tack
- Respect fragile materials and textured surfaces
Temperature and Humidity Tips for Tape Removal
You should remove painter’s tape when the room is near the manufacturer’s recommended temperature—usually between 50–90°F—to keep the adhesive from sticking too firmly or losing grip.
If it’s humid, use a dehumidifier or wait for drier conditions so the tape peels cleanly instead of lifting paint.
Quick checks and small adjustments to temperature and humidity can prevent tearing and paint pull.
Ideal Removal Temperature
Wondering when to pull the tape off? You want ideal tape conditions: moderate warmth and dry air for best removal techniques.
Follow these emotional, clear steps:
- Pause until paint cures slightly — patience soothes.
- Aim for 60–75°F to prevent lifting.
- Keep breeze gentle — confidence steadies your hand.
- Remove slowly at a 45° angle — satisfaction guaranteed.
Manage Indoor Humidity
After waiting for the paint to set and ensuring a comfortable room temperature, pay attention to indoor humidity—too much moisture can soften paint and make tape pull away or lift the finish.
You should use a dehumidifier or run ventilation to maintain consistent humidity control, improving indoor air quality and helping tape release cleanly.
Check levels with a hygrometer before removal.
Common Mistakes That Cause Paint Lifting (And How to Avoid Them)
When paint lifts with the tape, it’s usually because a simple step was skipped or done wrong; knowing the usual mistakes helps you prevent them. You’ll avoid lifting by checking paint adhesion and tape positioning.
Common errors:
- Pulling too fast—panic rips.
- Taping on wet paint—regret.
- Using low‑quality tape—sneaky failure.
- Skipping edge burnish—avoidable heartbreak.
Quick Pre‑Pull Checklist for Flawless Tape Removal
Before you pull a strip of painter’s tape, run through a short checklist to make certain you’ll lift cleanly: confirm paint is dry to touch, score the tape edge, warm stubborn sections with a hair dryer, pull slowly at a 45° angle.
These tape removal techniques and surface preparation tips prevent lifting and guarantee crisp lines without extra sanding or touch‑ups.
When to Call a Pro: Jobs Worth Outsourcing
If you’re tackling a large or intricate painting job, know when to hand the tape and brush over to a pro: complex trim work, high ceilings, extensive exterior surfaces, or projects that demand specialty finishes often cost less in time and rework when done by experienced painters.
You should use project evaluation and evaluating needs, weigh cost considerations, and seek local recommendations.
- Emotional relief
- Time saved
- Quality assurance
- Fewer callbacks
Follow hiring tips for finding experts and enjoy service benefits from professional painters.
Frequently Asked Questions
How Long Can Taped Edges Remain Before Adhesive Bonds Too Strongly?
You shouldn’t leave taped edges more than 24–48 hours; beyond that tape longevity drops as adhesive strength bonds too strongly, risking paint lift. Remove within a day when possible, or within two days at most.
Can Painter’s Tape Damage Wallpaper Glue or Remove It?
Like a cautious handshake, you shouldn’t force tape off; high tape adhesion can lift wallpaper glue and compromise wallpaper integrity. You’ll peel gently at a low angle, warming adhesive if needed, to protect the paper.
Are There Safe Solvents to Remove Adhesive Without Harming Paint?
Yes — you can use mild adhesive removers like Goo Gone or isopropyl alcohol, testing first; you’ll protect surfaces by applying gently, using soft cloths, and masking surrounding areas to guarantee surface protection and avoid paint damage.
Can UV Exposure Make Tape Harder to Remove Later?
Yes — UV exposure can increase tape longevity and make removal harder; you’ll see adhesive breakdown over time causing residue or embrittlement, so remove tape promptly after painting to avoid tougher, more brittle adhesive that sticks or flakes.
Does Tape Removal Technique Differ for Oil vs. Latex Finishes?
Yes — you’ll adjust technique: oil finishes often need gentler, slower removal while latex tolerates quicker pulls. Consider tape types and adhesive strength; test small areas, pull at low angles slowly to prevent lifting or residue.
Conclusion
Removing painter’s tape cleanly takes a little patience and the right technique. Did you know 60% of DIY paint mistakes happen during tape removal? That’s usually from wrong tape, failed prep, or pulling too fast. Slow your pull, keep the angle low, score the edge, and work when temps are moderate. If you follow the checklist and avoid common mistakes, you’ll get crisp lines—save the pros for complex jobs or high-value surfaces.